Archive | Breakfast/Brunch RSS feed for this section

Recipe: Kouign-Amann Pastries

27 Jan

Like many others, I first learned about Kouign-Amann from watching the Great British Bake Off (Great British Baking Show), marveling at the complexity and apparent deliciousness of this pastry from Brittany. Then I tasted some in San Francisco and Berkeley while visiting my son, daughter-in-law, and daughter — and became a convert. Kouign-Amann is a crispy, buttery, salty/sweet confection that is worth every moment of a weekend day (or two) to make — especially when, as is currently the case for me, there are no such pastries to be had nearby. I start thinking about them in winter when it is harder to be out and about and when the weather lends itself to baking. These pastries are perfect with a cup of coffee or tea as you settle into a cozy inside spot while reading one of the Brittany-based Commissaire Dupin mysteries.

This excellent recipe is from Brown Eyed Baker, though I reduced the sugar slightly and included cinnamon and chocolate chips as optional ingredients. Neither of those are traditional, but each lends something to the pastries. The original version is absolutely delicious, too. Finally, these kouign-amann are individual sized, whereas in Brittany the pastry is more traditionally made in the shape of a caramelized, crispy cake that is meant to be sliced.

Kouign-Amann
Makes 12

For the Dough:
1 c. (240 ml.) water, at room temperature
2 tsp. (3.2 gr.) instant yeast
2.5 c. (355 gr.) all-purpose flour
1 tsp. sea salt

For the Butter Block:
8 oz. (227 gr.) salted butter, chilled and cubed

For the Pastries:
1 1/3 cup (267 gr.) granulated white sugar, divided
1 tsp. (2.6 gr.) cinnamon (optional)
dark chocolate chips (optional)

Directions

Make the Dough:
Combine the water and yeast in the bowl of a stand mixer (or a mixing bowl, if kneading by hand). Add the flour and the salt. Stir with a wooden spoon until a shaggy dough is formed.

Fit the mixer with a dough hook attachment and knead the dough at low speed until the dough is slightly tacky but smooth, 3 to 5 minutes. If the dough sticks to the sides of the bowl, add 1 tablespoon of flour at a time and knead until the dough is smooth. If the dough feels very stiff and dry, add 1 tablespoon of water at a time and knead until the dough is smooth.

Transfer the dough to a clean bowl that has been lightly greased with butter, turning the dough to coat it with butter. Cover the mixing bowl with plastic wrap and let the dough rise until doubled in size, about 1 hour. Once the dough has doubled in size, place it in the refrigerator for at least 30 minutes.

MAKE-AHEAD NOTE 1: At this point, you can refrigerate the dough overnight, then proceed with the recipe.

Make the Butter Block:
Beat the butter on low speed until it’s smooth, about 3 minutes, scraping the beater and bowl as needed to break up the cubes. Turn the butter out onto a piece of parchment paper and shape into a rectangle about 6 x 10 in. (15 x 25 cm.). Wrap the butter in the parchment paper, pressing out any air. Gently roll a rolling pin over the butter packet, pushing the butter into the corners to create a perfect rectangle with even thickness. Refrigerate until firm yet still pliable, about 25 to 30 minutes.

Roll out the Dough:
Place the chilled dough onto a floured work surface and roll into a rectangle 12 in. wide x 20 in. long (30 x 50 cm.). Remove the butter from the refrigerator and place it in the middle of the dough. Fold one half of the dough over the butter, then fold the other half on top, like folding a letter. Roll it out slightly to press the layers together, then fold it again into thirds like a letter.

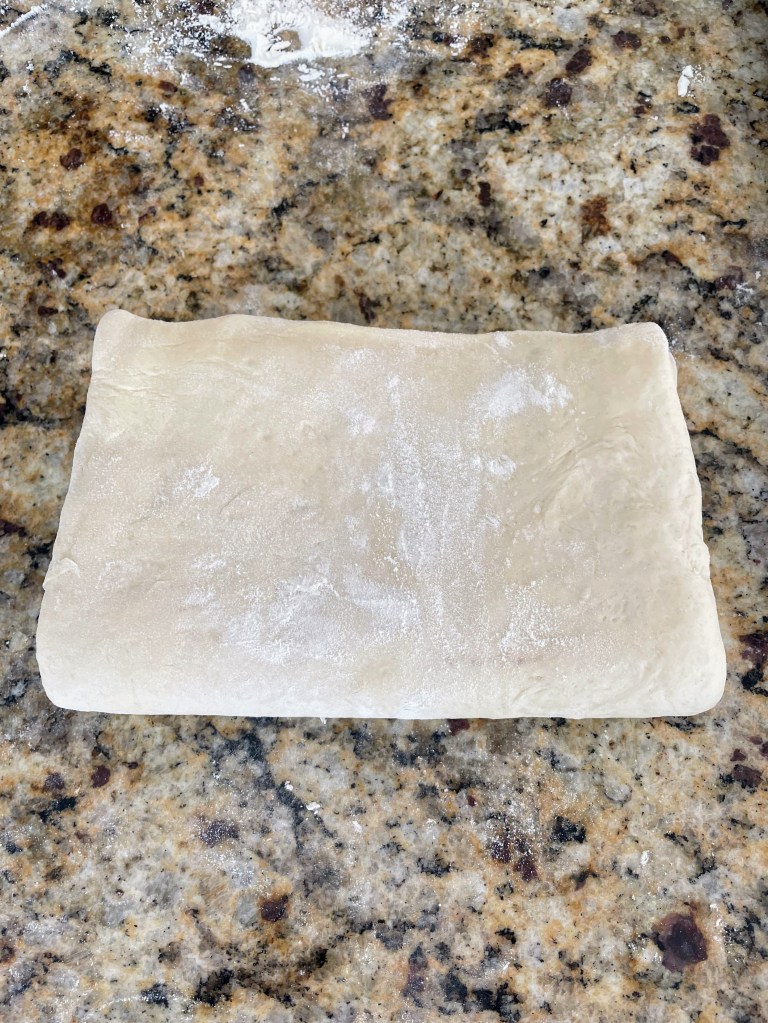
–Turn #1: Rotate the dough so that the open, narrower edge is facing you. Roll the dough out to a rectangle 12 in. wide x 20 in. long (30 x 50 cm.). Fold the top third down and bottom third up, again like folding a letter. Place the packet of dough on a baking sheet, cover with plastic wrap, and refrigerate for 30 minutes (but not longer as the butter will get too hard).

–Turn #2: Place the unwrapped packet of dough on a floured surface with the open, narrower edge facing you. Roll the dough out to a rectangle 12 in. wide x 20 in. long (30 x 50 cm.). Fold the top third down and bottom third up, again like folding a letter. Place the packet of dough on a baking sheet, cover with plastic wrap, and refrigerate for 30 minutes.

MAKE-AHEAD NOTE 2: At this point, you can wrap the dough in plastic wrap, place in a freezer-safe bag and freeze for up to 2 months. Thaw in the refrigerator overnight, then proceed with the recipe. **If you would only like to make a half batch now (ie, 6 pastries), cut the dough in half, wrap and freeze one half, and proceed with the recipe using the other half. This is my preferred option, as we no longer have a full house of eaters who could polish off 12 pastries in a weekend!

–Turn #3: Place the unwrapped packet of dough on a floured surface with the open, narrower edge facing you. Roll the dough out to a rectangle 12 in. wide x 20 in. long (30 x 50 cm.) [If making half a batch, roll the dough out to 6 x 10 in. (15 x 25 cm.); pinch cut edge closed before rolling]. Sprinkle the entire surface of the dough with 2/3 c. sugar [1/3 c. sugar for half batch], then press lightly to help it stick to the dough. Sprinkle with 1 tsp. cinnamon [1/2 tsp. for half batch], if using. Fold the top third down and bottom third up, again like folding a letter. If any sugar falls out, press it back into the folds. Place the packet of dough on a baking sheet, cover with plastic wrap, and refrigerate for 30 minutes.

–Turn #4: Place the unwrapped packet of dough on a floured surface with the open, narrower edge facing you. Roll the dough out to a rectangle 12 in. wide x 20 in. long (30 x 50 cm.) [If making half a batch, roll the dough out to 6 x 10 in. (15 x 25 cm.)]. Sprinkle the entire surface of the dough with 2/3 c. sugar [1/3 c. sugar for half batch], then press lightly to help it stick to the dough. Sprinkle with 1 tsp. cinnamon [1/2 tsp. for half batch], if using. Fold the top third down and bottom third up, again like folding a letter. If any sugar falls out, press it back into the folds. Place the packet of dough on a baking sheet, cover with plastic wrap, and refrigerate for 30 minutes.

Prepare the Muffin Tin:
Generously grease the insides of a standard 12-cup muffin pan (or 6-cup muffin pan if making a half batch) with butter. Set aside.

Shape the Kouign-Amann:
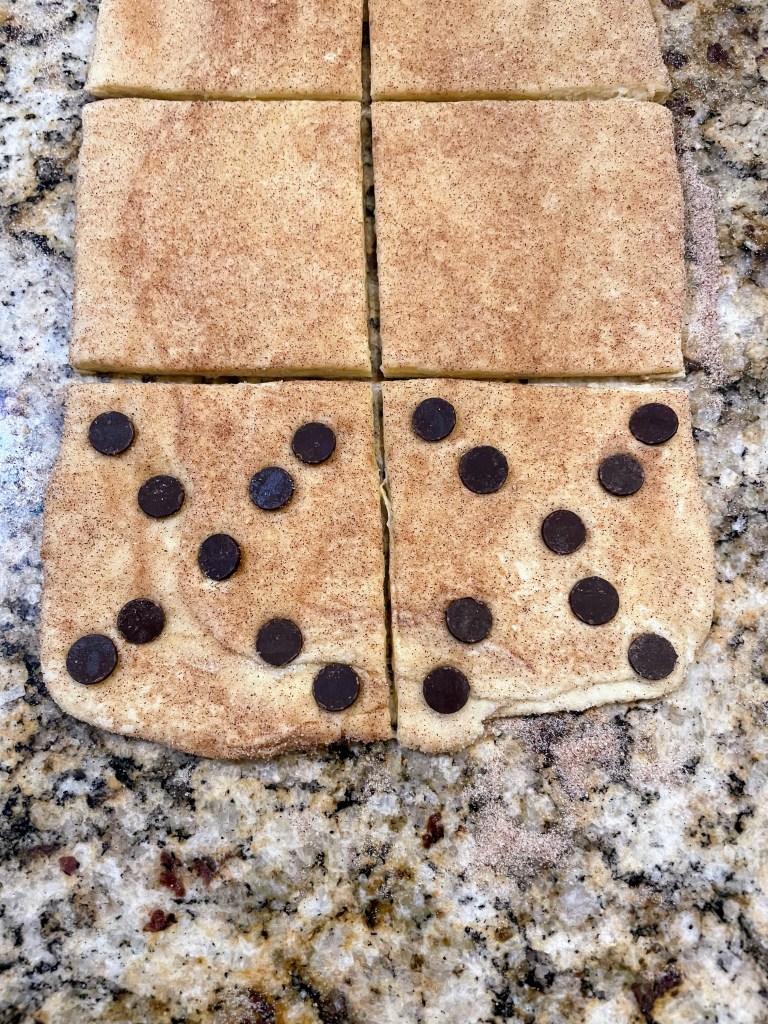
Remove the dough from the refrigerator and transfer it to the counter. Sprinkle a little extra sugar (and cinnamon, if desired) over the top of the dough; pat to press it in. Roll the dough out to a rectangle 8 in. wide by 24 in. long (20 x 60 cm.) [If making half a batch, roll the dough out to 8 x 12 in. (20 x 30 cm.).] Slice the dough down the long side to form two strips that are 4 in. wide. Cut each strip into 4 x 4-in. squares (10 x 10 cm.) to create 12 squares (or 6 squares if making a half batch).

If you are adding chocolate chips, arrange chocolate chips on each square. Note: You want to taste the buttery, salty, sweet pastry, so err on the side of fewer chocolate chips vs more. Fold the corners of each square toward the center. Pick up each pastry and tuck it firmly into the buttered muffin pan.

MAKE-AHEAD NOTE 3: At this point, you can cover the muffin pan with plastic wrap and refrigerate overnight. The next day, allow the pastries to come to room temperature and rise for 1 hour before baking.

Otherwise, cover the pan loosely with plastic wrap and let the pastries rise until slightly puffy, 30 to 40 minutes. Meanwhile, preheat the oven to 400 degrees F (200 C).

Bake the Kouign-Amann:
Set the muffin pan on a rimmed baking sheet, place in the oven and immediately reduce the heat to 350 degrees F (180 C). Bake until the pastries are deep golden brown and tips are very dark brown, 40 to 45 minutes, rotating the pan halfway through baking.

Transfer the pan to a cooling rack and let the pastries stand until they are just cool enough to handle, about 5 minutes. Gently remove them from the muffin pan and set them on the cooling rack to finish cooling completely. The kouign-amann can be served warm or at room temperature.
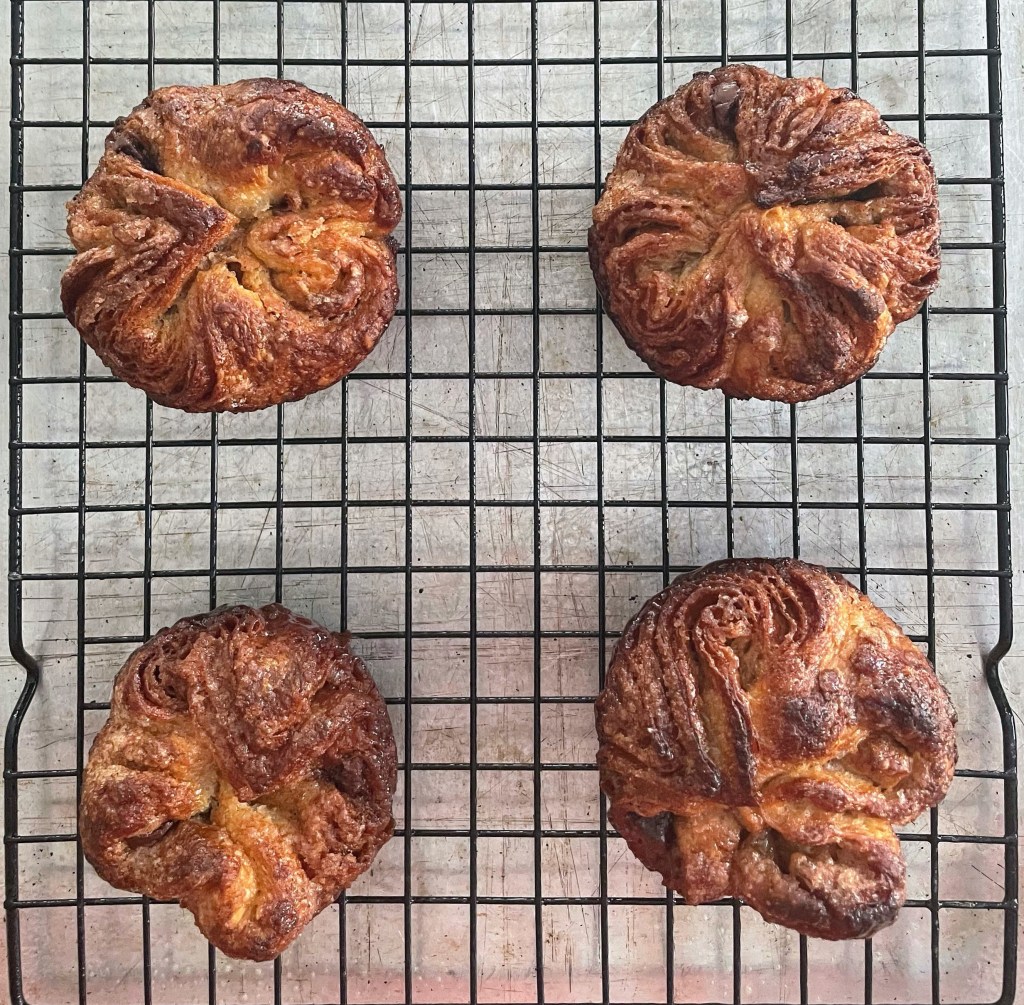
Final note: The pastries are best served the same day they are made, but you can store them at room temperature in an air-tight container and they will be good for one more day; after that they will get soft. You can also freeze the baked pastries by letting them cool completely, wrapping them individually in plastic wrap, and placing them in a freezer-safe bag; freeze for up to 3 months. Thaw at room temperature or place in a 325-degree F (163 C) oven for 10 minutes.

Recipe: Crostata Ricotta e Visciole (Sweet Ricotta Tart with Cherry Preserves)

17 Dec

Recently, my husband pointed out that we had TWO jars of cherry preserves, TWO jars of fig jam, and an unruly assortment of other jams, jellies, and preserves in the fridge. I was accused of jam overpopulation. I admitted to accidently opening a new jar of cherry preserves (my favorite) without realizing we already had one in the fridge, but I still maintain the other jars were not my fault…. However, in the spirit of providing a solution to this problem, I offered to make a ricotta crostata with what was left in one of the jars of cherry preserves. One less jar in the fridge, and attention diverted to dessert. A win-win.

Actually, a ricotta crostata is always a win-win; the sweet ricotta is beautifully creamy and you can use any preserves or jam of your liking, though the most traditional way of preparing this Italian sweet is with cherry preserves. Second, the dough for this crostata comes together in a food processor, adding speed and ease to the recipe’s many virtues. And finally, a crostata not only makes a great dessert, but a tasty breakfast as well — and a good accompaniment to afternoon tea or coffee.

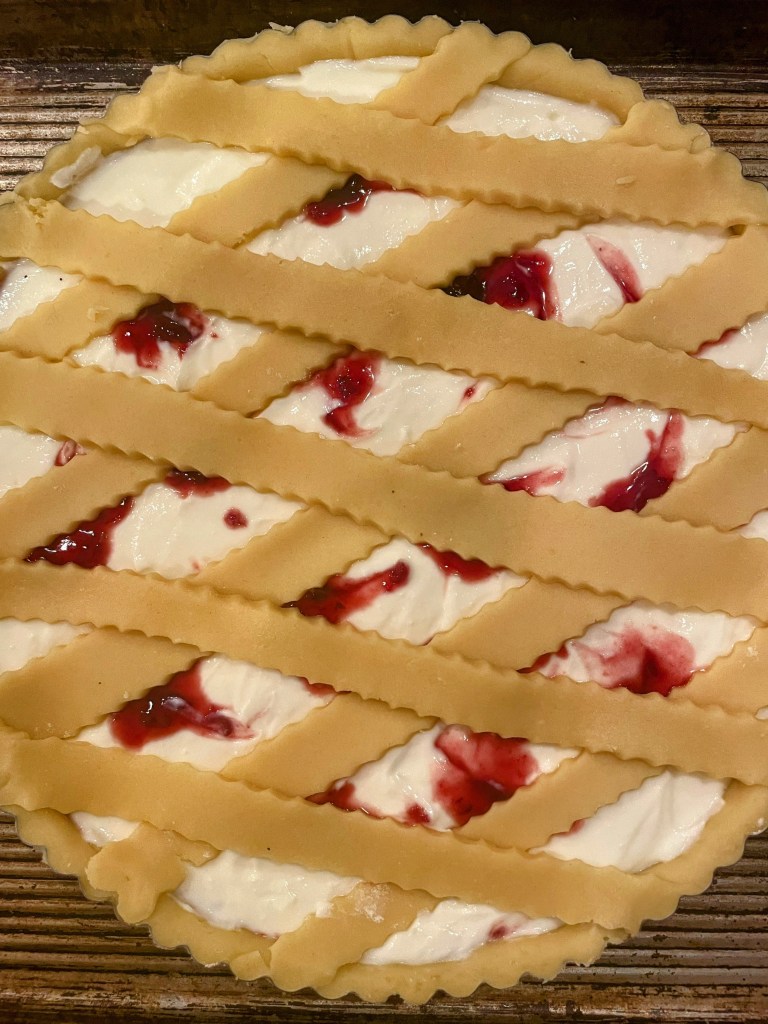
You can also let your creative side loose on the top crust; I made a very simple (unwoven) lattice with scalloped strips this time around.

Crostata Ricotta e Visciole
Recipe inspired by (and translated from) Antonio Romano Runchef
Note: This recipe is best made using a kitchen scale to weigh the ingredients.

Tart Dough:
225 gr. sugar (about 1 1/8 c.)
grated zest of one lemon
250 gr. butter (2 sticks + 1 tbsp)
120 gr. eggs (I used 3 yolks + 2 whole eggs, carefully adding the white of the last egg until I got to 120 gr.)
1 tsp. vanilla
pinch of salt
500 gr. flour (I used all-purpose; you can also use 00)

Filling:
450-500 gr. ricotta (16-oz. container); I try to find ricotta that is not super wet. Here in the U.S., I like Bel Gioioso Ricotta con Latte. I pour out any little liquid that may have collected in the container and dab the top with a paper towel to remove any extra moisture.
100 gr. sugar

250 gr. cherry preserves (about 3/4 c.)

Directions:
1. Place the sugar and lemon zest in a food processor and pulse until combined.
2. Cut the butter into cubes. (Note: An easy way to cut butter into cubes is to use a bench scraper; cut the sticks lengthwise into quarters, then chop into cubes. ) Add the butter cubes to the sugar in the food processor and continue to pulse until incorporated; the butter will look grainy. Add the eggs and vanilla and process until well combined.
3. Add the flour and sprinkle the pinch of salt over. Process just until a smooth dough forms.

4. Turn the dough onto a floured countertop and roll into a thick log. Pat into a rectangle, wrap in plastic film (or put in a sealable bag) and refrigerate for 2 hours.
5. Meanwhile, butter a tart pan. Make the ricotta filling by mixing the ricotta and sugar together; let it sit, stirring occasionally, until the sugar is fully incorporated.

6. Cut the dough into a 2/3 piece and a 1/3 piece. Return the 1/3 piece to the refrigerator. Roll the 2/3 piece into a circle about 3 inches wider than your tart pan. Carefully drape the dough over the pan, lifting it gently to tuck it into the inner diameter of the pan. If any dough overlaps the edge, press on it to crimp it off. Save the extra dough.
7. Spoon 2/3 of the preserves ( 1/2 c.) over the base of the tart. Carefully add the ricotta mixture, smoothing the top as best as possible. Dollop the remaining preserves across the top of the ricotta mixture and gently swirl.

8. Roll the remaining 1/3 piece of dough into a rectangle at least as long as the diameter of your tart pan. Cut into 10 strips, and lay the strips in a diamond pattern across the top of the tart. (You can also re-use any extra dough you have leftover from lining the tart pan, to make the 10 strips.)

9. Bake the crostata at 170C/340F for about 35 minutes, or until the lattice is golden. Let cool and then serve.

Recipe: Power Smoothie

14 Oct

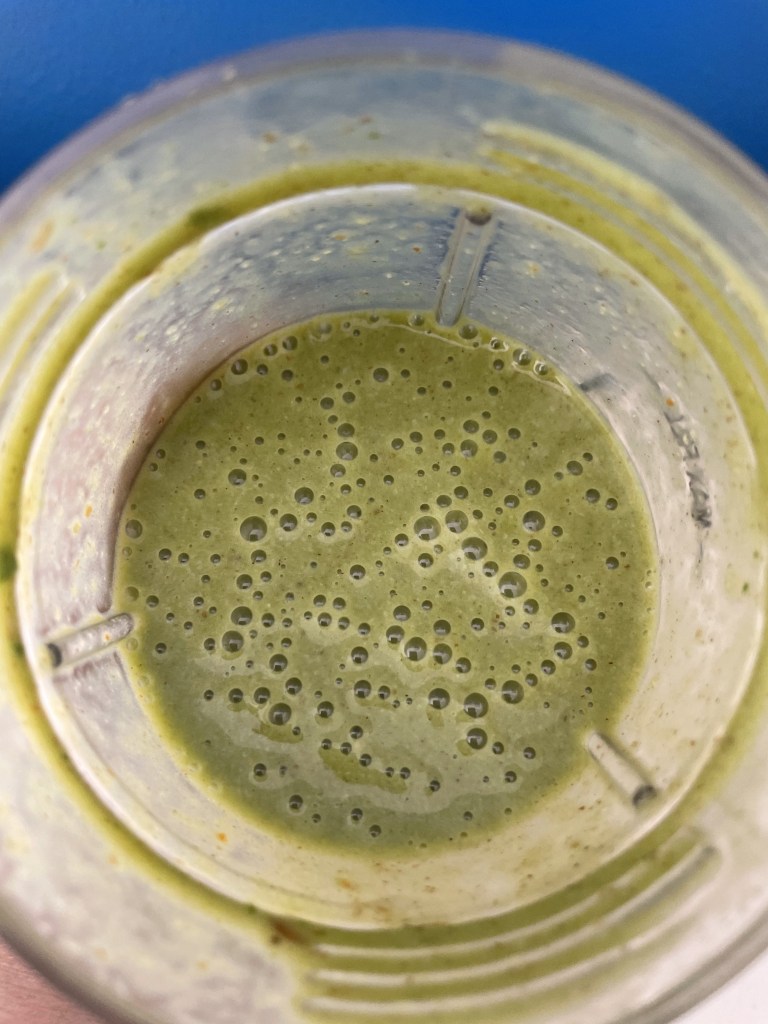
Sometimes, probably not as often as I should, I feel the need to eat (or drink) something super, extra virtuous. Even better if it’s delicious and quick, too. One signifier of virtuous for me = green, which is why I love this smoothie. It has such a beautiful color. It also has bananas, dates, oatmeal, flax seed, and cinnamon. Mmmmm! Perfect for breakfast, and even as part of lunch. Another bonus; it can be adapted countless ways:

  • I like less-thick smoothies, so I don’t use frozen bananas, but you easily could. I do add crushed ice, though, to offset any lingering warmness from the softened oats and dates.
  • Also, if my banana is very ripe (and thus, very sweet), I put in blueberries instead of the dates, to temper the sweetness. But… blueberries muddy the lovely green color somewhat, so be prepared for less vibrancy.
  • If I need an extra boost, I add almond butter or kefir.
  • Sometimes, I put everything in!

Power Smoothie (one serving)

2 tbsp rolled oats
2 pitted Medjool dates (opened up and flattened out)
boiling water (about 1/3 cup)
1 banana, in chunks
1 tbsp ground flaxseed
sprinkle cinnamon
1-2 handfuls baby spinach
handful ice
milk/plant milk of choice (about 3/4 cup)

Optional add-ins:
blueberries
1 tbsp almond butter
kefir

Preparation

1. Boil a small amount of water.

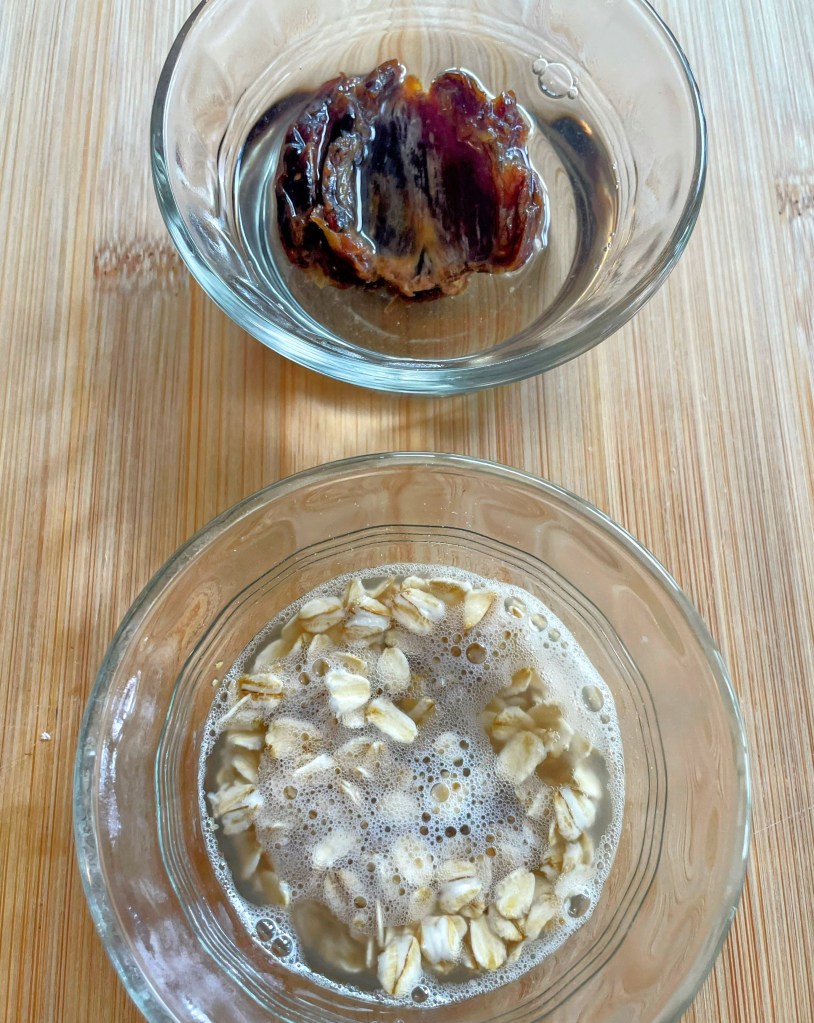
2. Put the oats in a small glass ramekin, and the dates in another. Pour boiling water over each, just to cover. Let the oatmeal and dates soften (and cool) while prepping the rest of the smoothie ingredients.

3. In a smoothie blender container (or in a blender), add the banana, flaxseed, cinnamon, oats, and dates. Stuff as much spinach as will fit, with a little space leftover for the ice. Pour in milk of choice.

4. Blend, and enjoy!

Recipe: Cinnamon Cardamom Coffee Cake with Extra Streusel

28 Mar

If you like cardamom in baked goods, this recipe is for you. If you don’t, just omit it and you will still have a delicious cinnamon-scented coffee cake with a generous amount of streusel. Cardamom, which is native to India and Indonesia, is in the same family as ginger and turmeric and is very fragrant. Ancient Egyptians, Greeks, and Romans all used it, and the Vikings took it back to Scandinavia. Today, it is widely used in Indian, Middle Eastern, and Swedish dishes as well as some Southeast Asian ones.

In its native India, whole green cardamom frequently appears in savory dishes, and green and/or black cardamom seeds are also part of many garam masala spice mixes. Black cardamom is also very popular in Vietnam; I discovered it was a key ingredient in the long-simmered broth of my favorite Vietnamese pho in Maryland, when the owner came from the kitchen to show me a handful of the aromatic black pods.

On the sweeter side of things (a very nice side indeed), cardamom is a key ingredient in chai teas and mulled wines like Swedish glögg and German glühwein. It is also a key flavor component in Nordic baking and in Indian sweets, which often feature one of cardamom’s most delicious partners: rose water.

This recipe pays homage to my love of cardamom, my love of coffee cake, and my love of lots of streusel.

Extra Streusel Coffee Cake with Cinnamon and Cardamom

Ingredients:

STREUSEL:
2/3-3/4 cup (135-150 gr.) brown sugar (adjust depending on how sweet you like your coffee cake)
4 tablespoons (34 gr.) all-purpose flour
2 1/2 teaspoons cinnamon
1/16 teaspoon ground cardamom
heaping 1/2 cup (80 gr.) chopped pecans or walnuts
3 tablespoons (45 ml.) canola/vegetable oil

CAKE:
1 1/2 cups (about 200 gr.) cake flour or regular flour
1 1/2 teaspoons baking powder
1/2 teaspoon salt
2/3 cup (134 gr.) sugar
1 teaspoon cinnamon
1/8 teaspoon ground cardamom

1/4 cup (60 ml.) canola/vegetable oil
1 egg
3/4 cup (180 ml.) milk (oat milk also lends a nice flavor)
1 teaspoon vanilla

Preparation:

1. Preheat oven to 350 degrees F/180 degrees C.
2. Grease the bottom of an 8×8-inch (20 cm.) square baking pan (or spray with cooking/baking spray), line with parchment paper, and grease or spray the paper.
3. In a medium bowl, mix the streusel ingredients until well combined. Press down on the mixture with the back of a spoon to compact (to create a few future streusel lumps), and set aside.
4. In a large bowl, combine the flour, baking powder, salt, sugar, and spices.
5. In another medium bowl, combine the oil, egg, milk, and vanilla. Add the wet mixture to the flour mixture, stirring just enough to mix. The batter will be a bit thin.
6. Pour 1/2 of the cake batter into the prepared pan (it will seem like a very thin layer; just make sure to fully cover the bottom of the pan).


7. With a knife or spoon, score a line across the top of the streusel in the bowl, dividing the streusel in half. Using a spoon, scoop and scatter 1/2 of the streusel on top of the batter, trying to retain some streusel lumps. Evenly pour the remaining cake batter over, and then scatter the other 1/2 streusel on top.
8. Bake the coffee cake for 25-30 minutes or until a toothpick, knife, or fork inserted in the center comes out clean.

Adapted from a recipe on food.com.

Recipe: Blueberry Cream Cheese Coffee Cake

28 Feb

Last night, we ended up with an abundance of blueberries, due to my lack of attention to the contents of our refrigerator. I stopped at the grocery store to pick up some items for dinner and of course bought a number of other things not on my shopping list, including fresh blueberries. I was pleased with this impulse purchase since the blueberries were for my husband, who likes to sprinkle them on top of his yogurt in the morning. I was sure he would be happy to have them, and he was indeed quite happy to have blueberries–the blueberries he himself had bought the day before. Argh. How had I not noticed them? All I can say is, it was the end of a long work week and my powers of observation were obviously not  very powerful. There was only one way out of this dire situation: we would have to make blueberry coffee cake. The best thing was that my husband made the cake, which was so good I may “accidentally” buy extra blueberries more often.

BCCC3

Blueberry Cream Cheese Coffee Cake
9  servings

Cake
1/4 c. butter, softened
2/3 c. sugar
1 egg
1/2 c. all-purpose flour
1/2 c. whole wheat flour
1/2 tsp. baking powder
1/4 tsp. salt
1/2 c. milk

1 c. fresh  blueberries
2 tbsp. flour
3 oz. cream cheese, softened , and cubed

Topping
4 tbsp. all-purpose flour
4 tbsp. sugar
2 tbsp. cold butter

Preparation
1.Preheat oven to 375°. Grease an 8×8 baking pan.
2. Cake: In a large bowl, cream the butter and sugar until light and fluffy. Beat in the egg. In a medium bowl, combine the all-purpose and whole wheat flours, baking powder, and salt. Add half the flour mixture to the butter/sugar mixture; stir to combine. Add half the milk to the butter/sugar mixture; stir to combine. Repeat with remaining flour mixture and milk.
3. Toss blueberries with the 2 tbsp. flour. Stir the blueberries and cream cheese cubes into the batter (batter will be thick). Pour into the prepared baking dish.
4. Topping: In a small bowl, combine the flour and sugar. Cut in the butter until crumbly. Sprinkle the topping over the batter.
5. Bake the cake for 40-45 minutes or until a toothpick inserted in the center comes out clean.

Recipe based on a Taste of Home recipe.

Recipe: Roasted Tomatoes, Onions, and Garlic with Basil

28 Jun

This year, I planted three tomato plants, which are beginning to completely take over the vegetable garden. If that weren’t enough, a fourth rogue plant sprung from the seeds of  last year’s tomatoes is giving them a run for their money. Which means I’m soon going to be faced with a bumper crop of tomatoes and the challenge of figuring out what to do with the ones I keep. This recipe is one of my all-time favorites for tomatoes, and I often serve it at brunches as an accompaniment to cold roasted meats. It is a very flexible recipe: it can be made ahead, served warm or at room temperature–and you can play around with the ingredients depending on what you have on hand. However you tweak it, it’s hard to go wrong with tomatoes, red onions, garlic, basil, and pine nuts.


Roasted Tomatoes, Onions, and Garlic with Basil
12 servings

3 lb. roma tomatoes (other smaller types work well, too)
2 large red onions, cut in half, each half cut into eight wedges
30 cloves garlic /2 bulbs, peeled (slice large cloves in half)
2/3 c. olive oil
2 tsp. sambal oelek (or sweet chilli sauce)
1 tbsp. sugar
2 tbsp. bottled pesto (or fresh, if you have it)
1 tsp. salt
2 tbsp. balsamic vinegar
1/2 c. shredded fresh basil
2 tbsp. chopped fresh oregano
1/2 c. pine nuts, toasted

Preparation

1. Heat oven to 400º.
2. Cut the tomatoes in half lengthwise. Place tomatoes, cut side up, in large baking dish, then nestle the onions and garlic around the tomatoes.
3. In a small bowl, combine the olive oil, sambal oelek, sugar, pesto, and salt. Pour over the vegetables.
4. Bake uncovered for about 30 minutes or until tomatoes, onions, and garlic are soft.
5. Meanwhile, dry toast the pine nuts in a small skillet over medium-high heat (watching carefully), until they start to turn golden. Remove them from the skillet and reserve.
6. Once the tomatoes come out of the oven, add the vinegar, herbs, and pine nuts, and mix gently. Serve warm or cold.

Recipe: Pavlova

27 Apr

We lived in Australia for four years and loved every minute of it, leaving behind dear friends and wonderful memories. One of those memories was of Pavlova, a beautifully light and sweet dessert named after the Russian prima ballerina Anna Pavlova, who toured Australia and New Zealand in the 1920s. There has been a long-standing debate based on primary and secondary sources and lots of national pride, as to whether the dessert was first created  in New Zealand or Australia. Though the scales may have now tipped toward New Zealand (with the Oxford English Dictionary crediting the first written record of the recipe to New Zealand), it is a question that may never be satisfactorily answered; in an elegant diplomatic maneuver, the OED also lists the origin of pavlova as “Austral. and N.Z.”

For our family, the answer is simple: since we first encountered Pavlova in Australia, it will for us forever remain as one of our favorite Australian desserts.

The version in the photo below is a double recipe, prepared in a rimmed 18 x 12-inch jelly roll pan–which was a mistake. There was no easy way to get the meringue out and onto a serving platter without shattering it into pieces–so we served the Pavlova straight from the pan, lifting each piece off the baking/parchment paper with a thin spatula. It was a bit messier than usual, but due to the amazing decorating job by three enthusiastic teenagers, and to the fantastic blend of flavors that has made this such a beloved recipe, no one minded. In the future, though, I’ll remember to use an unrimmed baking sheet….

pavlova

Pavlova
8 servings

6 large egg whites
pinch salt
1 1/2 c. + 1/8 c. sugar
2 tsp. cornstarch
1 tsp. white vinegar

1 1/2 c. cream
2 tsp. sugar
1 tsp. vanilla

1 large punnet strawberries, hulled and sliced
1 small punnet blackberries
1 small punnet raspberries
2 kiwis, peeled and sliced

Preparation

1. Preheat oven to 350 degrees.
2. Draw a 9″ circle on baking/parchment paper and place it on a baking sheet. Spray the paper with baking spray.
3. Combine egg whites and the pinch of salt in a very clean and completely dry large bowl, and beat until stiff peaks form (you can also use a stand mixer). Gradually add sugar, a tablespoon or two at a time, beating constantly, until the mixture is very glossy and the bowl can be held upside down without the meringue falling out. Gently whisk in the cornstarch and vinegar.
4. Using a spatula, spread the mixture onto the paper circle on the baking sheet; smooth the top with the spatula.
5. Place the baking sheet in the oven and bake the meringue for 5 minutes, then turn the heat down to 270 degrees and bake another 75 minutes, or until the outside of the meringue is crisp, but the inside is soft and chewy. Turn the oven off and leave the meringue in the oven, with the door ajar, for 15 minutes.
6. Slide the meringue, still on the baking paper, onto a rack and allow to cool completely. It will crack a bit when cooling; this is normal. Using two spatulas or a pizza peel, carefully lift the meringue off the baking paper and place on a serving platter.
7. Whip the cream with the sugar and vanilla until stiff peaks form. Try to use as little sugar in the whipped cream as your palate will allow, to offset the very sweet meringue.
8. Spread the whipped cream on the meringue and add the fruit in a decorative pattern. (The great thing about pavlovas is you can decorate them any way you like, with whatever fruit you prefer.)

Recipe adapted from Australian Table magazine.

Recipe: Nutella Hazelnut Palmiers

19 Apr

By family decree, certain elements of our Easter Brunch can never be altered: the Breakfast Pizzas; the Pesto-Roasted Tomatoes, Red Onion, and Garlic with Pine Nuts; and the Fruit Salad with Honey Lime Dressing. The ham comes and goes and the potatoes occasionally vary (Hashbrown Casserole has been a favorite for many years, but to the dismay of one of our sons, is being edged out this year by Country-Fried Potatoes with Bacon and Green Onions). Other dishes enter and exit as the urge strikes: this year, one of those “other” items will be Stuffed Mushrooms with Merguez Sausage and Spinach, which I realized I hadn’t made in a while.

The one area of Easter Brunch where more experimentation is allowed is the sweet section, which consists of 2-3 items chosen at whim. Today, I made these Nutella Hazelnut Palmiers while everyone was out hiking; I’ll need to hide them pretty soon, lest the returning teenagers and 20-somethings demolish them before tomorrow’s brunch. And before I “taste test” any more of them myself….

Palmiers

Nutella Hazelnut Palmiers
Makes about 30

1 (17.65 oz. ) pkg. puff pastry dough sheets, thawed
2 tbsp. raw sugar, divided in half
1 c. Nutella (chocolate hazelnut spread), divided in half*
1/2 c. chopped hazelnuts, divided in half

Preparation

1. Lightly flour a clean, 12 x 12-inch spot on your counter. Sprinkle the spot with 1 tbsp. raw sugar.
2. The puff pastry dough package should contain two sheets. Unfold one of the sheets and place it on top of the  flour/sugar. Gently roll out the dough to the left and to the right until it is about 15-inches long (don’t worry about the width); you mostly want to embed the sugar into the underside of the dough.
3. Spread 1/2 c. Nutella onto the puff pastry sheet; sprinkle 1/4 c. chopped hazelnuts over the top.
4. Starting at the top long end, roll the dough toward you until you get to the middle of the pastry sheet. Now roll from the bottom end up to the middle. Bring the two rolls together, and place the log of dough seam-side down on a baking sheet lined with parchment paper.
5. Repeat with the second puff pastry sheet. Sprinkle the counter with more flour and the remaining tbsp. of sugar, top with the second pastry sheet, and gently roll the dough out. Spread with the remaining Nutella and sprinkle the remaining hazelnuts on top; roll up as indicated in Step 4. Place the second log of dough on the baking sheet, too, and then put the baking sheet in the freezer for about 10 minutes to firm up the dough.
6. Preheat oven to 350 degrees.
7. Working with one  log of dough at a time, place on a cutting board and slice into 3/4-inch thick slices (or as close as you can get) with a serrated knife. Lay the palmiers flat side down on the parchment paper-lined baking sheet, with ample room between palmiers since they will expand.  You will need multiple baking sheets, or will need to bake in batches.
8. Bake for 30 minutes or so, until the palmiers are golden. (Keep an eye on them; baking time will depend on the thickness of the palmiers.)
9. Let them cool on the baking sheet for a couple of minutes, then remove to a rack to cool completely.
10. Enjoy!

* Can add up to 1/2 c. more Nutella ( 1/4 c. on each sheet) for sweeter but slightly messier palmiers.

Recipe: Chocolate Waffles

11 May

Because I’m leaving on a work trip tomorrow, I was treated to an early Mother’s Day breakfast of my choosing. But really, I didn’t have to think about it at all — I asked for the same thing I  always ask for: Chocolate Waffles. My 16-year-old daughter made them this year, and they looked absolutely gorgeous:


They tasted fantastic, too, with some whipped cream, maple syrup, and a sprinkle of cinnamon. A heavenly combination. And long after breakfast or brunch, you can grab a plain waffle and break off pieces to eat along with a nice cup of coffee or tea.

Chocolate Waffles
Makes 8-12 waffles
2 oz. unsweetened chocolate
1 1/2 c. flour
2 tsp. baking powder
1/4 tsp. salt
1/2 tsp. cinnamon
1/2 c. canola oil
1 c. sugar
2 eggs
1 tsp. vanilla
1/2 c. milk

Preparation

1. Melt chocolate, let cool.
2. Preheat waffle iron.
3. Sift dry ingredients together over medium bowl.
4. Mix oil and sugar together, then beat in eggs until well blended. Add vanilla and melted chocolate.
5. Add sifted ingredients to wet ingredients in three batches, alternating with milk.
6. Spray waffle iron with cooking spray. Pour batter onto iron and cook according to manufacturer’s directions. (Our waffle iron makes 4 waffles–we pour about 1 c. batter into the center of the iron, close, and wait for the waffle iron to beep.)
7. For these waffles, it’s important to spray the waffle iron each time you make a set of waffles.
8. Serve with whipped cream and maple syrup.

Adapted from Joy of Cooking.

Recipe: Scrambled Eggs with Spinach and Feta

22 Jan

Eggs are a miracle food in many ways, but what I most appreciate about them is that they make for a quick, nutritious meal any time of the day. These scrambled eggs are great for breakfast, brunch,  lunch, and even as an after-school snack for ravenous teenagers. And if I am ever on my own for dinner, these scrambled eggs often make an appearance.

Scrambled Eggs with Spinach and Feta
Serves 2

4 eggs
pinch salt, freshly ground pepper
1 tbsp. olive oil
1/4 onion, diced
1/2 c. chopped fresh spinach
1/4 c. crumbled feta

Preparation
1. In a small bowl, whisk the eggs with a fork. Add a pinch of salt, and freshly ground pepper.
2. In a small skillet, heat the olive oil, add the onions, and cook over high heat until soft and beginning to turn golden at the edges.
3. Reduce heat to medium and layer the spinach on top of the onions. Pour in the eggs, top with the crumbled feta, and gently scramble until set.
4. Serve immediately.