Tag Archives: Tart

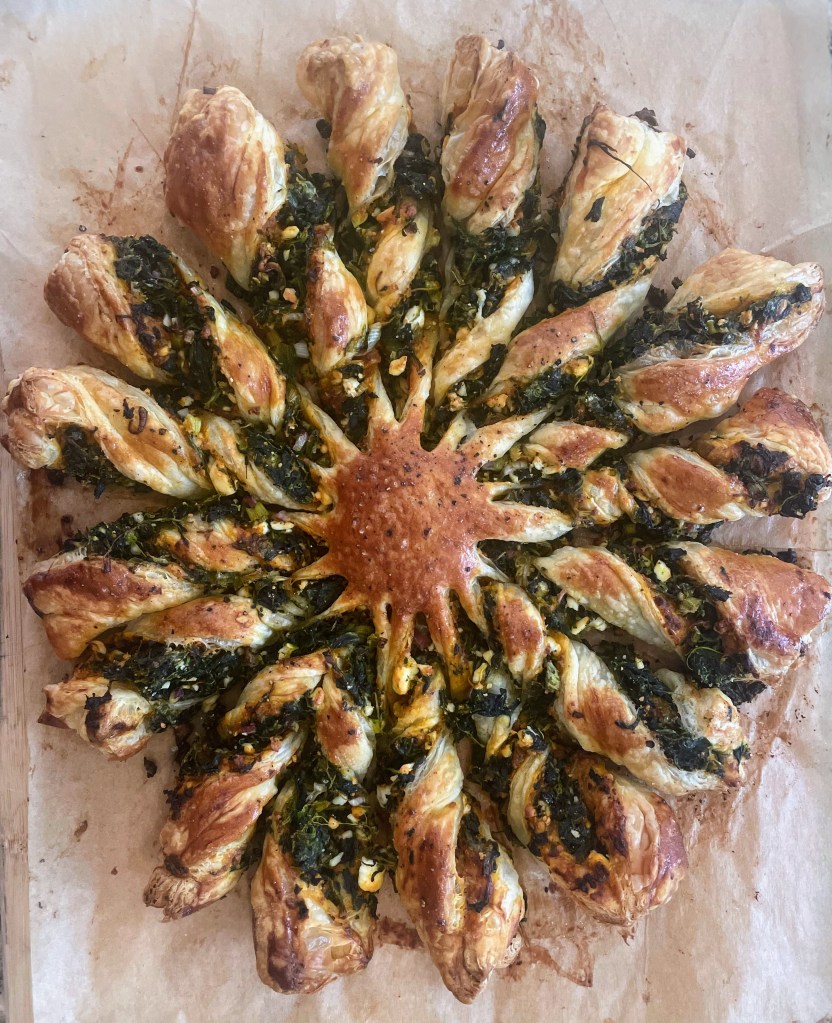
Recipe: Tarte Soleil (Sun-Shaped Spinach Feta Tart)

11 May

Looking for a stunning appetizer? Or a great accompaniment to, say, soup or a salad? Look no further than this pastry, which is as good to eat as it is to look at. It requires a little more effort than other things you can do with puff pastry, but is still relatively easy (and, more importantly, fun) to make. And anything that looks this delicious is worth it.

I love the original recipe as follows below. But, as you will see in some of the photos, I’ve played around with it at times. Once, I added a base layer of tomato pesto to see what that would be like, and used finely chopped red onions instead of the scallions I forgot to buy. Another time I did not have quite enough spinach, so I made up the weight by adding extra feta and shredded mozzarella. So tweak this recipe as you desire — or don’t; it will be delicious every time no matter how you prepare it.

Tarte Soleil
(adapted from Bon Appetit)

Ingredients:
1 package (17.3-oz. /490 gr.) frozen puff pastry (= 2 sheets)
2 packages (10 oz/283 gr. each) frozen, chopped spinach — defrosted; see below
2 scallions (or about 1/4 of a white or red onion), finely chopped
2 tbsp. fresh dill, finely chopped
2½ oz. (70 gr.) feta cheese, crumbled ( = about ⅔ cup)
2 garlic cloves, crushed
1 lemon, zested
1 tsp. kosher salt, plus more
¼ tsp. freshly ground black pepper, plus more
All-purpose flour (for rolling)
1 large egg, whisked (aka egg wash)

Preparation:
1. Defrost the frozen puff pastry and the frozen spinach in the fridge for at least 8 hours or overnight. (Note: Place the spinach packages in a leak-proof container, just in case.)
2. When you are ready to make the tart, place the defrosted spinach in a fine-meshed strainer, and press/squeeze to get as much of the liquid out as possible; you want it as dry as you can get it.
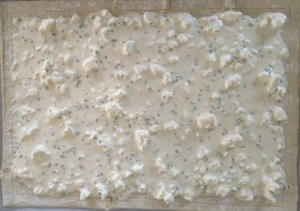
3. Add the spinach, scallions, dill, feta, garlic, lemon zest, salt, and pepper to a medium bowl. Stir to combine, making sure to break up any spinach clumps. I find it is easiest to use my (clean) hands to do this. You should have 2½ cups spinach mixture. (The photo below is from when I added mozzarella to make up for not having quite enough spinach.)

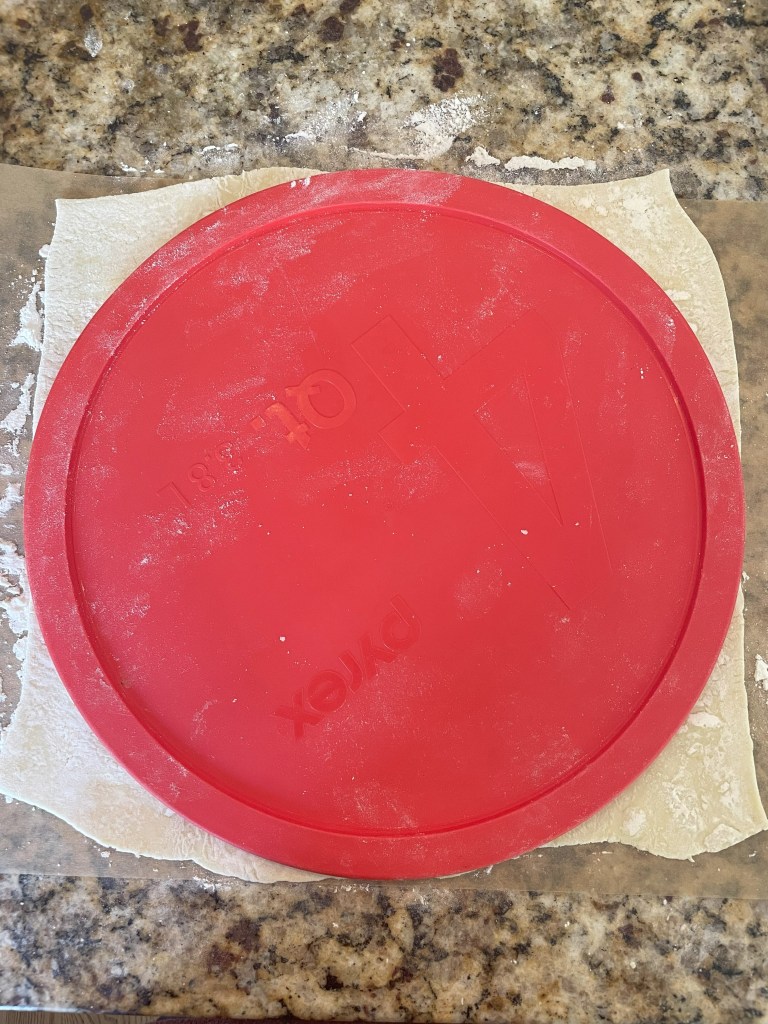
4. Find a round object that’s 10–12 inches (25-30 cm.) in diameter. I’ve used whatever I can lay my hands on, such as the lid of a Tupperware container or the lid of a large Dutch oven, each about 11 inches/28 cm. in diameter.
5. Place one of the pastry sheets on parchment paper (or on a well-floured counter if you prefer, or if you forgot you were supposed to roll it out on parchment paper…). Lightly dust the pastry with flour, both over and under. Roll it out in all directions and dust with more flour if needed, until it’s at least 1–2 inches (2.5-5 cm.) larger than your round object/lid.
6. Place the round object/lid over the pastry, press to indent, then use a sharp knife to trace the circle. Set aside the excess pastry. (Tip: You can save the excess pastry in the fridge for a couple days, tightly wrapped, then when the urge strikes you can tear it into small pieces, dust with cinnamon and sugar, and bake for a few minutes for a quick and delicious treat).
7. If you rolled your pastry directly on the counter, now is the time to 1) transfer your pastry round to some parchment paper (preferred) or to a baking mat (if you are out of parchment), and then to 2) place the whole thing on a baking sheet. Brush the egg wash all along the circumference of the pastry round; reserve remaining egg wash for later. Spread the spinach mixture over the pastry base, leaving a ½” border.

8. Cut out the second sheet of pastry, following the same directions as for the first one. Place the second round of pastry on top of the spinach mixture (if you’re having trouble moving it, fold it into quarters, then unfold it on top of the spinach) and press gently to seal. Using a small cup or shot glass (2 inches/ 5 cm. in diameter), make an indent in the very center. Your pastry might be slightly warm by now. If so, chill 10–20 minutes.
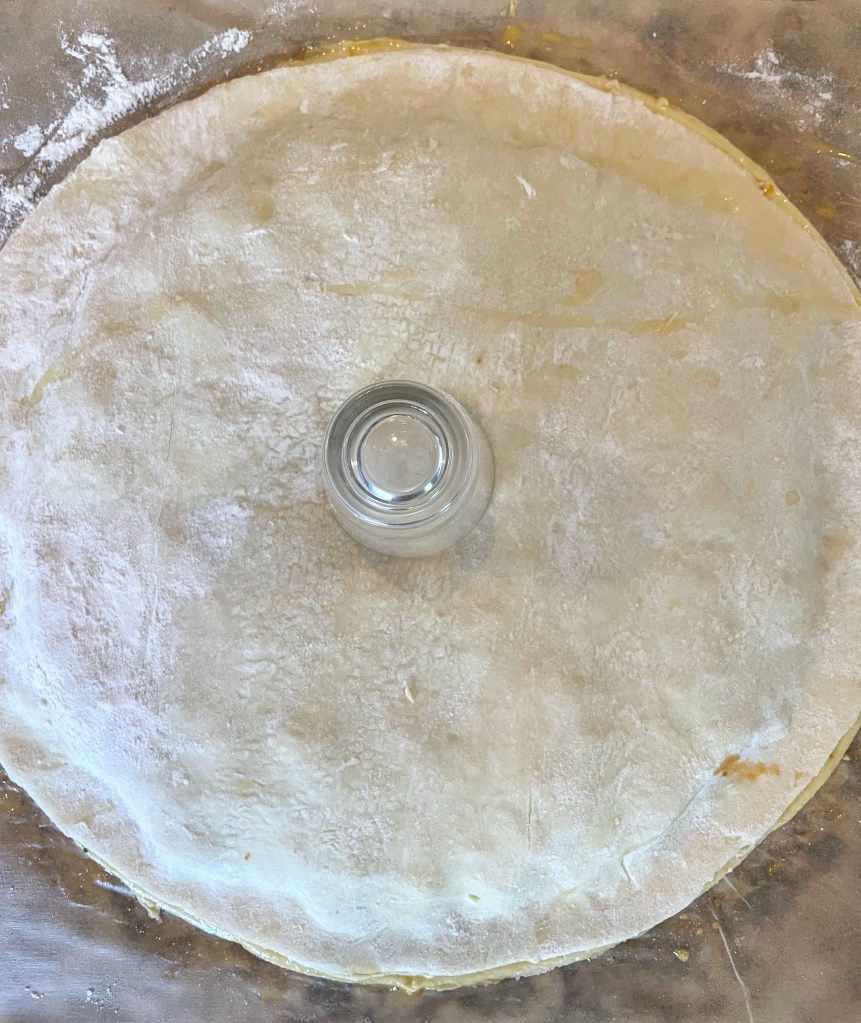
9. Once the pastry is cool, transfer the whole set-up, parchment/baking mat and all, to a work surface. With a chef’s knife, cut pastry into 4 quadrants, stopping when you reach the center circle. Cut each quadrant in half, then in half again, so that you have 16 spokes. (Note: If cutting on a baking mat, cut as gently as possible to avoid damaging the mat). Transfer the tarte with the parchment/baking mat back to sheet tray.

10. Working with one spoke at a time, pull gently away from the center (to extend the length of each piece), then twist to expose the spinach insides. Aim for three or four twists. Nudge them around to distribute evenly. it doesn’t matter if they look messy; they will all look beautiful when baked. Freeze the tarte until cold, 10–15 minutes.

11. Meanwhile, place a rack in the middle of the oven; preheat to 400°F/200°C. Brush the tarte all over with the reserved egg wash; season with salt and pepper. Bake the tarte until well browned, about 30–35 minutes.

Recipe: Easy Puff Pizza ‘al Taglio’

25 Feb

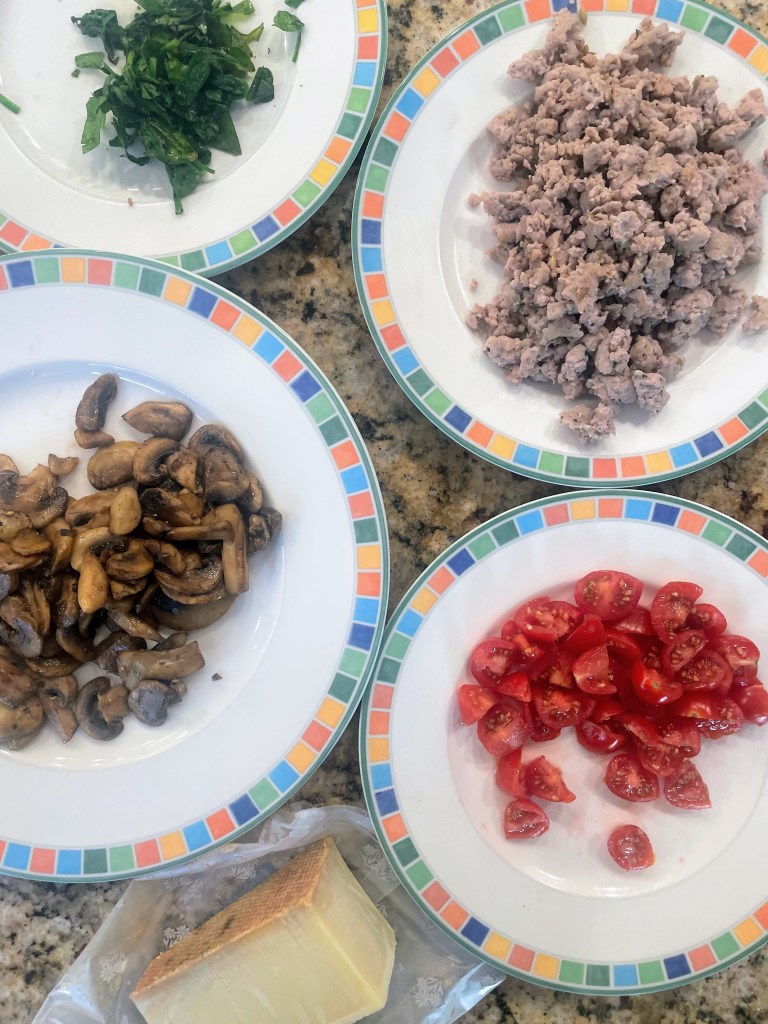
Puff pastry is a culinary lifesaver, since pretty much anything tastes better when puff pastry is involved. Also, it’s a great way to use up all sorts of things in your fridge or cupboards. This week, I defrosted a package of puff pastry for a meal I did not end up making, and I needed to use it soon. So the scavenger hunt began. Amongst other things in the fridge, I spotted two pork sausage links, some mushrooms that were not going to make it much longer, and a bit of fresh spinach that was beginning to look not so fresh. On the counter, I could see some cherry tomatoes on the cusp of wrinkling. And in the cheese drawer were wedges of Gruyere and Pecorino Romano.

These ingredients reminded me of a sausage and mushroom pizza al taglio (pizza by the slice) I loved in Rome. So the solution was clear–I would make an ‘Avoid Food Waste/Clear Out the Fridge’ puff pizza al taglio. (Ok, honestly, this can also be called a puff pastry tart….) You can cut it into larger pieces for lunch or dinner, or cut it smaller ones to serve as an appetizer.

Note: This recipe is just a suggestion; you can put all sorts of things on top of puff pastry (like this beet and feta vegetarian option) and you will end up with something delicious. I often let fate and the contents of my fridge decide. With a little bit of extra effort, you can also make puffs, but I was feeling lazy and went freeform.

Ingredients

1 pkg. puff pastry (the kind I buy has two sheets of pastry; I used both)
mushrooms, sliced (16 oz./450 gr.)
garlic salt (optional)
baby spinach, chopped (as much as desired; I only had a small handful)
2 pork sausages, casings removed
cherry tomatoes, cut in quarters (as much as desired; I had about 10 cherry tomatoes to use)
Gruyere cheese, grated (as much as desired)
Pecorino Romano cheese, grated (as much as desired)

Preparation

1. Thaw your puff pastry (ideally, overnight in the fridge).
2. Preheat oven to 375 F (190 C).
3. Cook any ingredients that are likely to wet the puff pizza too much (or not cook fully while in the oven). For me, those ingredients were the mushrooms, spinach, and sausage. In a frying pan, I quickly sauteed the mushrooms in some olive oil and tossed them with garlic salt. I placed them on a dish, then cooked the sausage in the same pan until it was no longer pink, crumbling it as it cooked. The sausage went on another plate and the little spinach I had went into the pan; it almost disappeared before my eyes, but ended up being just enough to add a spot of additional color to the puff pizza.

    4. Spray a rimmed baking sheet with olive oil cooking spray, or wipe a thin layer of oil over it.
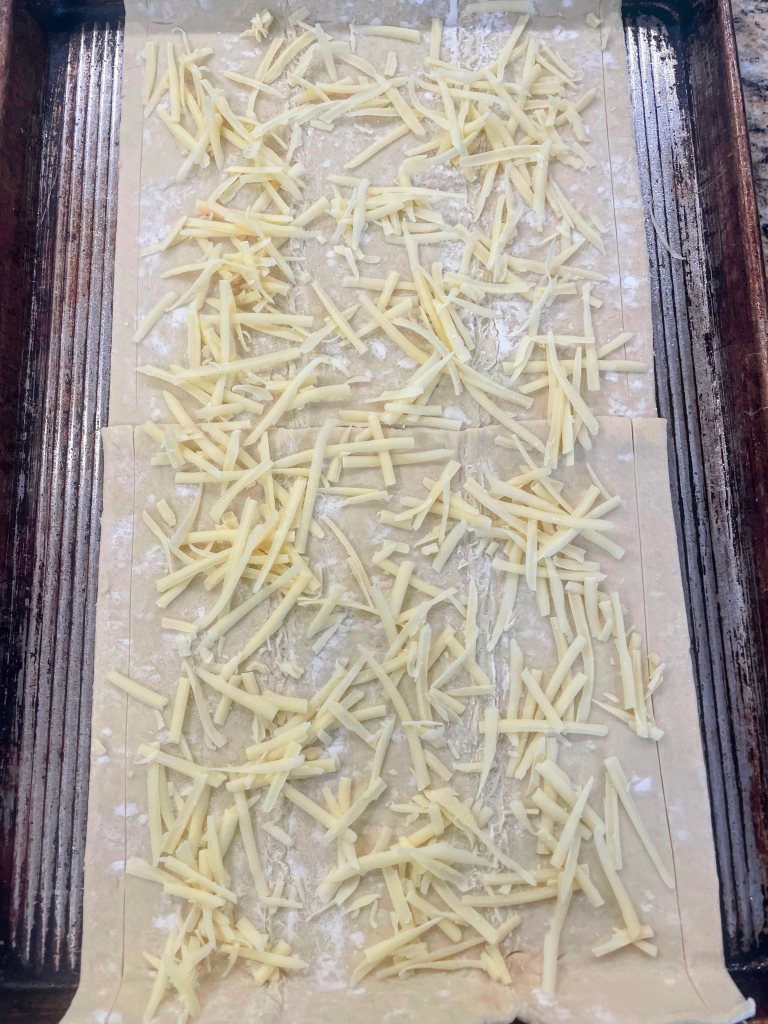
    5. Lay the puff pastry sheets down the center of the baking sheet, pressing the seam between the two together. Score the sides of the pastry with a sharp knife. This will allow the sides to rise into a crust. (I did not score the short sides as I was able to press them up against the baking sheet rim where they formed their own crust.)

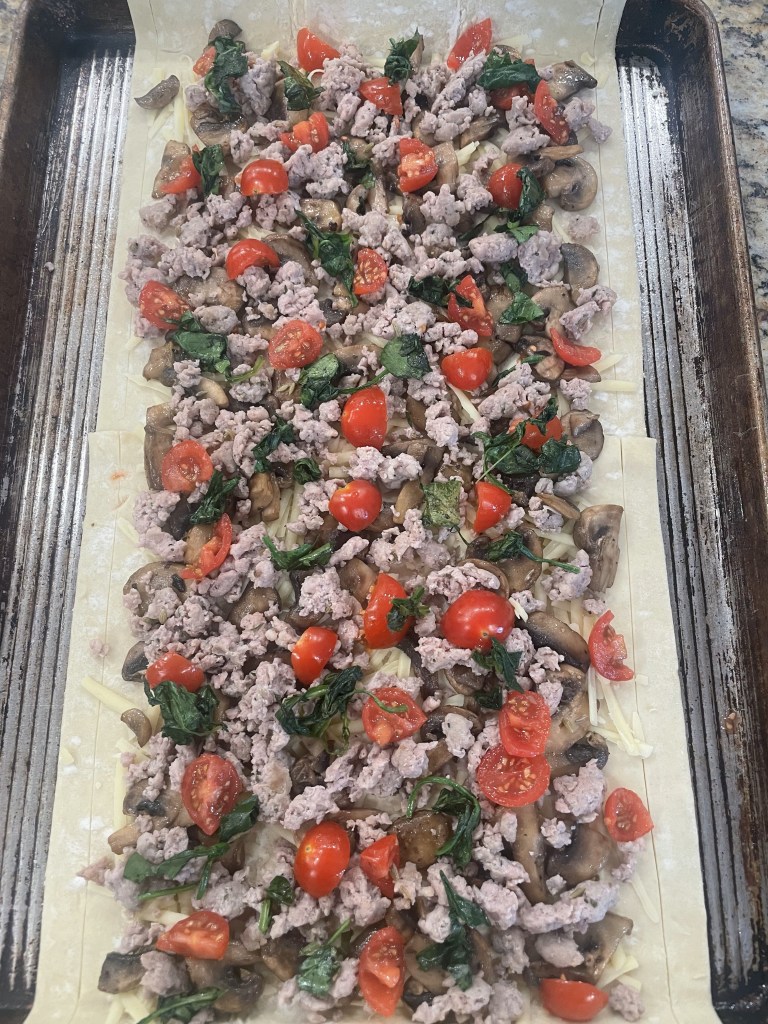
    6. Layer your prepped ingredients onto the puff pastry, taking care to not place anything past the score lines: I started with a little Gruyere, then the mushrooms, sausage, tomatoes, and spinach, ending with a bit more Gruyere and some Pecorino Romano. I tend to go lightly on the cheeses as I want the flavors of the other ingredients to shine, but feel free to add as much as you like.

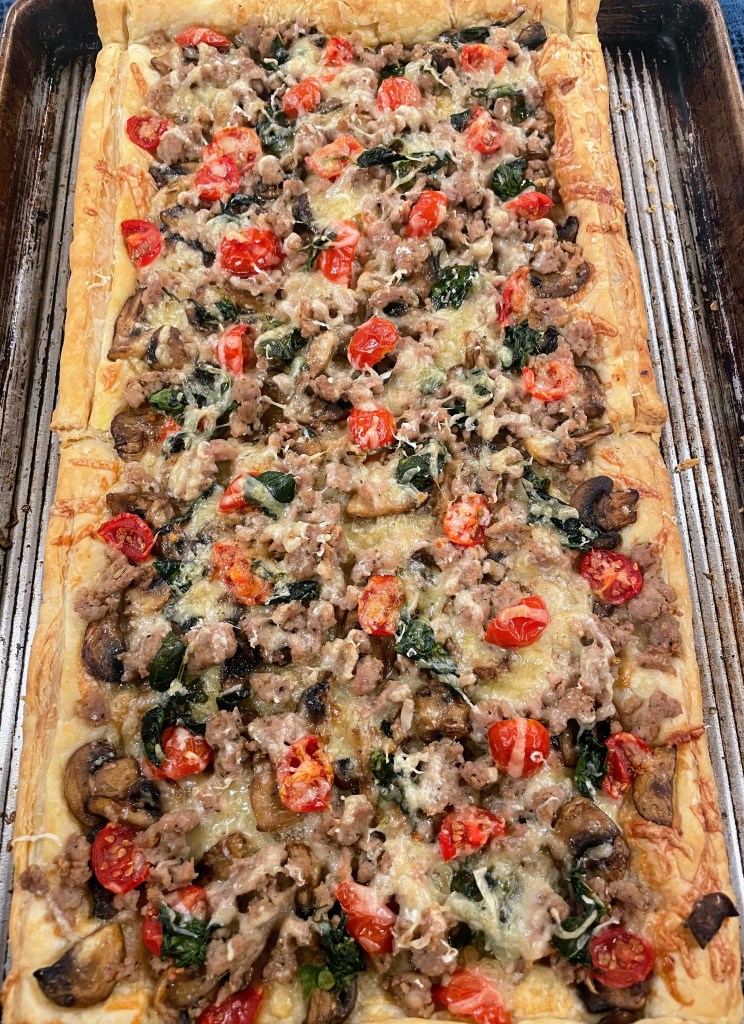
    7. Bake for 25-30 minutes, or until puff pastry and cheeses are golden. Using a firm spatula, lift one edge of the pizza up and check the bottom; you want to be sure it, too, is golden.
    8. Remove, let sit for a minute or two, then cut into individual pieces. Enjoy!

    Recipe: Crostata Ricotta e Visciole (Sweet Ricotta Tart with Cherry Preserves)

    17 Dec

    Recently, my husband pointed out that we had TWO jars of cherry preserves, TWO jars of fig jam, and an unruly assortment of other jams, jellies, and preserves in the fridge. I was accused of jam overpopulation. I admitted to accidently opening a new jar of cherry preserves (my favorite) without realizing we already had one in the fridge, but I still maintain the other jars were not my fault…. However, in the spirit of providing a solution to this problem, I offered to make a ricotta crostata with what was left in one of the jars of cherry preserves. One less jar in the fridge, and attention diverted to dessert. A win-win.

    Actually, a ricotta crostata is always a win-win; the sweet ricotta is beautifully creamy and you can use any preserves or jam of your liking, though the most traditional way of preparing this Italian sweet is with cherry preserves. Second, the dough for this crostata comes together in a food processor, adding speed and ease to the recipe’s many virtues. And finally, a crostata not only makes a great dessert, but a tasty breakfast as well — and a good accompaniment to afternoon tea or coffee.

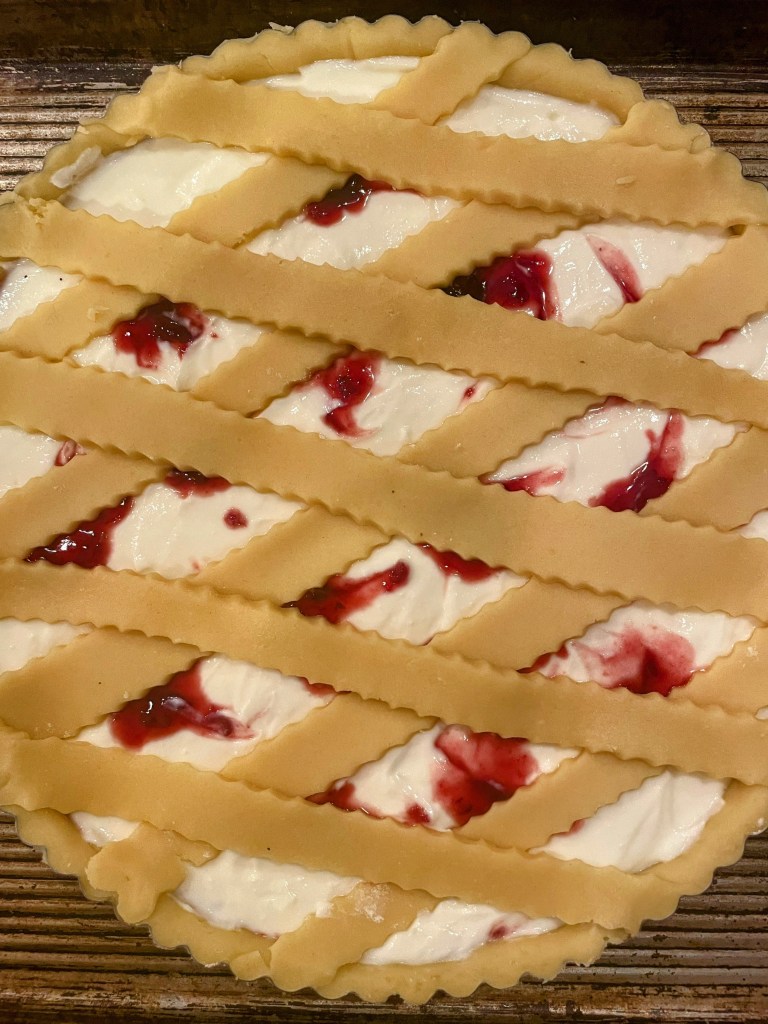
    You can also let your creative side loose on the top crust; I made a very simple (unwoven) lattice with scalloped strips this time around.

    Crostata Ricotta e Visciole
    Recipe inspired by (and translated from) Antonio Romano Runchef
    Note: This recipe is best made using a kitchen scale to weigh the ingredients.

    Tart Dough:
    225 gr. sugar (about 1 1/8 c.)
    grated zest of one lemon
    250 gr. butter (2 sticks + 1 tbsp)
    120 gr. eggs (I used 3 yolks + 2 whole eggs, carefully adding the white of the last egg until I got to 120 gr.)
    1 tsp. vanilla
    pinch of salt
    500 gr. flour (I used all-purpose; you can also use 00)

    Filling:
    450-500 gr. ricotta (16-oz. container); I try to find ricotta that is not super wet. Here in the U.S., I like Bel Gioioso Ricotta con Latte. I pour out any little liquid that may have collected in the container and dab the top with a paper towel to remove any extra moisture.
    100 gr. sugar

    250 gr. cherry preserves (about 3/4 c.)

    Directions:
    1. Place the sugar and lemon zest in a food processor and pulse until combined.
    2. Cut the butter into cubes. (Note: An easy way to cut butter into cubes is to use a bench scraper; cut the sticks lengthwise into quarters, then chop into cubes. ) Add the butter cubes to the sugar in the food processor and continue to pulse until incorporated; the butter will look grainy. Add the eggs and vanilla and process until well combined.
    3. Add the flour and sprinkle the pinch of salt over. Process just until a smooth dough forms.

    4. Turn the dough onto a floured countertop and roll into a thick log. Pat into a rectangle, wrap in plastic film (or put in a sealable bag) and refrigerate for 2 hours.
    5. Meanwhile, butter a tart pan. Make the ricotta filling by mixing the ricotta and sugar together; let it sit, stirring occasionally, until the sugar is fully incorporated.

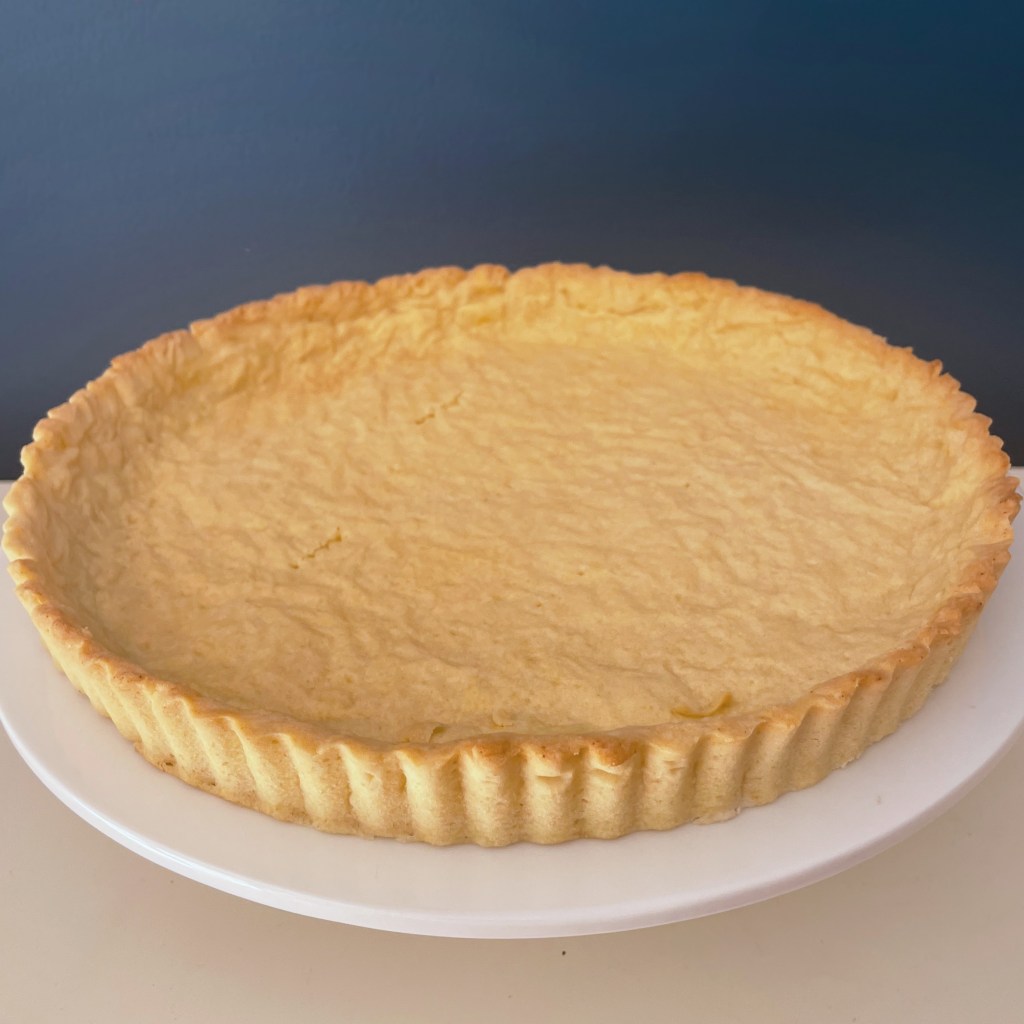
    6. Cut the dough into a 2/3 piece and a 1/3 piece. Return the 1/3 piece to the refrigerator. Roll the 2/3 piece into a circle about 3 inches wider than your tart pan. Carefully drape the dough over the pan, lifting it gently to tuck it into the inner diameter of the pan. If any dough overlaps the edge, press on it to crimp it off. Save the extra dough.
    7. Spoon 2/3 of the preserves ( 1/2 c.) over the base of the tart. Carefully add the ricotta mixture, smoothing the top as best as possible. Dollop the remaining preserves across the top of the ricotta mixture and gently swirl.

    8. Roll the remaining 1/3 piece of dough into a rectangle at least as long as the diameter of your tart pan. Cut into 10 strips, and lay the strips in a diamond pattern across the top of the tart. (You can also re-use any extra dough you have leftover from lining the tart pan, to make the 10 strips.)

    9. Bake the crostata at 170C/340F for about 35 minutes, or until the lattice is golden. Let cool and then serve.

    Recipe: Summer Fruit Tart

    10 Sep

    My sweet tooth has been fairly well documented on these pages, I think. Anything with chocolate? Check. Caramel? Check. Cinnamon, cardamom, nuts? Check. The list goes on.

    But in recent years, I’ve tried to add more fruity desserts into the mix. This weekend, our son and daughter-in-law were visiting and I discovered my daughter-in-law loves fresh fruit tarts. So, decision easily made. Which was perfect, as I had long been wanting to tackle pastry cream (crème pâtissière, aka creme pat), because frankly, who among us who have watched the Great British Bake Off have not wanted to be able to whip up a creme pat at a moment’s notice? Plus–all those fruits count toward the 30-Plant Challenge, too! It was a win-win.

    Note: For a first-time attempt, this tart turned out pretty well. But there are two things I will keep in mind for next time:
    1. The original recipe I followed for the creme pat said to cook “until thickened,” which I did, but the pastry cream ended up just a tad soft. What you really must do is gently bring the egg-milk mixture to a boil and hold it there, stirring nonstop, for one minute. That will allow it to set perfectly; I’ve noted this in the revised recipe below. (Not that anyone minded my slightly softer creme pat; the entire tart was gone within 8 hours.)
    2. I played with the design of the fruit and settled on a delicate-looking pattern (see all the photos). Next time, I won’t be so delicate. In fact, what you should do is completely cover the creme pat–you should not be able to see it at all. So, overlap the fruit, stand it on end, etc. What you want is a high fruit-to-pastry cream ratio.

    With these notes in mind, here is the recipe:

    Summer Fruit Tart

    –Pastry cream (Crème pâtissière, creme pat):
    2 c. whole milk
    3/4 c. granulated sugar (if you like things barely sweet, use 1/2 cup; if you like things pretty sweet, use 1 cup)
    6 egg yolks
    1/4 c. cornstarch
    1/4 tsp. salt
    1 tbsp. butter
    2 tsp. vanilla extract (or 2 tsp. vanilla bean paste, or 1 vanilla bean, scraped)*

    –Tart crust:
    7 tbsp. butter, softened
    1/2 c. powdered sugar
    1 egg
    1/2 tsp. vanilla extract
    1/4 tsp. salt
    1 1/4 c. flour
    1/4 tsp. baking powder

    –Fruit:
    4 c. fresh fruit, larger fruits cut into decorative pieces (strawberries, blueberries, blackberries, raspberries, mango, kiwi, etc.)

    –Glaze:
    ¼ cup apricot jam (try to scoop out the least chunky bits) + 1 tablespoon water

    Preparation:
    Pastry cream:
    1. Heat the milk in a medium saucepan over medium heat for about 7-8 minutes, until it reaches 180 degrees. (If you do not have a thermometer, watch for tiny bubbles to form in the milk, but don’t let the milk come to a full boil or it will scald.) Stir frequently as the milk heats up; you can get through the first part of Step #2 while the milk is beginning to warm up, but the milk will require your full attention — and stirring — as it gets hotter, to prevent scalding. When the milk is at the right temperature, take the saucepan off the stove, and place it on the counter near your work area.

    *Note: If you prefer to use a scraped vanilla bean or vanilla bean paste instead of vanilla extract, you can add those to the milk right as you start the heating process, instead of afterward in Step #3.

    2. In a large bowl, whisk together the egg yolks and sugar until light and creamy. (This process is called blanching and helps prevent lumps when you are later cooking the pastry cream.) Whisk in the cornstarch and salt.

    Keep whisking the egg mixture, and pour in half of the hot milk that is in the saucepan. When all of the milk is incorporated, whisk in the remaining milk and return to saucepan. (This process tempers the eggs, which prevents them from scrambling; you are doing everything you can to end up with a smooth, delicious pastry cream).

    3. Cook the egg/milk mixture on medium heat, whisking constantly, until it thickens and then comes to a boil. This will take a few minutes. Once the mixture comes to a boil, cook for 1 minute more, whisking nonstop. Whisk in the vanilla and butter until the butter is melted, then pour the pastry cream into a bowl. Press a piece of plastic wrap directly onto the surface of the pastry cream, then refrigerate for 2 to 3 hours.

    Tart crust:
    1. Using a) a stand mixer with the paddle attachment, or b) an electric mixer, or c) a whisk (ie, by hand, which is what I did), cream the butter and powdered sugar together until pale and fluffy. Scrape down the sides of the bowl with a spatula and add the egg. Continue mixing until combined, scraping down the bowl as necessary. Add the vanilla and salt and mix until combined. Add the flour and baking powder and mix (or combine with a wooden spoon) until the dough comes together. Put a piece of plastic wrap on the counter, scrape the dough onto the plastic wrap, wrap tightly and chill at least 1 hour.

    2. Preheat oven to 350 degrees. On a lightly floured piece of parchment paper, roll out the dough until it’s about 10 inches in diameter. Invert the dough over a 9-inch tart pan, unpeel from the parchment paper, and press the dough firmly into the bottom and up the sides of the pan. Trim any excess dough.

    3. Crinkle up a new piece of parchment paper until it is nice and wrinkly and soft. Place it on top of the dough in the tart pan. Fill the pan with pie weights or dried beans or dried rice; bake for 12 minutes. Carefully lift up the parchment paper and empty the pie weights/beans/rice into a bowl to cool. Prick the base of the tart and return the tart to the oven. Bake 10 to 15 minutes longer, until golden brown. Cool completely.
    Fruit Tart:
    Fill the cooled tart crust with chilled pastry cream. Arrange the fruit in a decorative pattern. Be generous with the fruit and cover the pastry cream completely (which I did not do in these photos, but will do in the future.)

    Glaze:
    In a heat-proof small bowl, stir together the apricot jam with 1 tablespoon of water. Heat in the microwave for about 30 seconds, then stir again; the glaze should have gotten thin enough to spread. (If there are chunky bits in the glaze, strain it through a sieve.) Use a pastry brush to gently dab the fruit with the apricot glaze.

    Chill the tart until ready to serve.

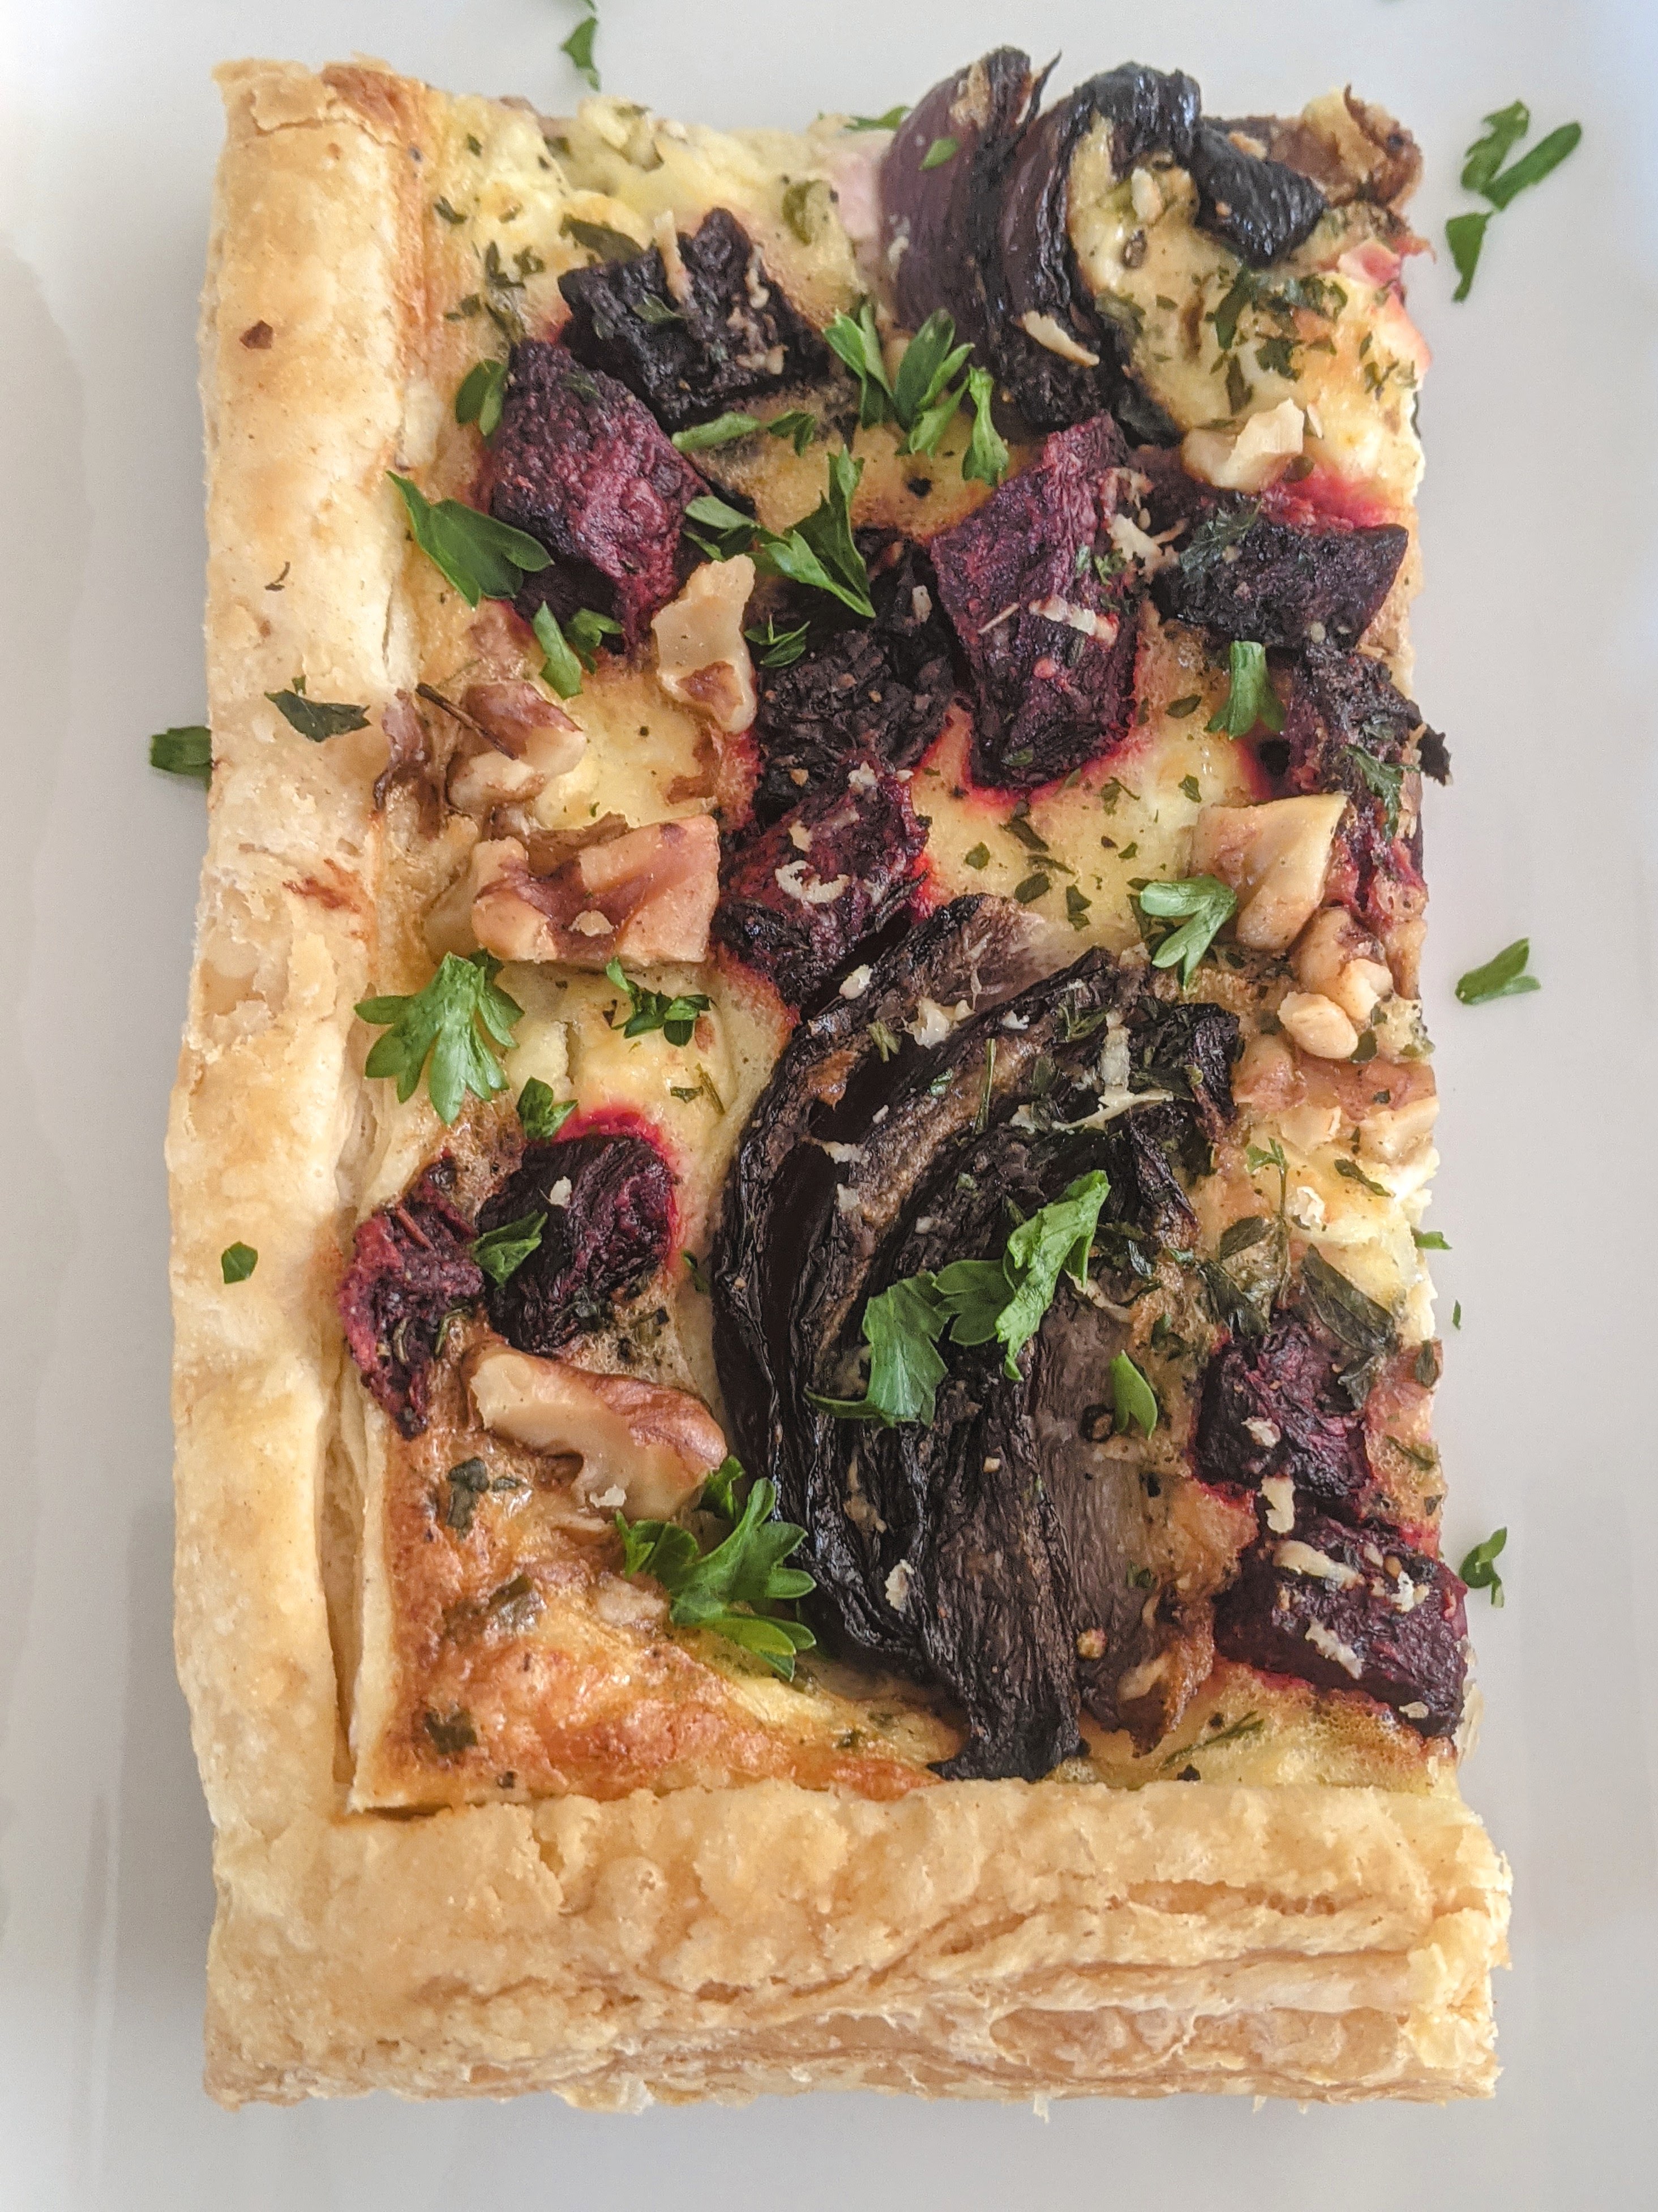
    Recipe: Roasted Beet and Red Onion Tart with Feta and Walnuts

    14 Mar

    I realized a bit late that today is Pi Day, 3/14 (March 14). Our daughter is a huge fan of Pi Day baking, so I wanted to see if I could come up with a savory pie without having to go to the grocery store. Luckily, beets can keep in the fridge for a long, long time, and I recalled that two of them had been living in our crisper drawer for at least a month. Were they still good? Yes, they were. That meant the main ingredient for my pie was set. What goes beautifully with beets? Feta and walnuts. Both were miraculously on hand. As was a red onion that needed to be used, too, lending itself nicely to the red theme. So far, so good. Then I checked the freezer. Excellent: the puff pastry I thought I had in there was there, so I took it out to thaw. Pie ingredients all available!

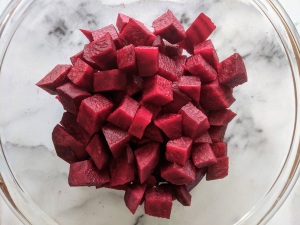
    Like most things involving pre-made puff pastry, this is a pretty easy recipe. The most complicated step (which is not hard, just messy) is peeling and dicing the raw beets. Prepare them on a plastic cutting board or a surface that will not stain. And beware of your hands. I washed my hands with soap and water after peeling each beet, then after dicing each beet, and then a final time for good measure–and my hands escaped unblemished. You could also use gloves. Or you could not worry about it, and then have time (on your hands) to admire a potent natural dye….

    Roasted Beet and Red Onion Tart with Feta and Walnuts
    6-8 servings

    Ingredients

    • 1 pkg. (17.3 oz./490 gr., usually comes with two sheets) puff pastry (pasta sfoglia, pâte feuilletée)–thawed
    • Two large raw beets (about 1.1 lb./ 500 gr. total), peeled and diced into medium-sized pieces
    • 1 large red onion, cut in half, then each half cut into about 5-6 wedges
    • olive oil, dried thyme
    • 1 cup (135 gr.) feta cheese, crumbled
    • 1/2 cup (about 118 ml.) heavy cream
    • 1 egg, lightly beaten
    • 1 garlic clove, crushed
    • 1 tbsp. dried chives, or 2 tbsp. fresh chives, finely chopped
    • freshly grated black pepper
    • 1/4 cup grated Pecorino Romano or Parmesan cheese
    • small handful walnut pieces
    • 1 tbsp. dried parsley
    • fresh parsley if available, as garnish

    Preparation

    1. Preheat oven to 400 degrees F / 200 degrees C.
    2. In a medium bowl, toss the diced beets with 1 tbsp. olive oil, a pinch of salt and pepper, and 1/4 tsp. thyme.
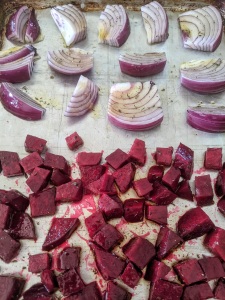
    3. Lightly oil a large baking sheet (I used a half sheet) and spread the beets onto 2/3 of the sheet.
    4. Place the red onion wedges on the other 1/3 of the baking sheet. Brush the onion wedges with olive oil, then sprinkle with salt, pepper, and more thyme.

    5. Bake the vegetables for about 25-30 minutes or until the onions are soft and look slightly grilled. Carefully remove the onions and place them on a plate to cool. Roast the beets for 10 more minutes until they are soft and golden looking (ie, about 40 minutes total), then place them on a plate to cool slightly, too.
    6. Lower the oven temperature to 375 degrees F / 190 C.
    7. Line another baking sheet with parchment paper (I used another half sheet pan, but if you do not have one, you can use two smaller baking pans) . Unfold the thawed puff pastry sheets and arrange them on the parchment paper to fill up the pan as best as possible. Note: Depending on the size of your baking pan, this will require some cutting and pressing to fill the pan properly. With a sharp knife, score the edge of the pastry all the way around, creating a 1/2-inch border, but don’t cut the pastry all the way through. Here’s what my pastry looked like when I was done (if you aren’t in the mood for jigsaw puzzles, you could also place a puff pastry sheet on each of two smaller pans):

    8. Make the feta base. Combine the feta, cream, egg, garlic, chives, and black pepper, and mash together. Prick the pastry, then spread the feta mixture over it, being carefully not to go past the border.

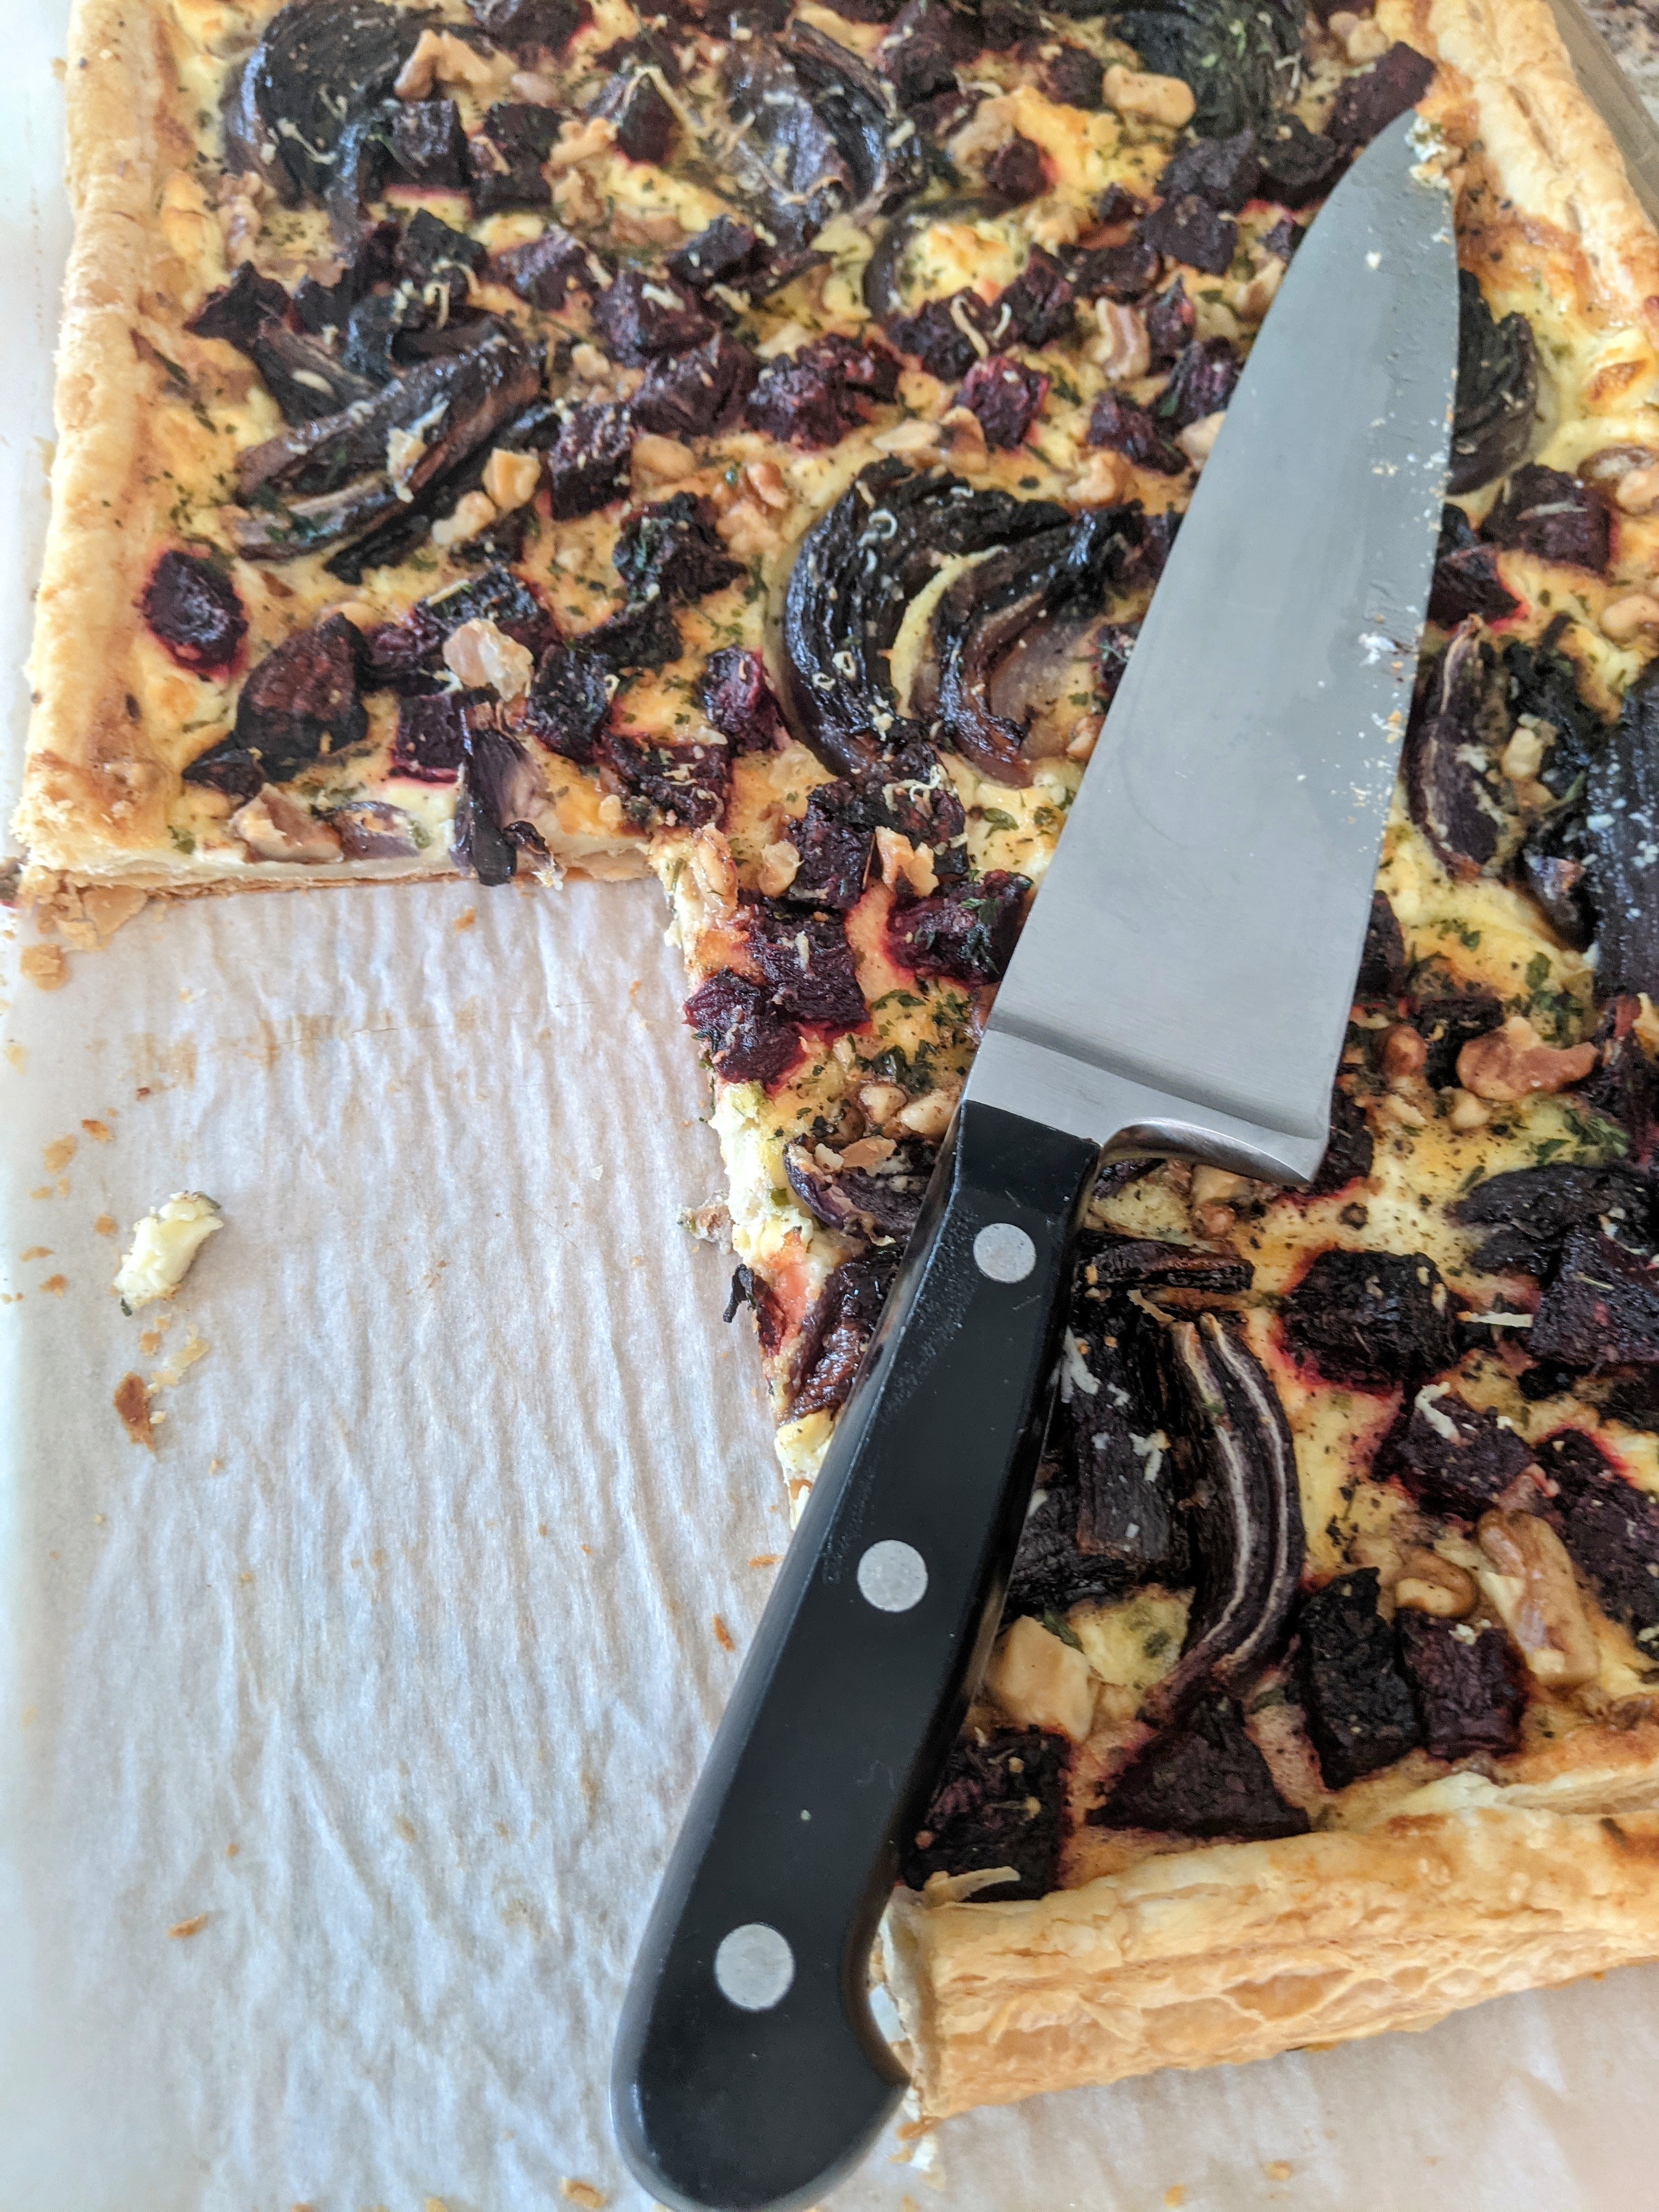
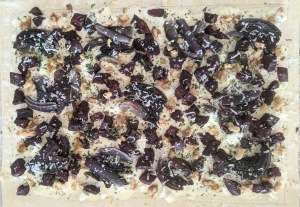
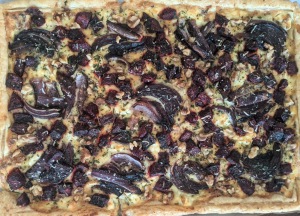
    9. Arrange the beets and onion wedges on top of the feta mixture, sprinkle with Pecorino Romano cheese (or Parmesan), then scatter the walnuts around. Sprinkle dried parsley and more ground pepper over the top. If you really love cheese, you could spoon some extra crumbled feta over the top, too.

    10. Bake the tart for 30 minutes or until the edges and bottom are golden. Let cool for a few minutes, then sprinkle with fresh chopped parsley and serve with peppery greens (like arugula, though a spring mix would do, too) drizzled with a balsamic vinaigrette.