Recently, my husband pointed out that we had TWO jars of cherry preserves, TWO jars of fig jam, and an unruly assortment of other jams, jellies, and preserves in the fridge. I was accused of jam overpopulation. I admitted to accidently opening a new jar of cherry preserves (my favorite) without realizing we already had one in the fridge, but I still maintain the other jars were not my fault…. However, in the spirit of providing a solution to this problem, I offered to make a ricotta crostata with what was left in one of the jars of cherry preserves. One less jar in the fridge, and attention diverted to dessert. A win-win.
Actually, a ricotta crostata is always a win-win; the sweet ricotta is beautifully creamy and you can use any preserves or jam of your liking, though the most traditional way of preparing this Italian sweet is with cherry preserves. Second, the dough for this crostata comes together in a food processor, adding speed and ease to the recipe’s many virtues. And finally, a crostata not only makes a great dessert, but a tasty breakfast as well — and a good accompaniment to afternoon tea or coffee.
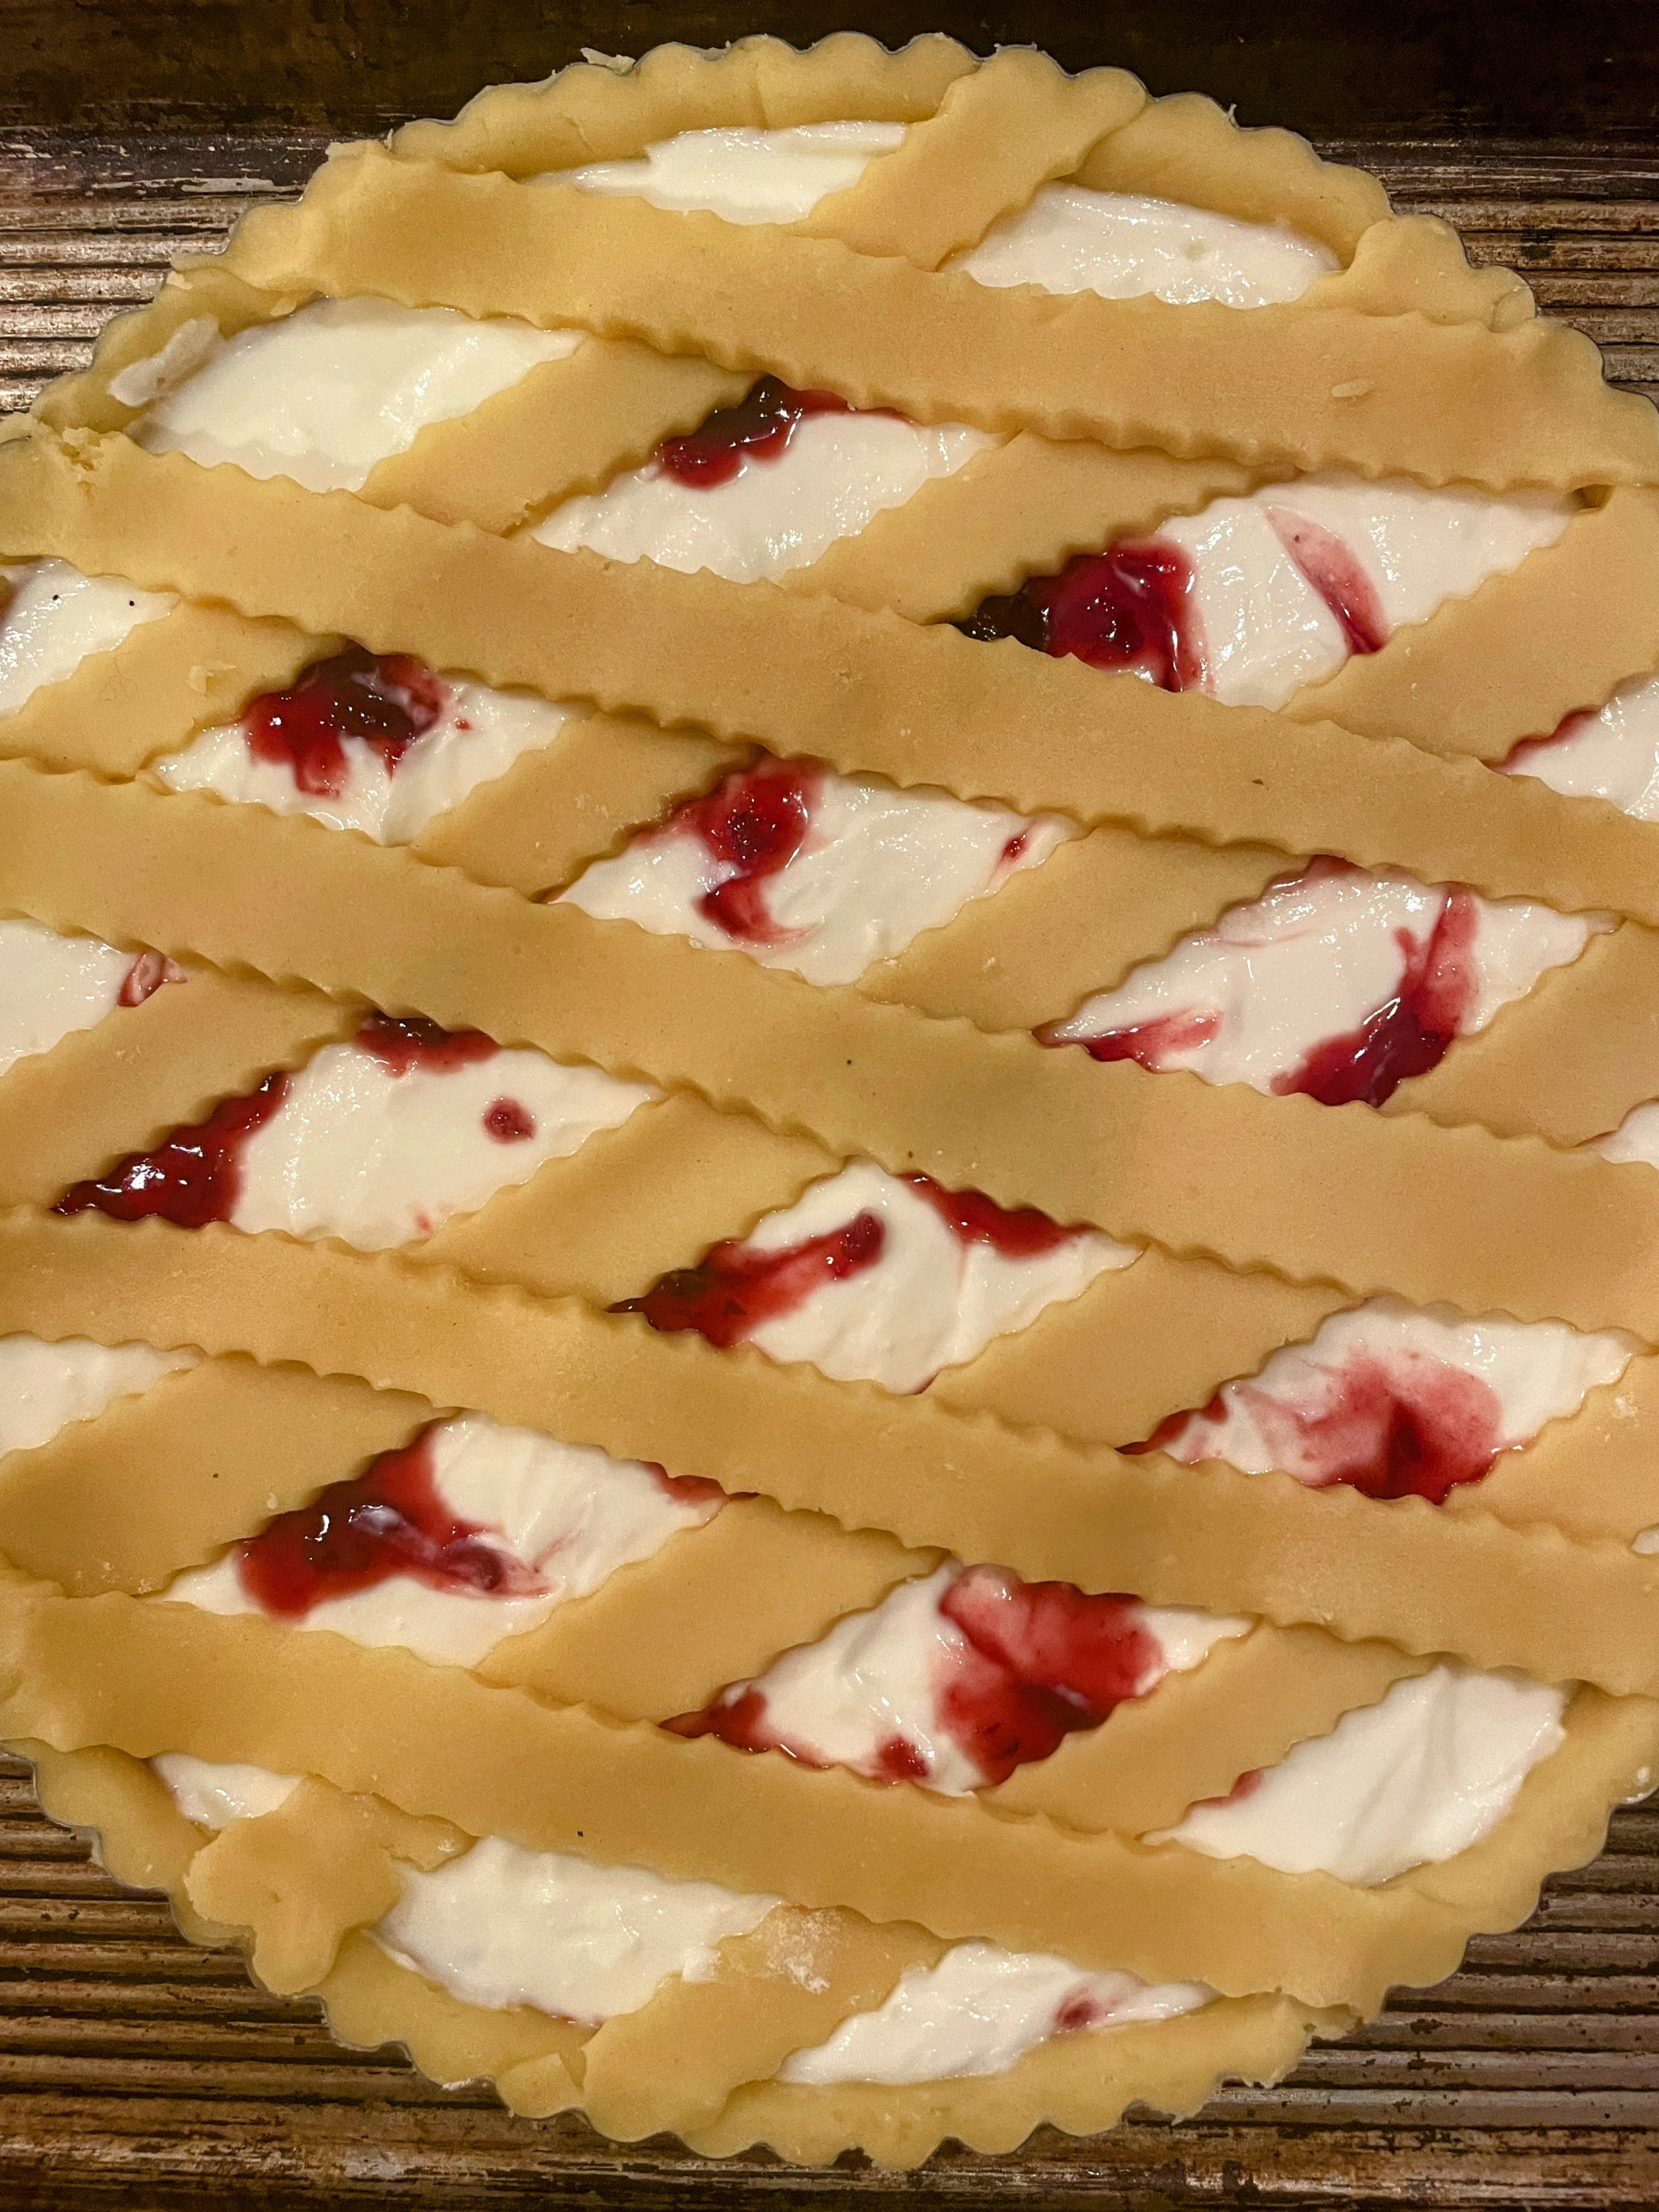
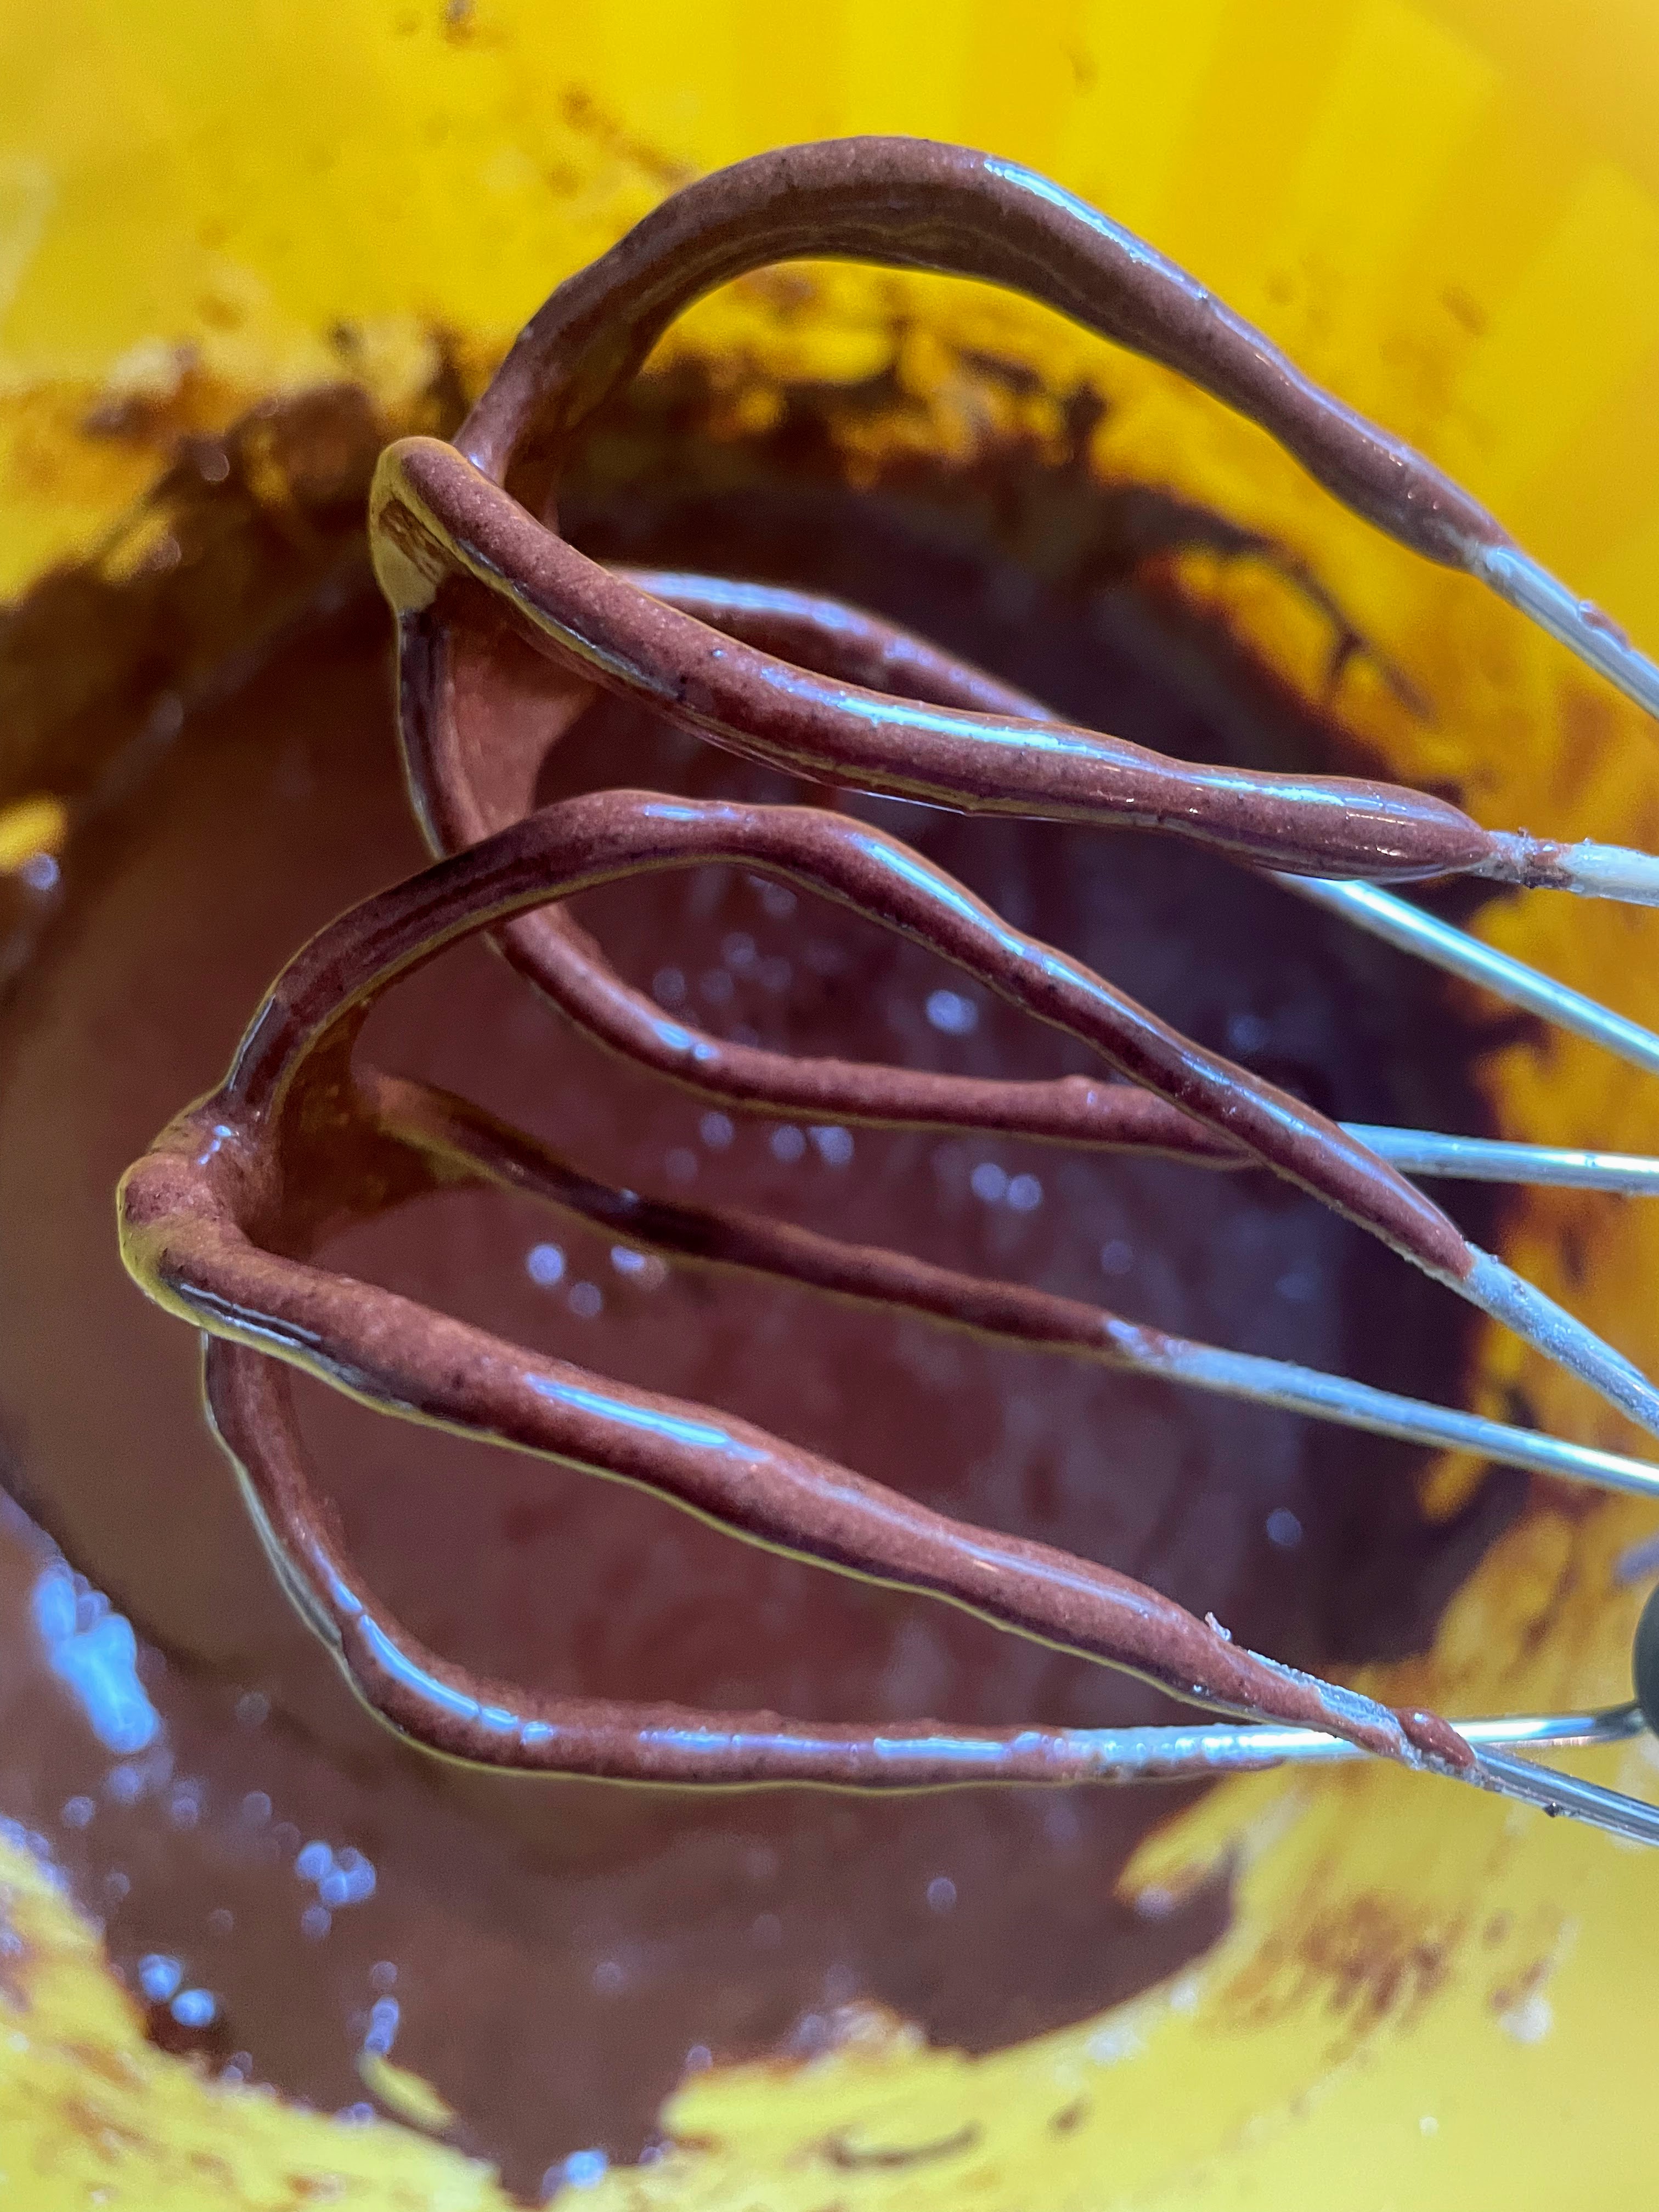
You can also let your creative side loose on the top crust; I made a very simple (unwoven) lattice with scalloped strips this time around.
Crostata Ricotta e Visciole Recipe inspired by (and translated from) Antonio Romano Runchef Note: This recipe is best made using a kitchen scale to weigh the ingredients.
Tart Dough: 225 gr. sugar (about 1 1/8 c.) grated zest of one lemon 250 gr. butter (2 sticks + 1 tbsp) 120 gr. eggs (I used 3 yolks + 2 whole eggs, carefully adding the white of the last egg until I got to 120 gr.) 1 tsp. vanilla pinch of salt 500 gr. flour (I used all-purpose; you can also use 00)
Filling: 450-500 gr. ricotta (16-oz. container); I try to find ricotta that is not super wet. Here in the U.S., I like Bel Gioioso Ricotta con Latte. I pour out any little liquid that may have collected in the container and dab the top with a paper towel to remove any extra moisture. 100 gr. sugar
250 gr. cherry preserves (about 3/4 c.)
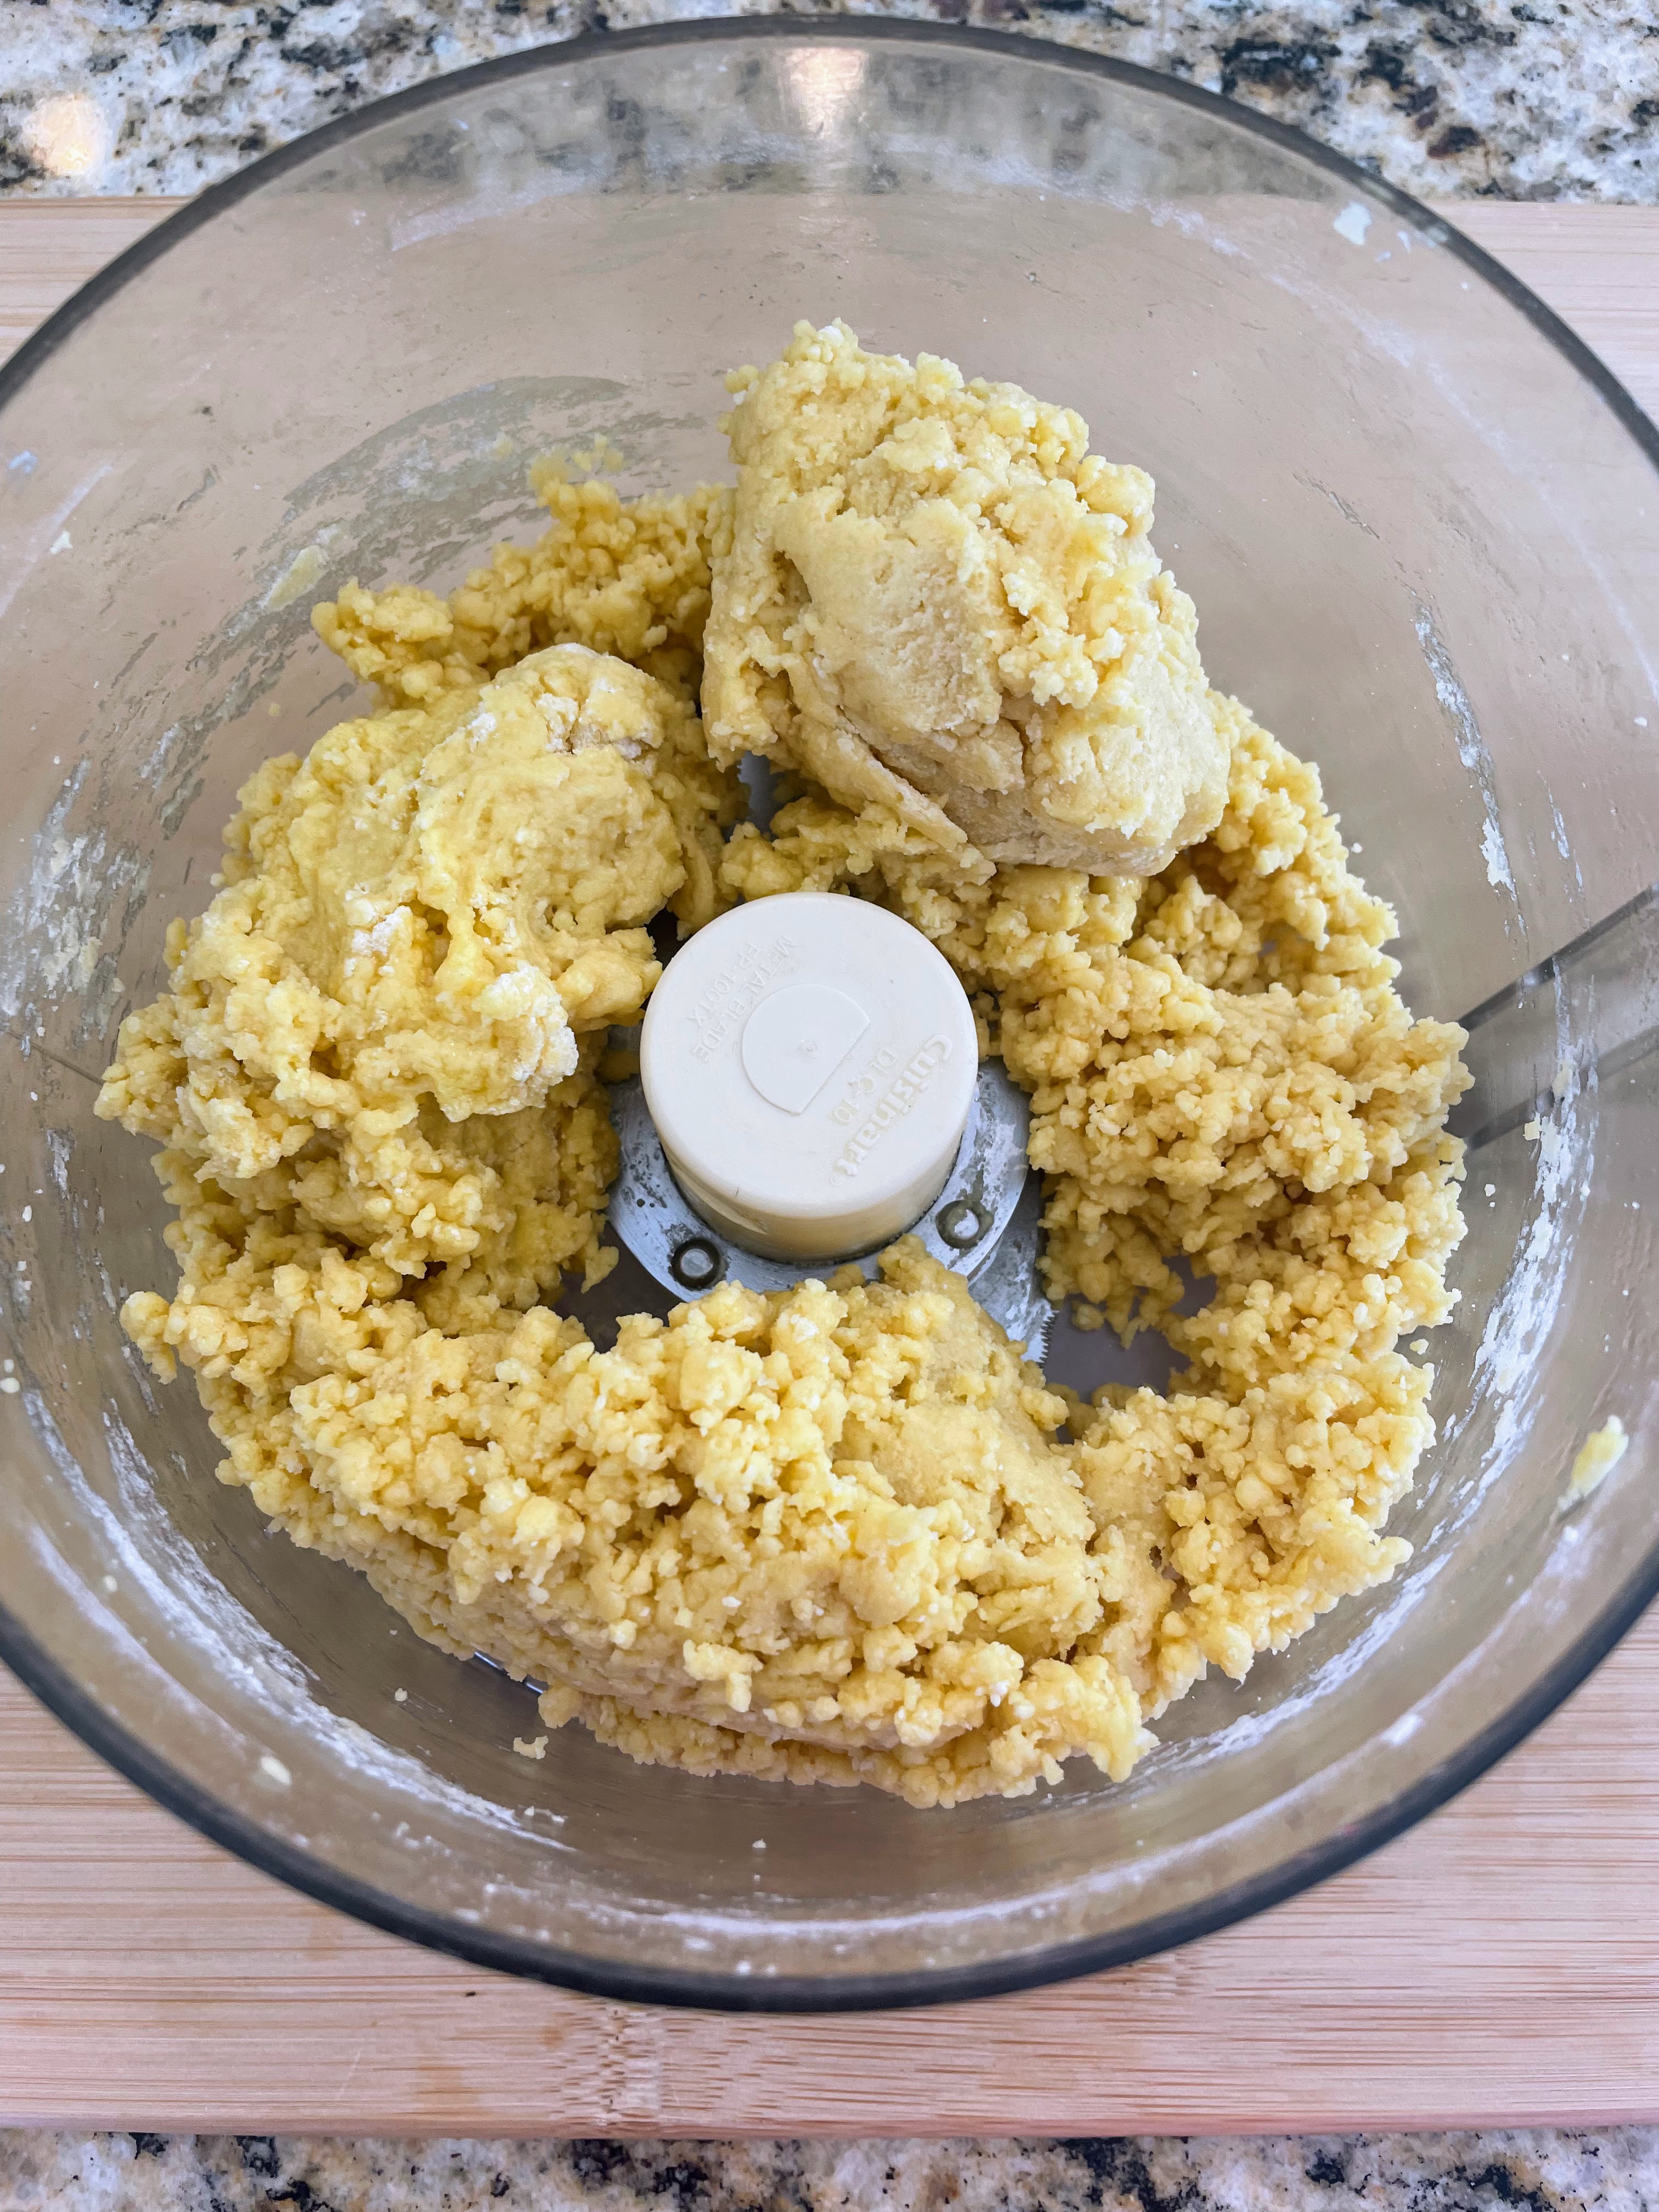
Directions: 1. Place the sugar and lemon zest in a food processor and pulse until combined. 2. Cut the butter into cubes. (Note: An easy way to cut butter into cubes is to use a bench scraper; cut the sticks lengthwise into quarters, then chop into cubes. ) Add the butter cubes to the sugar in the food processor and continue to pulse until incorporated; the butter will look grainy. Add the eggs and vanilla and process until well combined. 3. Add the flour and sprinkle the pinch of salt over. Process just until a smooth dough forms.
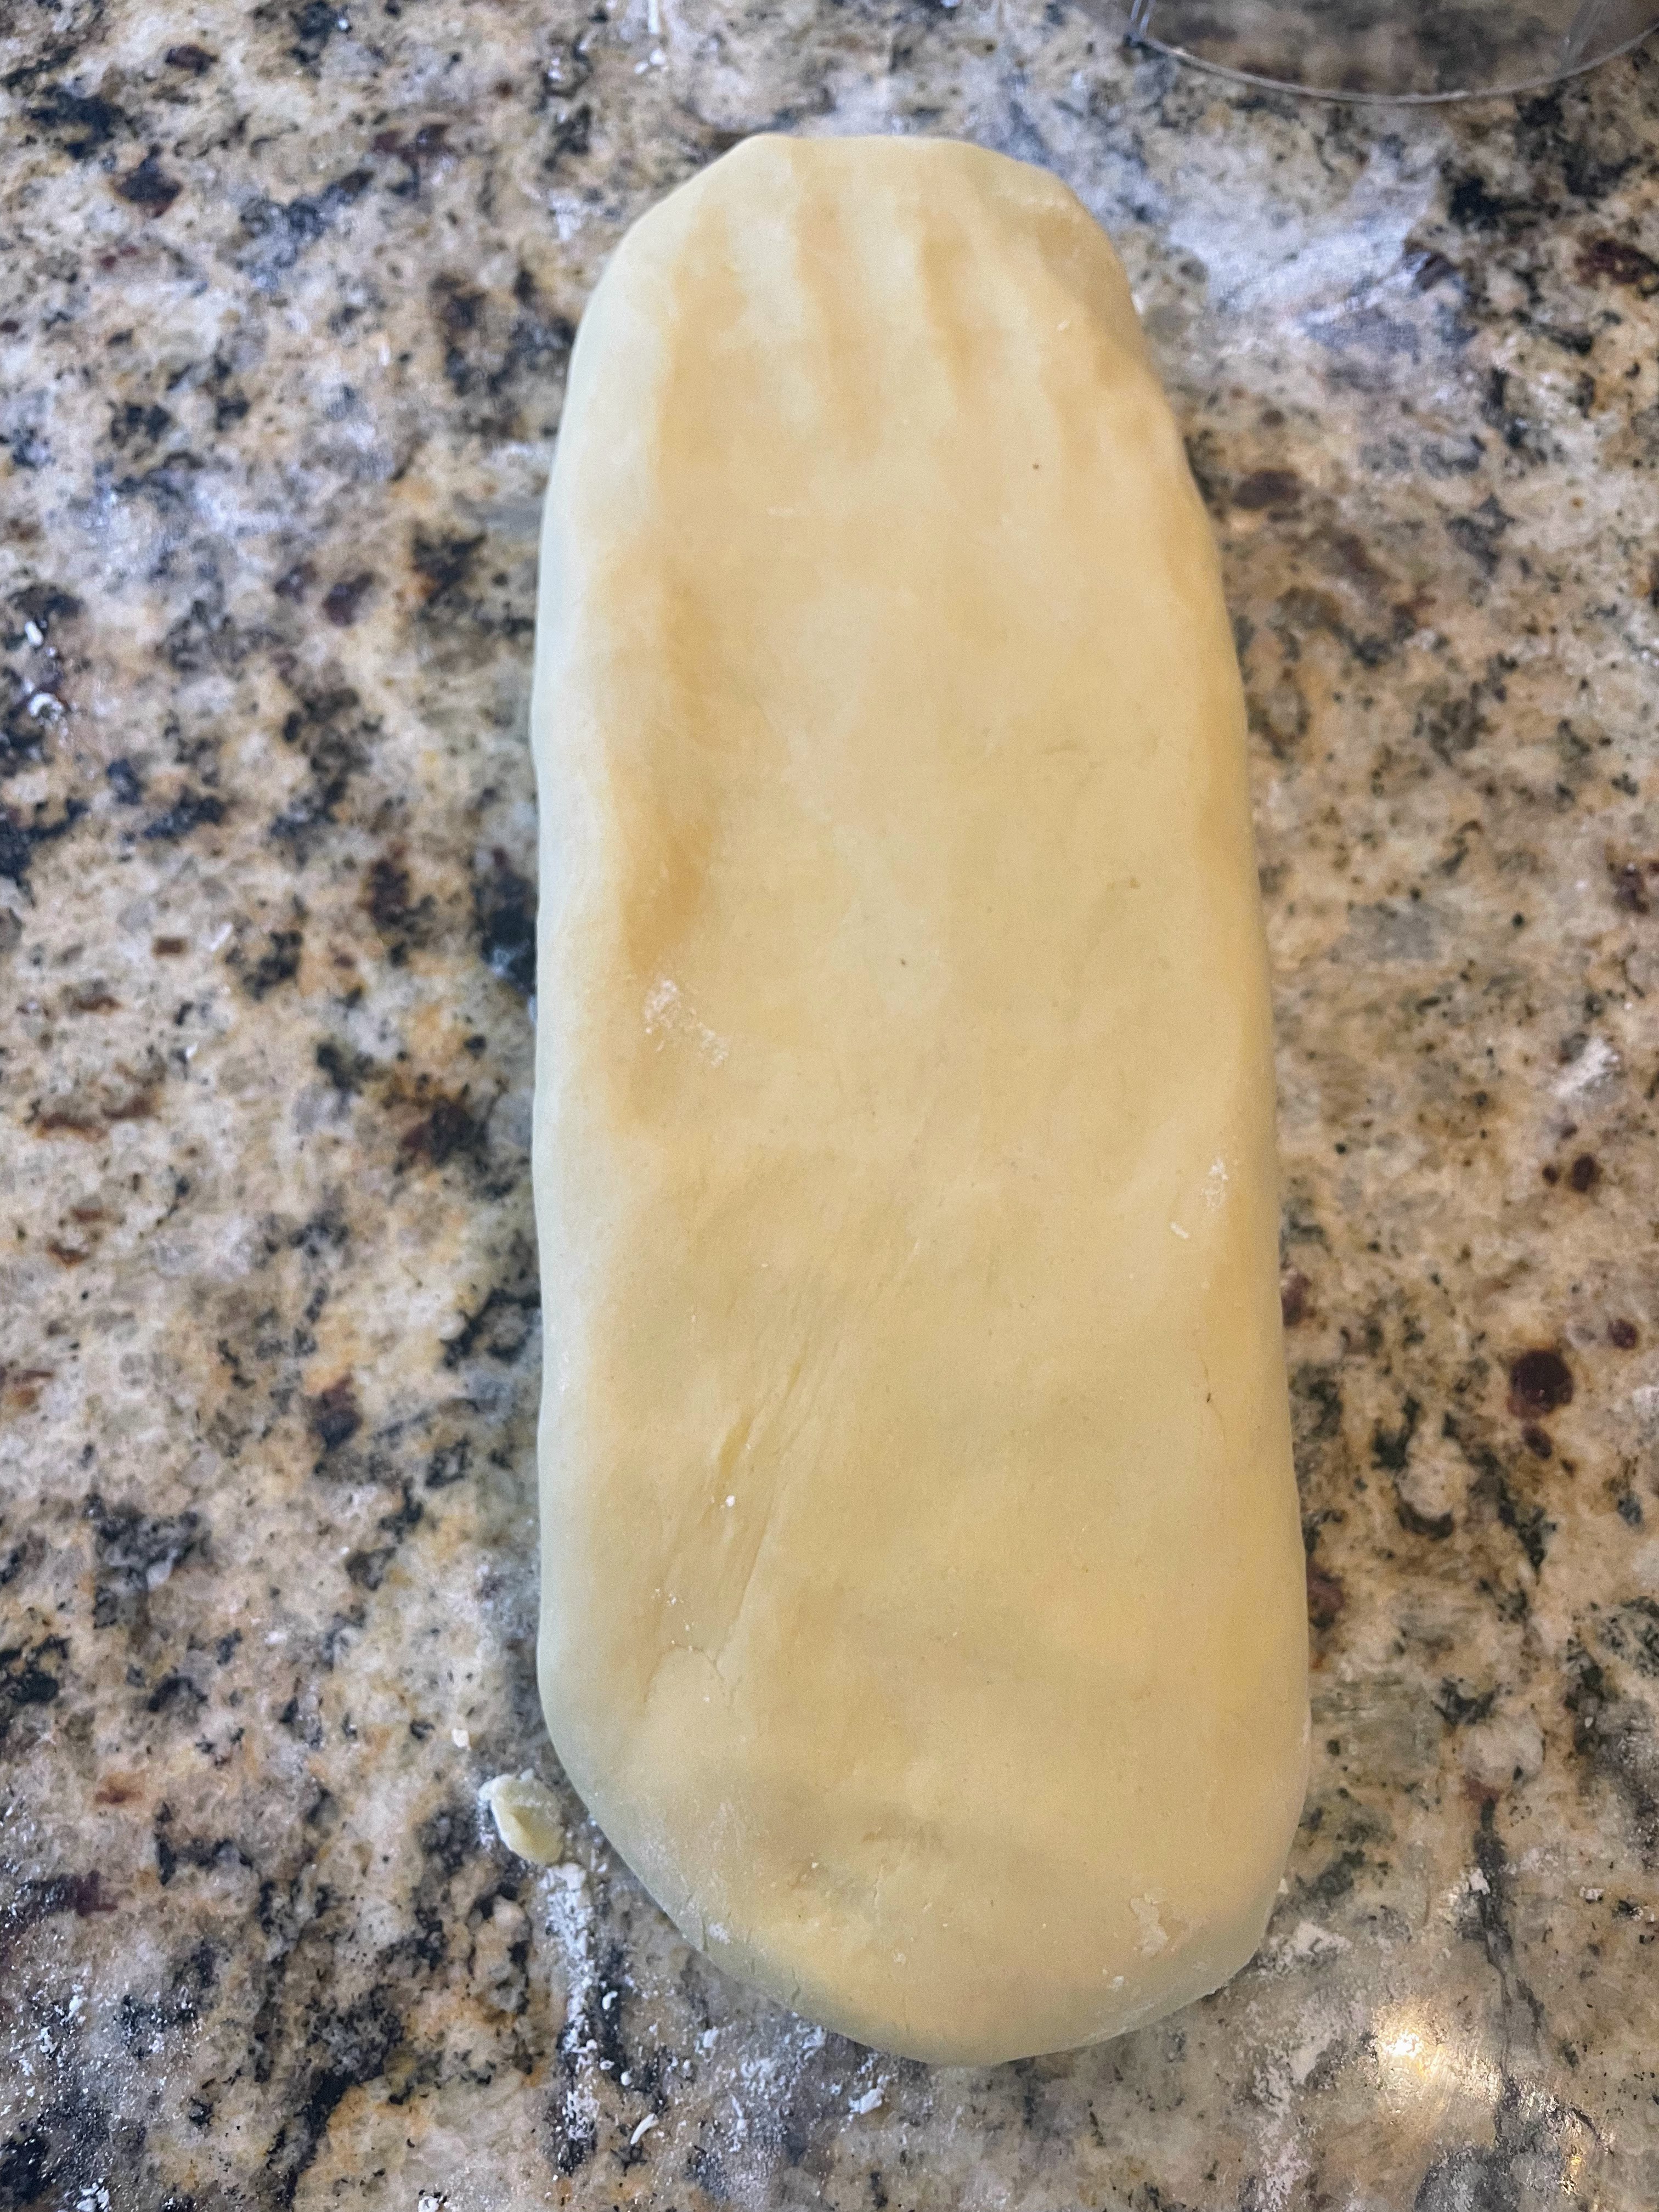
4. Turn the dough onto a floured countertop and roll into a thick log. Pat into a rectangle, wrap in plastic film (or put in a sealable bag) and refrigerate for 2 hours. 5. Meanwhile, butter a tart pan. Make the ricotta filling by mixing the ricotta and sugar together; let it sit, stirring occasionally, until the sugar is fully incorporated.
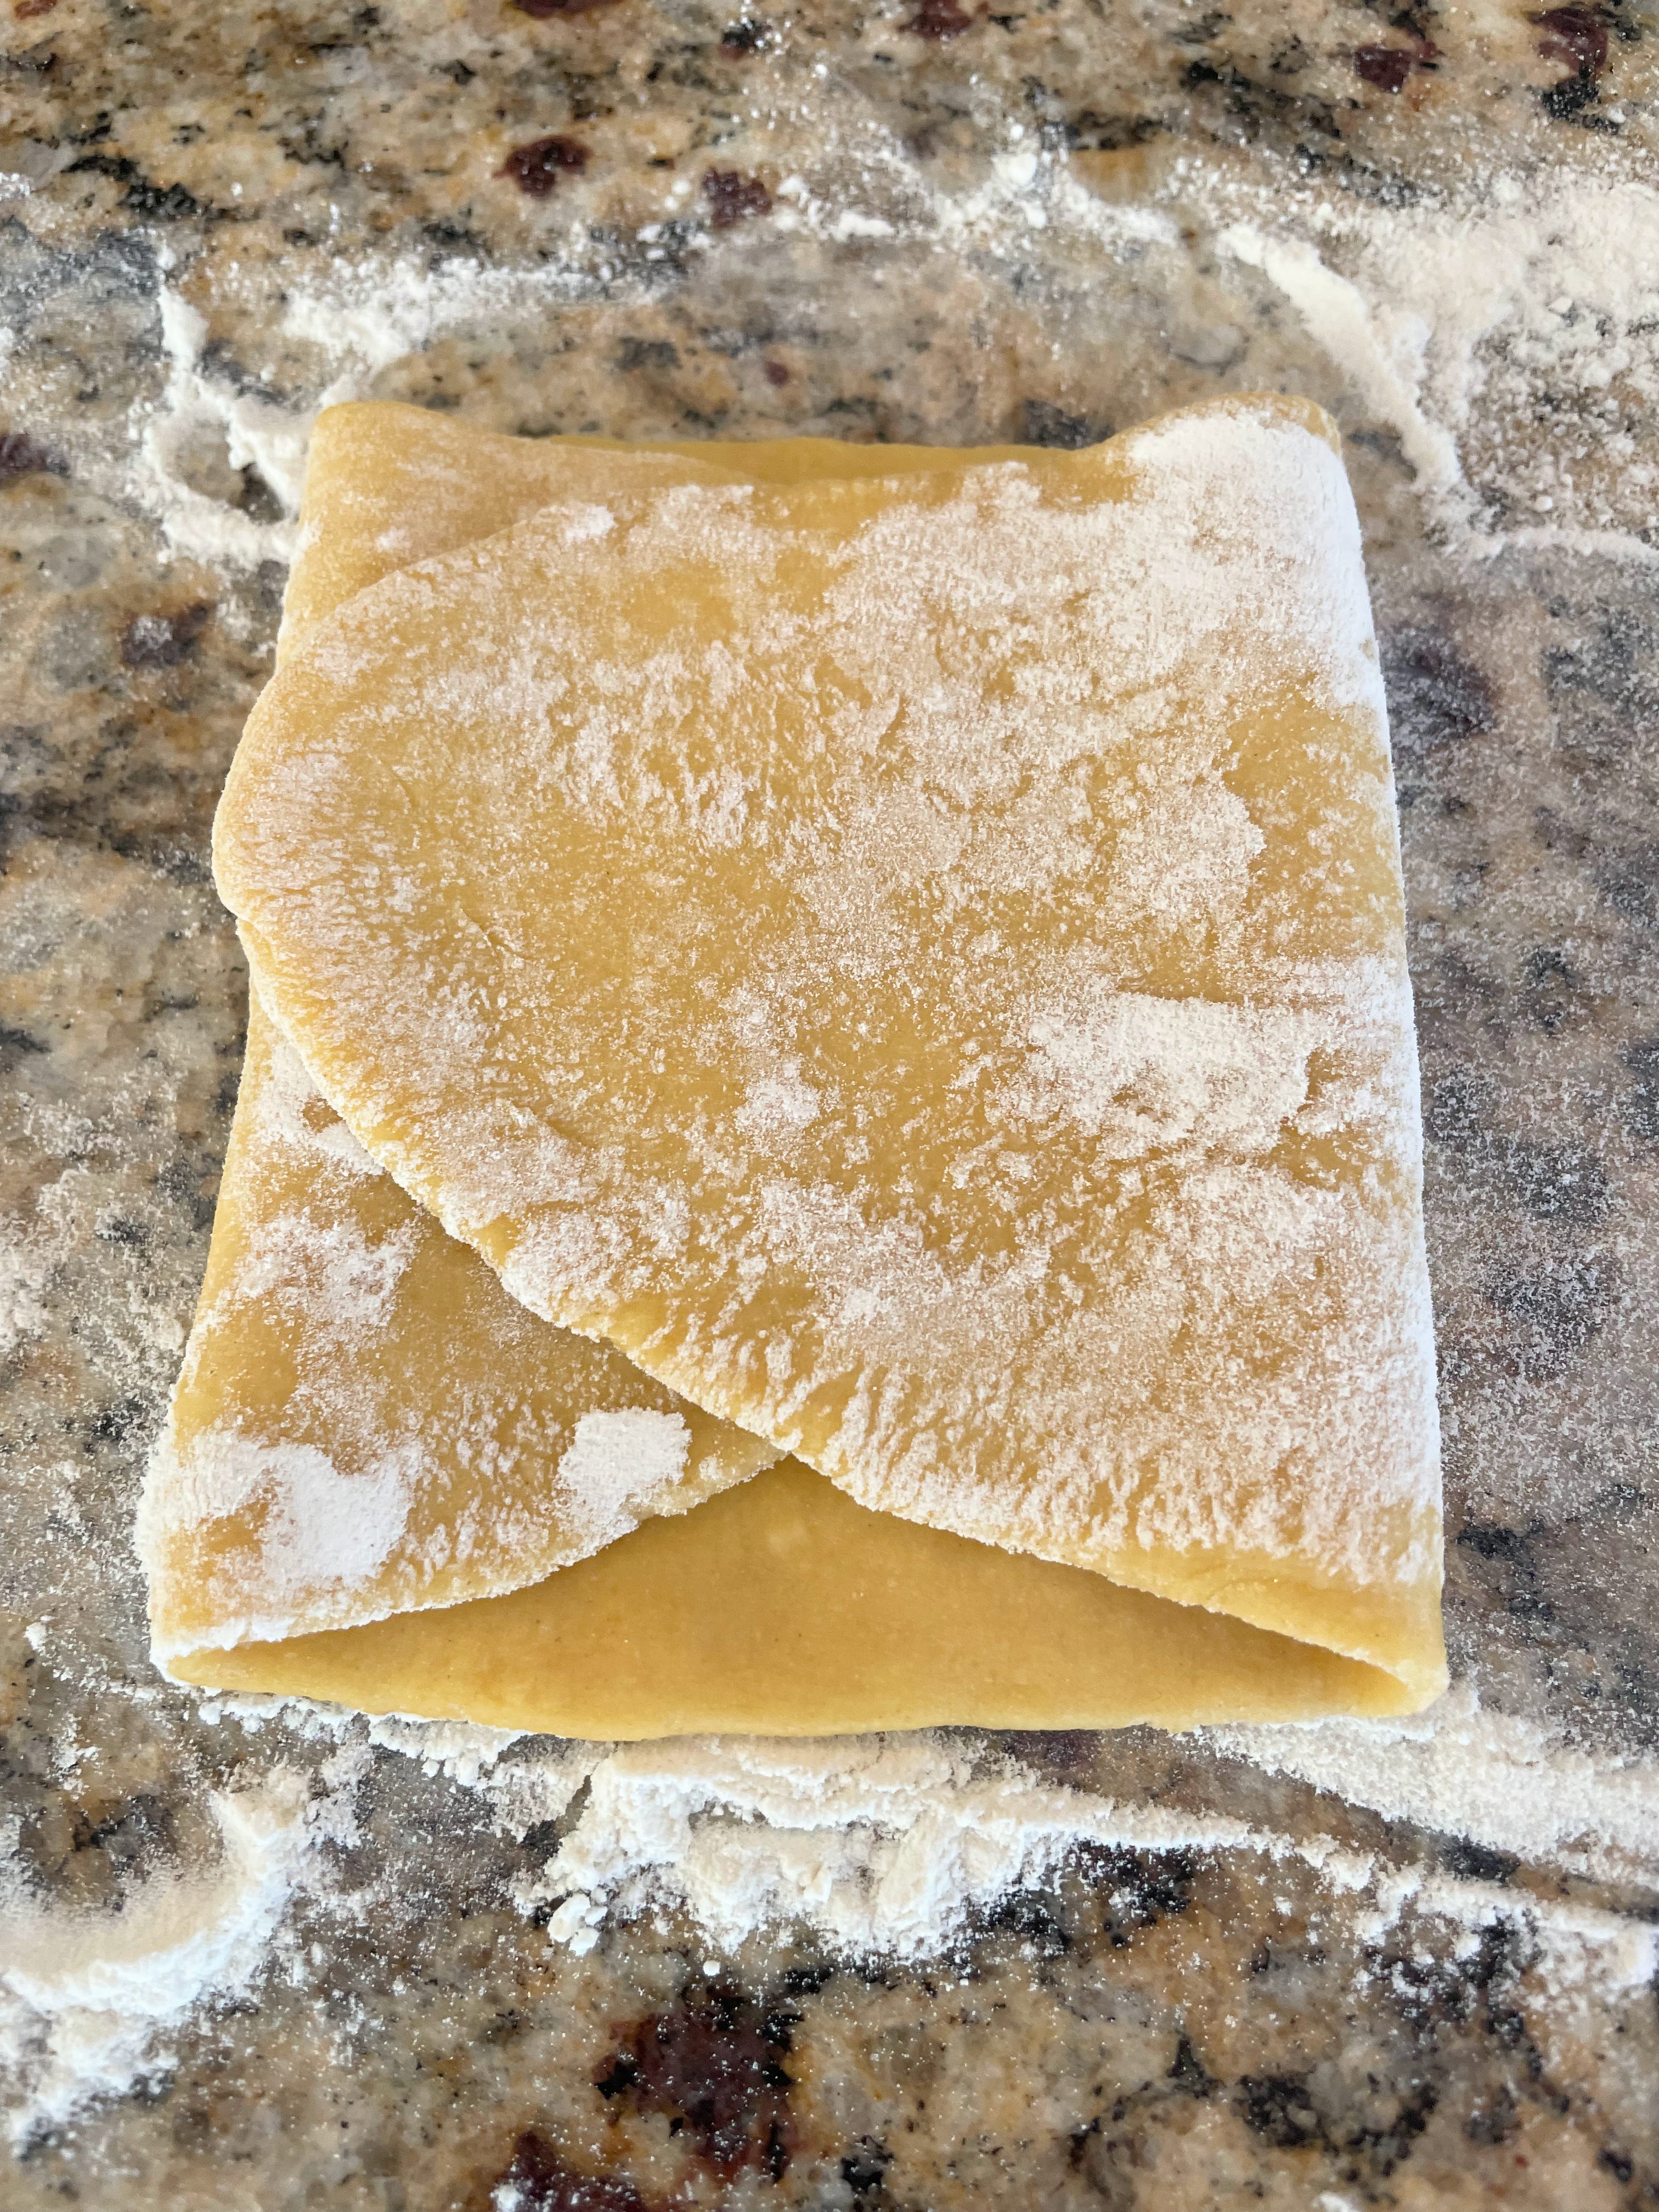
6. Cut the dough into a 2/3 piece and a 1/3 piece. Return the 1/3 piece to the refrigerator. Roll the 2/3 piece into a circle about 3 inches wider than your tart pan. Carefully drape the dough over the pan, lifting it gently to tuck it into the inner diameter of the pan. If any dough overlaps the edge, press on it to crimp it off. Save the extra dough. 7. Spoon 2/3 of the preserves ( 1/2 c.) over the base of the tart. Carefully add the ricotta mixture, smoothing the top as best as possible. Dollop the remaining preserves across the top of the ricotta mixture and gently swirl.
8. Roll the remaining 1/3 piece of dough into a rectangle at least as long as the diameter of your tart pan. Cut into 10 strips, and lay the strips in a diamond pattern across the top of the tart. (You can also re-use any extra dough you have leftover from lining the tart pan, to make the 10 strips.)
9. Bake the crostata at 170C/340F for about 35 minutes, or until the lattice is golden. Let cool and then serve.
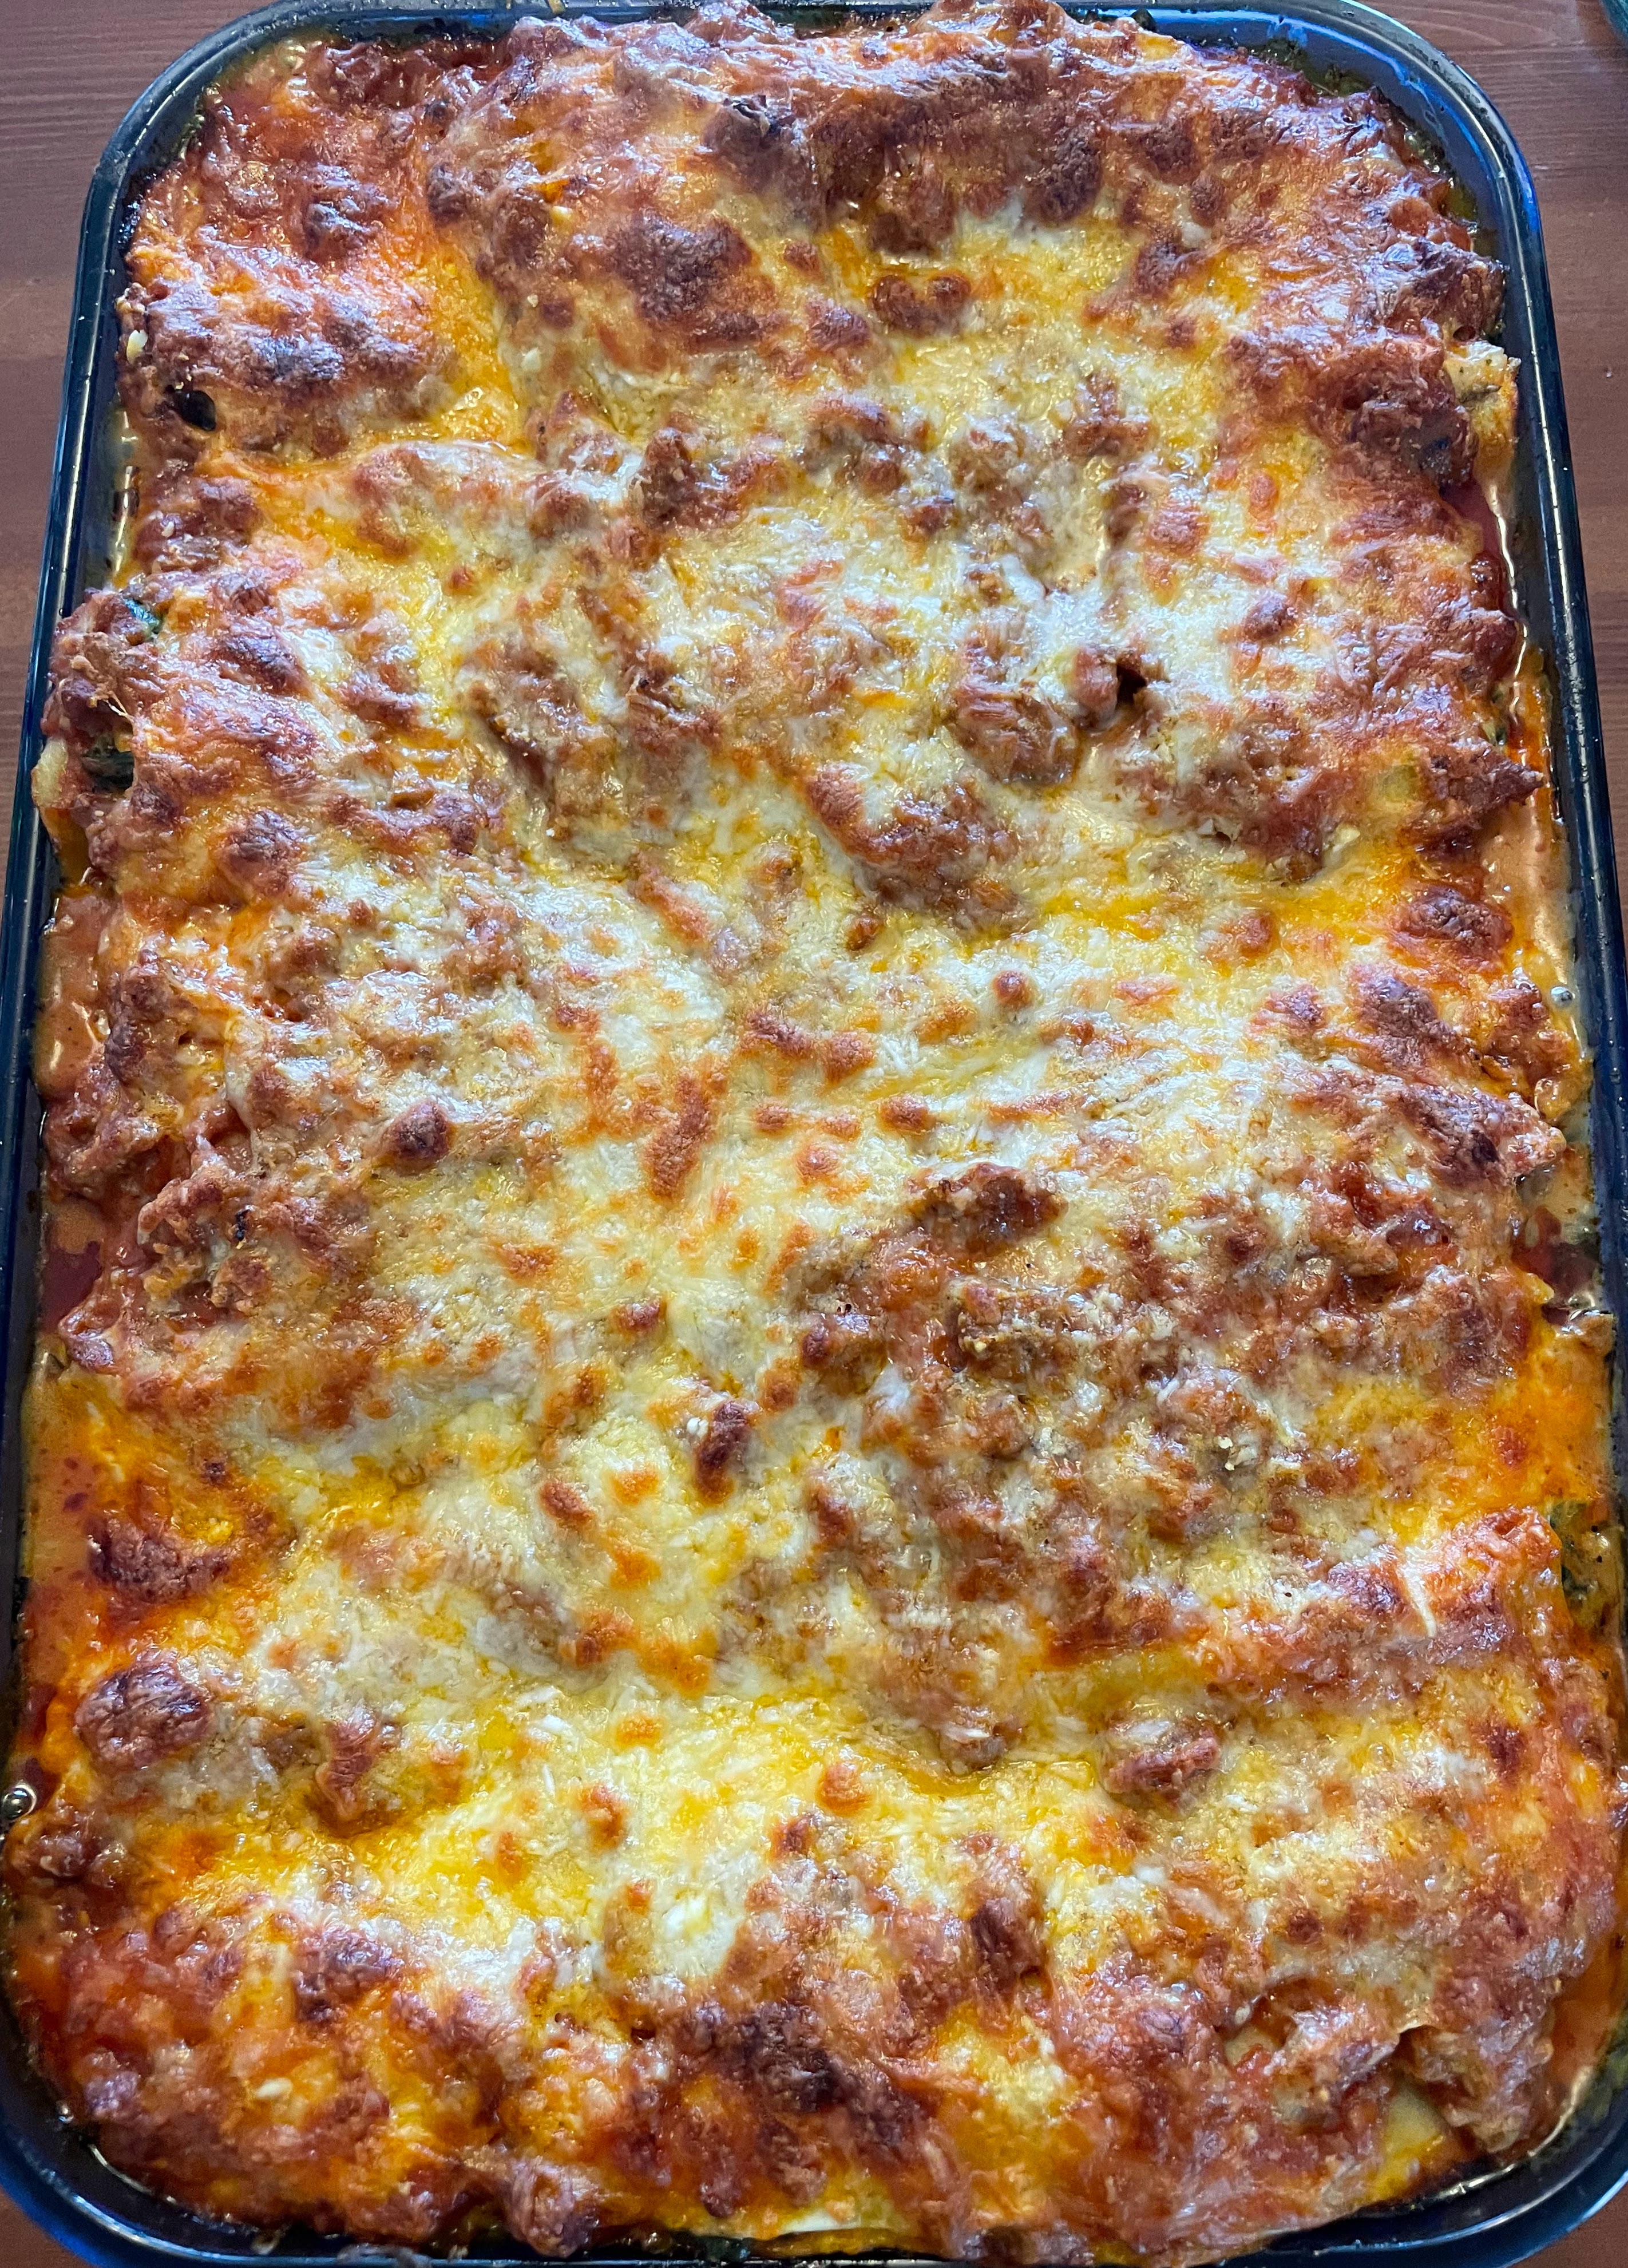
I love recipes that can do double duty. This one’s dual role came about by accident when I was pondering what to make for dinner one recent busy weeknight. We first had the very delicious sausage cheese dip on a weekend while watching a football game, but had some leftovers. So, when staring at the contents of my fridge a couple days later, I thought: “Sausage and cheese? Both those things go very well with pasta…. hmmm.” And I had a zucchini that I needed to use, too. Thus, Sausage Cheese Dip Rigatoni with Zucchini was born. And it was good! Both recipes follow.
Original Sausage Cheese Dip (left), Sausage Cheese Dip Pasta with Zucchini (right)
Sausage Cheese Dip (based on a recipe from Natasha’s Kitchen) Note: This serves 4 without leftovers (2 with leftovers)
Ingredients 1/2 lb. (226 gr) mild Italian sausage, removed from casing 2 garlic cloves, minced pinch onion powder salt and pepper to taste 4 oz (113 gr) cream cheese, cut into cubes (no need to soften) 10 oz (283 gr) can diced tomatoes with green chilies 1/2 cup corn (I cut the corn off one previously cooked cob, but frozen would also work) 4 oz (113 gr) sharp cheddar or similar cheese, shredded
Preparation 1. Drizzle a small amount of olive oil in a medium skillet. Brown sausage over med/high heat, breaking it apart with a wooden spoon, until browned. If the sausage generates a lot of grease, drain the grease. 2. Add the garlic, onion powder, and some pepper, and cook over medium heat for one more minute, stirring through. 3. Add the cream cheese cubes and stir until melted and incorporated. 4. Add the undrained tomatoes, corn, and shredded cheddar. Cook, stirring occasionally, just until bubbly and cheese is melted. Check seasonings, and add salt or pepper as needed. 5. Remove from heat and serve with tortilla chips. The kind that look like scoops are perfect for this dip. (Note: The photo below also includes Cumin-Scented Black Bean Salad.)
Sausage Cheese Dip Pasta with Zucchini (serves 2 hungry people)
Ingredients 5.3 oz (150 gr) pasta of choice (I used mezzi rigatoni) olive oil 1 zucchini, diced 1 cup Sausage Cheese dip cream or milk (if needed) Pecorino Romano or Parmesan cheese, grated salt and pepper to taste
Preparation 1. Bring salted water to a boil and cook pasta as directed for al dente. 2. While water is coming to a boil, drizzle some olive oil into a large skillet. Add diced zucchini and cook over medium-high heat until zucchini starts to get golden around the edges. 3. Add the sausage cheese dip and stir until warm and melted. Check the consistency; add a splash of cream or milk if too thick. If too thin, add some grated Pecorino Romano or Parmesan cheese. 4. When pasta is ready, drain, and add to sauce in skillet, along with more grated cheese. Check the seasonings, and add salt or pepper as needed. 5. Serve immediately.
Much to the dismay of one son in particular when he was younger, there is almost no way, shape, or form of zucchini I don’t like; I cooked it often when he was little. Back in those days of juggling work and young kids, I usually sauteed zucchini slices in olive oil, with salt, pepper, and maybe some basil and/or a sprinkle of Parmesan or Pecorino Romano: a quick and easy side dish that I still love. But it was not one my son enjoyed…. However, times change. He now prepares zucchini frequently for his daughter, who likes it a lot. So the family tradition continues!
This stuffed zucchini dish is one I learned from an Italian friend when we lived in Rome. It is especially good as the weather gets colder. Note: I’ve made this dish many times, in Rome and here in the US. The photos in this post come from various times; some show Roman zucchini (Costata romanesco zucchini–which is lighter green, more speckled, and ridged) and others show the darker, smoother zucchini more typically found in the U.S. (see first photos below). Both are delicious!
Fun fact: In Italian, the word “zucchini” does not exist. The vegetable has a feminine name: one single vegetable is called a zucchina, and multiple ones are zucchine. I’m not entirely sure how we in the U.S. ended up using a masculine plural form for both singular and plural versions of a “feminine” vegetable, but there you have it. To complicate things, other English-speaking countries call the vegetable “courgette,” which comes from the French word for marrow, which is actually a big zucchini (ok, a big zucchina).
Ingredients
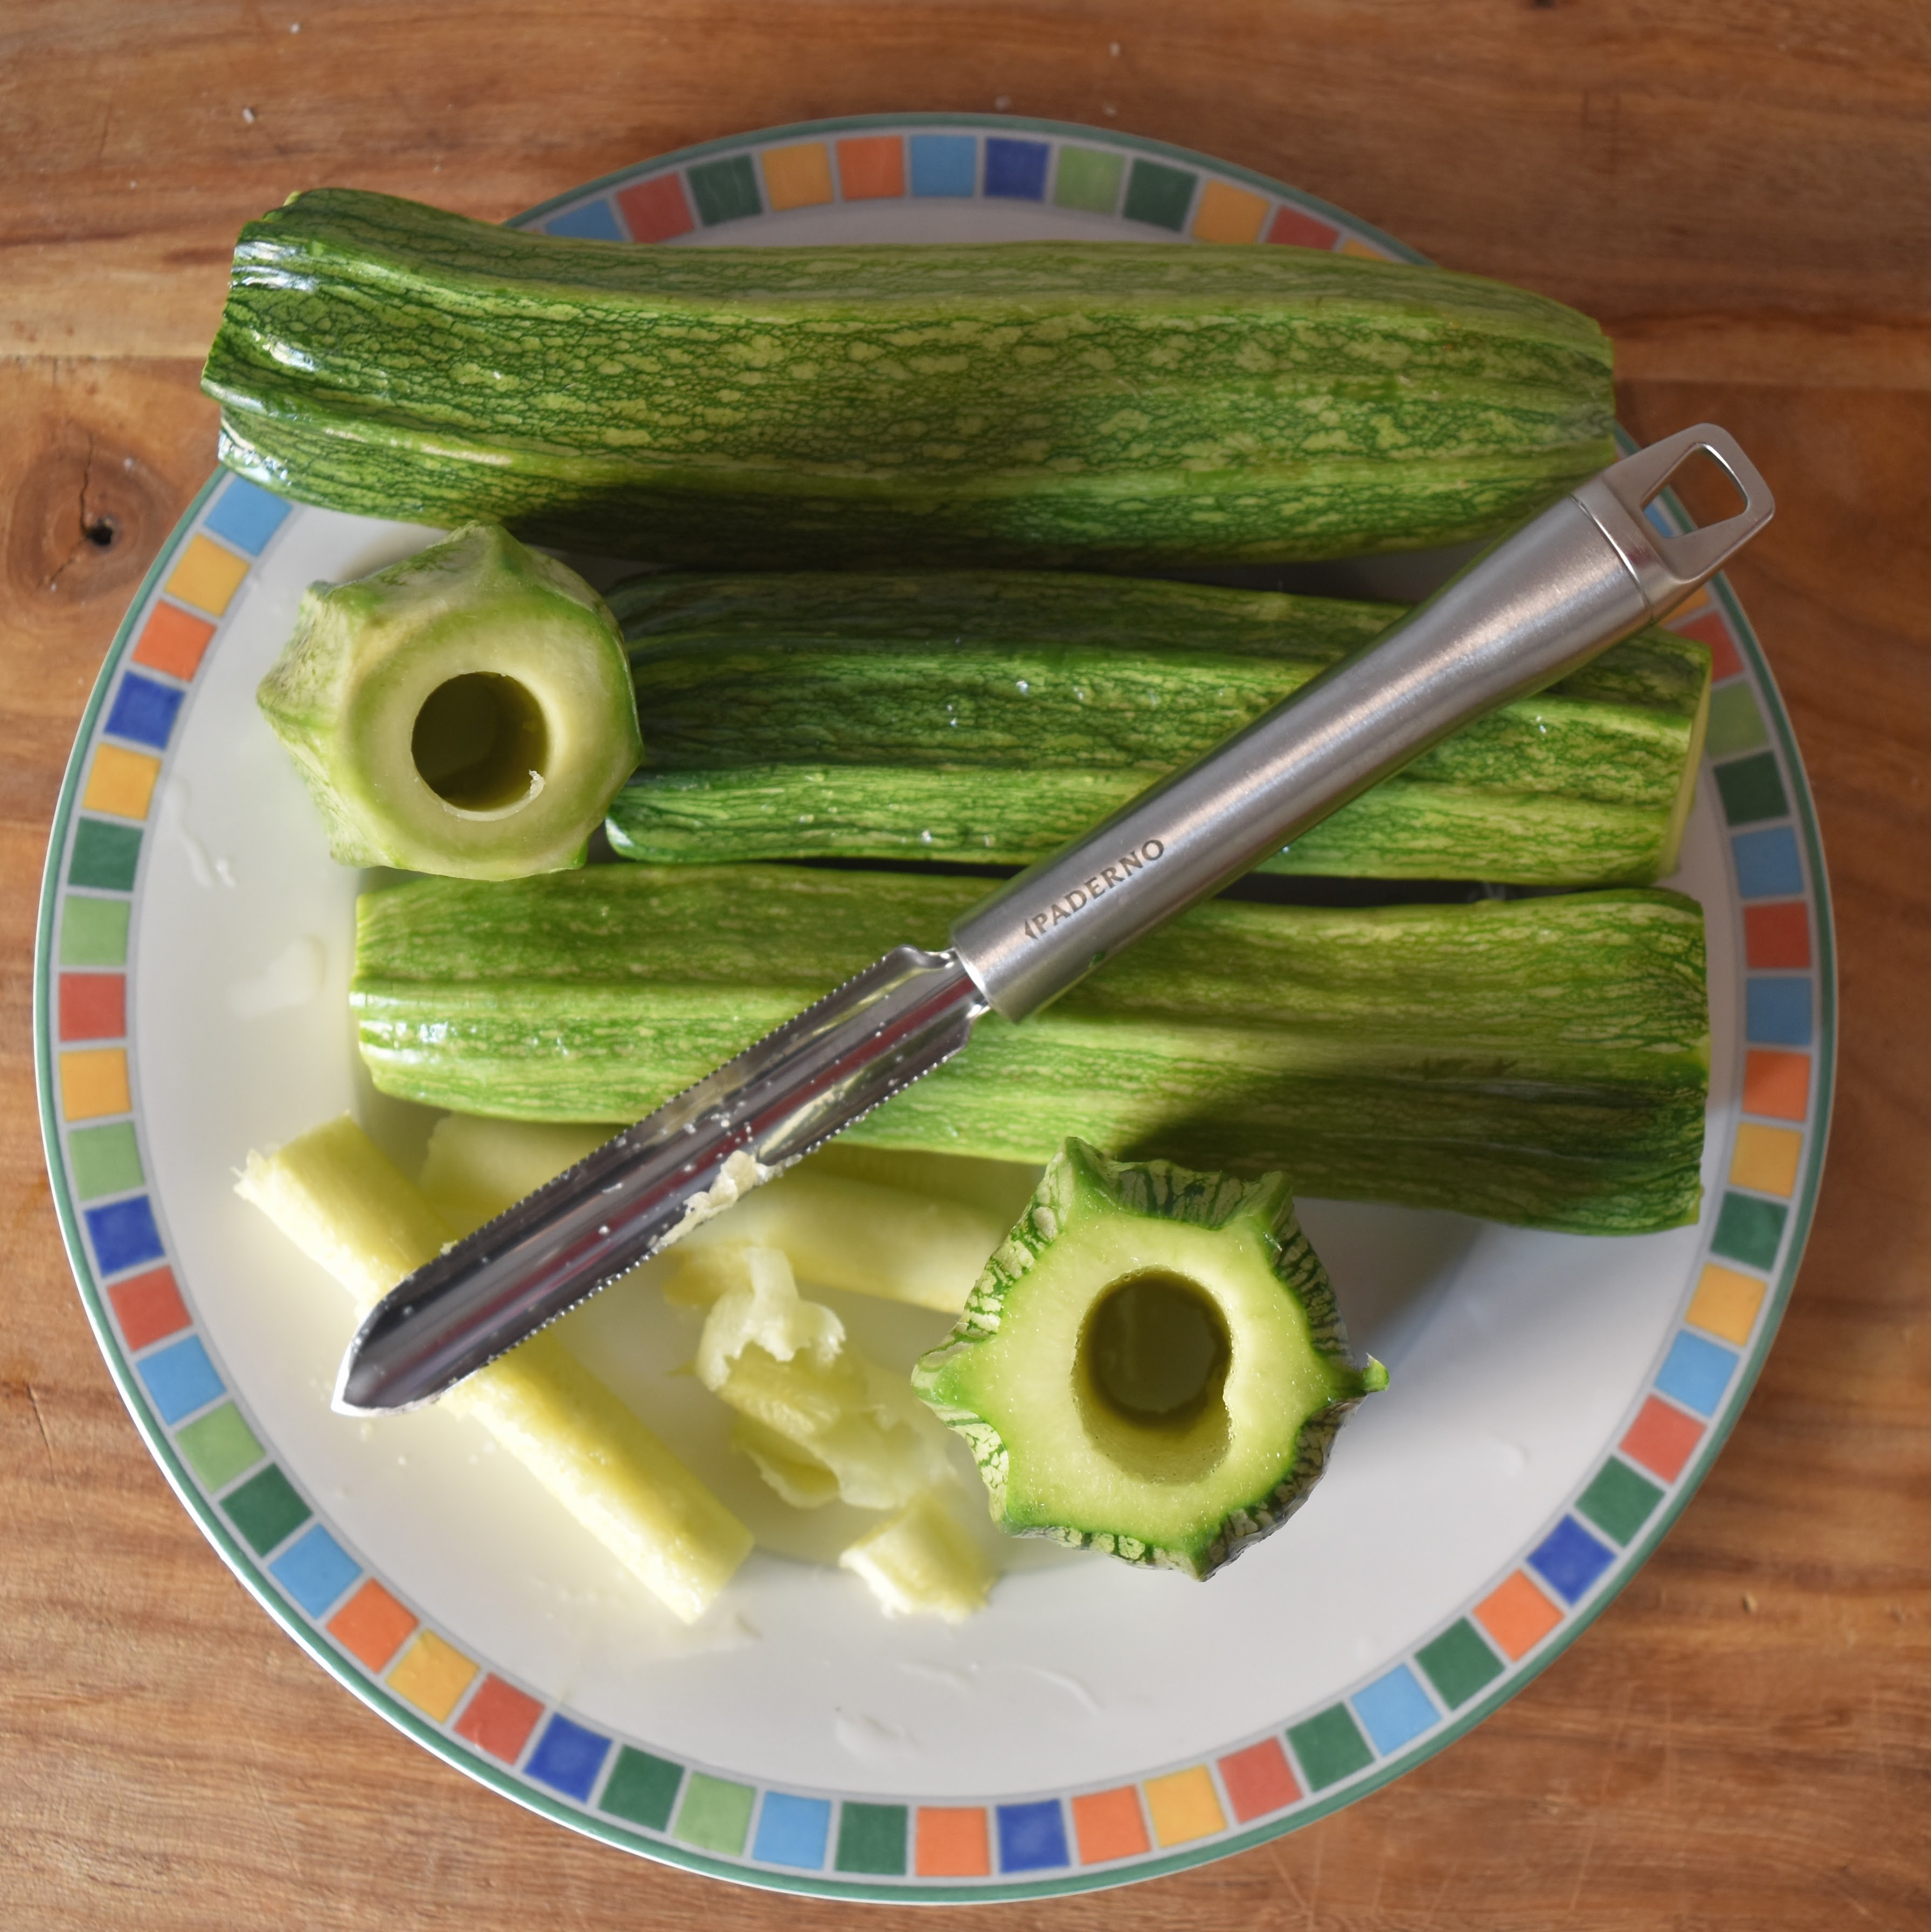
4 zucchini, as equal in length and diameter as possible
olive oil 1/2 onion, finely diced 1 carrot, grated 4-5 innermost, tenderest stalks of celery (with leaves), finely diced 1 lb (450 gr) ground pork (or other ground meat of choice) 2 garlic cloves, minced 1 tsp. (6 gr) table salt freshly ground pepper 1 egg, lightly beaten 1/3 c. (36 gr) panko breadcrumbs 1/2 c. (110 gr) grated Pecorino Romano (or Parmesan) cheese nice handful of parsley, finely chopped nice handful of basil leaves, finely chopped
About 32-40 oz (940 ml-1.1 liters) marinara sauce (such as Rao’s), or tomato passata (such as Mutti), or any marinara/passata/tomato sauce of your preference
Preparation
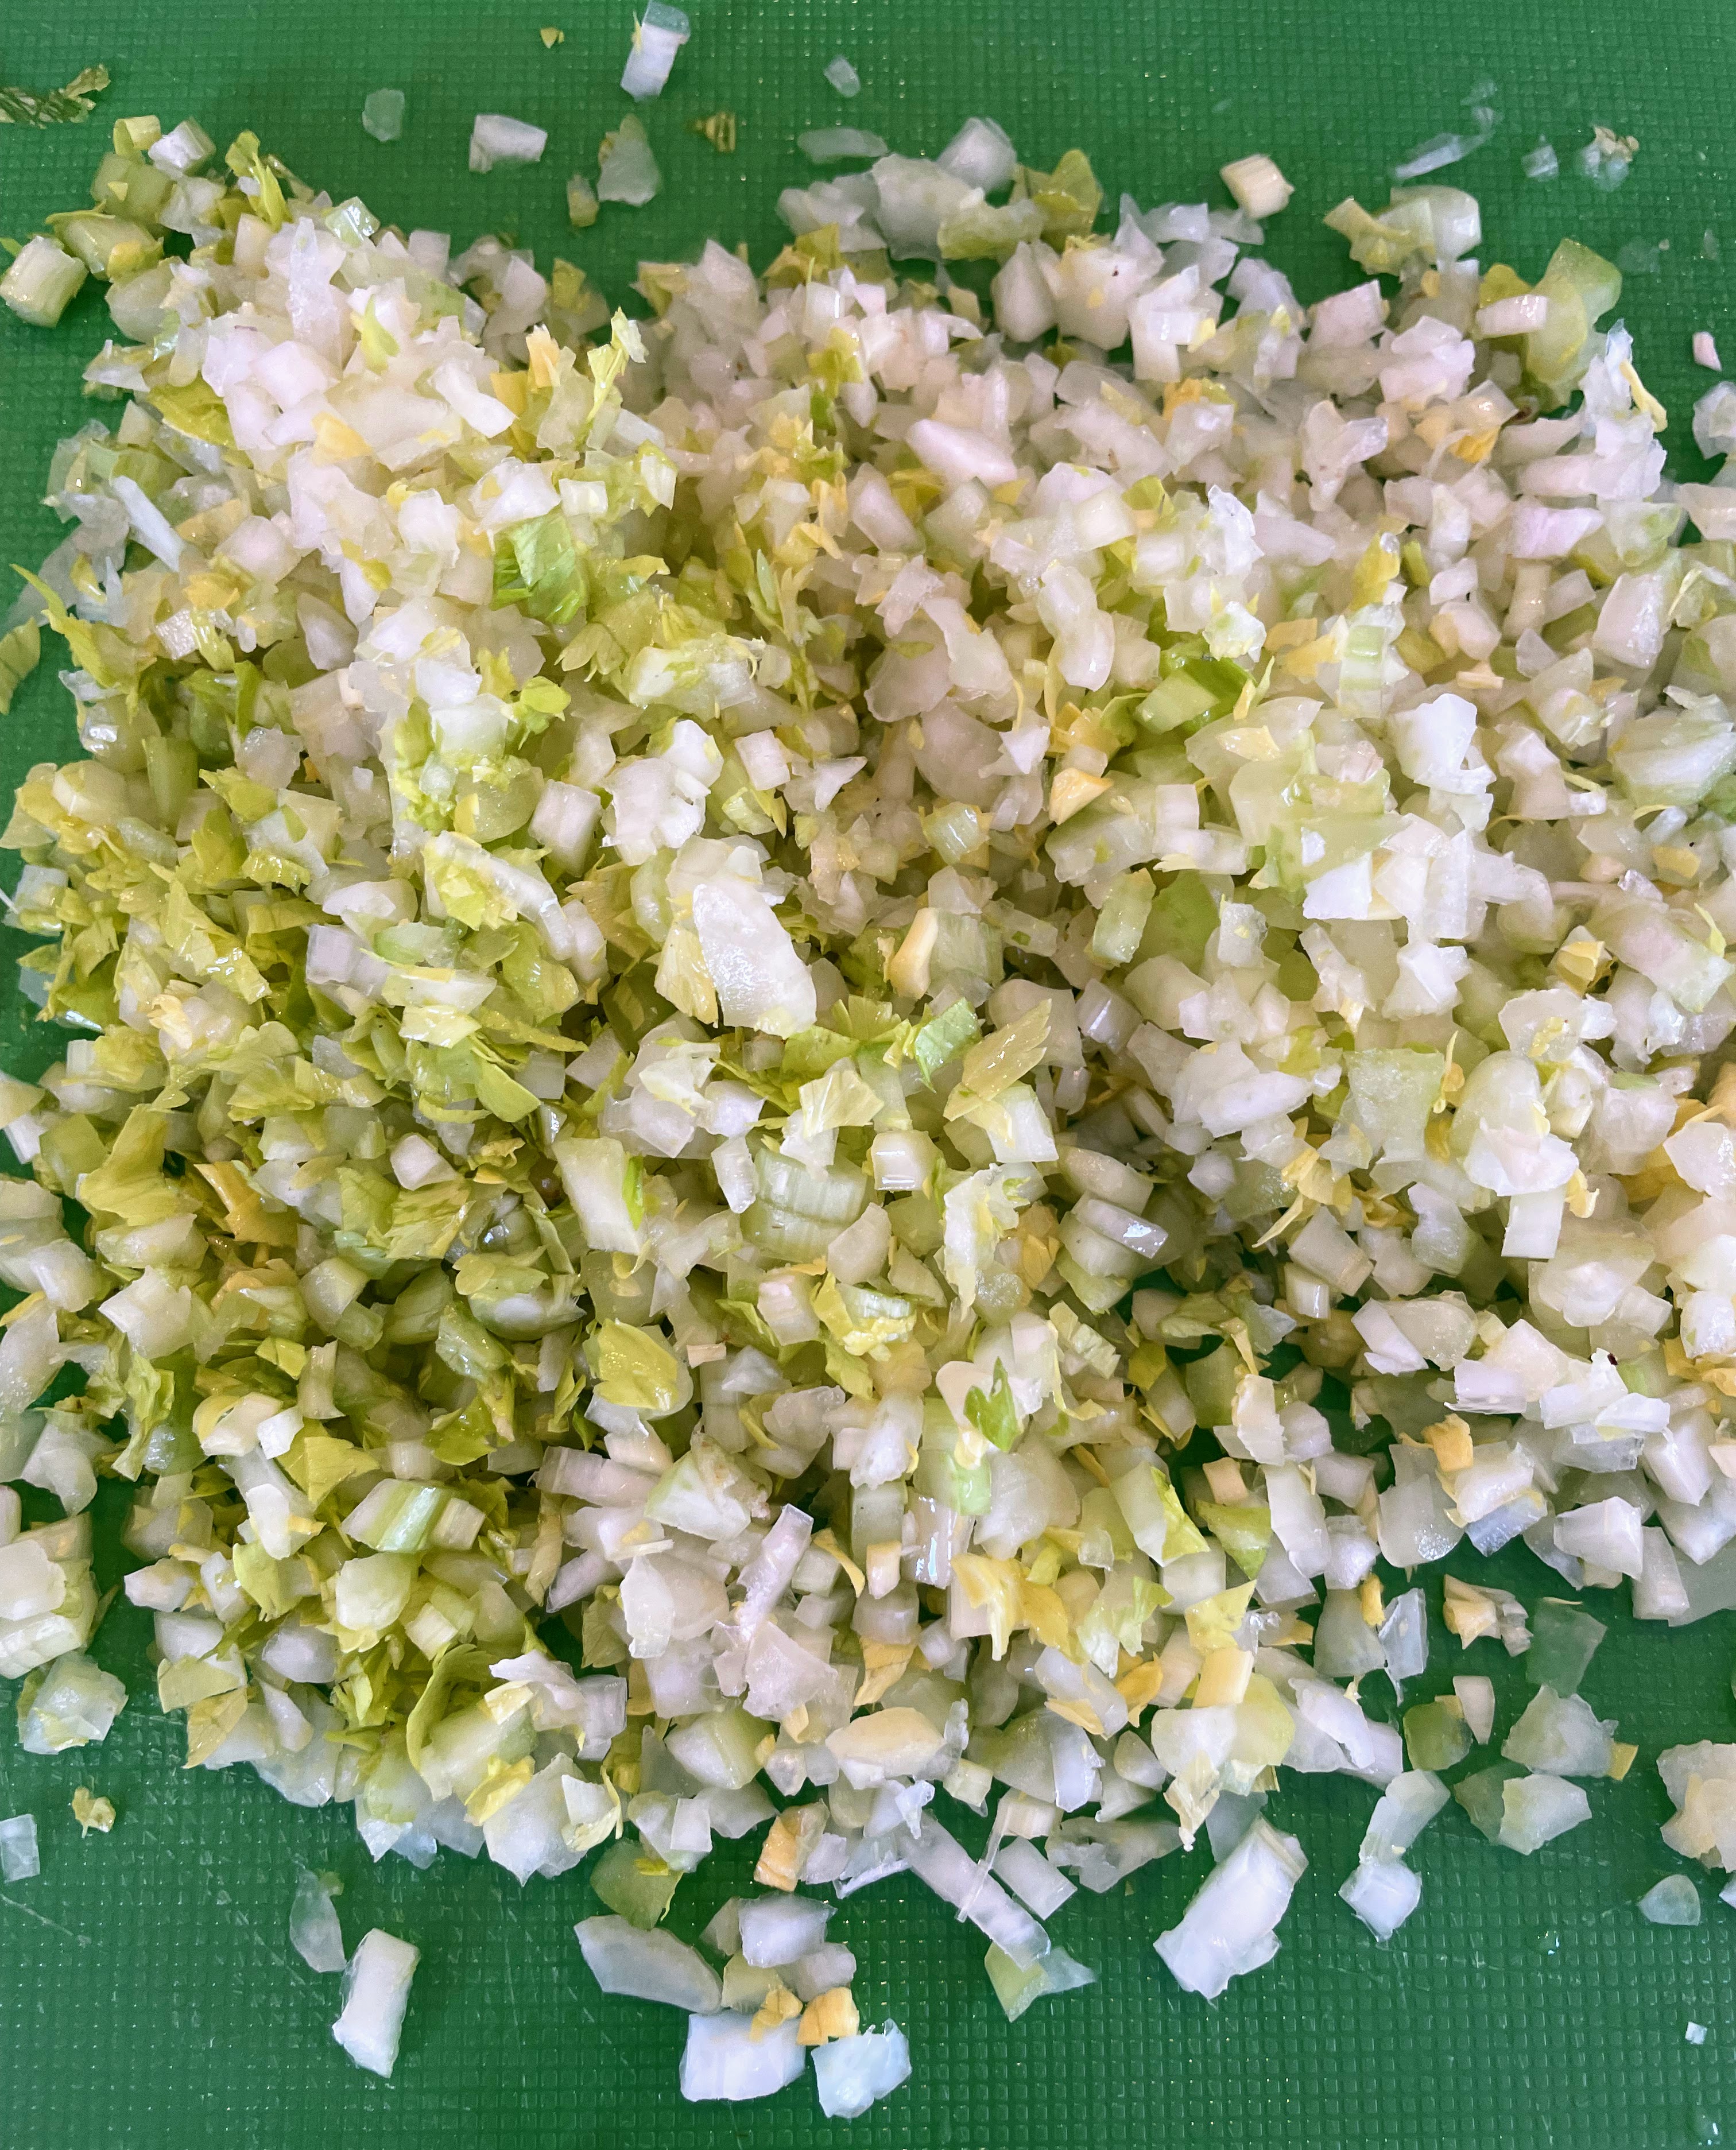
1. Cut each zucchini into 3 equal sections, then core each section. Finely dice the cores (the inner parts) and set aside.
2. Drizzle some olive oil into a skillet, and sauté the onion, carrots, and celery/celery leaves until almost soft. Add the diced zucchini innards, and cook until just tender. Place the veggies in a mixing bowl and let cool.
3. Add the remaining filling ingredients and mix well.
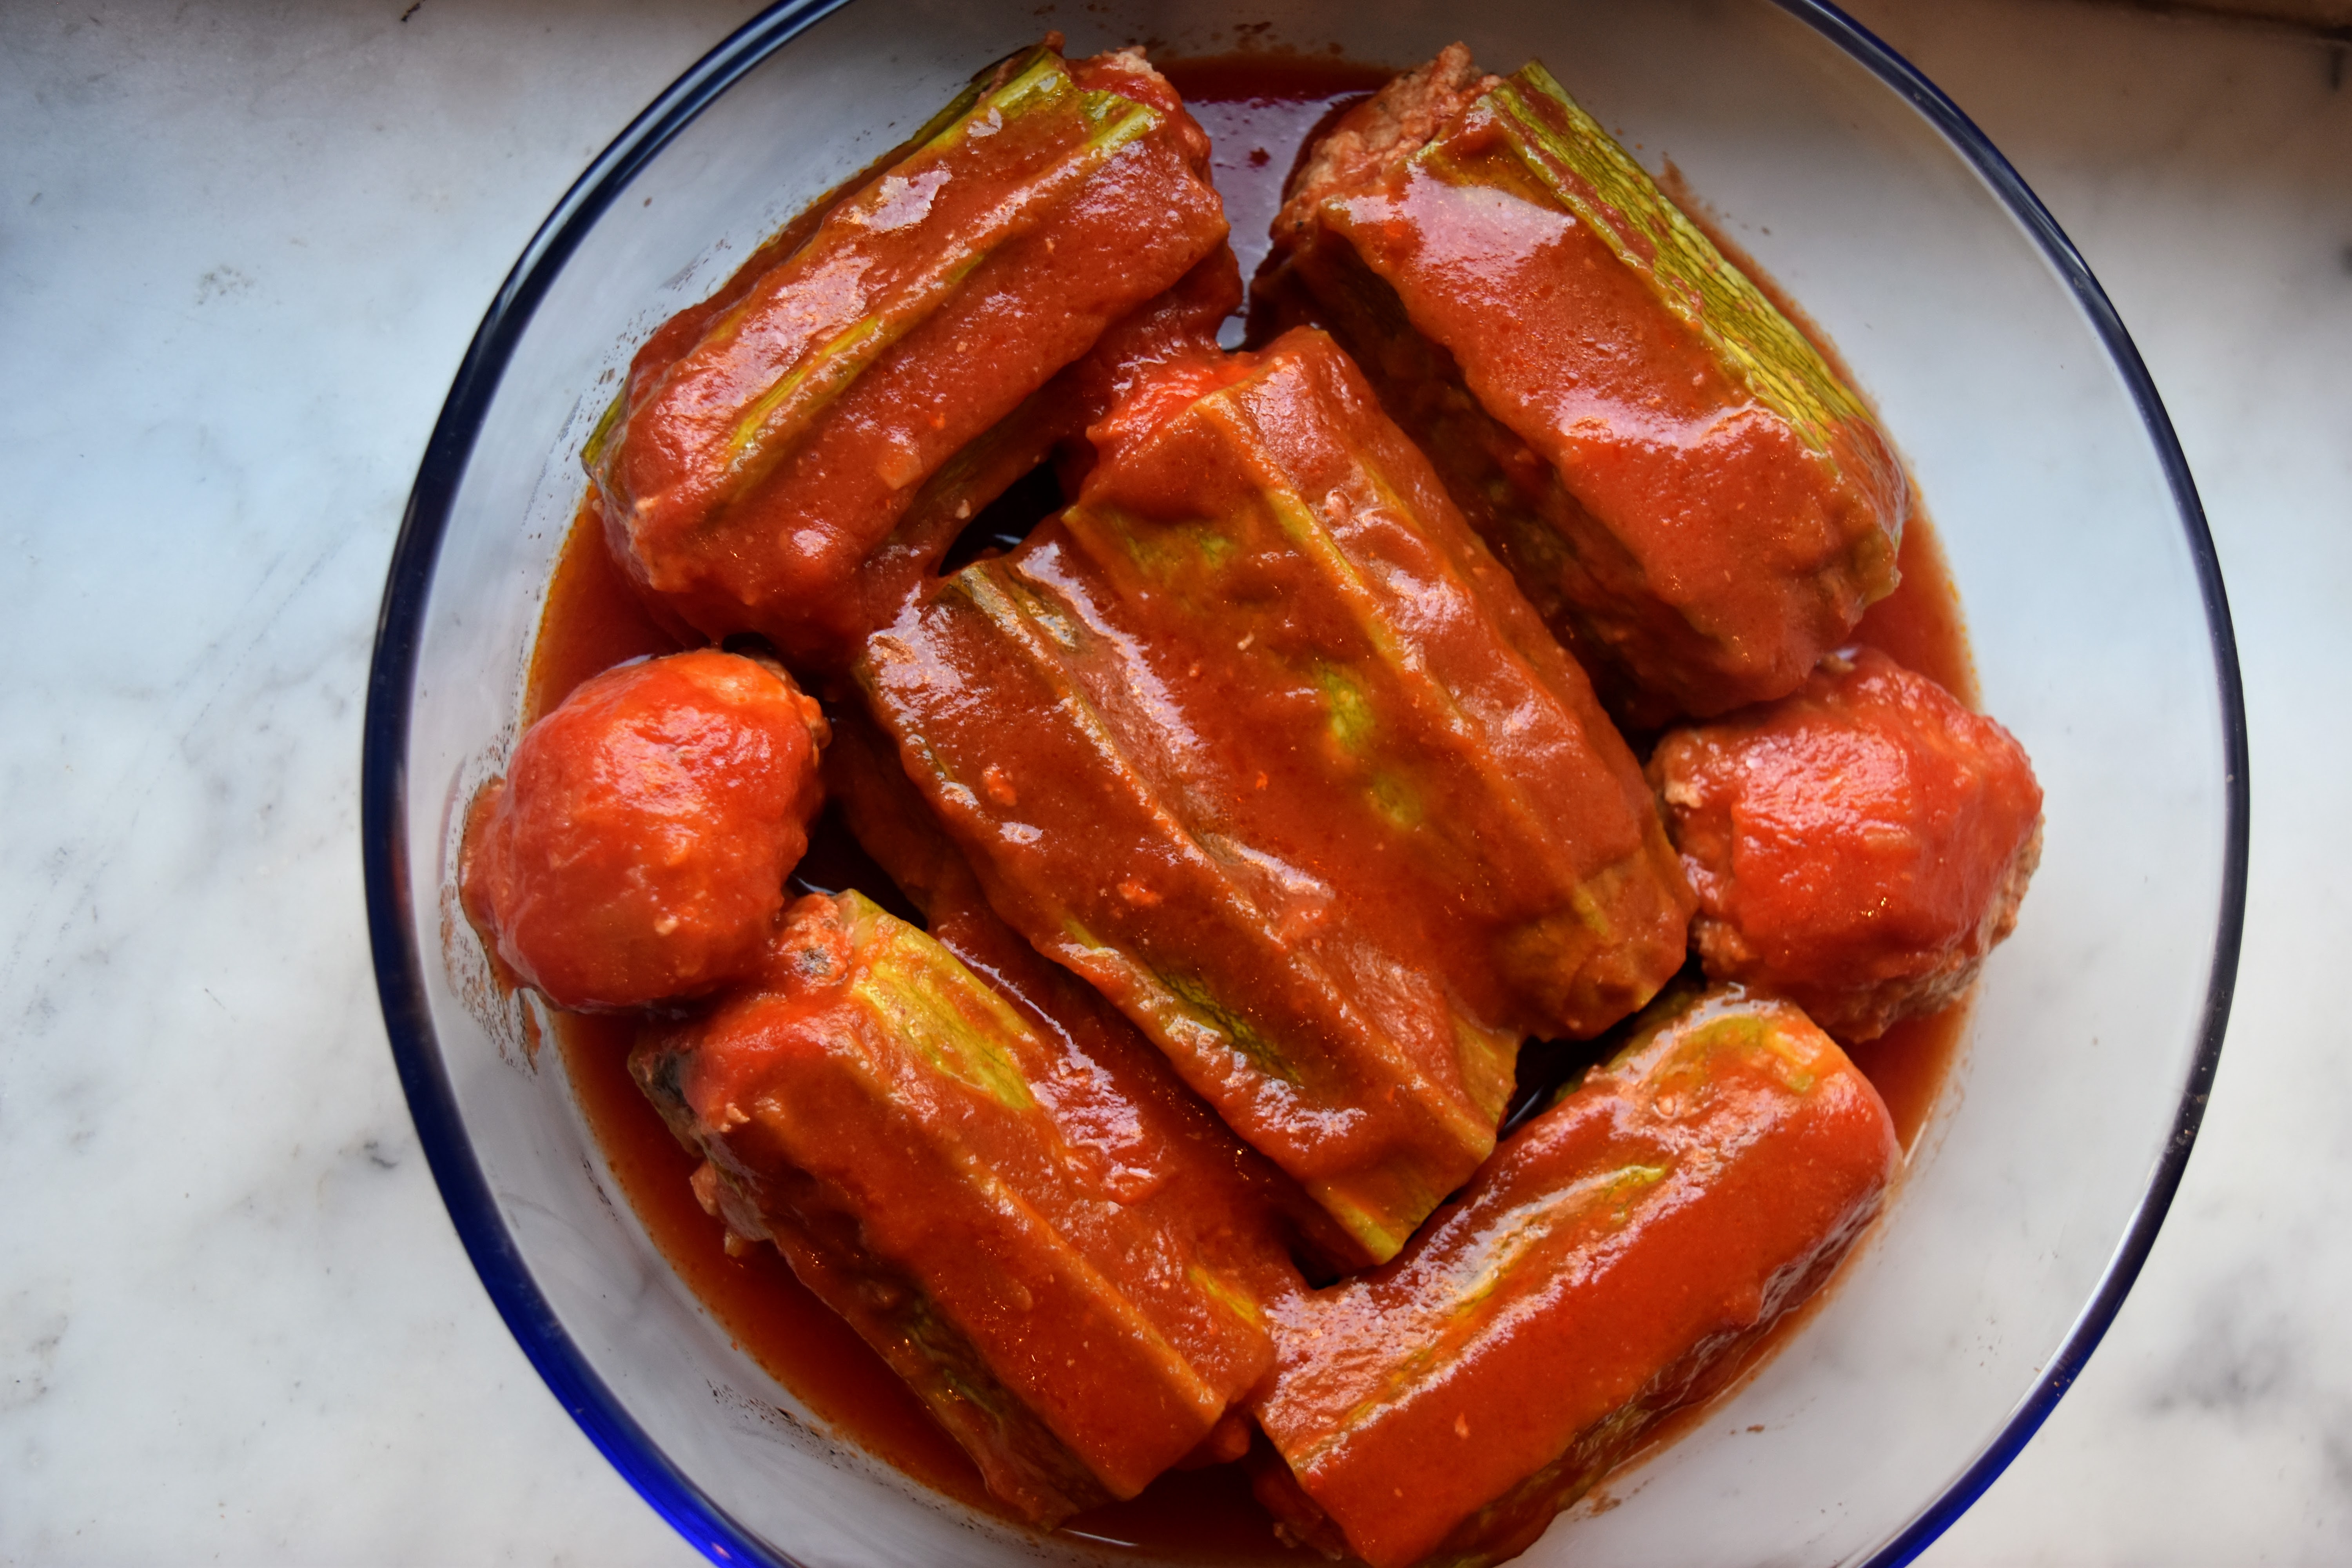
4. Pour the marinara sauce or passata into a Dutch oven or pot that is large enough to hold all zucchini pieces upright in a single layer. Start by adding sauce to a depth that is half the length of each zucchini piece. So, if your zucchini pieces are 4 inches/10 cm long, then add about 2 inches/5 cm depth of sauce to the pot. The sauce will rise up as you add the zucchini pieces to it.
5. With clean hands, take a small handful of filling and stuff the filling into the cored zucchini pieces with your fingers (you may need to stuff both ends). If you have extra filling, shape it into mini meatballs.
6. Nestle the stuffed zucchini pieces (and any meatballs) into the sauce in the pot. If needed, add more sauce so that it comes close to the tops of the zucchini pieces.
7. Bring to a simmer over high heat, then cover the pot and lower the heat to a simmer. Cook for about 30 minutes or until the zucchini are tender.
8. Serve with extra grated cheese sprinkled on top, if desired. Enjoy!
Sometimes, you need a pick-me-up in the form of caffeine + chocolate, a match made in heaven. These rich, moist brownies more than hit the spot. Pair them with a cup of coffee and you will be good to go for quite some time; perfect for a busy weekend afternoon!
Note: To make these, you will need a kitchen scale.
Brown Butter Espresso Brownies (recipe adapted from Julie Marie Eats)
Ingredients: 130 g (4.6 oz) granulated sugar 130 g (4.6 oz) brown sugar 3 large eggs, at room temperature 120 g (4.2 oz) butter 75 g (2.7 oz) dark chocolate chips 70 g (2.5 oz) neutral oil 1 ½ teaspoon vanilla extract 75 g (2.7 oz) all-purpose flour 35 g (1.3 oz) cocoa powder 1 tablespoon cornstarch 2 tablespoon instant espresso powder ½ teaspoon salt 75 g (2.7 oz) dark chocolate chips, to fold into the batter
Preparation: 1. Preheat the oven to 160ºC/ 325ºF. Spray a 20×20 cm (8×8 in) square pan with baking spray, line with parchment paper, and spray again with baking spray. 2. In a medium saucepan, add the butter and cook over medium/high heat until it is golden brown; it will take about 8-10 minutes. Pour the browned butter into a medium bowl, scraping out all the brown bits from the saucepan. Add the cocoa powder and whisk in. Add the chocolate chips, let sit for a few minutes, then stir until melted.
3. Stir together the flour, cornstarch, espresso powder, and salt.
4. Place the eggs, brown sugar, and granulated sugar in a large bowl and mix with an electric hand mixer until light and fluffy; this will take about 4 minutes.
5. Add the melted butter/chocolate mixture, plus the oil and vanilla, and mix until combined. Turn the hand mixer off, add the flour mixture to the batter, and gently mix everything on the lowest setting until combined, scraping down the sides of the bowl with a spatula.
6. Add the extra chocolate chips and gently fold them in. Pour the batter into the prepared baking pan and smooth the top. Bake for about 35-40 minutes. Let cool, then serve.
I remember a teacher in elementary school bringing our class a batch of “Everything But the Kitchen Sink” cookies, which I’d never had before. I didn’t quite understand the name, so the teacher explained that it meant she had put all sorts of things into the cookies, almost everything in her kitchen but the kitchen sink. That day, I tasted a new cookie and learned a new phrase.
For me, Minestrone is an “Everything but the Kitchen Sink” soup. When the leaves start turning colors in the fall — ie, when soup weather is upon us — and I have vegetables to use up, I immediately think “Minestrone.” In Italian, minestra means “soup;” minestrone means “big soup.” And it really is a big soup, full of so many good things.
Of those good things, there is one without which this cannot be Minestrone, in my view: the cheese rinds. We usually have a wedge of Pecorino Romano cheese in the fridge, and as we get to the last of each wedge, I save the rinds. Without some rind, the soup will not taste like Minestrone; the slow-simmered cheese is a huge part of what makes the broth so delicious.
Pecorino Romano rind (black), Parmesan rind (golden yellow). And a Pecorino rind with the black part already trimmed off.
Aside from the rinds and the soffritto ingredients (onion, carrot, celery; see below), I like to add canned tomatoes, zucchini, white beans, and cabbage or spinach or both (or any other leafy green). Plus pancetta when I have it, potatoes if I need to use some up, and small pasta if there is room.
Today this is what I had at hand:
Fridge:
two onion halves (one red, one white)
four stalks of celery
some leftover grated carrots (about 1.5 c.)
zucchini (I had 2, but ended up using only 1 big one)
some shredded cabbage, ie ‘cole slaw’ mix (about 4.5 oz/127 gr)
baby spinach (about 3-4 handfuls)
Some Pecorino Romano and Parmesan ‘heels’ (see photo)
Freezer:
Cubed pancetta (4 o oz/113 gr)
Pantry:
Yukon Gold potatoes (I had 3, but ended up using only 2)
Whole peeled tomatoes
Cannellini beans (2 cans, 15.5 oz/440 gr each, undrained)
Garlic (3 large cloves)
Bay leaves
Vegetable bouillon cubes
Salt and pepper
Perfect–I had everything I needed for Minestrone! I also had mini pasta sea shells, which I’ve used in Minestrone before, but I did not use them this time; by the time I got to the point where I would have added them, there was no more room in the pot! Plus, dry pasta keeps and I had to use up the potatoes. (If you have pasta but no potatoes or just prefer the pasta, add a handful of that instead.)
For me, Minestrone is a soup I make in ‘layers,’ meaning I start with the first ingredients and while they are cooking, I prep the others, adding them to the pot as I go. Today, I started by cooking the pancetta in olive oil in a large Dutch Oven until it got crispy. (If you are vegetarian, omit the pancetta).
While the pancetta was cooking, I diced the onions and celery, then added them–and the already-grated carrots and a couple bay leaves–to the pot along with a splash more olive oil. This mixture of onions, celery, and carrots is what the Italians call soffritto and the French call mirepoix, and it is the foundation of many great soups. When the veggies got soft, I crushed the garlic cloves straight into the pot, added some freshly ground black pepper, and cooked everything for a couple more minutes. This is what I consider to be Layer 1, made up of a few subparts. [I forgot to take a photo of this, however.]
To start building Layer 2, I added some hand-crushed tomatoes and their juices to the soup pot. If I’d had a can of diced tomatoes, I would have used that instead–but necessity is the mother of hand crushing. With a very clean hand, I gently took a whole peeled tomato from the can, and crushed it into the soup pot, repeating until I had crushed all the tomatoes. [Note: If you will also crush the tomatoes by hand, lower your hand as far as possible into the pot, and crush each tomato very slowly. Otherwise, the likelihood of having crushed tomato all over your back stove wall, and yourself, is extremely high–as I’ve learned from experience.]
Successfully hand-crushed tomatoes; all in the pot, none on me
Then I added the cheese rinds (trimmed of the outer, colored parts) and 4 cups of water and let everything simmer while I diced the potatoes. When the potatoes were ready, I added them, the canned cannellini beans with all their liquid, and a vegetable bouillon cube to the pot, along with more freshly ground pepper. This is Layer 2. I let this simmer, partially covered, for about 10 minutes while I prepped the zucchini for Layer 3.
Nestling cheese rinds into the soup
In Layer 3, I added the diced zucchini and the already-shredded cabbage, and continued to simmer the soup until the zucchini and potatoes were both soft. I also checked the seasonings and decided to add another bouillon cube and a little salt. At that point, my Minestrone was essentially done and ready to serve, so I did the very last thing: I put the handfuls of spinach on top and stirred until the spinach was wilted in.
Then I set the soup pot out for everyone to serve themselves (with everyone getting at least one piece of the now-soft cheese rinds–an absolute treat), along with some freshly grated Pecorino Romano to sprinkle on top. Mmmm. So good on a fall day.
I’m a fairly equal-opportunity eater; I’m happy with all kinds of food, even airplane food. Yes, I admit it: I actually look forward to seeing what’s on the menu when I’m flying. But I absolutely cannot eat airplane pasta. It is always too soft, and I have been conditioned (spoiled?) to need a bit of “bite” to my pasta.
Luckily, today I’m writing about a pasta dish I would gladly eat many times over: Ragù Bolognese. I’ve been making some form of this since college, and have even provided a quick(er) version of it on this blog, more suited to a weeknight meal. But now I want to point you to a more traditional/authentic recipe that is my go-to for fall and winter weekends when I have more time. It is from the Washington Post, whose author tested six well-known ragu bolognese recipes before settling on a new version combining the best elements of her favorite three recipes. I am so glad she did all that testing, because since I read the article in the Post two years ago, I stopped searching for the perfect ragù myself; for me, this one is it.
The first time I made it, I also decided to make the pasta to go with it. It was the dead of winter, we were fairly snowbound, and I had not used my pasta-making equipment in a while, so I decided to go for it, using a New York Timesrecipe for the pasta dough (see below, including the notes). But then I returned to my lazy ways the other times I’ve made this ragù and used store-bought pasta instead, which did not fill me with quite the same sense of satisfaction, but allowed me to focus on other tasks. If you do have the time and inclination to make your own pasta, then definitely try it. You will be proud of your accomplishment.
Notes: 1) The ragù recipe takes about five hours to make–though most of that time is slow simmering time. You don’t need to be actively engaged for those five hours, but you will need to tend to the ragù every so often. If you are making the pasta yourself, you can also do that during the ragù cooking time. 2) I found it is best to weigh the vegetables for the ragù, as that is most accurate; a medium onion or celery stalk can mean different things to different people. 3) The ragù is delicious the next day, too, so you can make it ahead. I also try to freeze some each time, to use for future lasagna fillings.
4 oz (113 gr) cubed pancetta 3 large garlic cloves 6 tbsp (85 gr) unsalted butter, divided 1 medium onion (8-9 oz/226-255 gr), very finely chopped 1 medium carrot (4-5 oz/113-141 gr), grated 2 medium celery stalks with tender leaves, if any (about 3 oz/85 gr), very finely chopped 1 lb (454 gr) ground beef, 80% lean, 20% fat 1 lb (454 gr) ground pork 3 cups (710 ml) chicken broth 1 cup (237 ml) dry white wine, such as pinot grigio 1 teaspoon (3 gr) kosher salt 1 pinch grated nutmeg 1 cup (237 ml) whole milk 2 tablespoons (32 gr) tomato paste 1 cup (237 ml) tomato puree/passata (such as Pomi or Mutti) Freshly ground black pepper
Preparation: 1. In a mini food processor, combine the pancetta and garlic, pulse a few times to break up the pieces, then process until it becomes a smooth paste.
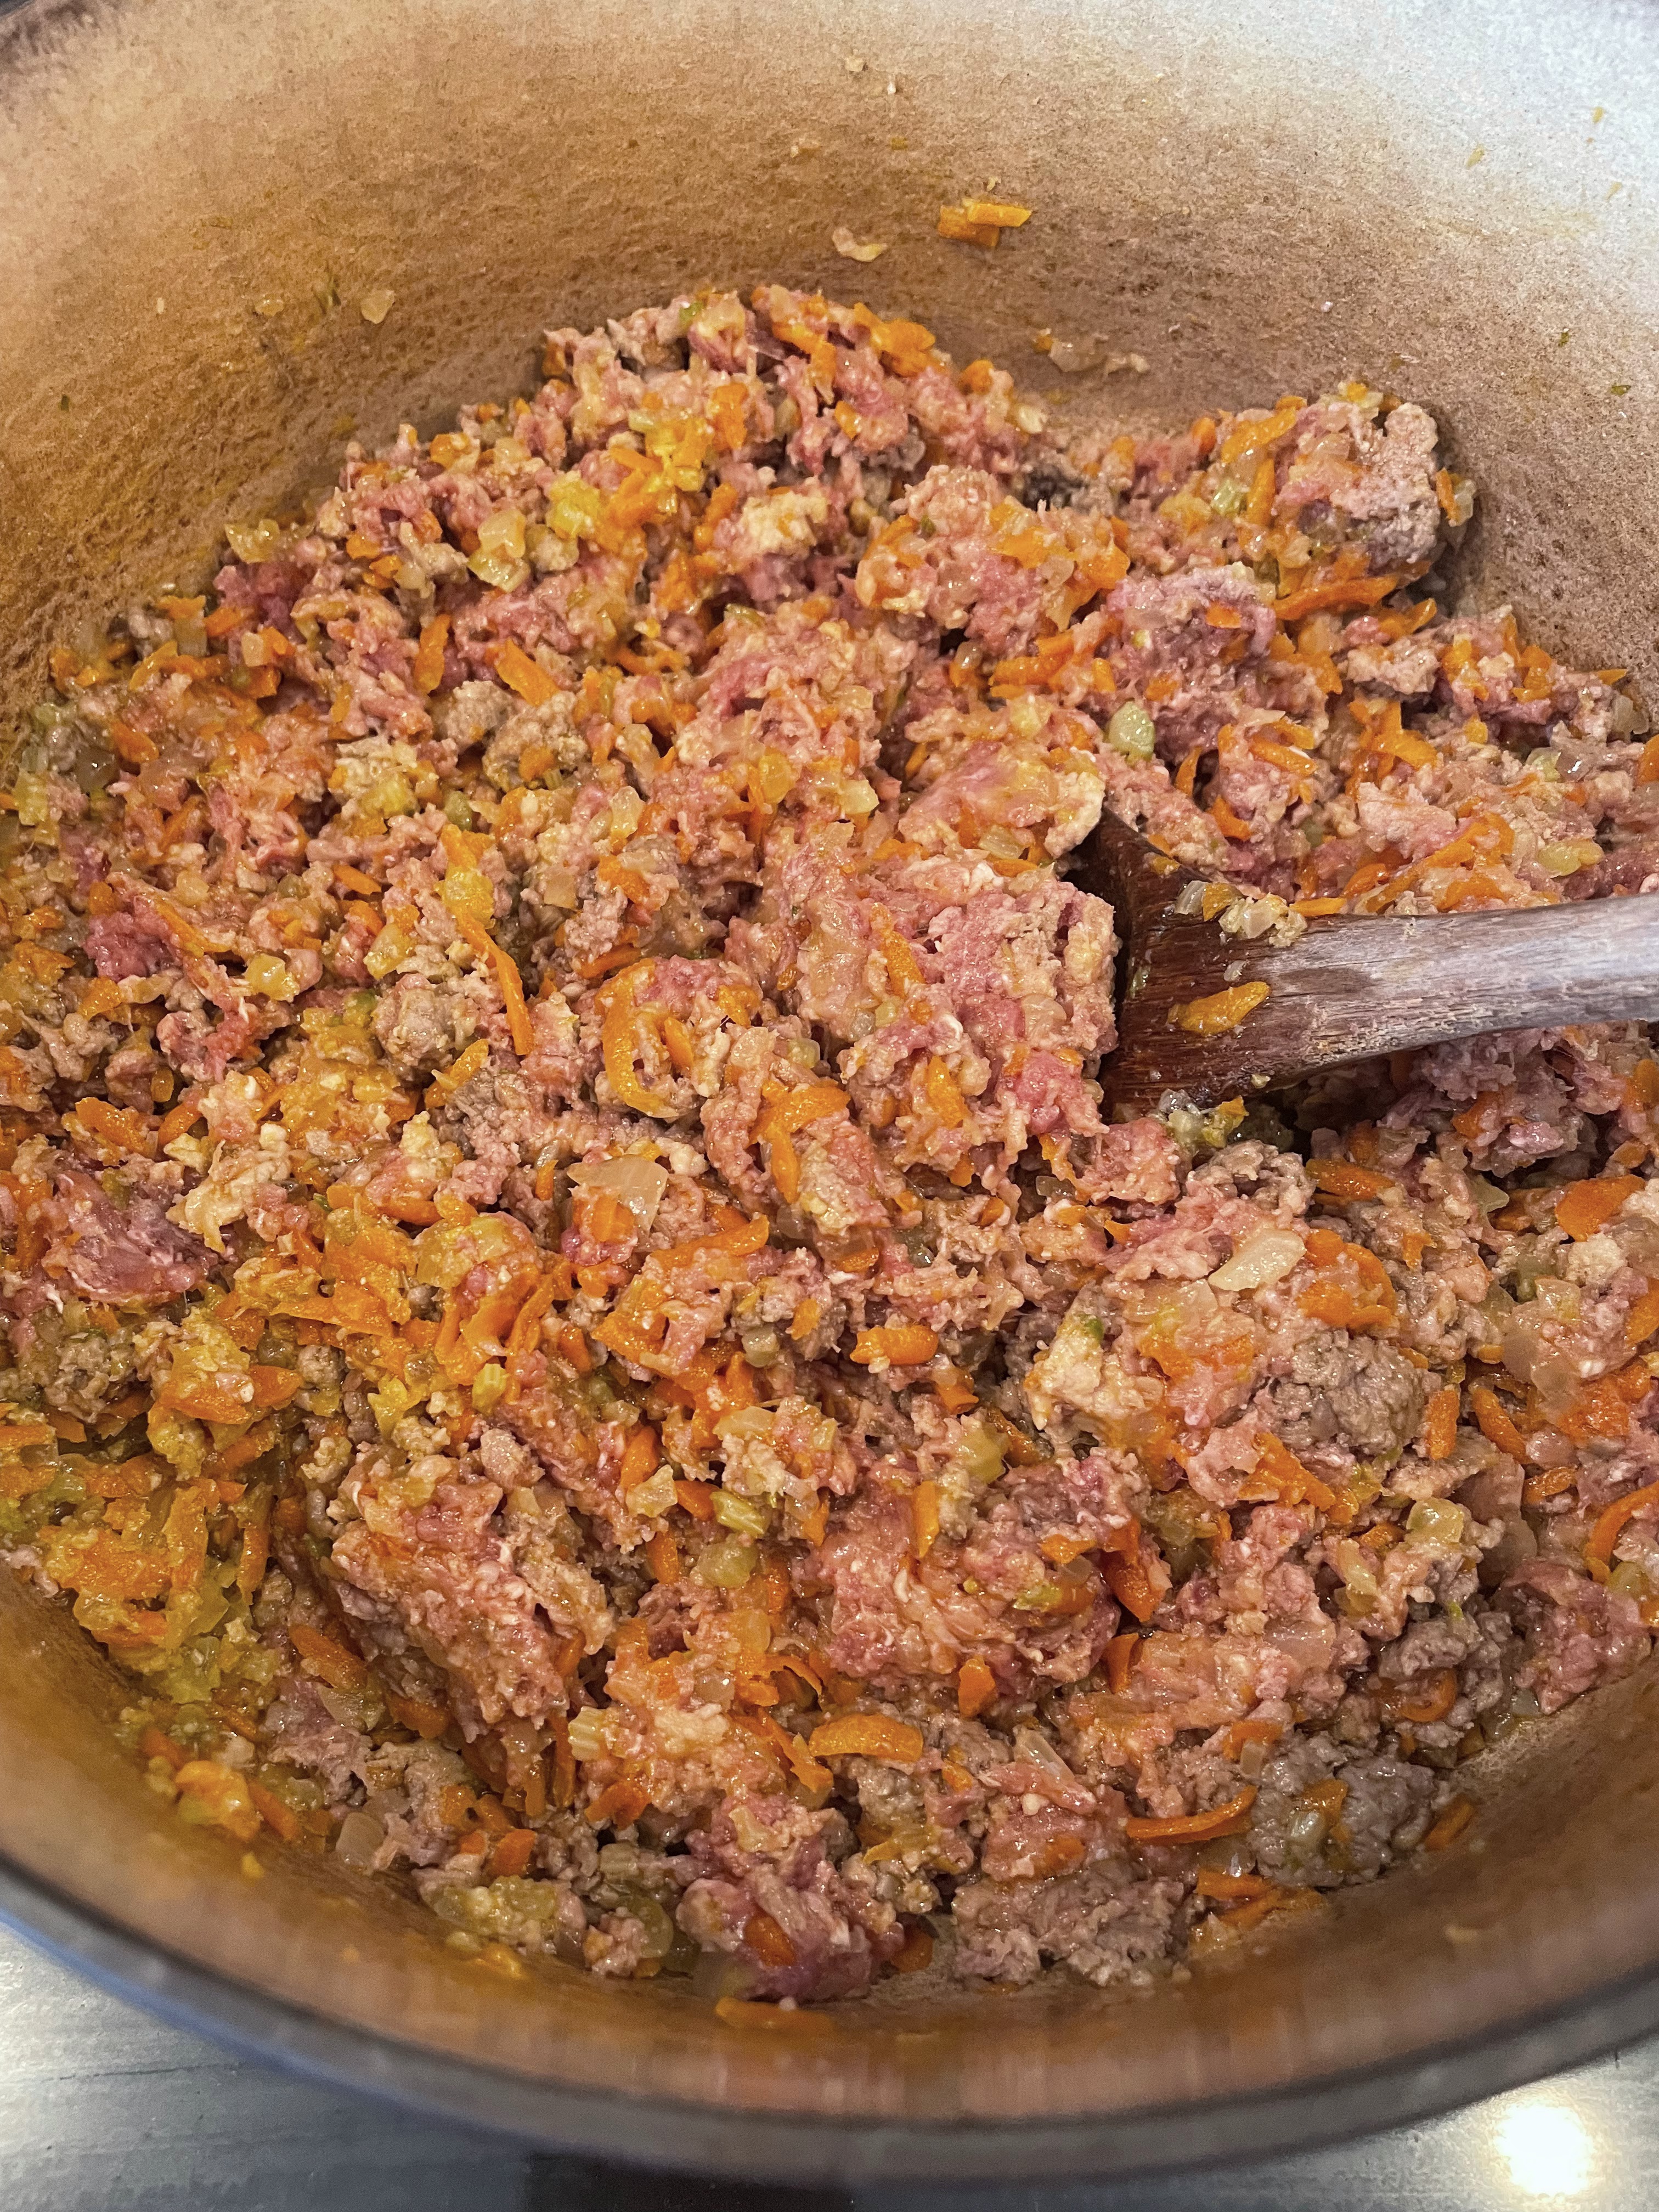
2. Scrape the paste into a large, wide Dutch oven or other heavy-bottomed pot, along with 2 tablespoons of the butter. Melt them together over medium heat, spreading the paste around with a wooden spoon so the pancetta fat begins to render. Cook until the fat is mostly rendered, about 4 minutes, stirring occasionally. Add the onion, carrot and celery — the soffritto — and cook slowly over medium-low heat, stirring frequently enough so the soffritto doesn’t brown — until the onion is soft, translucent and pale gold, about 15 minutes. 3. Add the ground beef and pork to the pot, increase the heat to medium, and break up the meat with a wooden spoon as much as possible. Once the meat starts to faintly sizzle, reduce the heat to medium-low. Let the meat brown slowly, stirring occasionally and continuing to break up any remaining clumps, for about 1 hour, until evenly browned and burnished.
4. When the meat is nearly done browning, in a medium saucepan over high heat (or in the microwave), heat the broth until simmering; cover and keep hot over low heat until ready to use. Increase the heat under the browned meat to medium-high and stir in the wine, scraping up any browned bits or deposits on the bottom of the pan. Cook and stir until the wine is mostly soaked in and evaporated, about 3 minutes. Stir in the salt and nutmeg, reduce the heat to medium-low and add the milk, cooking and stirring until it is barely visible, about 3 minutes. 5. Measure 2 cups of the hot broth and dissolve the tomato paste in it. Stir the broth with paste into the meat sauce, then stir in the tomato puree. (Keep the unused broth handy in the pot in case you need to reheat it and add more to the sauce later.) Partially cover the pot and let the sauce simmer slowly and gently, stirring occasionally, until it is thick and all the components begin to melt together, about 2 hours.
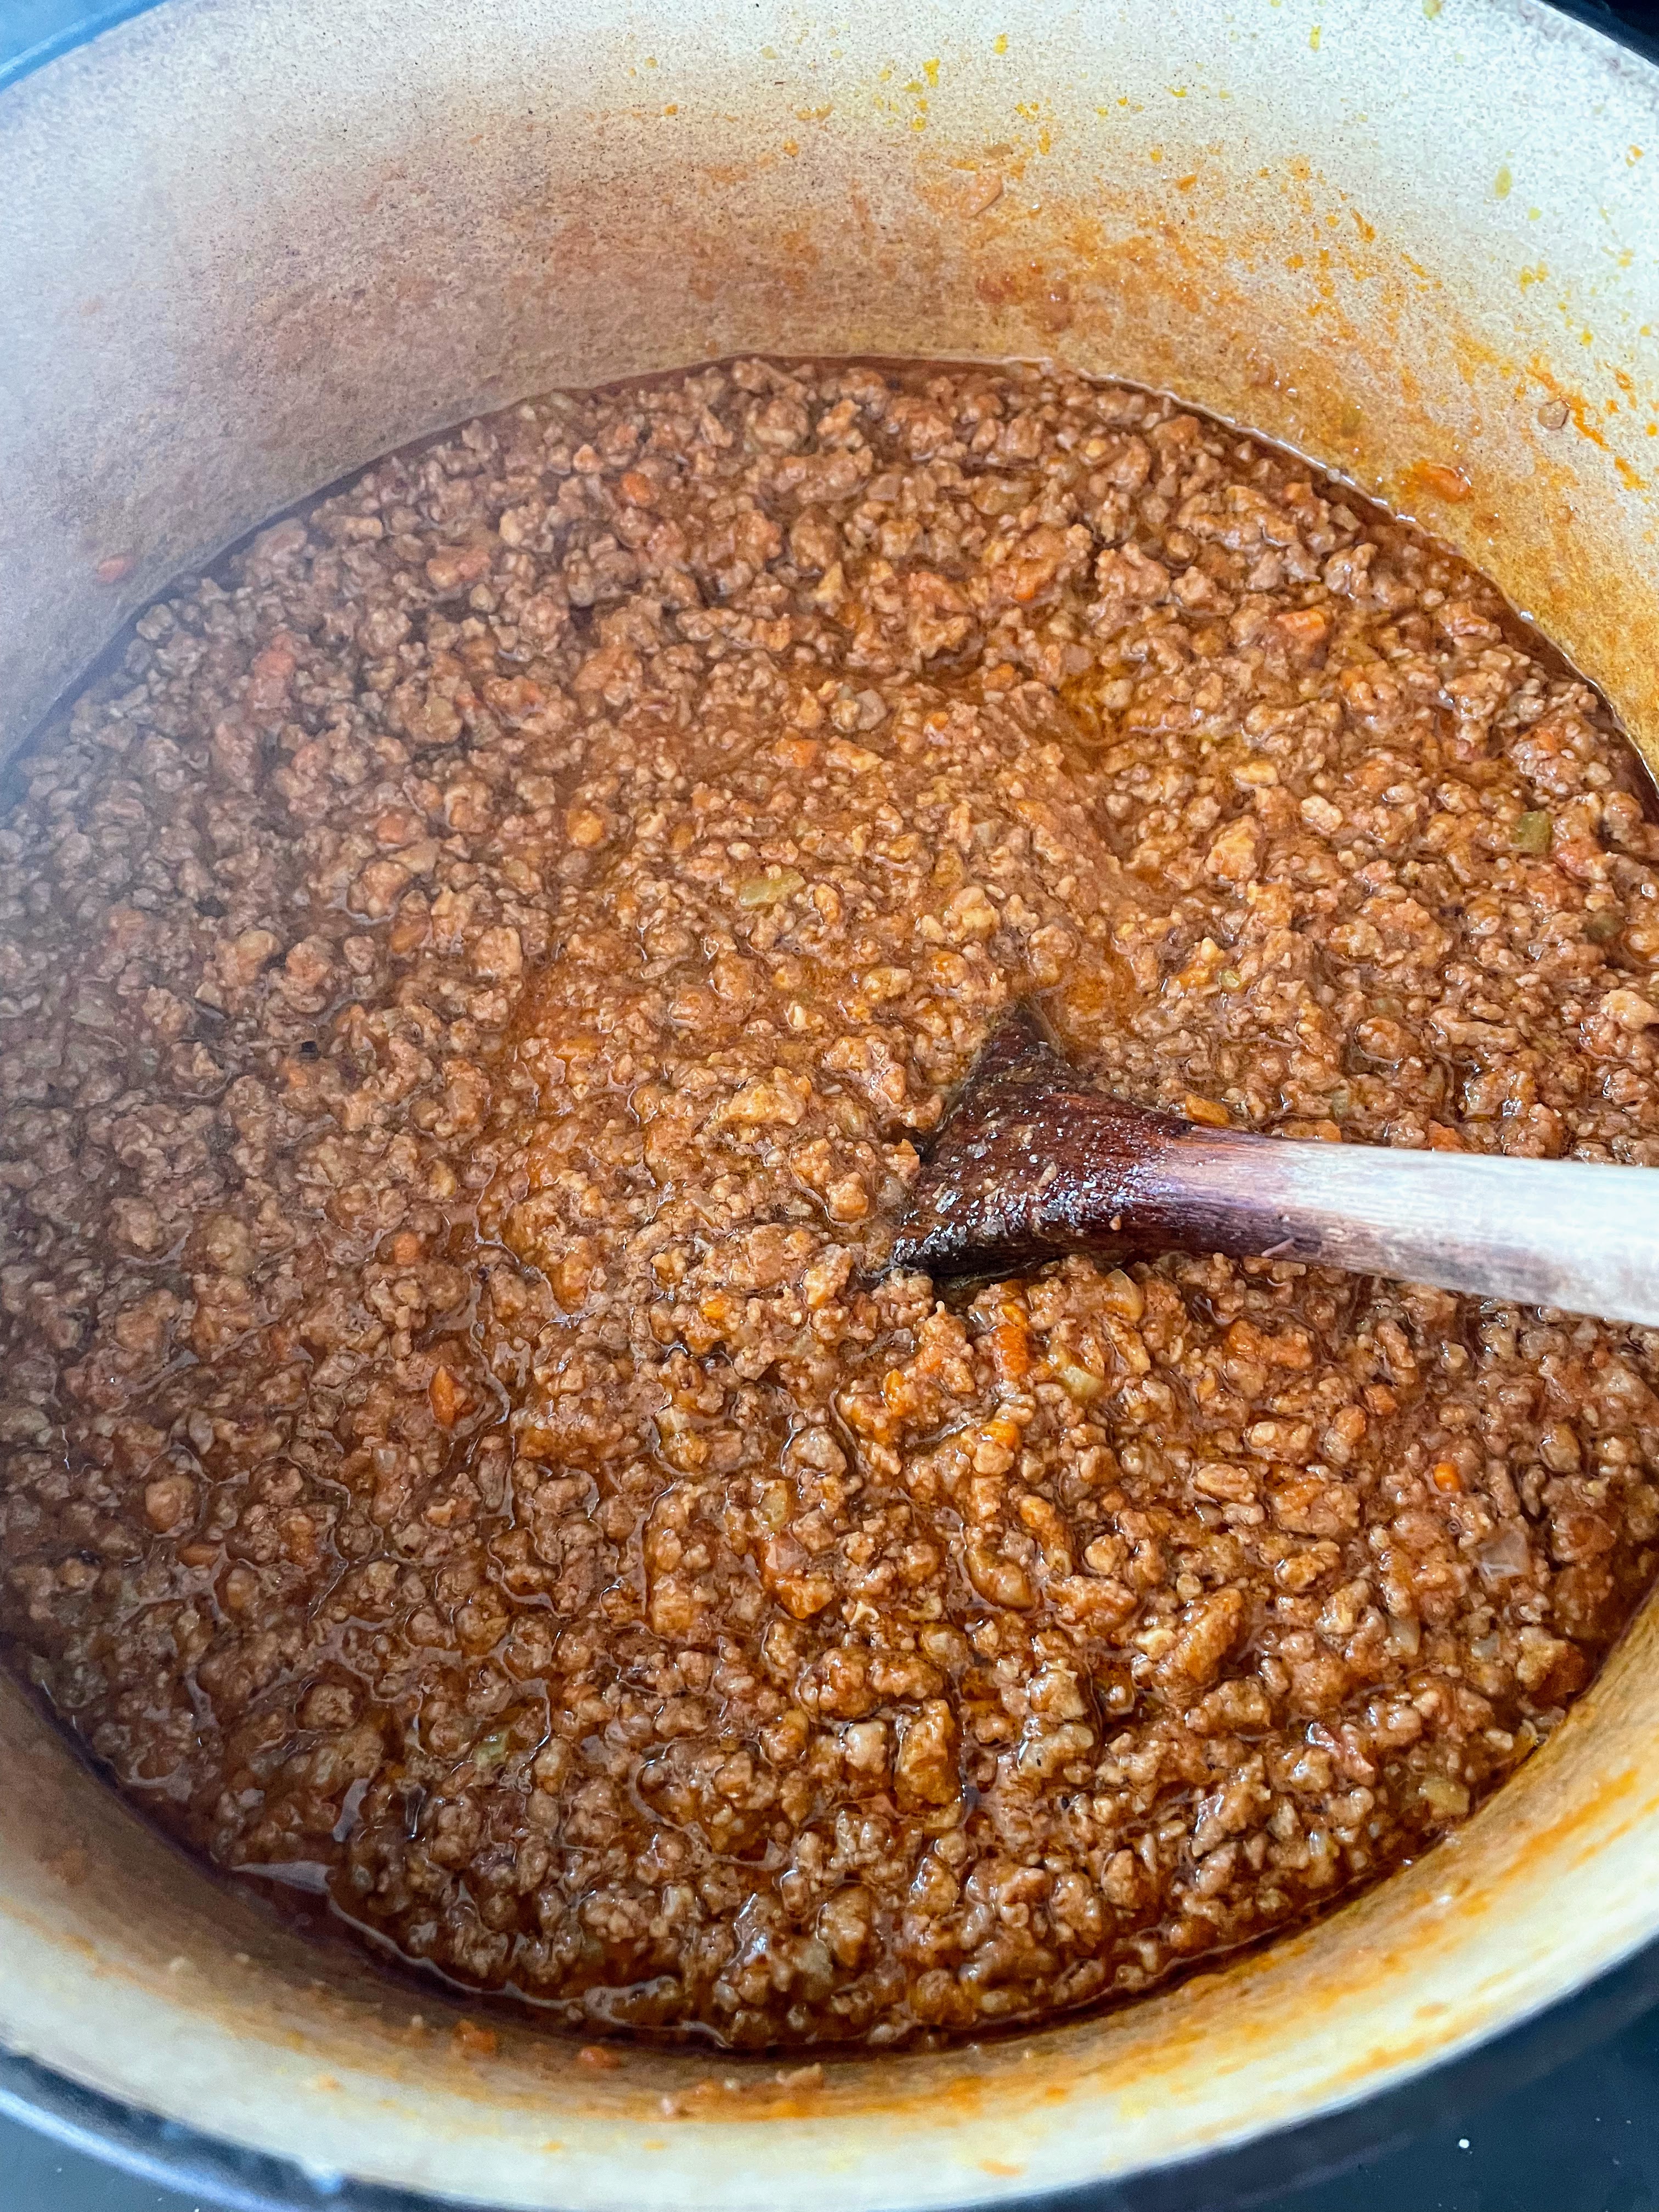
Left: Earlier in the simmering phase. Right: Later, as sauce has thickened more.
6. Stir the sauce — if it looks at all dry, reheat the remaining broth, ladle in a little more, about 1/2 cup, and stir. Continue to simmer gently, uncovered, stirring occasionally and adding a little more broth or water as needed to keep the sauce sumptuously saucy, until the vegetables have completely melted into the sauce, about 1 hour. 7. Cut the remaining 4 tablespoons of butter into a few pieces and stir them into the sauce; add about 20 grinds of black pepper and stir that in, too. Taste, and season with more salt and/or pepper, if desired.
Note from NYT: “Using the “00” flour gives the silkiest, softest pasta while bread flour will give you more of a satisfying chew, and all-purpose lands you squarely in the middle.” Note from me: I made this first with “00” flour, and it was delicious, but as you now know, I need more “bite” to my pasta. So I prefer to make it with bread flour if I have it, or all-purpose otherwise.
2 1/4 cups (290 gr) all-purpose flour, bread flour, or “00” flour, more as needed 1 tsp (3 gr) kosher salt 2 whole large eggs 3 egg yolks 1 tbsp (15 ml) extra-virgin olive oil, more as needed
Preparation: 1. In a food processor, pulse together flour and salt. Add eggs, yolks, and oil and run the machine until the dough holds together. If dough looks dry, add another teaspoon olive oil. If dough looks wet, add a little flour until dough is tacky and elastic.
2. Dump dough onto a work surface and knead briefly until very smooth. Wrap in plastic and rest at room temperature for 2 hours or in the fridge overnight.
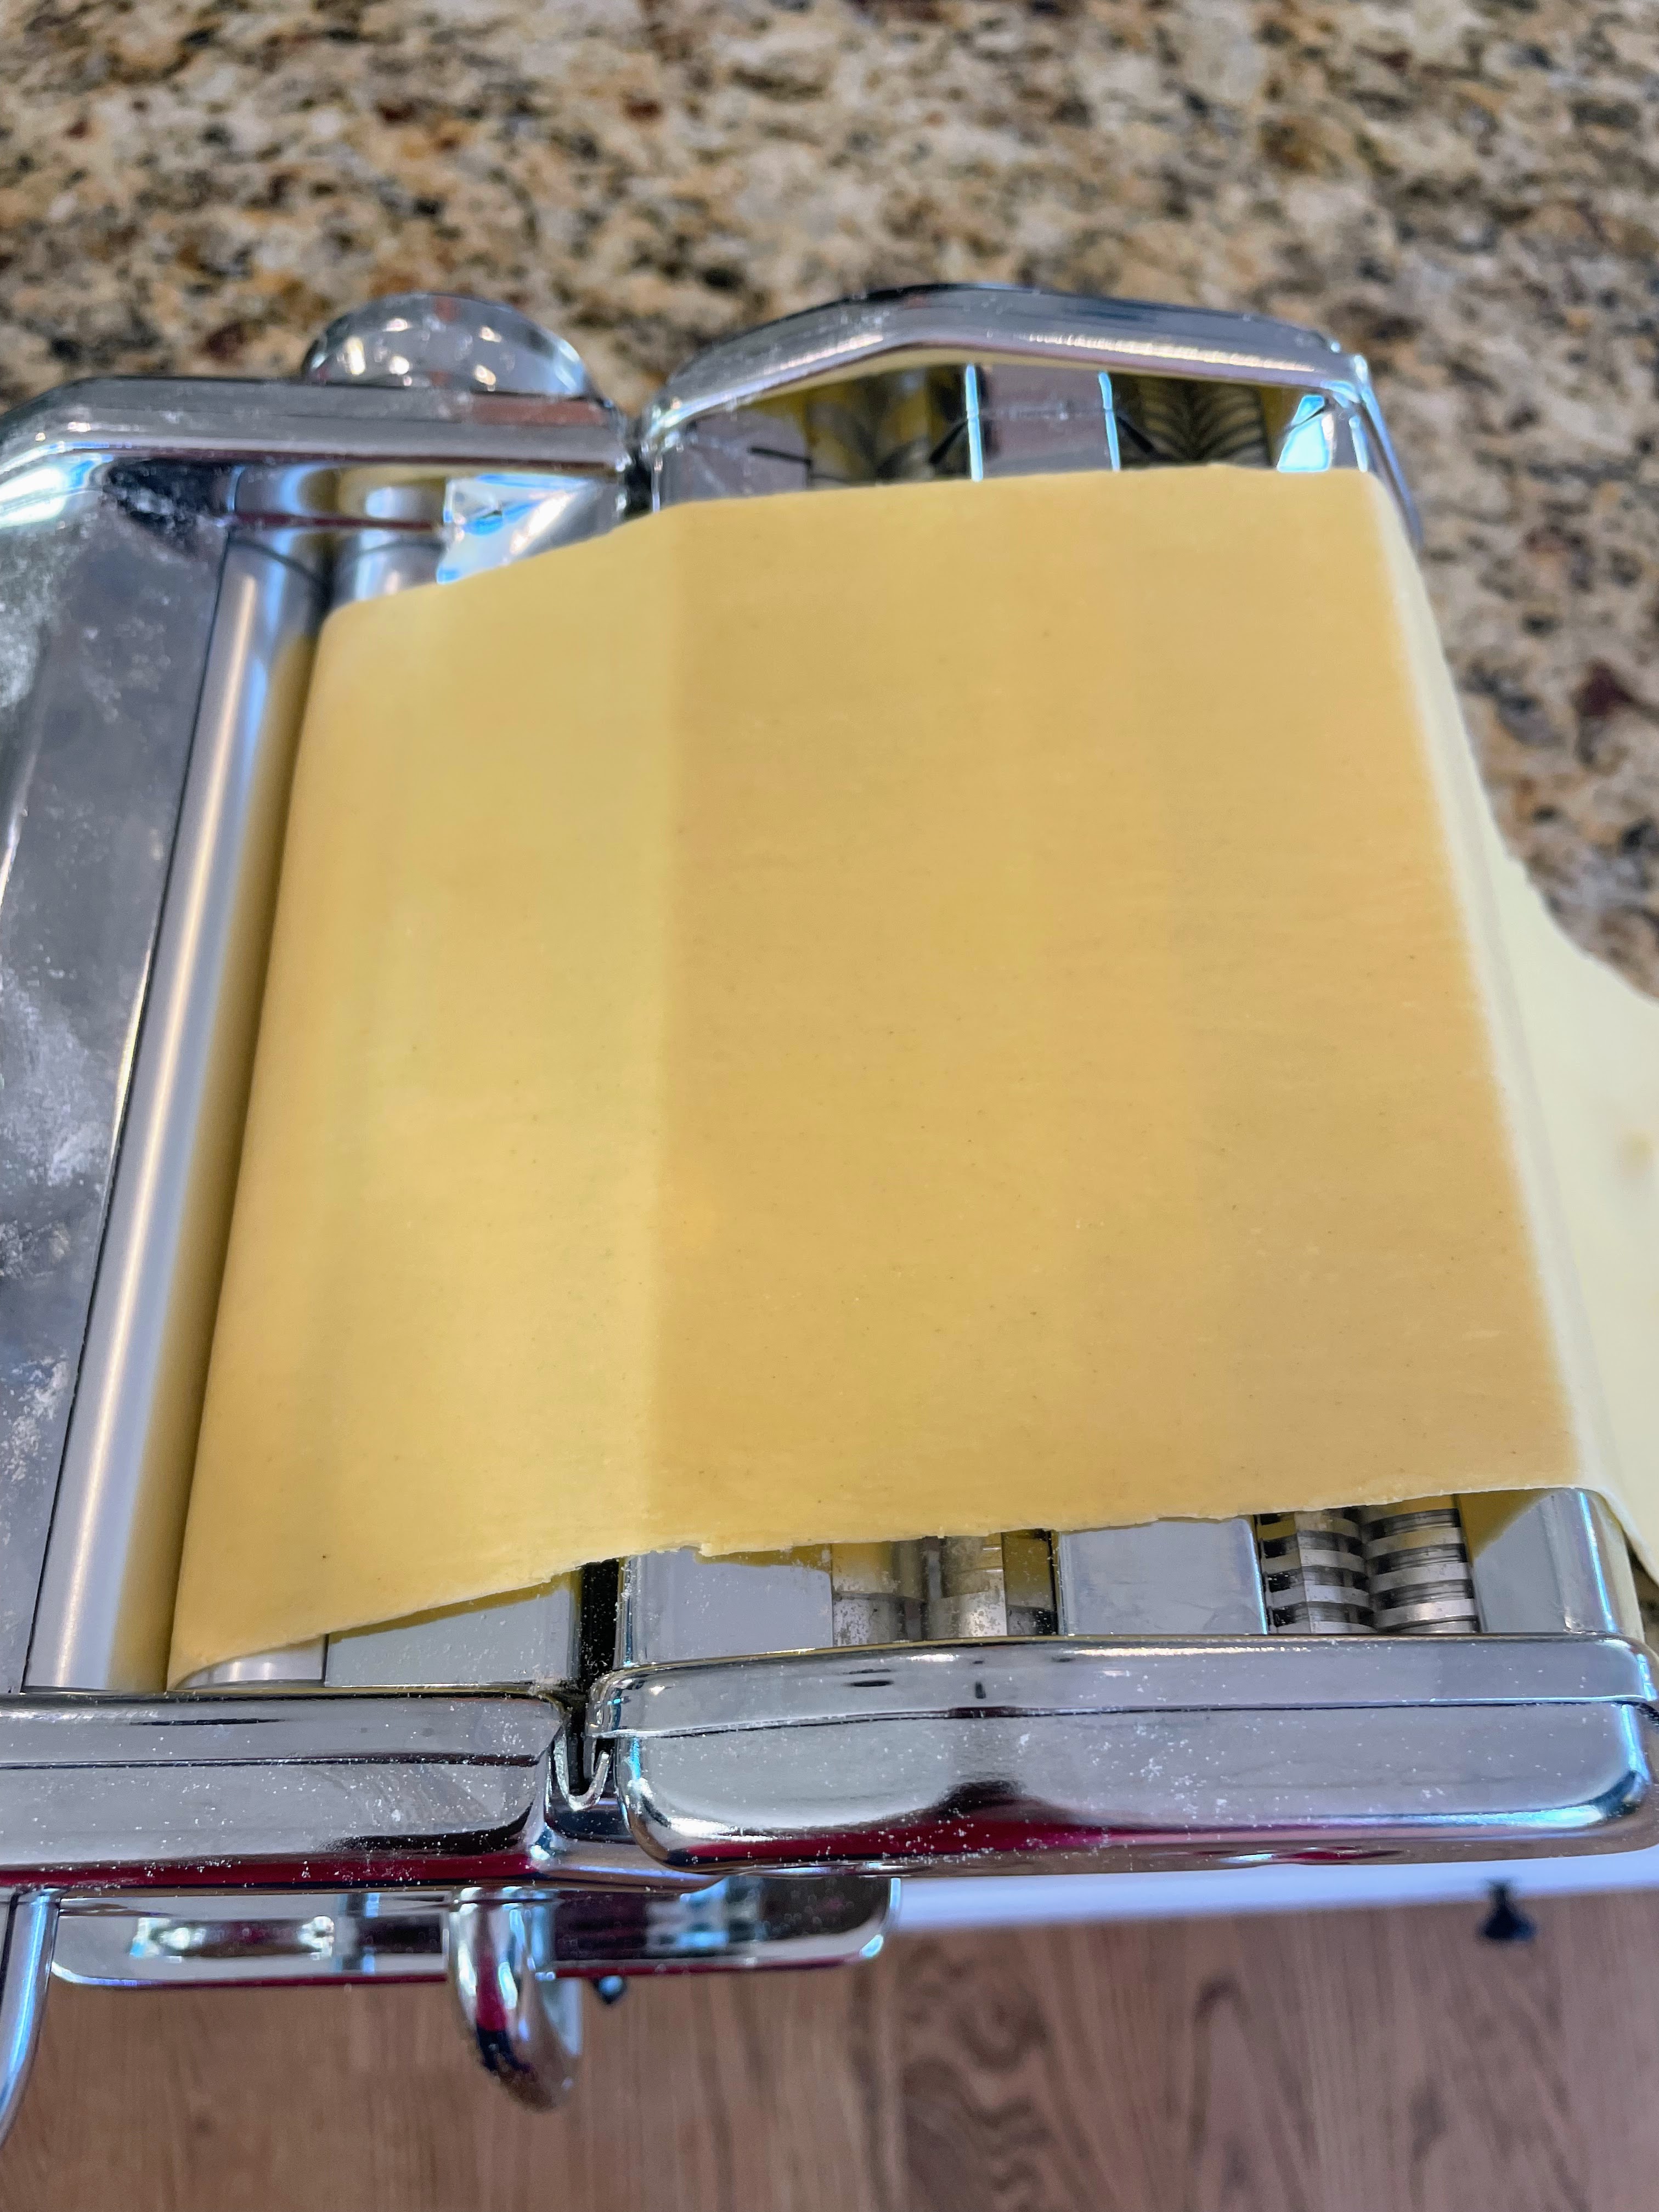
3. Cut the dough into 4 pieces, keeping them covered with plastic wrap or a dish towel when not in use. (If you’re rolling the dough out by hand, rather than using a pasta machine, cut it into 2 pieces instead.) Using a pasta roller set to the thickest (widest) setting, roll one piece of dough out into a sheet. Fold the sheet in thirds like a letter and pass it through the machine 2 more times on the same setting.
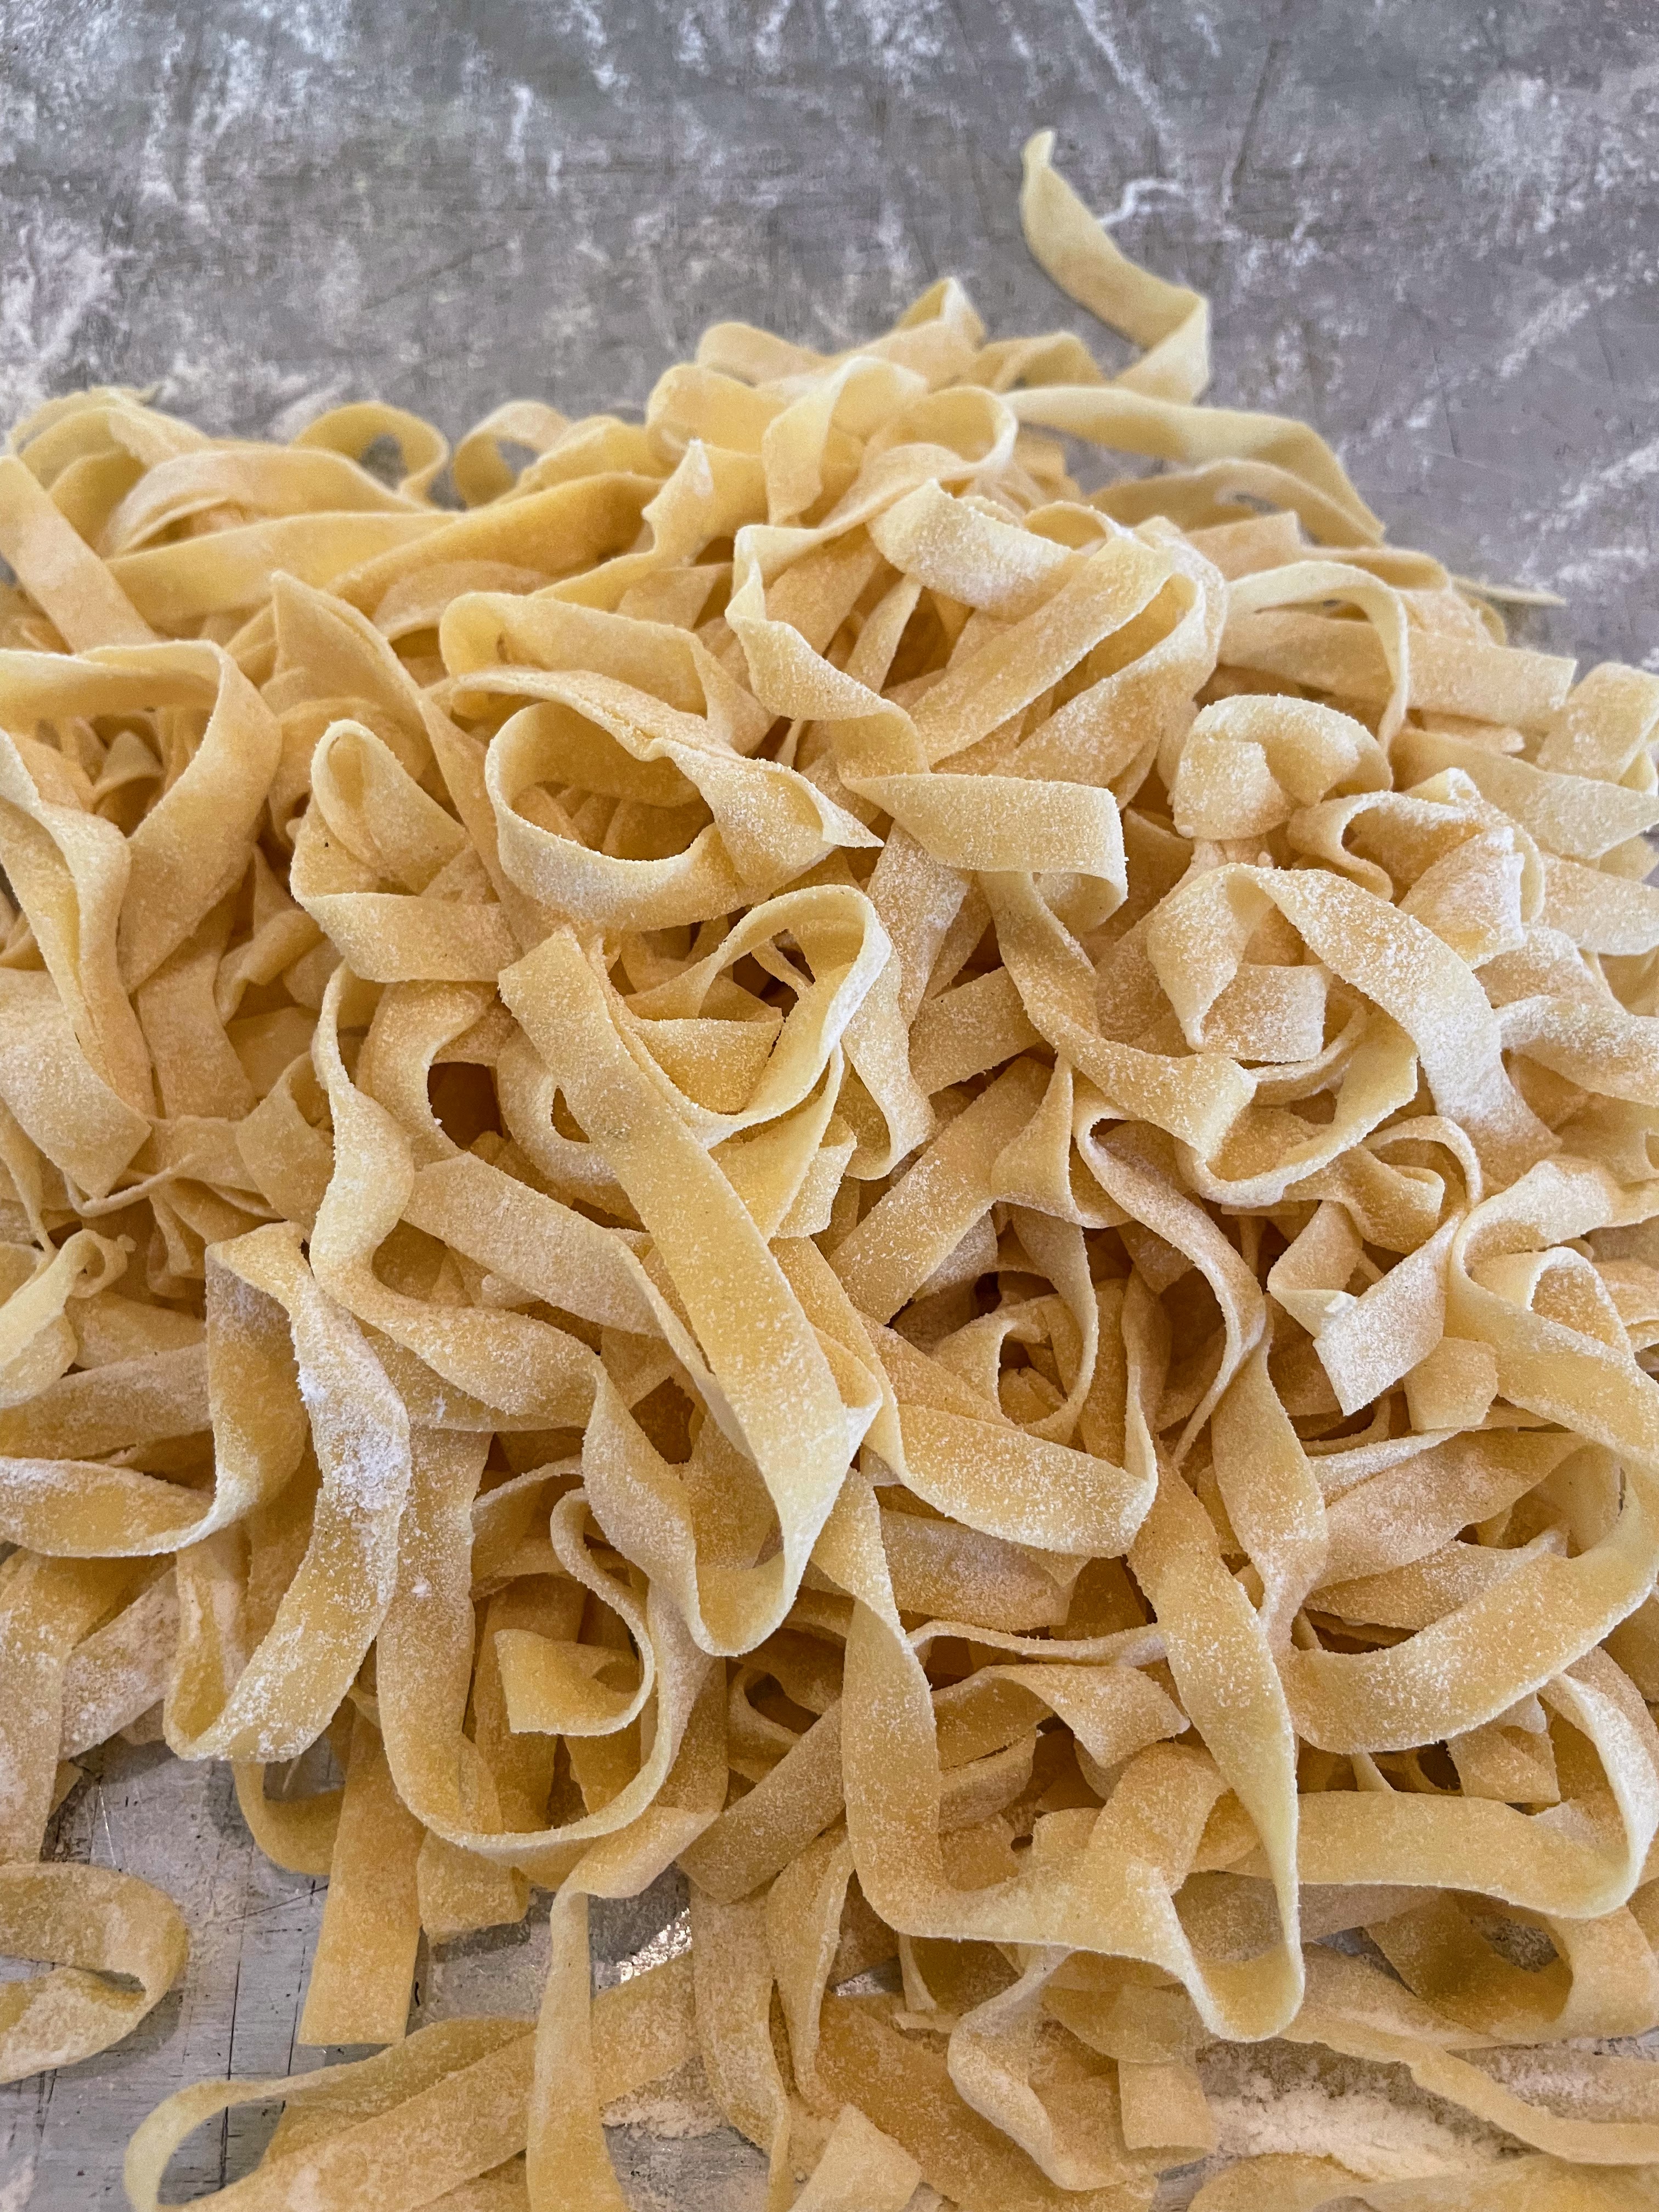
4. Reduce the setting, and repeat rolling, passing it through the machine 2 or 3 times before going to the next setting. For pappardelle and fettuccine, stop rolling after the dough has gone through setting #6. 5. Shape the pasta. For pappardelle, cut rolled pasta into 1-inch-wide strips. For fettuccine, run the rolled sheets through the fettuccine setting on your roller. Place cut pasta on a flour-dusted sheet tray and cover with a dish towel while rolling and cutting the remaining dough. Make sure to sprinkle flour over the cut pasta before you place another layer on top. If not using immediately, cover the sheet pan with a dish towel to keep the dough supple.
6. Bring a large pot of well-salted water to a boil, add fresh pasta and boil for 60-90 seconds, depending on thickness of the pasta. Drain well.
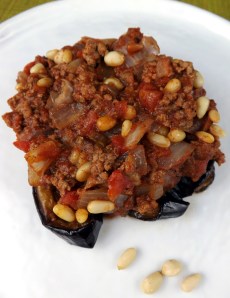
This is a Lebanese dish for saucy eggplant (and lamb) lovers. Lamb and eggplant are natural partners and frequent appear together in Middle Eastern, Turkish, Greek and Balkan dishes. There are many recipes for this as a stuffed eggplant dish but I like this deconstructed version, which layers the filling on top. As it all cooks together, the lamb and tomatoes season and soften the eggplant below, resulting in comforting, cinnamon-scented mouthfuls that are enhanced by the taste and texture of buttery pine nuts.
Lamb and Eggplant
Ingredients:
olive oil 3 small-medium eggplants, thinly sliced garlic powder salt and pepper
1 onion, diced 4 cloves garlic, minced 1 tsp. cinnamon 1/2 tsp. allspice salt and pepper 1 lb. (450 gr.) ground lamb 1 can (14 oz./411 gr.) petite diced tomatoes 1 can (14 oz./411 gr.) tomato sauce
1/3-1/2 c. pine nuts chopped parsley (optional; I forgot it this time around!)
Preparation
1. Cook the eggplant slices in olive oil (in a singe layer, working in batches) in a large frying pan over medium-high heat until they are golden, tending to them carefully so they don’t burn. You will likely need to add more oil to the pan with every new layer. Place the eggplant slices in the bottom of a 9×13-inch (23×33 cm) baking dish and sprinkle them with a little garlic powder, salt, and pepper as you layer them, while they are still warm. (I have a garlic salt grinder and sometimes grind that over the layers, along with some black pepper, so that’s another option.)
2. In another pan, cook the onion in about 2 tbsp. olive oil until soft. (Note: If you’d like to up the heat factor of this dish, you could also add a pinch of red-pepper/chili flakes along with the onions.) Add the minced garlic and cook a couple minutes more, then add the cinnamon and allspice and cook for another couple minutes. Remove the onions from the pan and set aside. Add the ground lamb to the pan and cook until no longer pink; drain,* then add the cooked onions, the diced tomatoes and the tomato sauce. Simmer until the liquid is slightly reduced, about 20 minutes. Check the seasonings after about 10 minutes, and add more cinnamon, allspice, salt, or pepper as needed.
3. Melt a bit of butter or olive oil in a small frying pan over medium heat and sauté the pine nuts until they start to turn golden.
4. Spoon the lamb mixture over the eggplant slices in the baking dish and sprinkle the pine nuts on top. The photo below shows this step halfway through.
4. Bake at 350 degrees F (180 C) until bubbling, about 30 minutes.
5. Sprinkle chopped parsley on top and serve with vermicelli rice pilaf. I also like to eat the lamb and eggplant (and the rice) with plain full-fat yogurt on the side, too.
*In the United States, the lamb sometimes requires draining. If your lamb is leaner, you can add the ground lamb directly to the cooked onions in the pan and skip the draining part.
Mother Nature is really letting us have it this winter; we have been hit with yet another snow storm. The government has shut down and so has my office: today is an official snow day. Being home on a day such as this, my thoughts turned to warm and comforting things such as soup. Specifically, to an earthy soup featuring two types of mushrooms and lots of green onions–hence the name. I might have called it quadruple mushroom soup because it features mushrooms four ways: dried (and soaked) mushrooms, sautéed sliced mushrooms, fresh chopped mushrooms–and sliced raw mushrooms as a garnish. This is definitely a soup for mushroom lovers, of which I am one. But it is also a good soup for anyone needing some flexibility (that would be me, too). Not enough dried mushrooms on hand? Add more of the fresh ones. Don’t like (or have) button mushrooms? Substitute portabella or another type. Use one, two, or all three of the broths suggested below. Make it vegan, or not (see below). This is a forgiving soup perfectly suited to an unforgiving day.
Creamy Double Mushroom Soup with Green Onions Serves 4-6
2 oz. dried mushrooms (porcini, shitake, etc.)
2-3 tbsp. olive oil
20 oz. white button mushrooms–slice half the mushrooms, finely chop the other half (save two mushrooms to slice later for garnish)
2 bunches green onions/scallions, trimmed at both ends, rinsed clean, and thinly sliced (save one green onion to slice later for garnish)
3 cloves garlic, minced
freshly ground pepper, to taste
dash of dry sherry or splash of white wine (optional)
5 c. beef broth (or veggie broth or miso broth, or combination of broths)
1 tbsp. soy sauce (optional)
pinch of sugar (about 1/2 tsp.), to taste
1 c. heavy cream (or unsweetened coconut milk or soy creamer)
Preparation 1. Place the dried mushrooms in a bowl and pour enough boiling water over them to cover; soak for 30 minutes.
2. Meanwhile, heat half the olive oil in a soup pot over medium-high heat, add the sliced white mushrooms, and sauté until they start to turn golden; remove the mushrooms from the pot and reserve.
3. Add the remaining olive oil to the soup pot and sauté the green onions until soft. Add the minced garlic and pepper; cook for another two minutes. Add the sherry/wine (if using) and reserved sautéed mushrooms. Turn heat to low.
4. Strain the soaked mushrooms through a fine sieve, saving the dark mushroom liquid. Rinse the mushrooms twice in a small amount of water, adding the first rinse to the dark mushroom liquid and discarding the second rinse. 5. Add the rinsed mushrooms to the soup pot. Strain the saved mushroom liquid and add it to the soup pot, along with the broth, soy sauce (if using), and sugar. Turn the heat back to medium high.
6. Using an immersion blender, blend the contents of the soup pot (or blend in batches in a blender and return to pot).
7. Add the chopped mushrooms to the soup and simmer for 20 minutes. Turn off the heat and add the heavy cream (or coconut milk/soy creamer). Check seasonings, adding more pepper, soy sauce, or sugar as desired.
8. Serve soup in individual bowls and top with a few thin mushroom slices and a sprinkle of sliced green onions.
I love mangoes in any way, shape, or form–and so do my children, who used to line up for a chance to get the pit after I was done slicing the rest of the fruit. For years, I vowed to make mango mousse–but I always let myself be lured by the siren call of the chocolate version instead. Until recently, when I was making a Latin American dinner and wanted a Latin American dessert to go with it. And now I’ve been asking myself, why didn’t I try this sooner? This recipe, very slightly adapted from The South American Table by Maria Baez Kijac, calls for fresh mangoes, and like many other mousses, includes raw egg whites (so use the freshest eggs possible). It serves 8 regular dessert lovers, or 6 serious mango lovers. Note: the original recipe suggests serving the mousse with a raspberry coulis, but I am a purist who prefers an unadulterated mango flavor.
Mousse de Mango
1/4 c. fresh orange juice
1 envelope unflavored gelatin
2 large, ripe but firm mangoes, peeled, seeded, and chopped (2 c.)
3/4 c. sugar
2 tbsp. orange liqueur or rum
1 c. whipping cream
2 large egg whites
1/4 tsp. cream of tartar
Preparation
1. Place the orange juice in a small heat-proof bowl, sprinkle the gelatin over top, and let soften for 5 minutes. Set the bowl in a small saucepan with 1 inch of simmering water and heat until the gelatin is completely dissolved. Remove the bowl containing the gelatin mixture from the saucepan.
2. Place the mangoes in a blender or food processor and process until smooth. Add the sugar, liqueur/rum, and dissolved gelatin, and process again until smooth. Place the mango puree into a large bowl.
3. Whip the cream in a medium-size mixing bowl until soft peaks form. Beat the egg whites with the cream of tartar in another medium-sized bowl until soft peaks form.
4. Very gently fold half the whipped cream into the mango puree, followed by half the egg whites. Repeat, and mix gently until all the cream and egg whites have been incorporated.
5. Distribute the mousse among 6-8 dessert cups, cover, and refrigerate until thickened–about 30 minutes.
6. Enjoy!
In our house, we love dulce de leche (we are not at all averse to eating it by the spoonful), and we really love the pastry cake known as Torta Chilena (delicate, crispy layers of pastry laced with the rich, caramelly spread–see the recipe here). But Torta Chilena is quite labor intensive (a labor of love, but laborious nonetheless). I wanted to make a slightly less time-consuming cake featuring dulce de leche–one that was special in its own right. The result: this White Chocolate Dulce de Leche Cake. It’s a more traditional cake-like cake (if that makes sense), but has lots in it to love. It does require more time than a box mix (though using ready-made dulce de leche will reduce the prep time), but it is so worth it.
White Chocolate Dulce de Leche Cake
–Cake
2 ½ c. flour
2 tsp. baking powder
½ tsp. salt
1 c. white chocolate chips, melted and cooled
1 c. butter
2/3 c. sugar
2 eggs
2 egg whites
1 c. buttermilk (or 1 tbsp. vinegar, plus enough milk to make 1 c.)
–Frosting
8 oz. cream cheese, softened
¼ c. butter, softened
1 c. confectioner’s sugar
1 c. white chocolate chips, melted and cooled
—Filling
1 recipe home-made dulce de leche (see directions below) — or use 1 (13.4-oz. can) prepared dulce de leche
Preparation 1. FILLING: To make dulce del leche, heat oven to 425º. Spray a glass casserole dish with cooking spray, pour both cans of condensed milk into it, cover the dish, and then set it in a bain marie (baño maria), which is a roasting pan filled with enough water to rise slightly above the level of the condensed milk in the casserole dish. Bake for about 2 hours, stirring periodically, until golden brown. Set aside and let cool. (This is the dulce de leche – there will be extra left over). If using prepared (canned) dulce de leche, proceed to making the cake. Note: you may need to vigorously stir (or even slightly heat) canned dulce de leche to make it spreadable.
2. CAKE: Reduce oven temperature to 350º. In a glass bowl, heat the 1 c. white chocolate chips in a microwave in 30-second bursts, stirring after each, until chocolate is mostly melted. [Note: be careful with the melting process; overcooked white chocolate turns into a hard lump.] Stir the chocolate until it is completely smooth and let cool. Spray 4 cake pans with cooking spray, line with parchment paper, and spray the parchment paper. In a medium bowl, combine flour, baking powder, and salt. In a large bowl, beat butter and sugar until smooth. Gradually beat in the eggs and egg whites, then add the melted white chocolate and incorporate. Add half the flour mixture, mix in, add half of the buttermilk, mix in and repeat. Spread the cake batter evenly into the 4 pans. Bake for about 10-15 minutes, or until knife/toothpick inserted in middle comes out clean. Let cool.
3. FROSTING: Beat cream cheese, butter, and confectioner’s sugar together in medium bowl until smooth, then stir in 1 c. melted white chocolate chips (see note in #2 about melting white chocolate).
4. ASSEMBLY: Place 1 cake layer on plate/stand. Frost the layer with 1/3 of the dulce de leche, then with 1/6 of the frosting–just enough for a very thin layer; you want to be sure to have enough frosting left for the outside of the cake. Continue stacking layers, and use remaining frosting to frost top and sides of cake. Chill 1 hour before serving.


 on the sides; front-facing wall of opus mixtum (bands of brick and tufa), with lateral 'toothing' and a structural arch; plus rough-hewn travertine column--Portico of Claudius, Portus (c. 50 AD)")
")
 with lateral 'toothing' and putlog holes at the top--Trajan's warehouse, Portus (c. 100 AD)")
")
, Trajan's warehouse, Portus (c. 100 AD)")

