I first discovered dense, delicious mud cakes when we lived in Australia. Traditional mud cakes are rich, fudgy, and very chocolatey — which may explain the name. They are said to have originated in the southern U.S.; the Mississippi variant has marshmallows melted into the frosting on top, while the Aussie version is often topped with a velvety ganache. Mud cakes are single layer, and most are baked low and slow. They also freeze very well.
This particular cake is not chocolate–but caramel, and is an amalgam of two recipes. The ganache is adapted from the Australian Women’s Weekly, and the cake from taste.com.au. The amount of ganache listed here is just enough to cover the cake, and when the cake is also served with whipped cream, it is perfect. If you really, really love frosting/ganache, then make 1.5x the recipe. Which I will do next time….
Ingredients
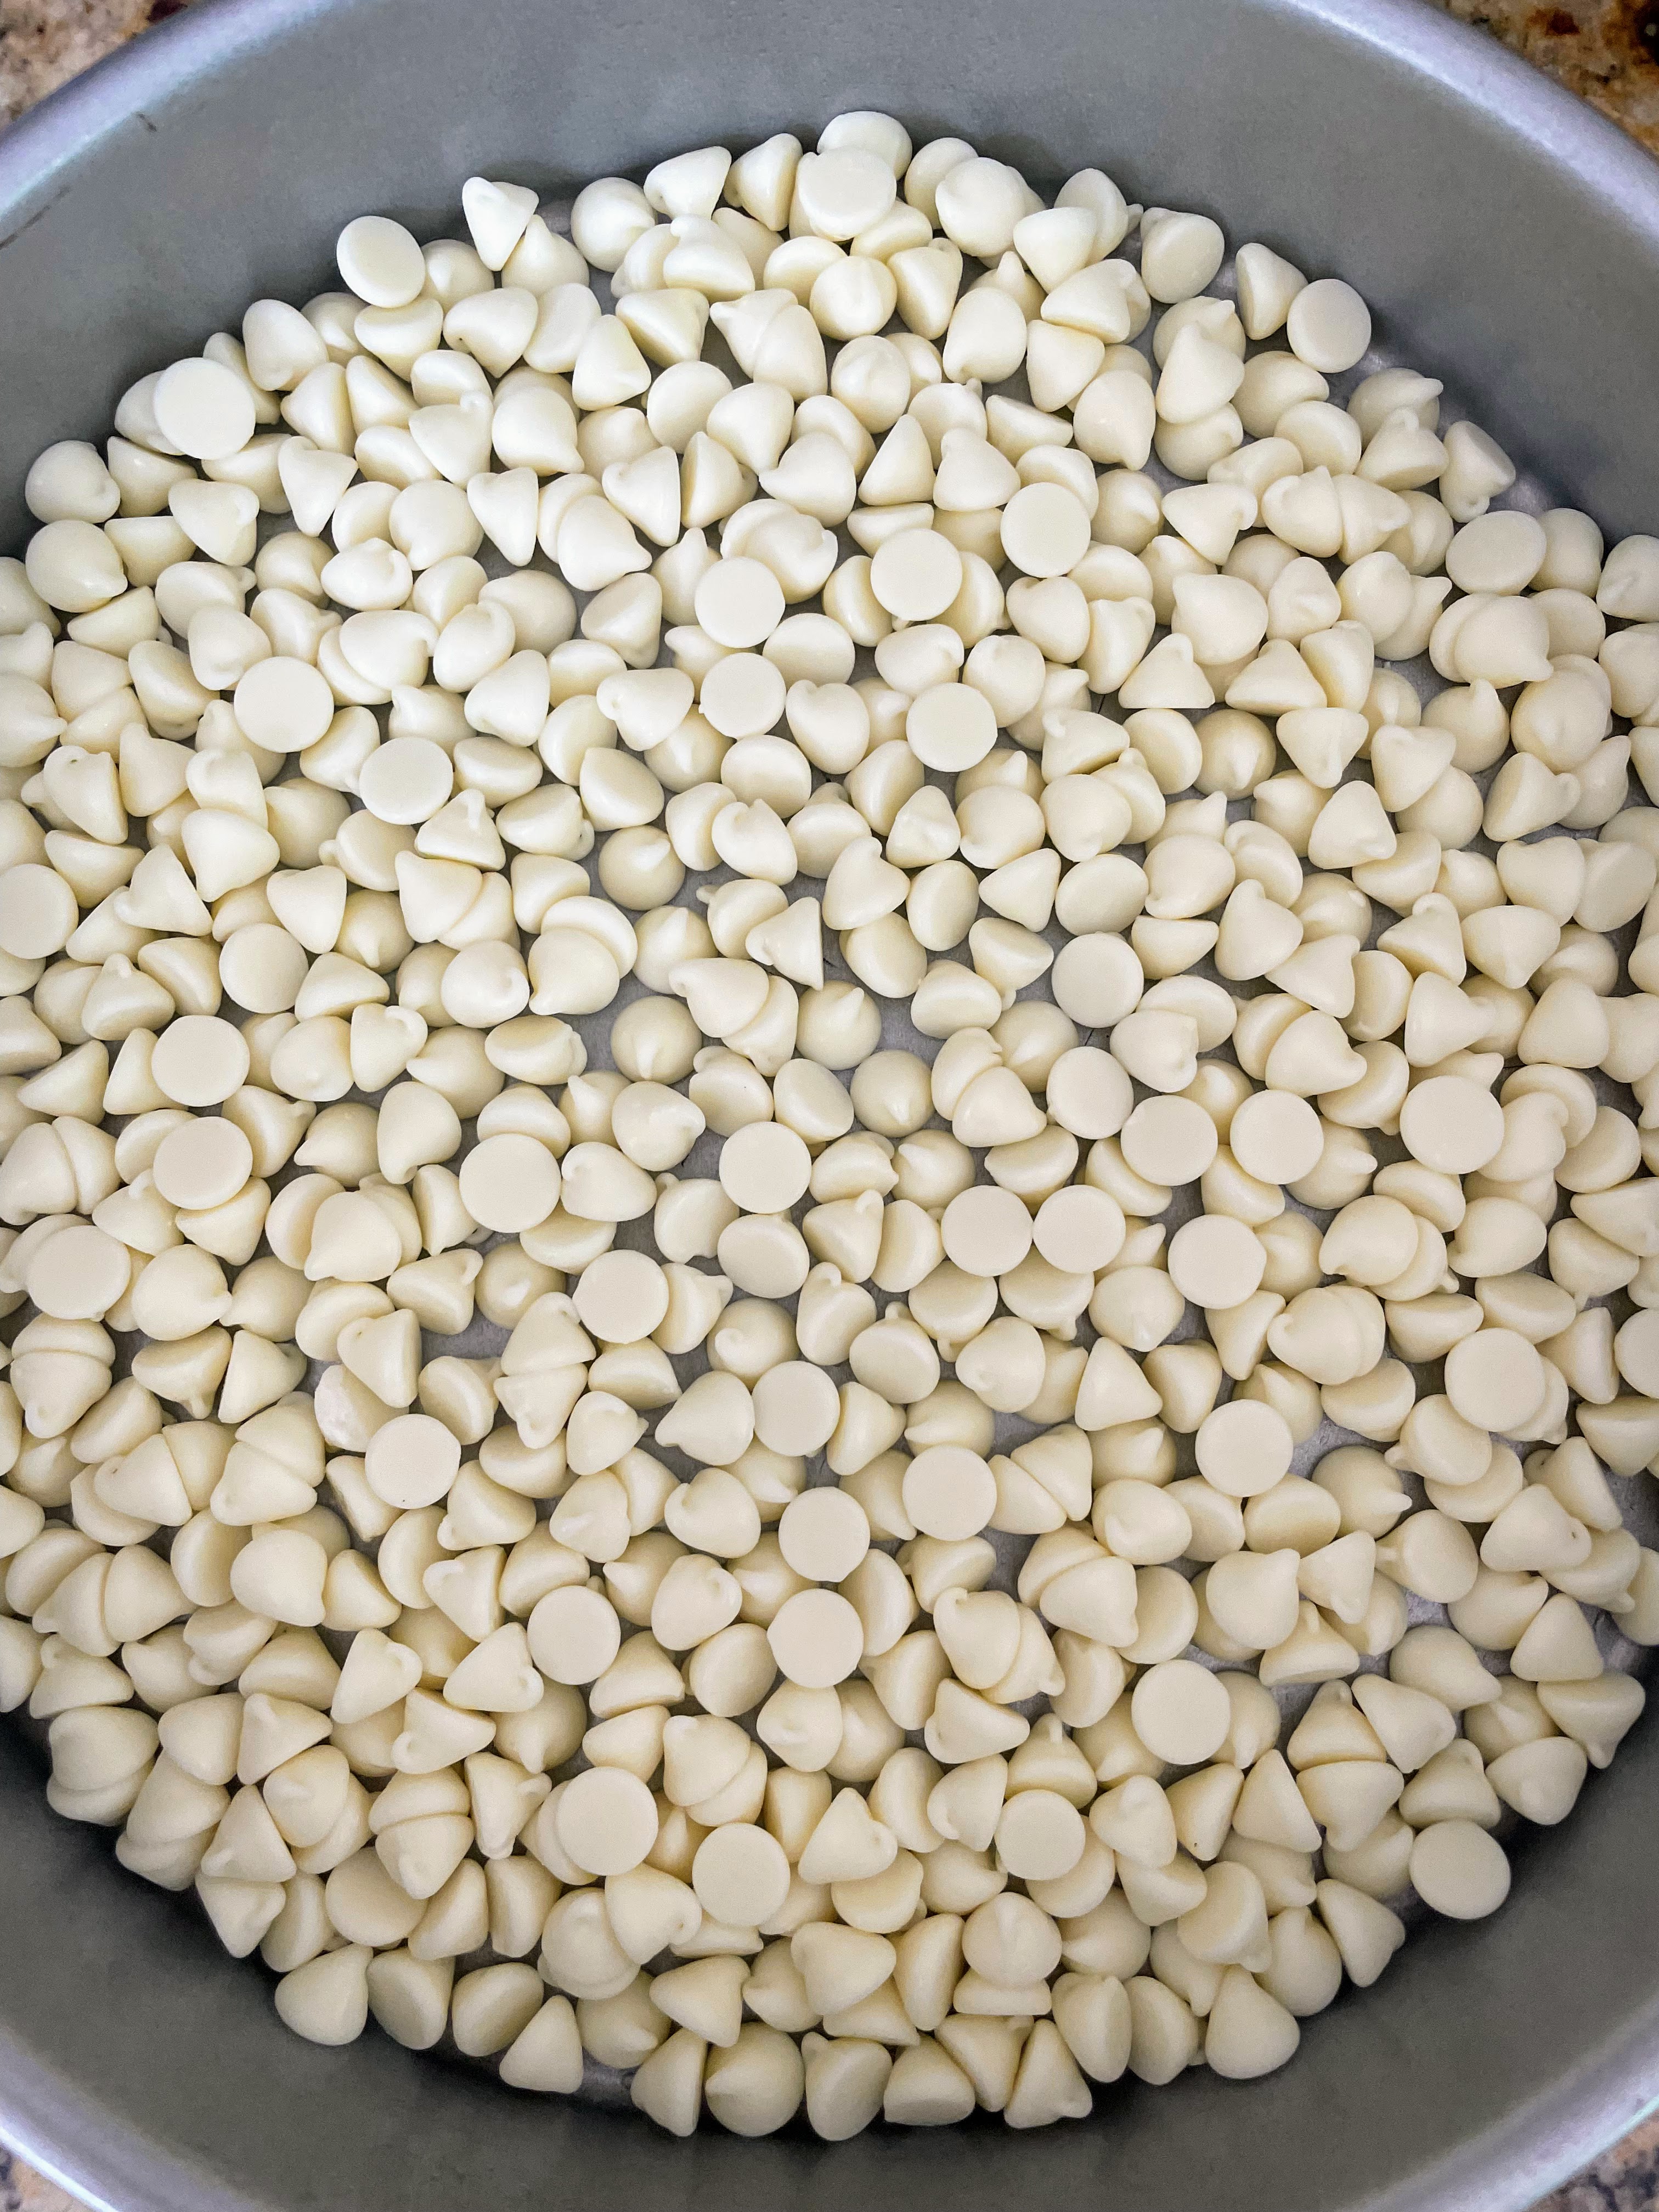
Caramelized White Chocolate Ganache 300 grams (10.5 oz) white chocolate chips 1/2 cup (125 ml) heavy cream 1 tsp vanilla 1/4-1/2 tsp table salt, to taste
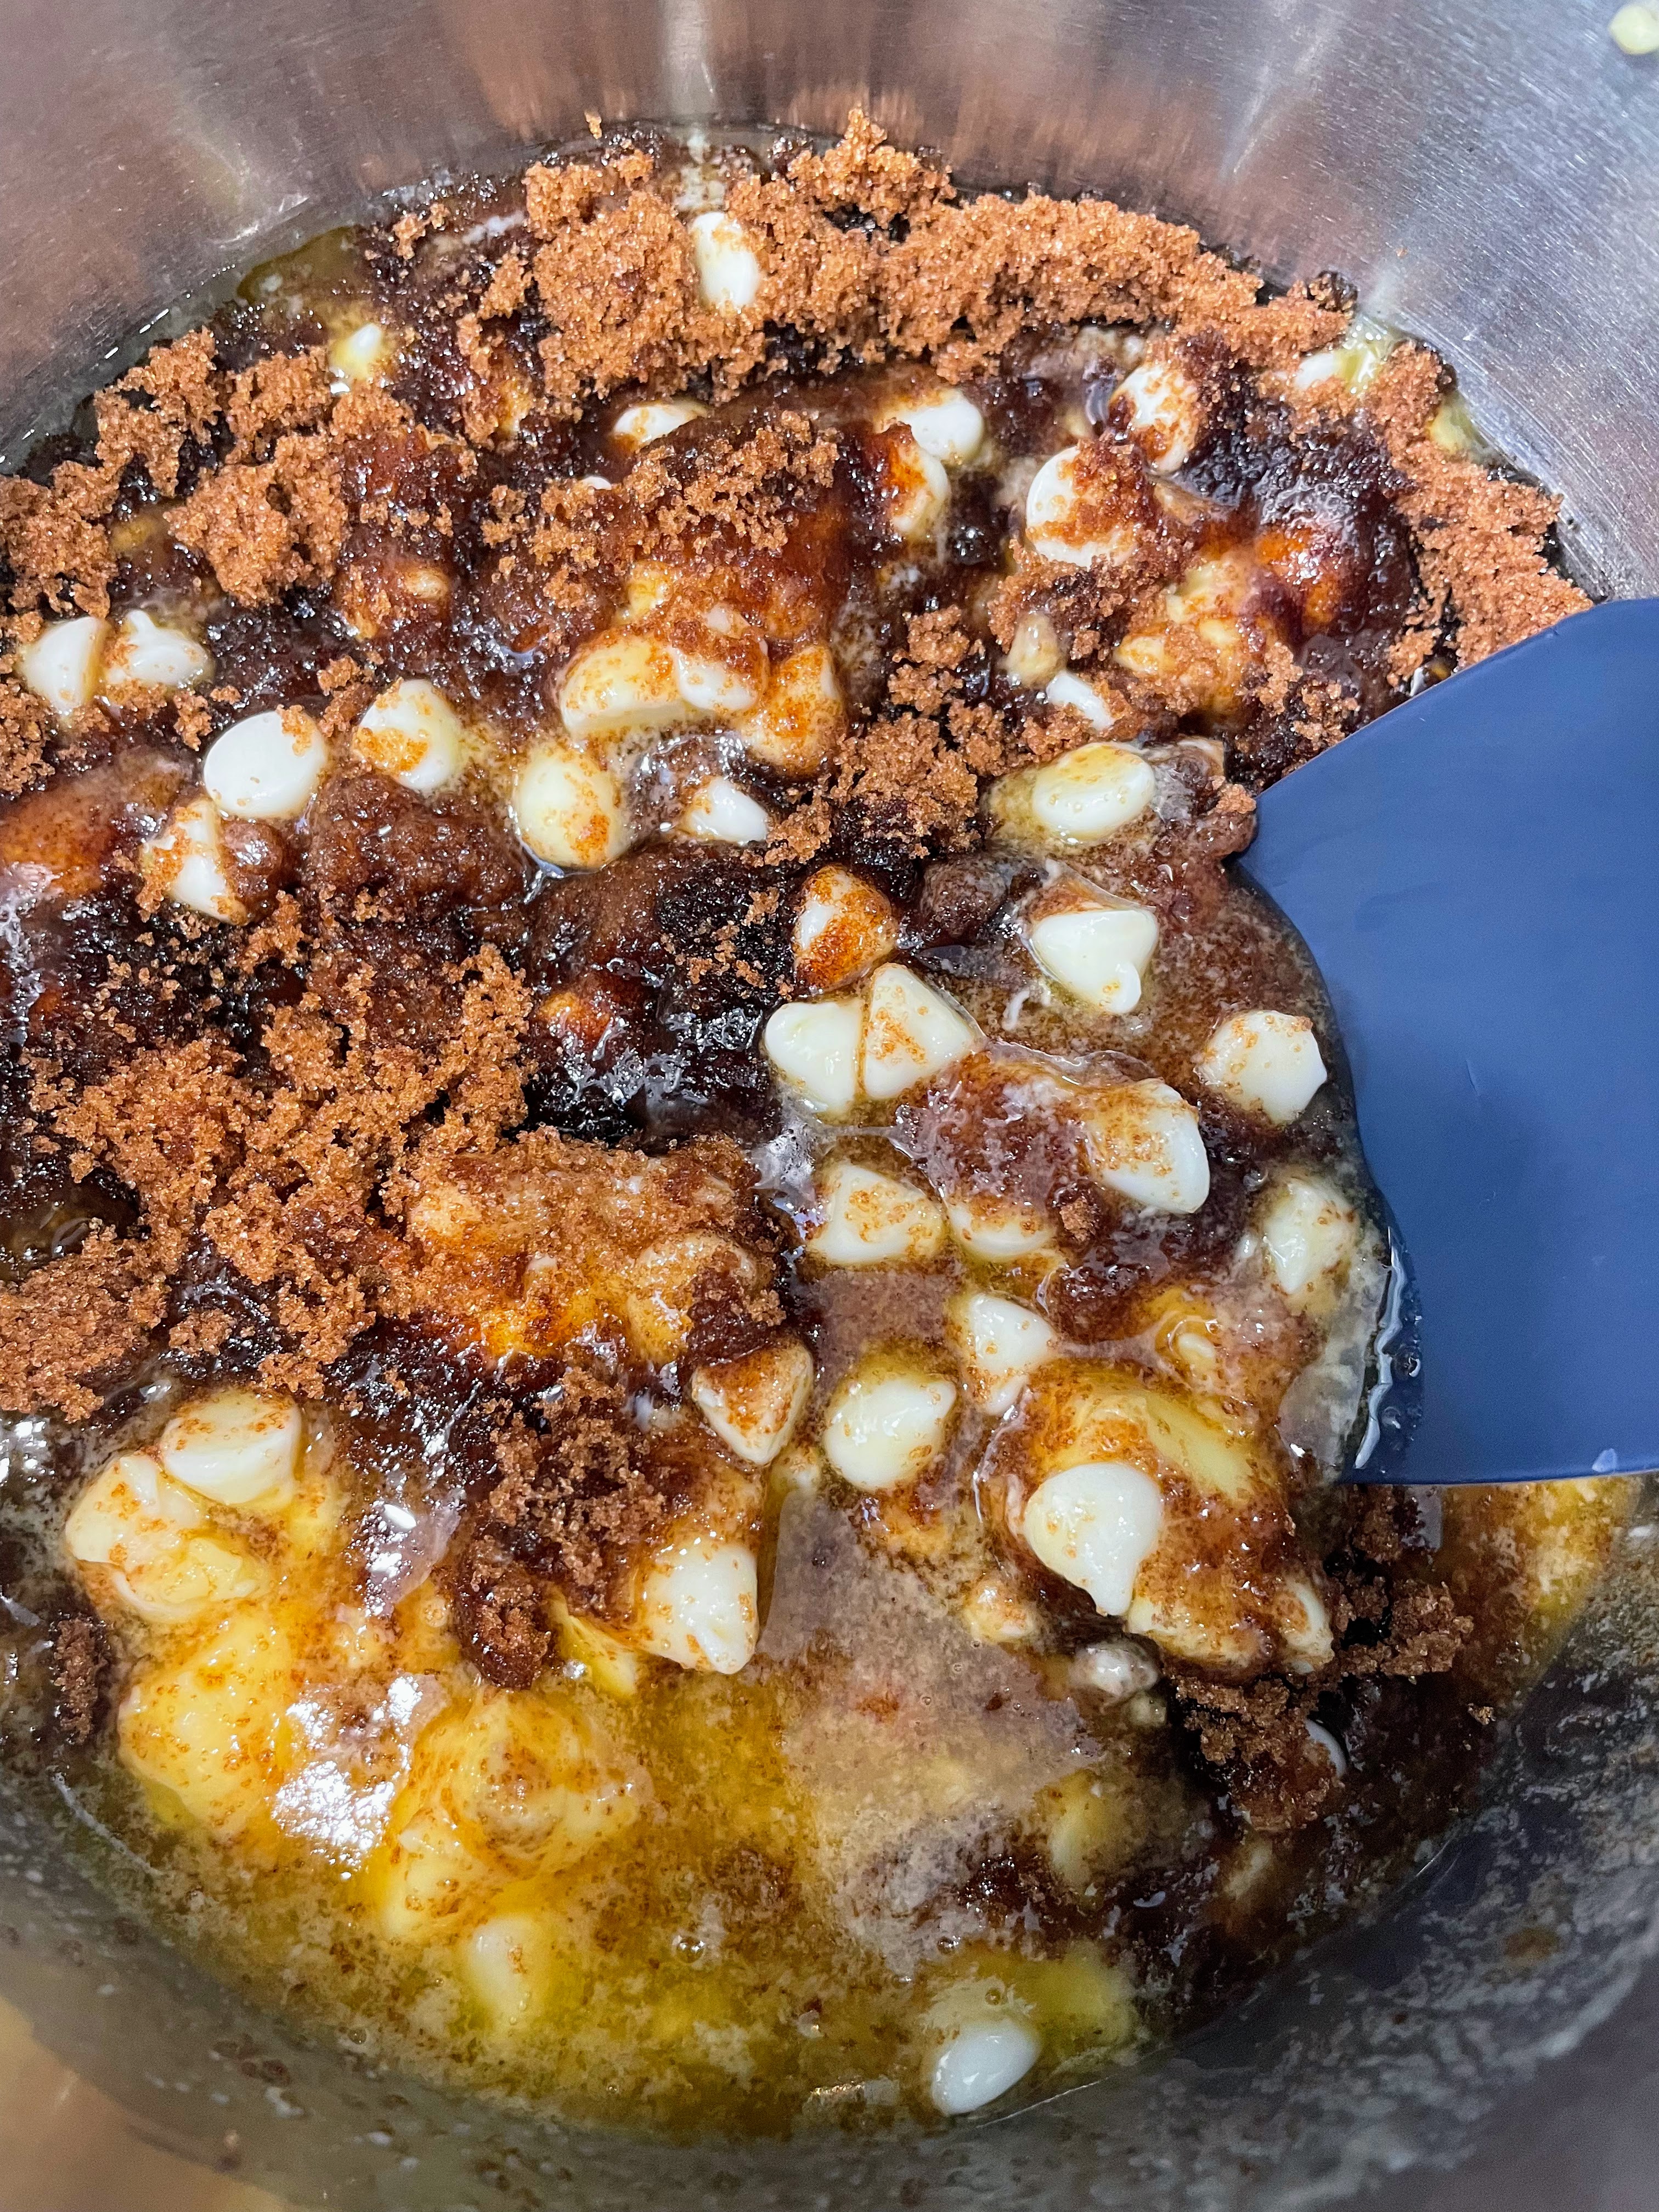
Mud Cake Melted butter, to grease 200 gr (7 oz) butter, cubed 200 gr (7 oz) white chocolate chips 200 gr (7 oz) dark brown sugar 180 ml (3/4 cup) hot water (or milk; can also sub in a little whiskey for a boozier cake) 1 tbsp golden syrup, maple syrup, or dark corn syrup 1 tbsp vanilla 2 eggs, at room temperature 150 gr (1 cup) all-purpose flour 150 gr (1 cup) self-raising flour [= 1 cup all-purpose flour + 1 tsp baking powder + ½ tsp salt + ¼ tsp baking soda]
Preparation
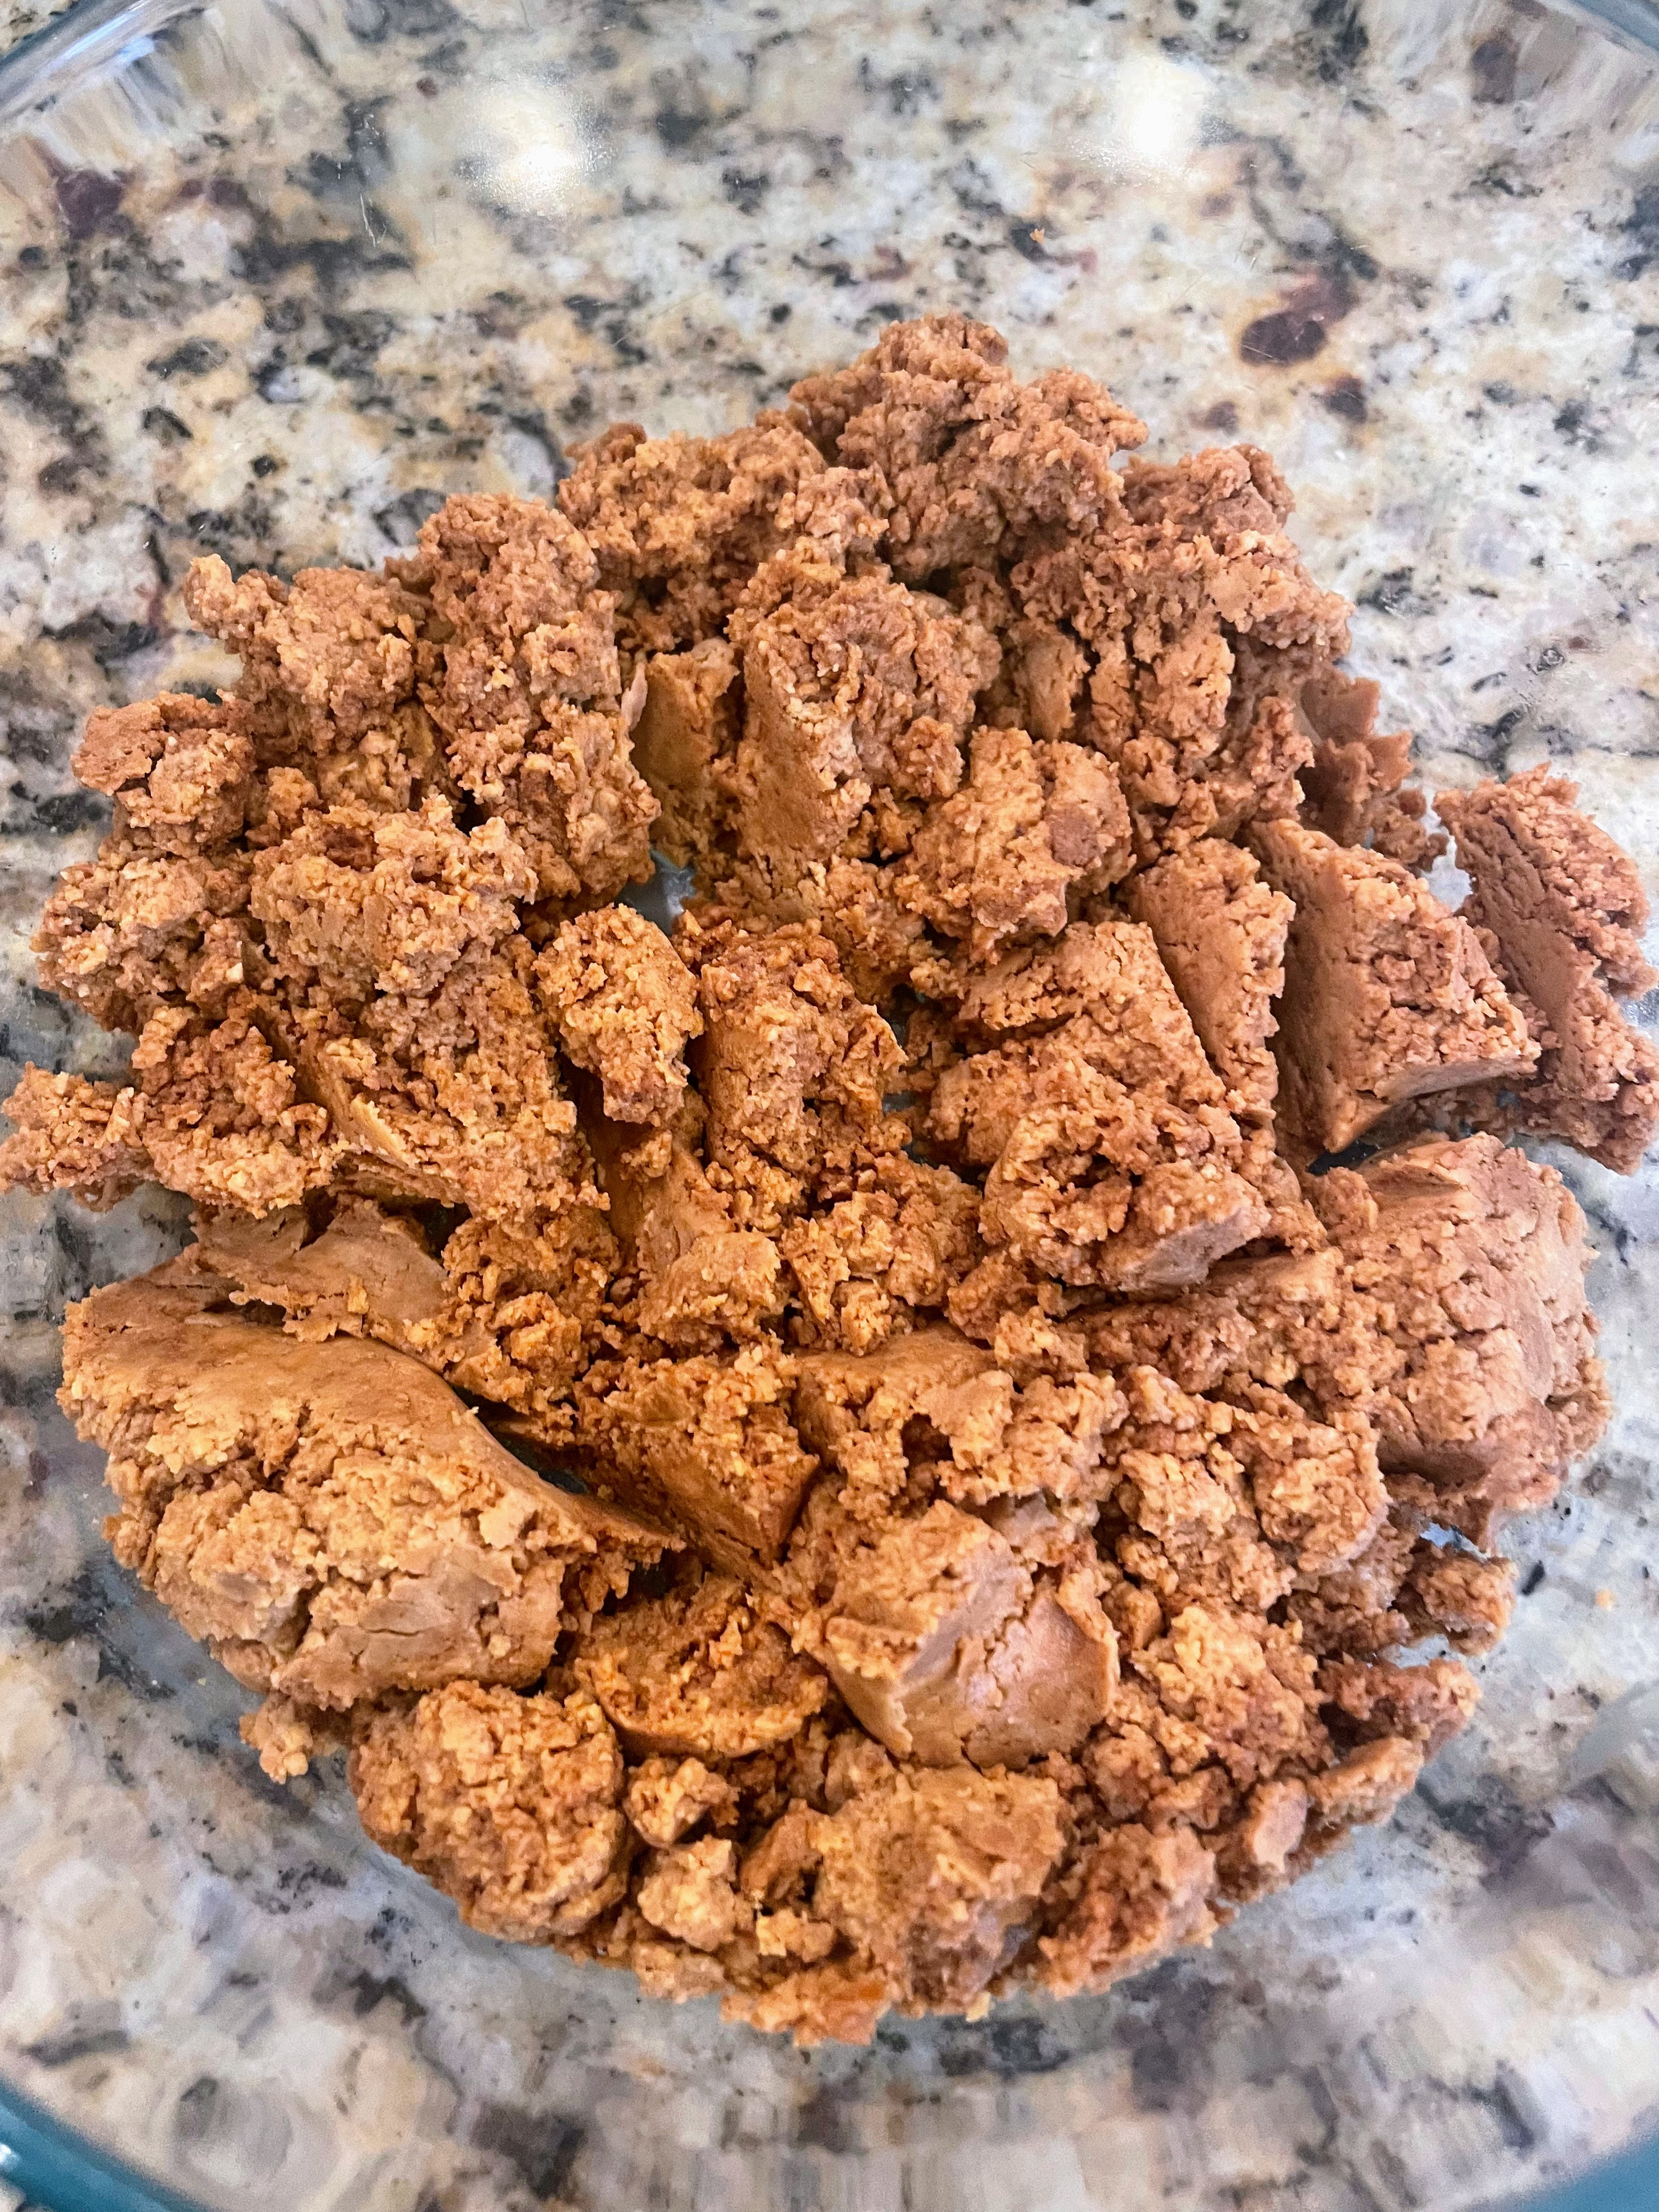
Ganache 1. Preheat oven to 180C/350F. Scatter chocolate evenly over base of a shallow baking dish/cake tin and bake for about 15-20 minutes, stirring a few times with a rubber spatula, until caramel in colour (the chocolate will be crumbly, and will slowly change color; keep stirring and baking until it is a rich chocolate brown).
2. Transfer to a large bowl. Bring cream almost to the boil in a small saucepan and pour over chocolate. Mix until semi incorporated, then blend with an immersion blender until smooth.
3. Cover and refrigerate for 30 minutes, stirring occasionally, or until ganache is of a spreadable consistency.
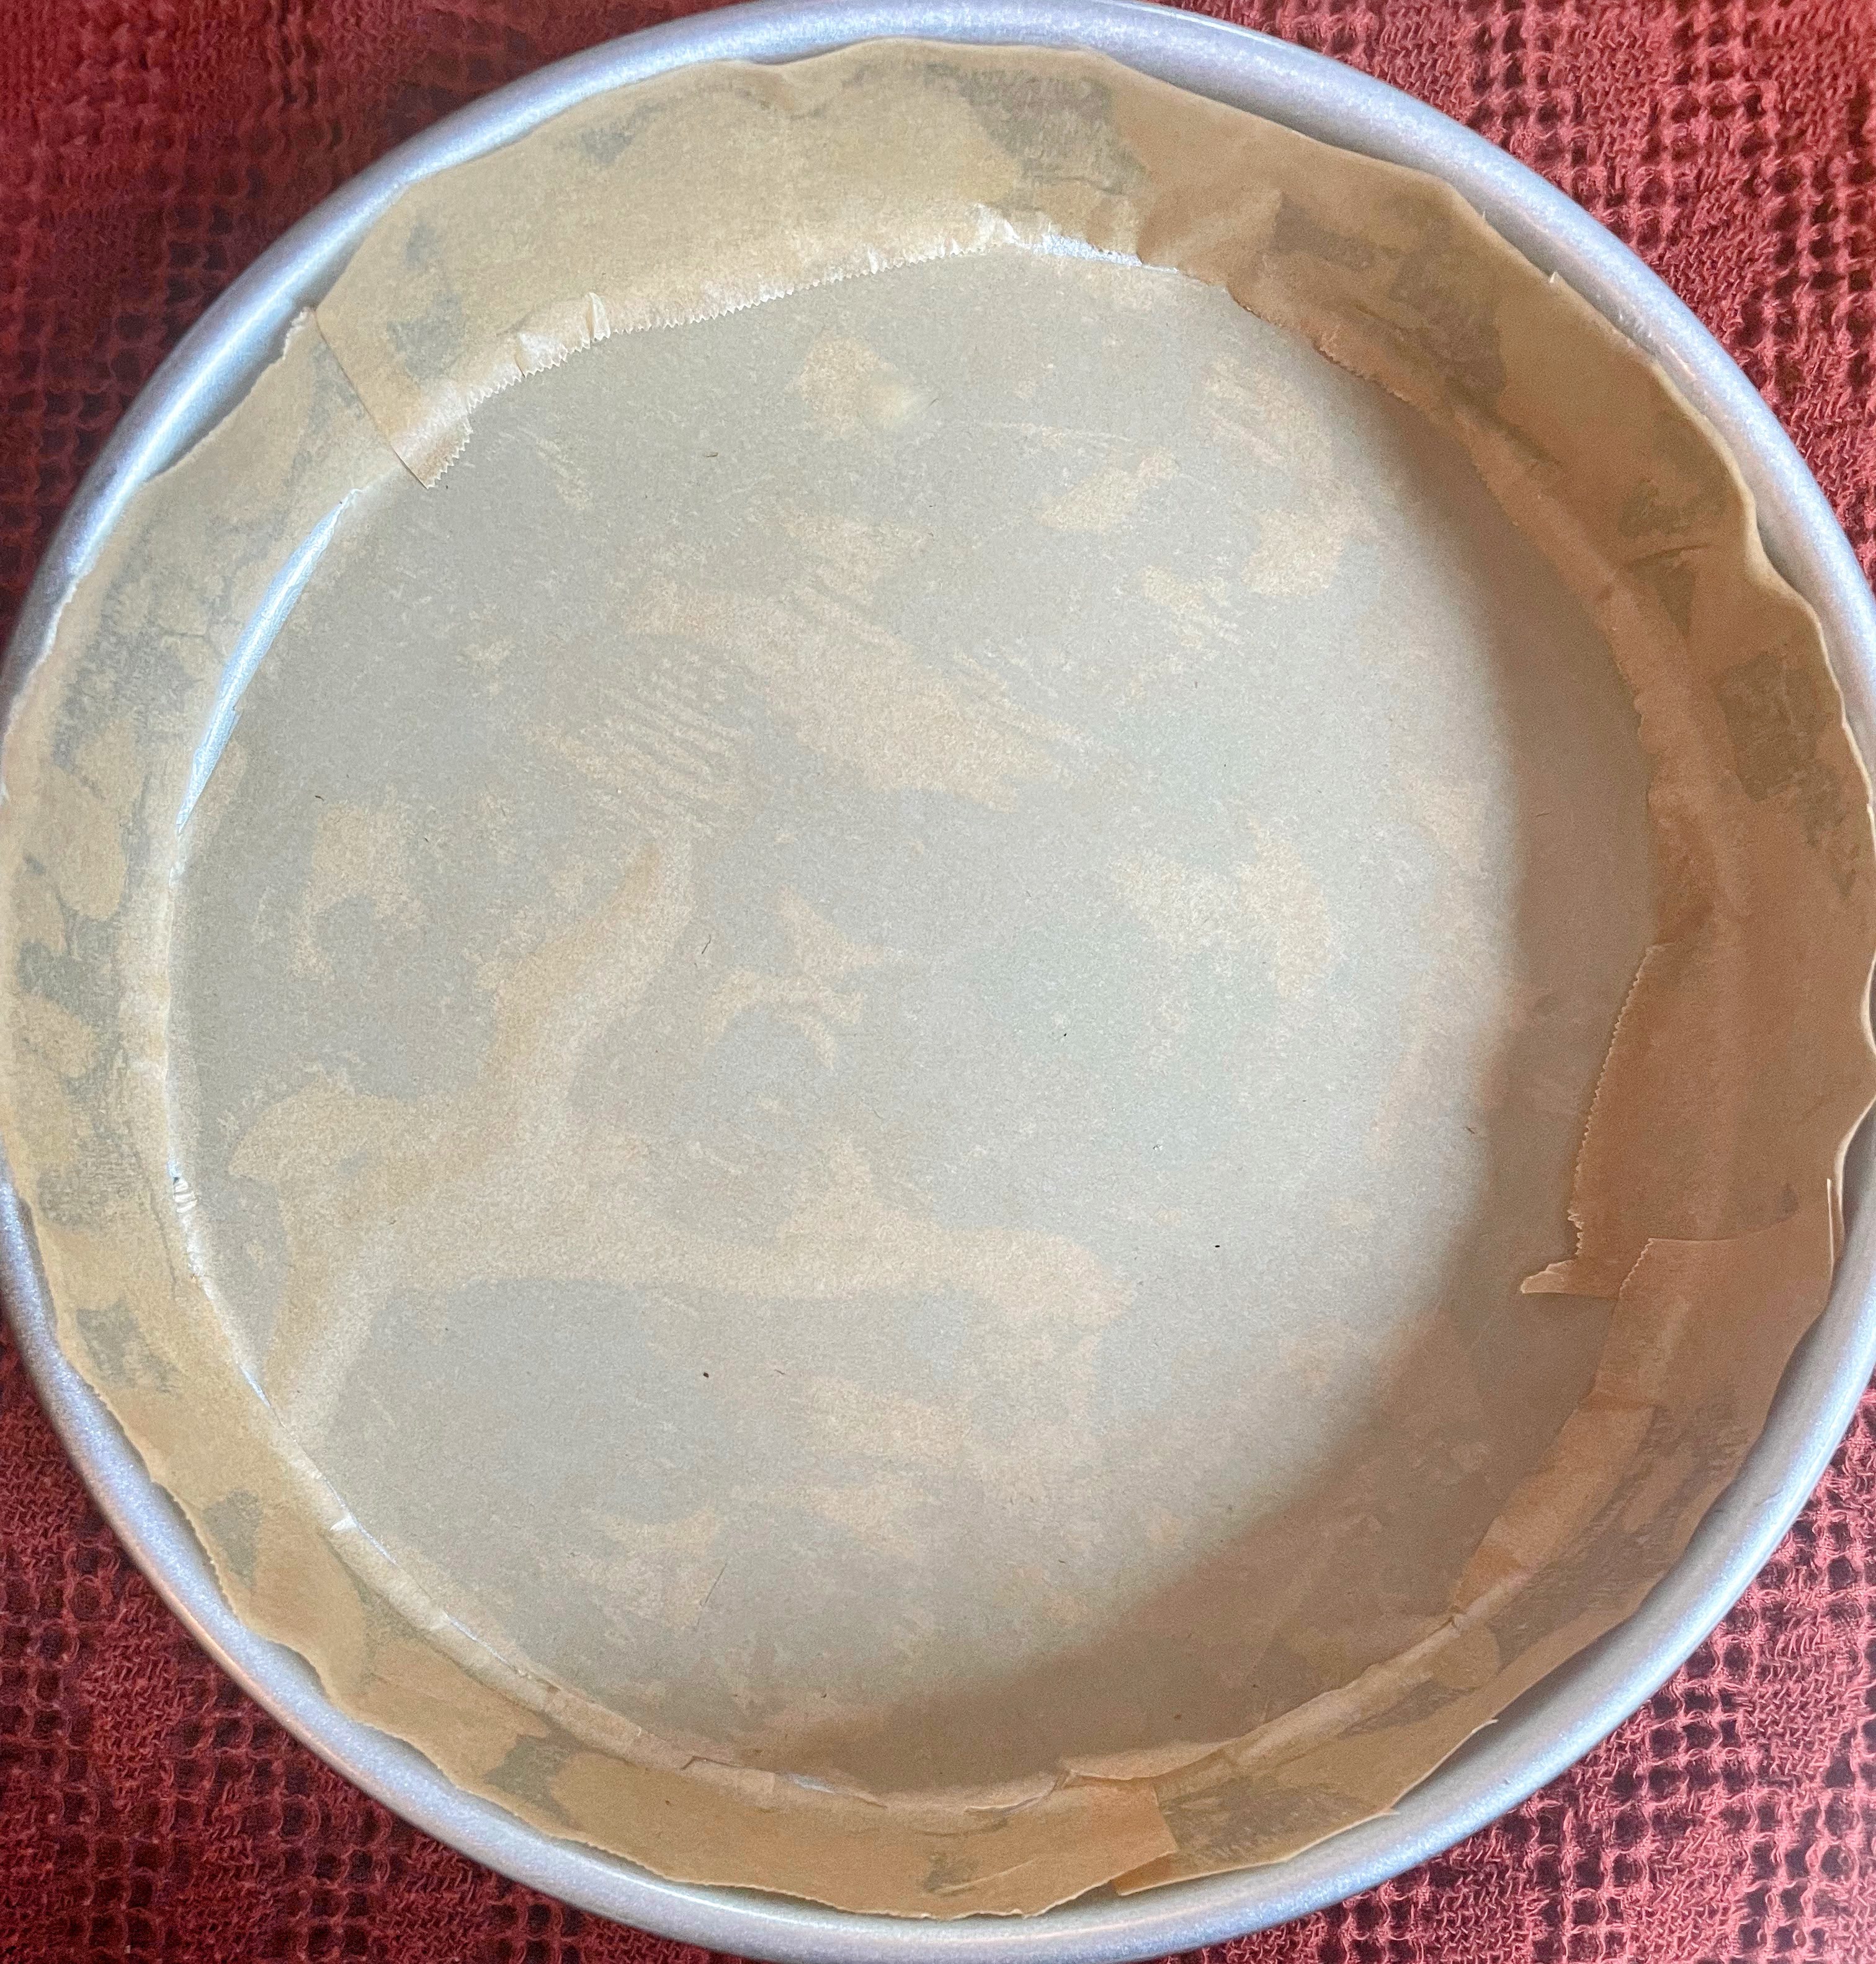
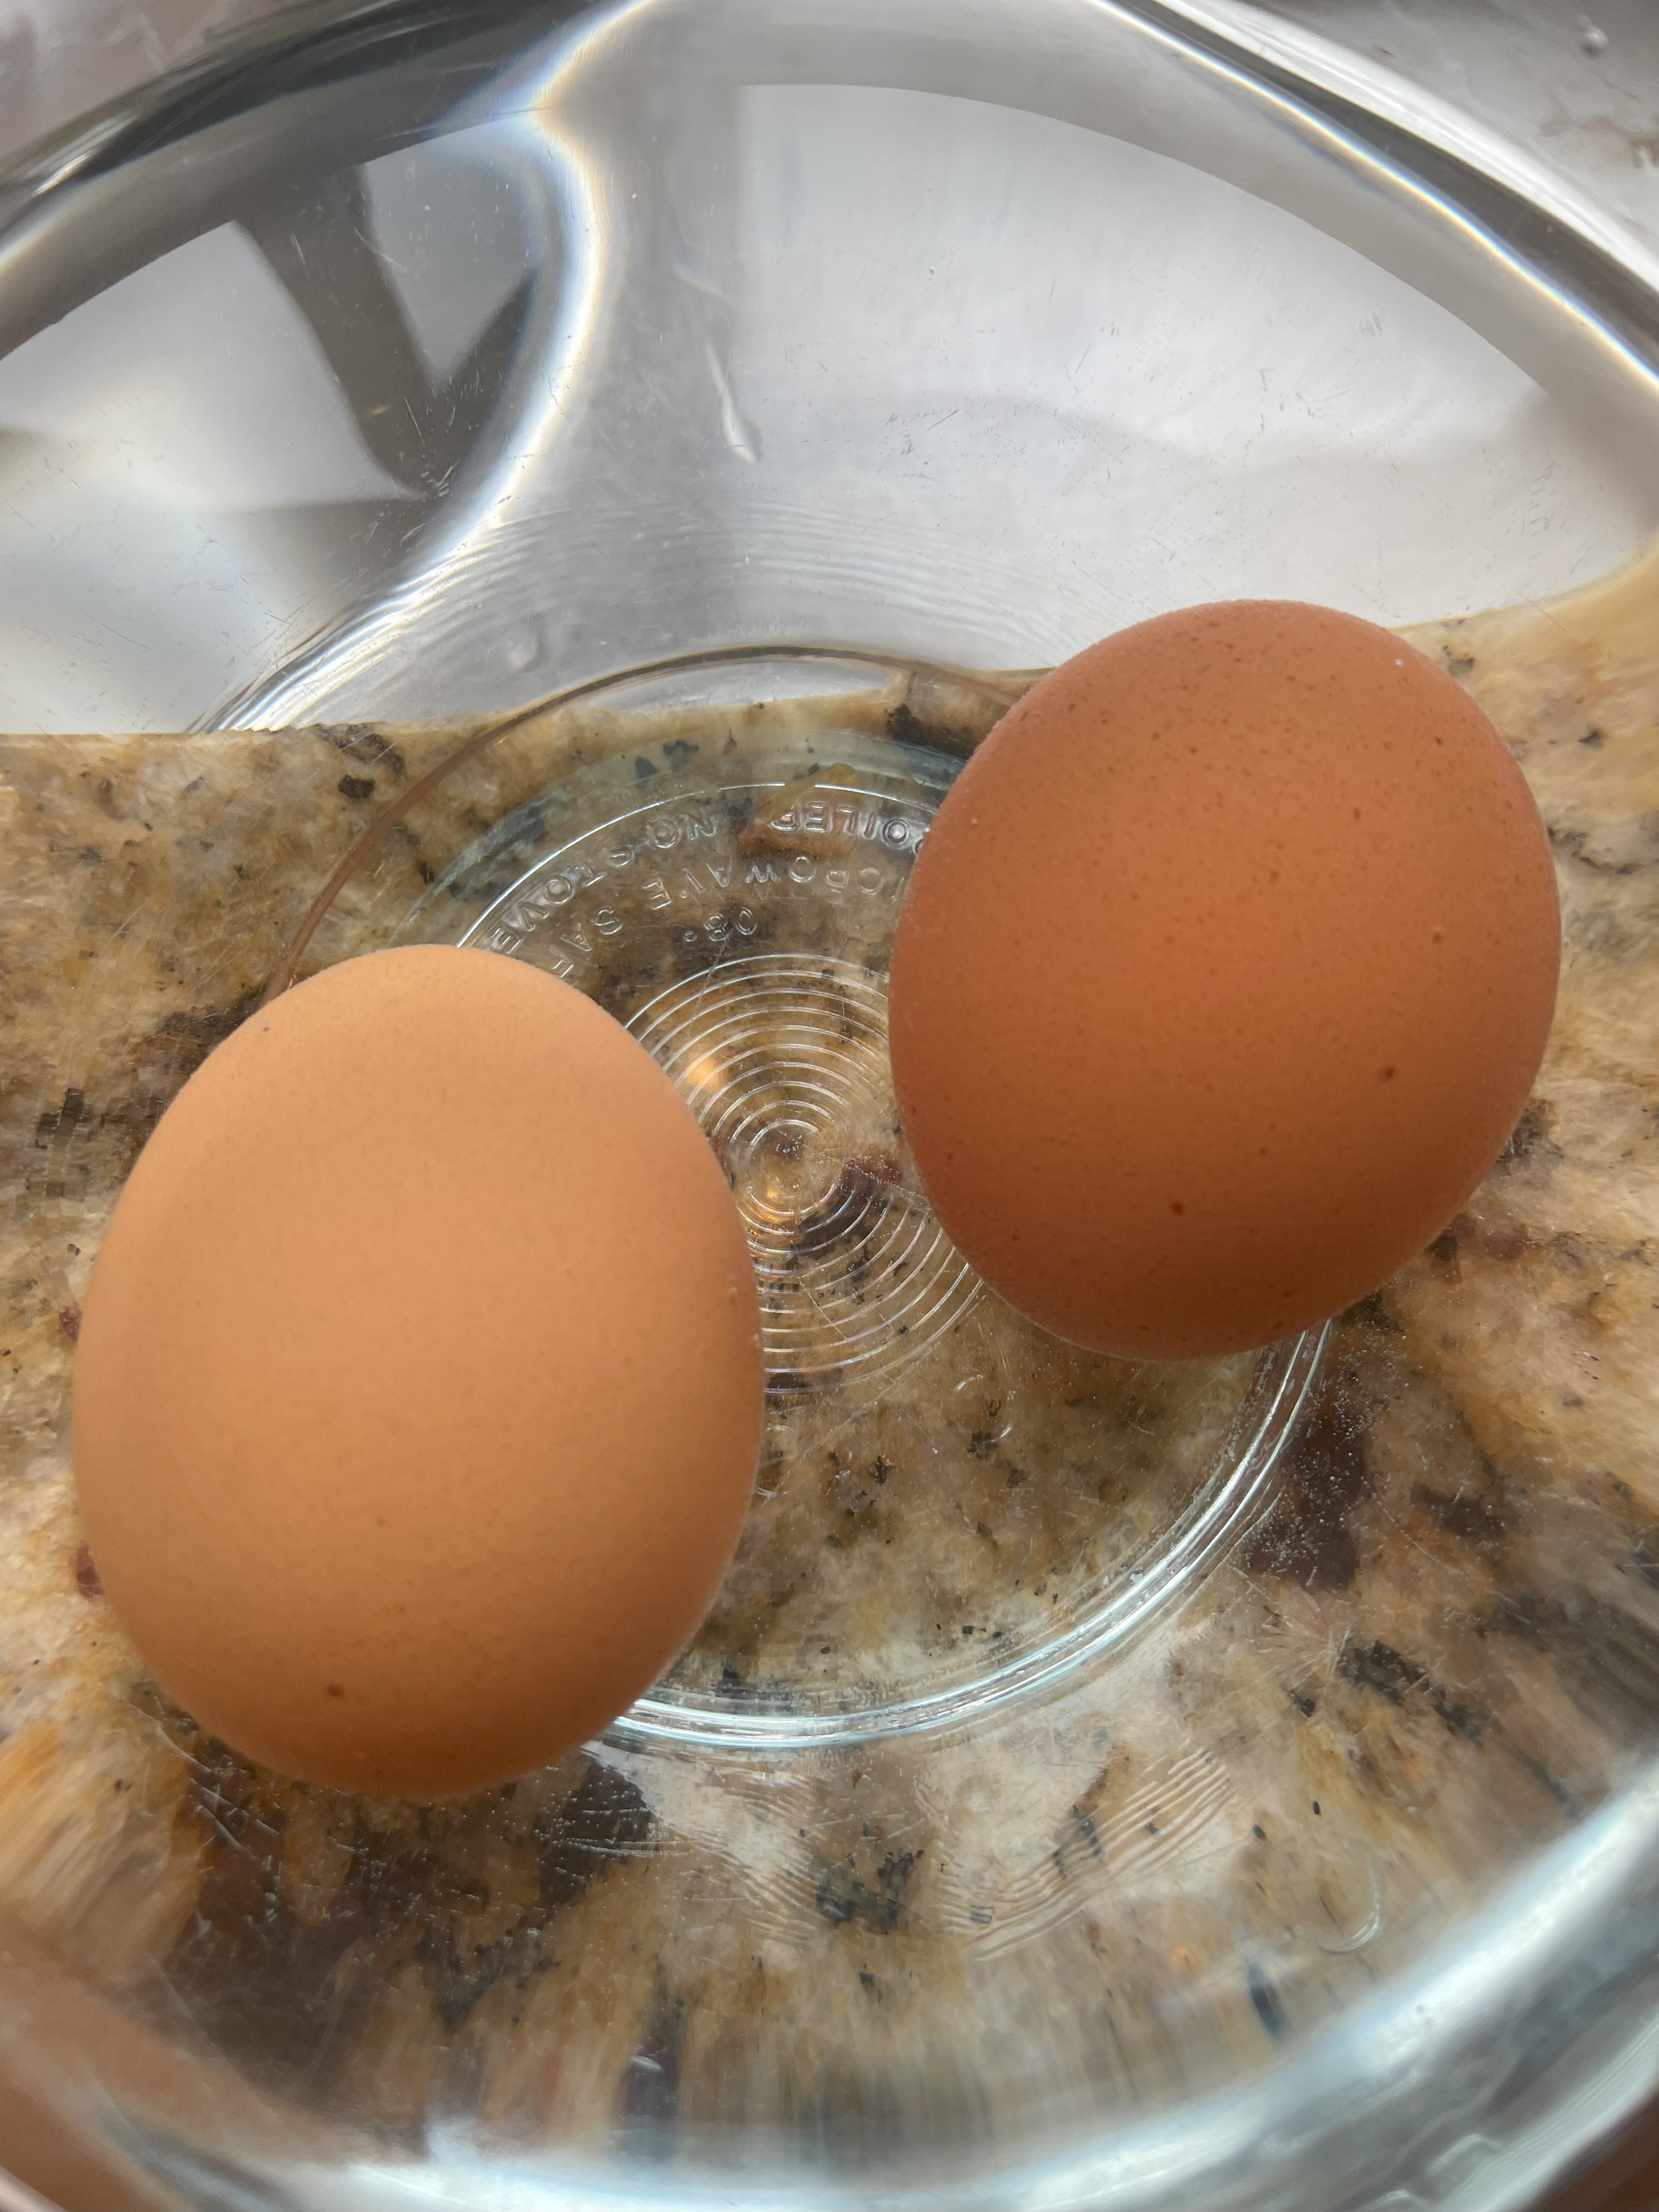
Mud Cake 1. Preheat oven to 160C (320F). Brush a round 22 cm (8-9 inch) cake pan with melted butter. Line base and sides with parchment paper, then spray the paper with baking spray or gently brush more melted butter over. [Note: If you forgot to take your eggs out earlier, you can let them sit in some hot water while you get the cake tin and the rest of the batter ready.]
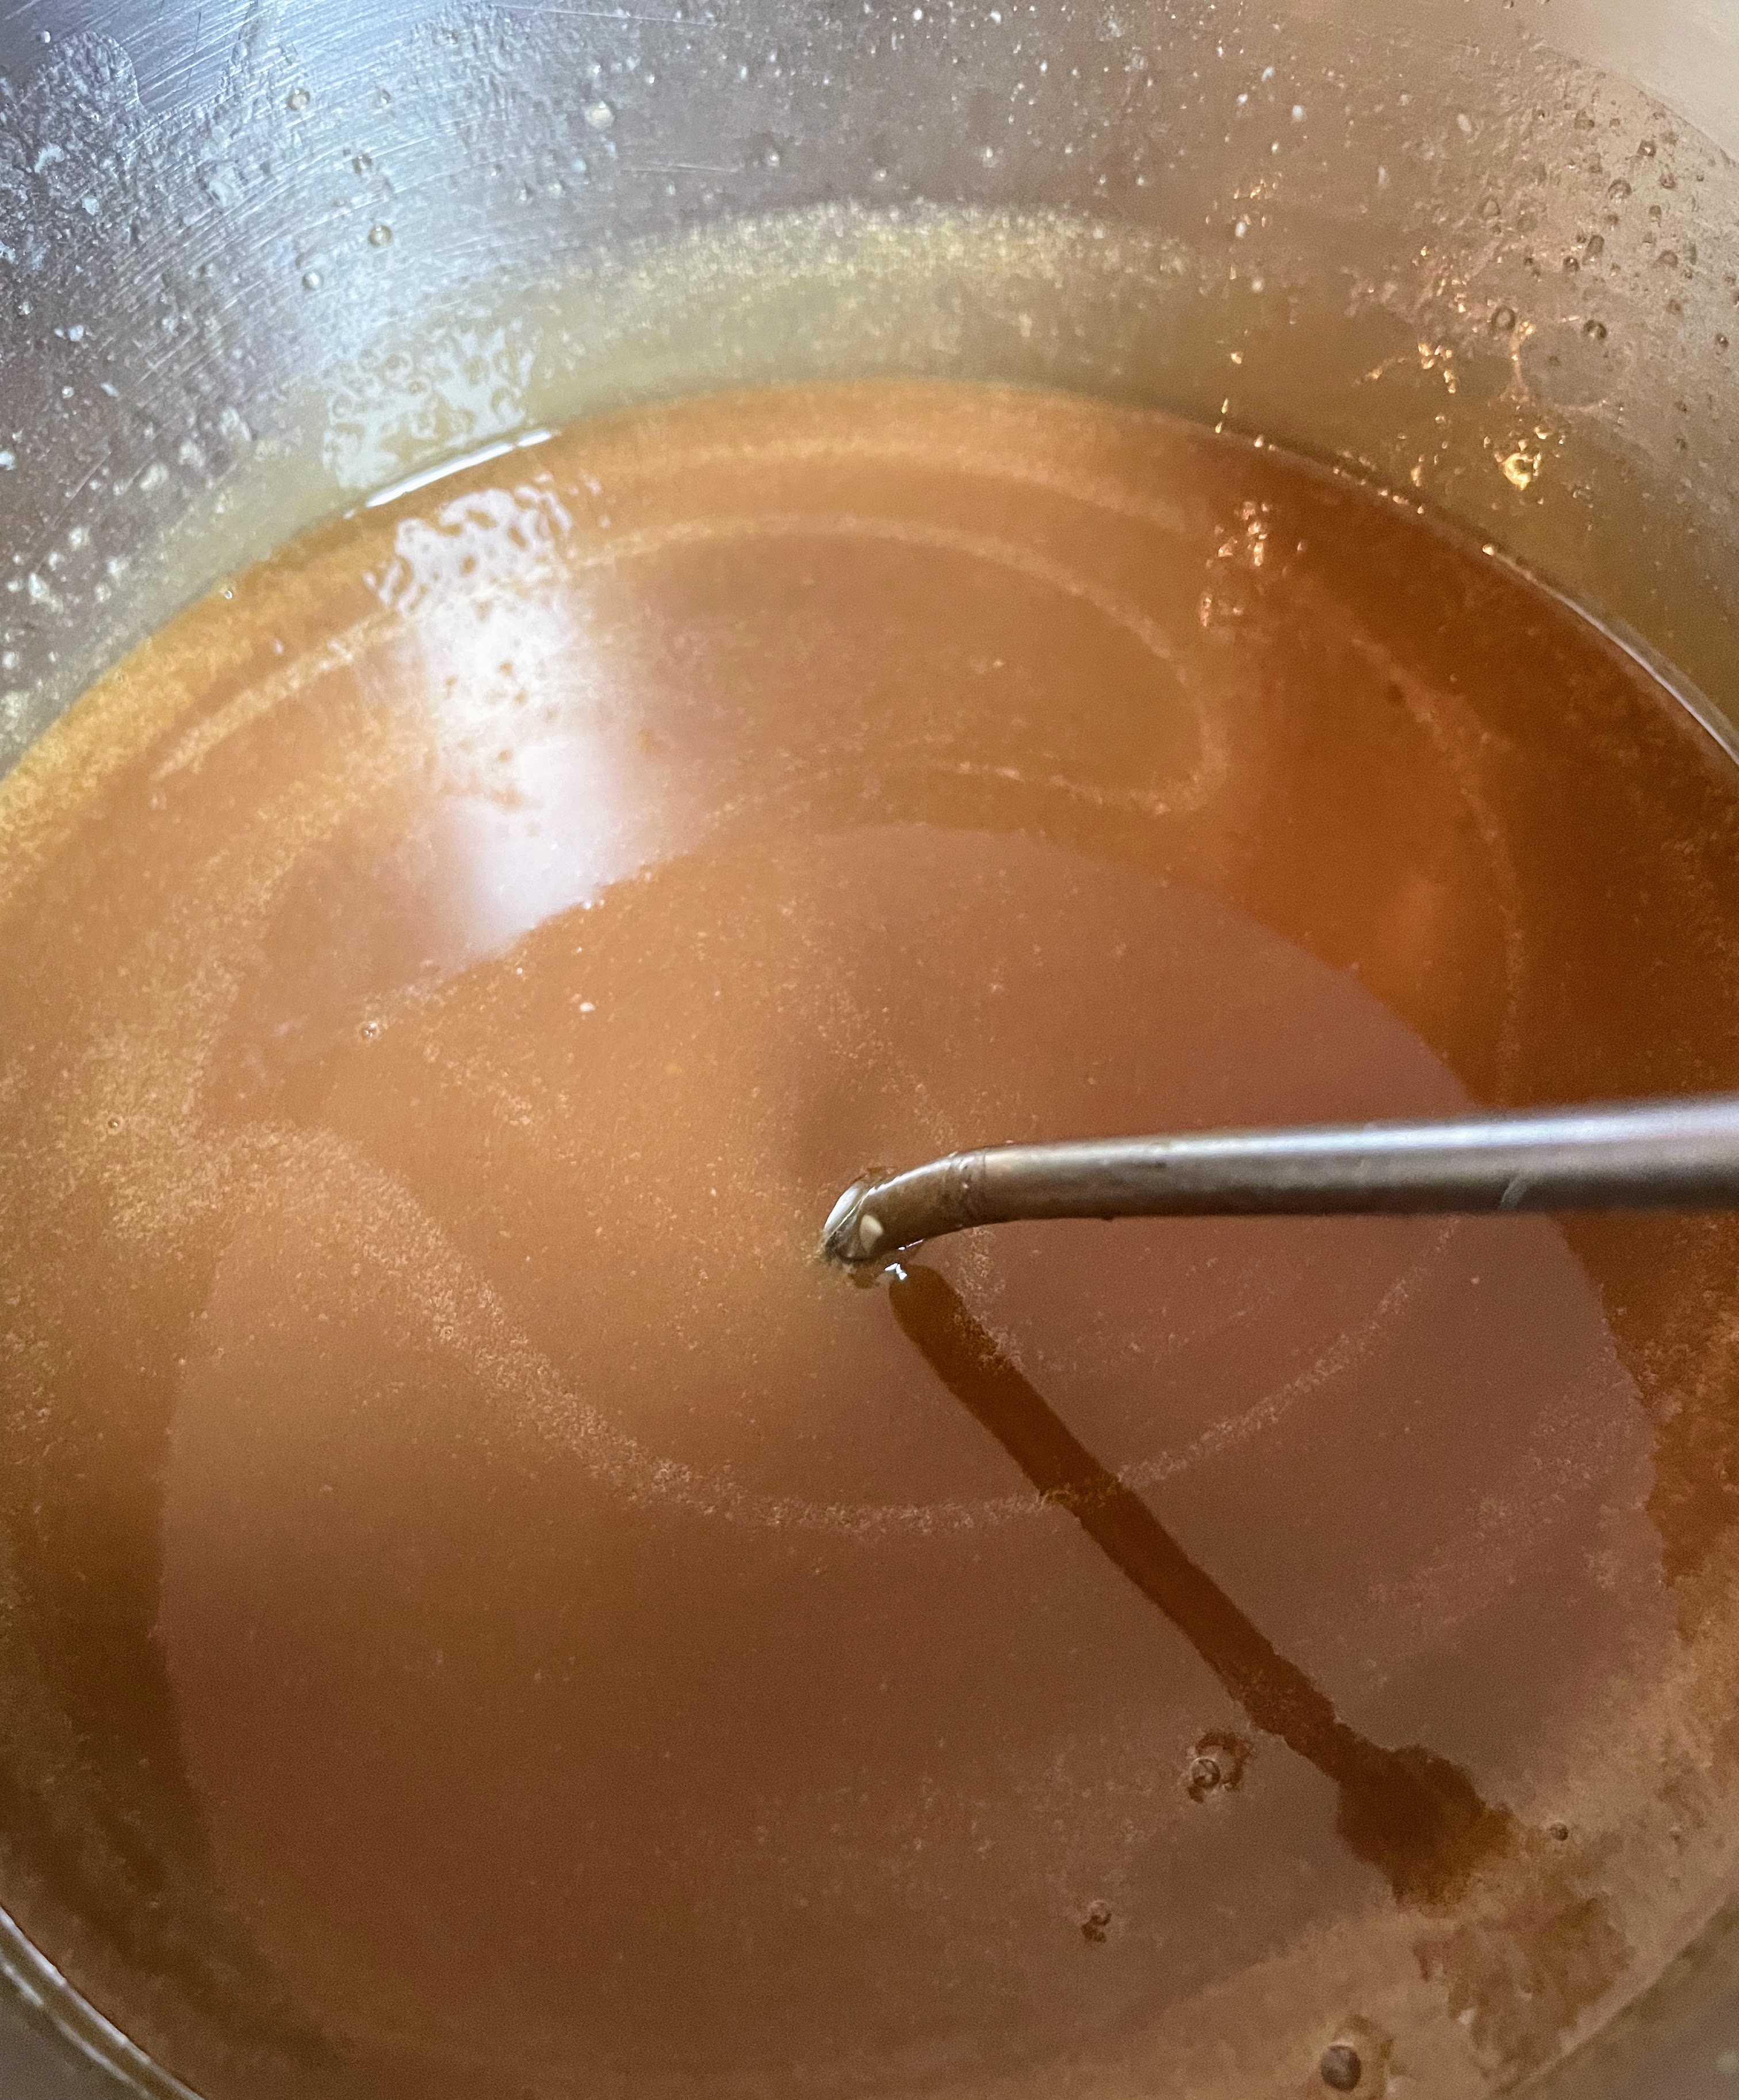
2. Place butter, white chocolate, sugar, water, syrup, and vanilla in a heavy-based saucepan. Stir over medium-low heat for 5 minutes or until white chocolate melts and mixture is smooth. Set mixture aside for 20 minutes to cool.
3. Add eggs to white chocolate mixture in saucepan, one at a time, beating well after each addition. Sift in the flours (plus the extra ingredients if you don’t have self-raising flour) and stir until well combined.
4. Pour mixture into pan and bake in preheated oven for 50 mins or until a skewer comes out almost clean. Let cake sit for 20 mins before turning onto a wire rack to cool. Frost with ganache and enjoy! (Or, refrigerate, covered, for up to three days; let come to room temperature before serving.)
Like many others, I first learned about Kouign-Amann from watching the Great British Bake Off (Great British Baking Show), marveling at the complexity and apparent deliciousness of this pastry from Brittany. Then I tasted some in San Francisco and Berkeley while visiting my son, daughter-in-law, and daughter — and became a convert. Kouign-Amann is a crispy, buttery, salty/sweet confection that is worth every moment of a weekend day (or two) to make — especially when, as is currently the case for me, there are no such pastries to be had nearby. I start thinking about them in winter when it is harder to be out and about and when the weather lends itself to baking. These pastries are perfect with a cup of coffee or tea as you settle into a cozy inside spot while reading one of the Brittany-based Commissaire Dupin mysteries.
This excellent recipe is from Brown Eyed Baker, though I reduced the sugar slightly and included cinnamon and chocolate chips as optional ingredients. Neither of those are traditional, but each lends something to the pastries. The original version is absolutely delicious, too. Finally, these kouign-amann are individual sized, whereas in Brittany the pastry is more traditionally made in the shape of a caramelized, crispy cake that is meant to be sliced.
Kouign-Amann Makes 12
For the Dough: 1 c. (240 ml.) water, at room temperature 2 tsp. (3.2 gr.) instant yeast 2.5 c. (355 gr.) all-purpose flour 1 tsp. sea salt
For the Butter Block: 8 oz. (227 gr.) salted butter, chilled and cubed
For the Pastries: 1 1/3 cup (267 gr.) granulated white sugar, divided 1 tsp. (2.6 gr.) cinnamon (optional) dark chocolate chips (optional)
Directions
Make the Dough: Combine the water and yeast in the bowl of a stand mixer (or a mixing bowl, if kneading by hand). Add the flour and the salt. Stir with a wooden spoon until a shaggy dough is formed.
Fit the mixer with a dough hook attachment and knead the dough at low speed until the dough is slightly tacky but smooth, 3 to 5 minutes. If the dough sticks to the sides of the bowl, add 1 tablespoon of flour at a time and knead until the dough is smooth. If the dough feels very stiff and dry, add 1 tablespoon of water at a time and knead until the dough is smooth.
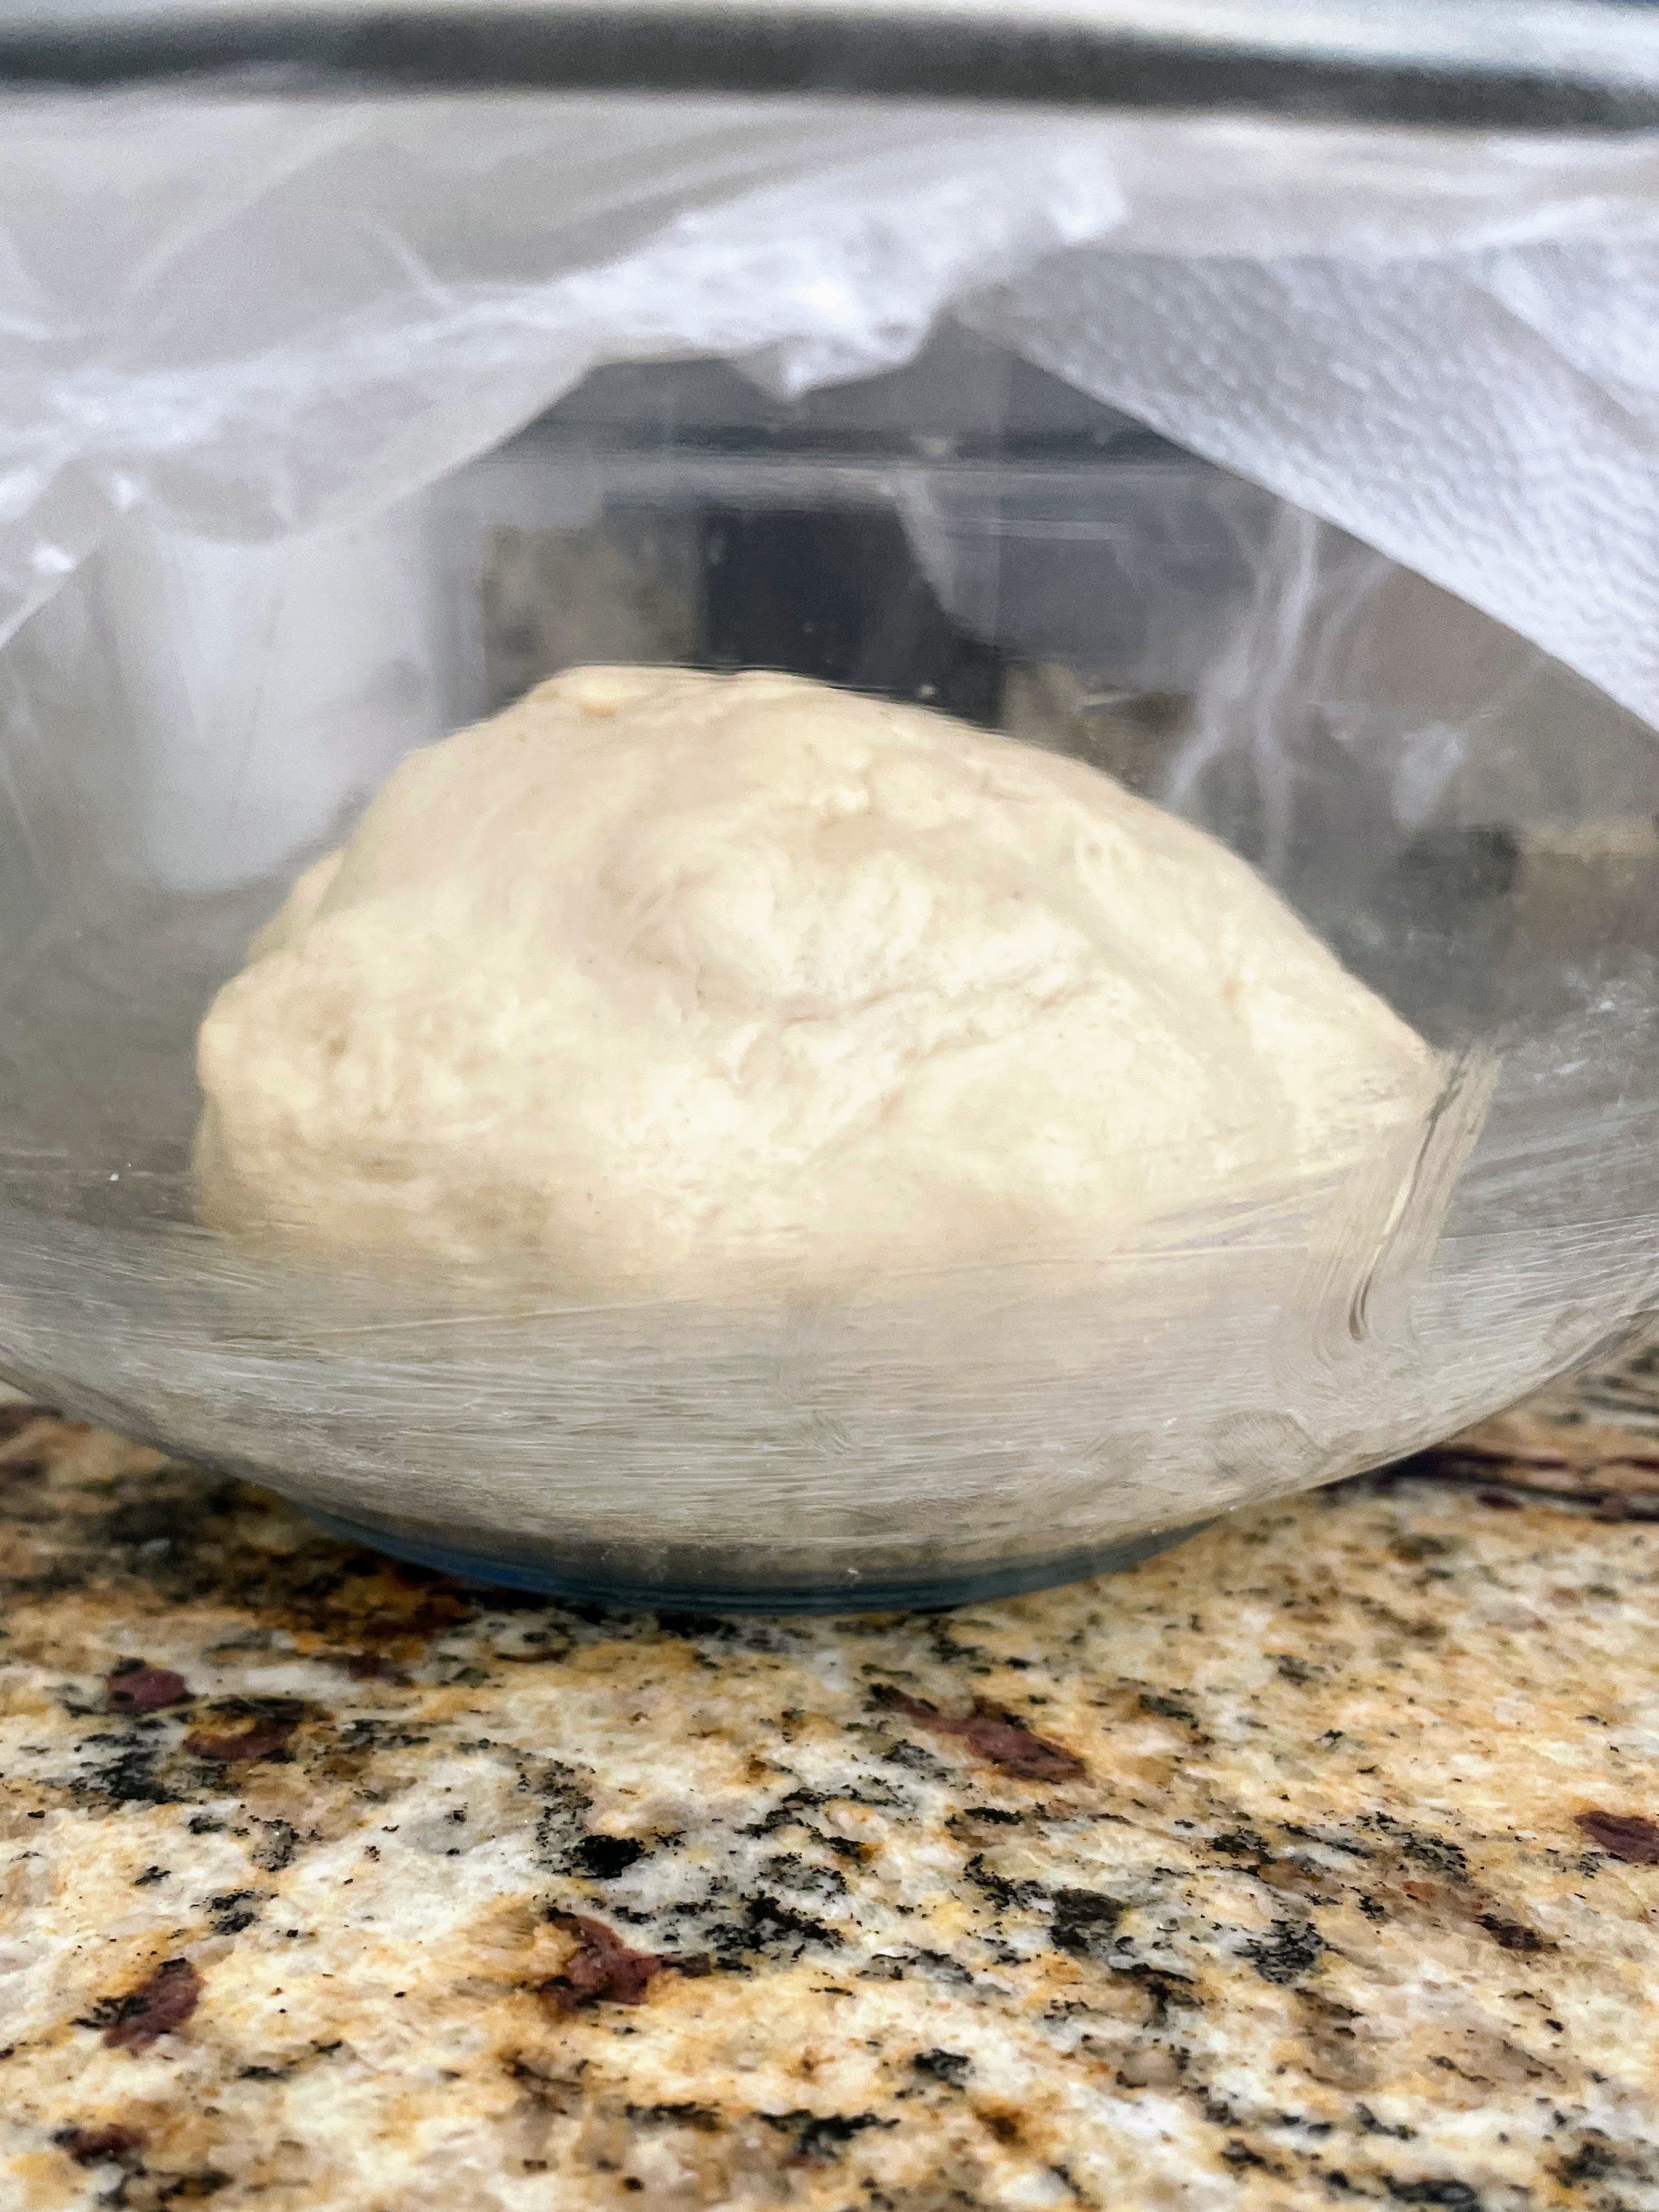
Transfer the dough to a clean bowl that has been lightly greased with butter, turning the dough to coat it with butter. Cover the mixing bowl with plastic wrap and let the dough rise until doubled in size, about 1 hour. Once the dough has doubled in size, place it in the refrigerator for at least 30 minutes.
MAKE-AHEAD NOTE1: At this point, you can refrigerate the dough overnight, then proceed with the recipe.
Make the Butter Block: Beat the butter on low speed until it’s smooth, about 3 minutes, scraping the beater and bowl as needed to break up the cubes. Turn the butter out onto a piece of parchment paper and shape into a rectangle about 6 x 10 in. (15 x 25 cm.). Wrap the butter in the parchment paper, pressing out any air. Gently roll a rolling pin over the butter packet, pushing the butter into the corners to create a perfect rectangle with even thickness. Refrigerate until firm yet still pliable, about 25 to 30 minutes.
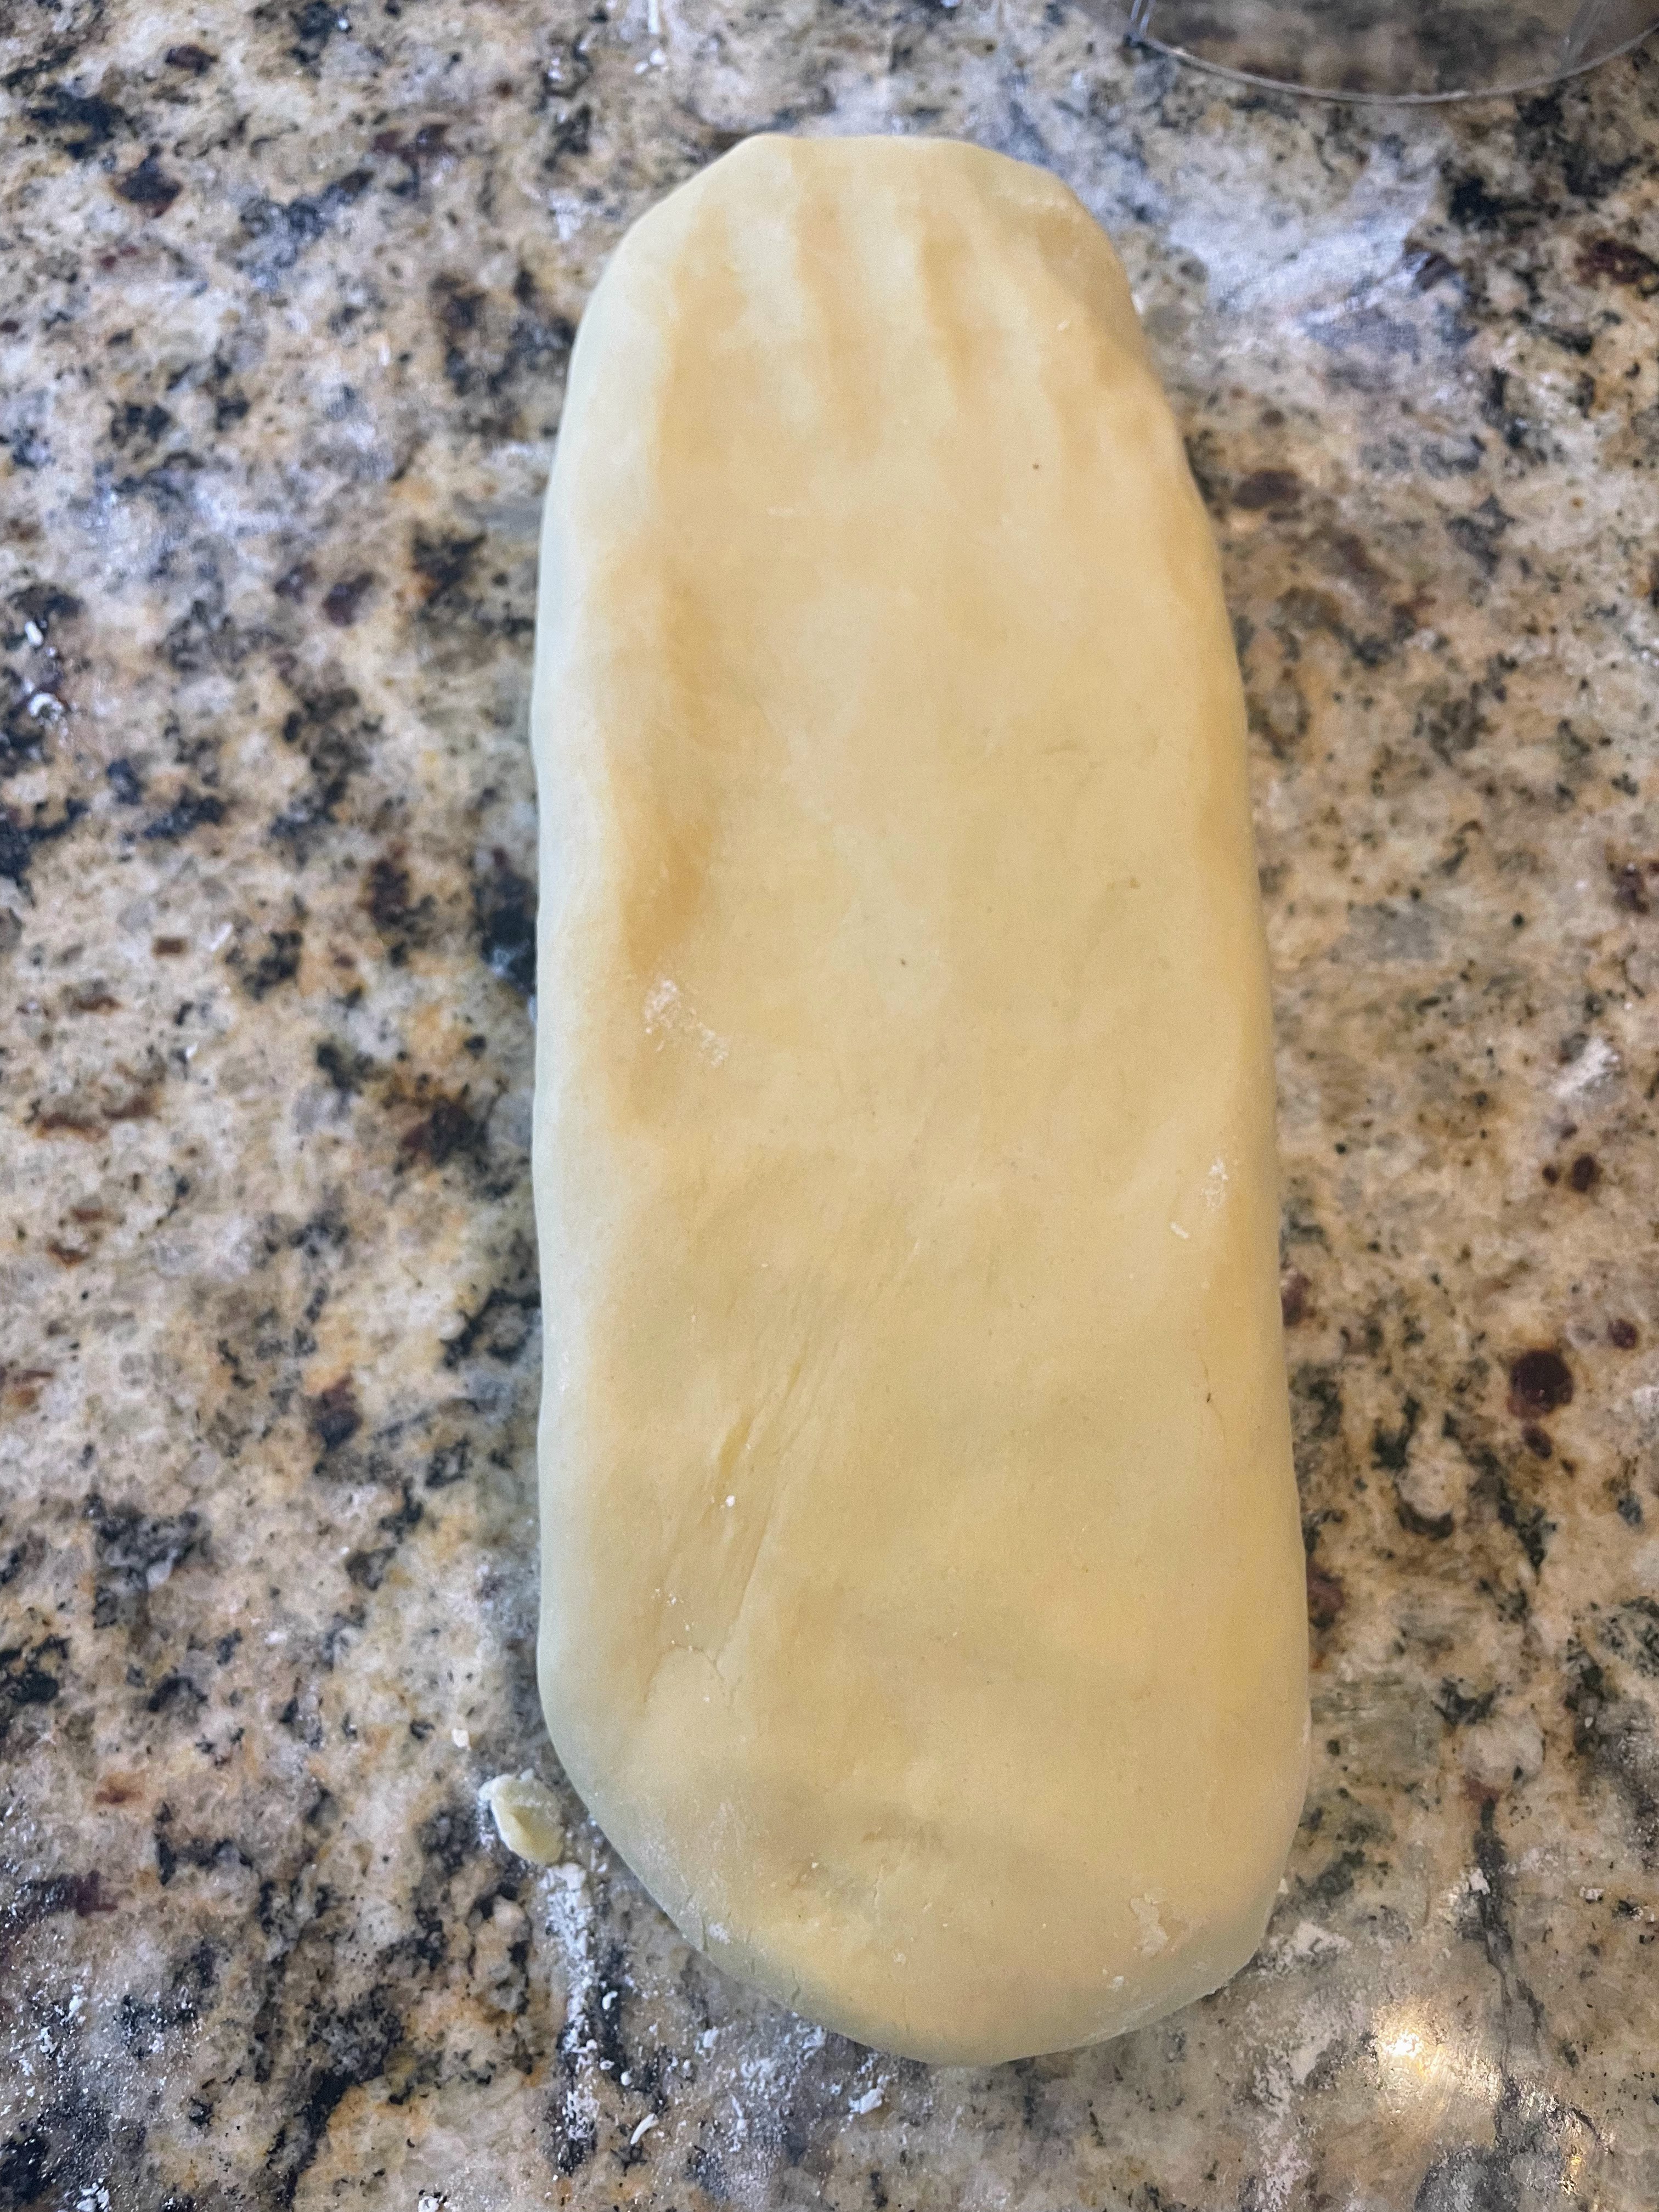
Roll out the Dough: Place the chilled dough onto a floured work surface and roll into a rectangle 12 in. wide x 20 in. long (30 x 50 cm.). Remove the butter from the refrigerator and place it in the middle of the dough. Fold one half of the dough over the butter, then fold the other half on top, like folding a letter. Roll it out slightly to press the layers together, then fold it again into thirds like a letter.
–Turn #1: Rotate the dough so that the open, narrower edge is facing you. Roll the dough out to a rectangle 12 in. wide x 20 in. long (30 x 50 cm.). Fold the top third down and bottom third up, again like folding a letter. Place the packet of dough on a baking sheet, cover with plastic wrap, and refrigerate for 30 minutes (but not longer as the butter will get too hard).
–Turn #2: Place the unwrapped packet of dough on a floured surface with the open, narrower edge facing you. Roll the dough out to a rectangle 12 in. wide x 20 in. long (30 x 50 cm.). Fold the top third down and bottom third up, again like folding a letter. Place the packet of dough on a baking sheet, cover with plastic wrap, and refrigerate for 30 minutes.
MAKE-AHEAD NOTE 2: At this point, you can wrap the dough in plastic wrap, place in a freezer-safe bag and freeze for up to 2 months. Thaw in the refrigerator overnight, then proceed with the recipe. **If you would only like to make a half batch now (ie, 6 pastries), cut the dough in half, wrap and freeze one half, and proceed with the recipe using the other half. This is my preferred option, as we no longer have a full house of eaters who could polish off 12 pastries in a weekend!
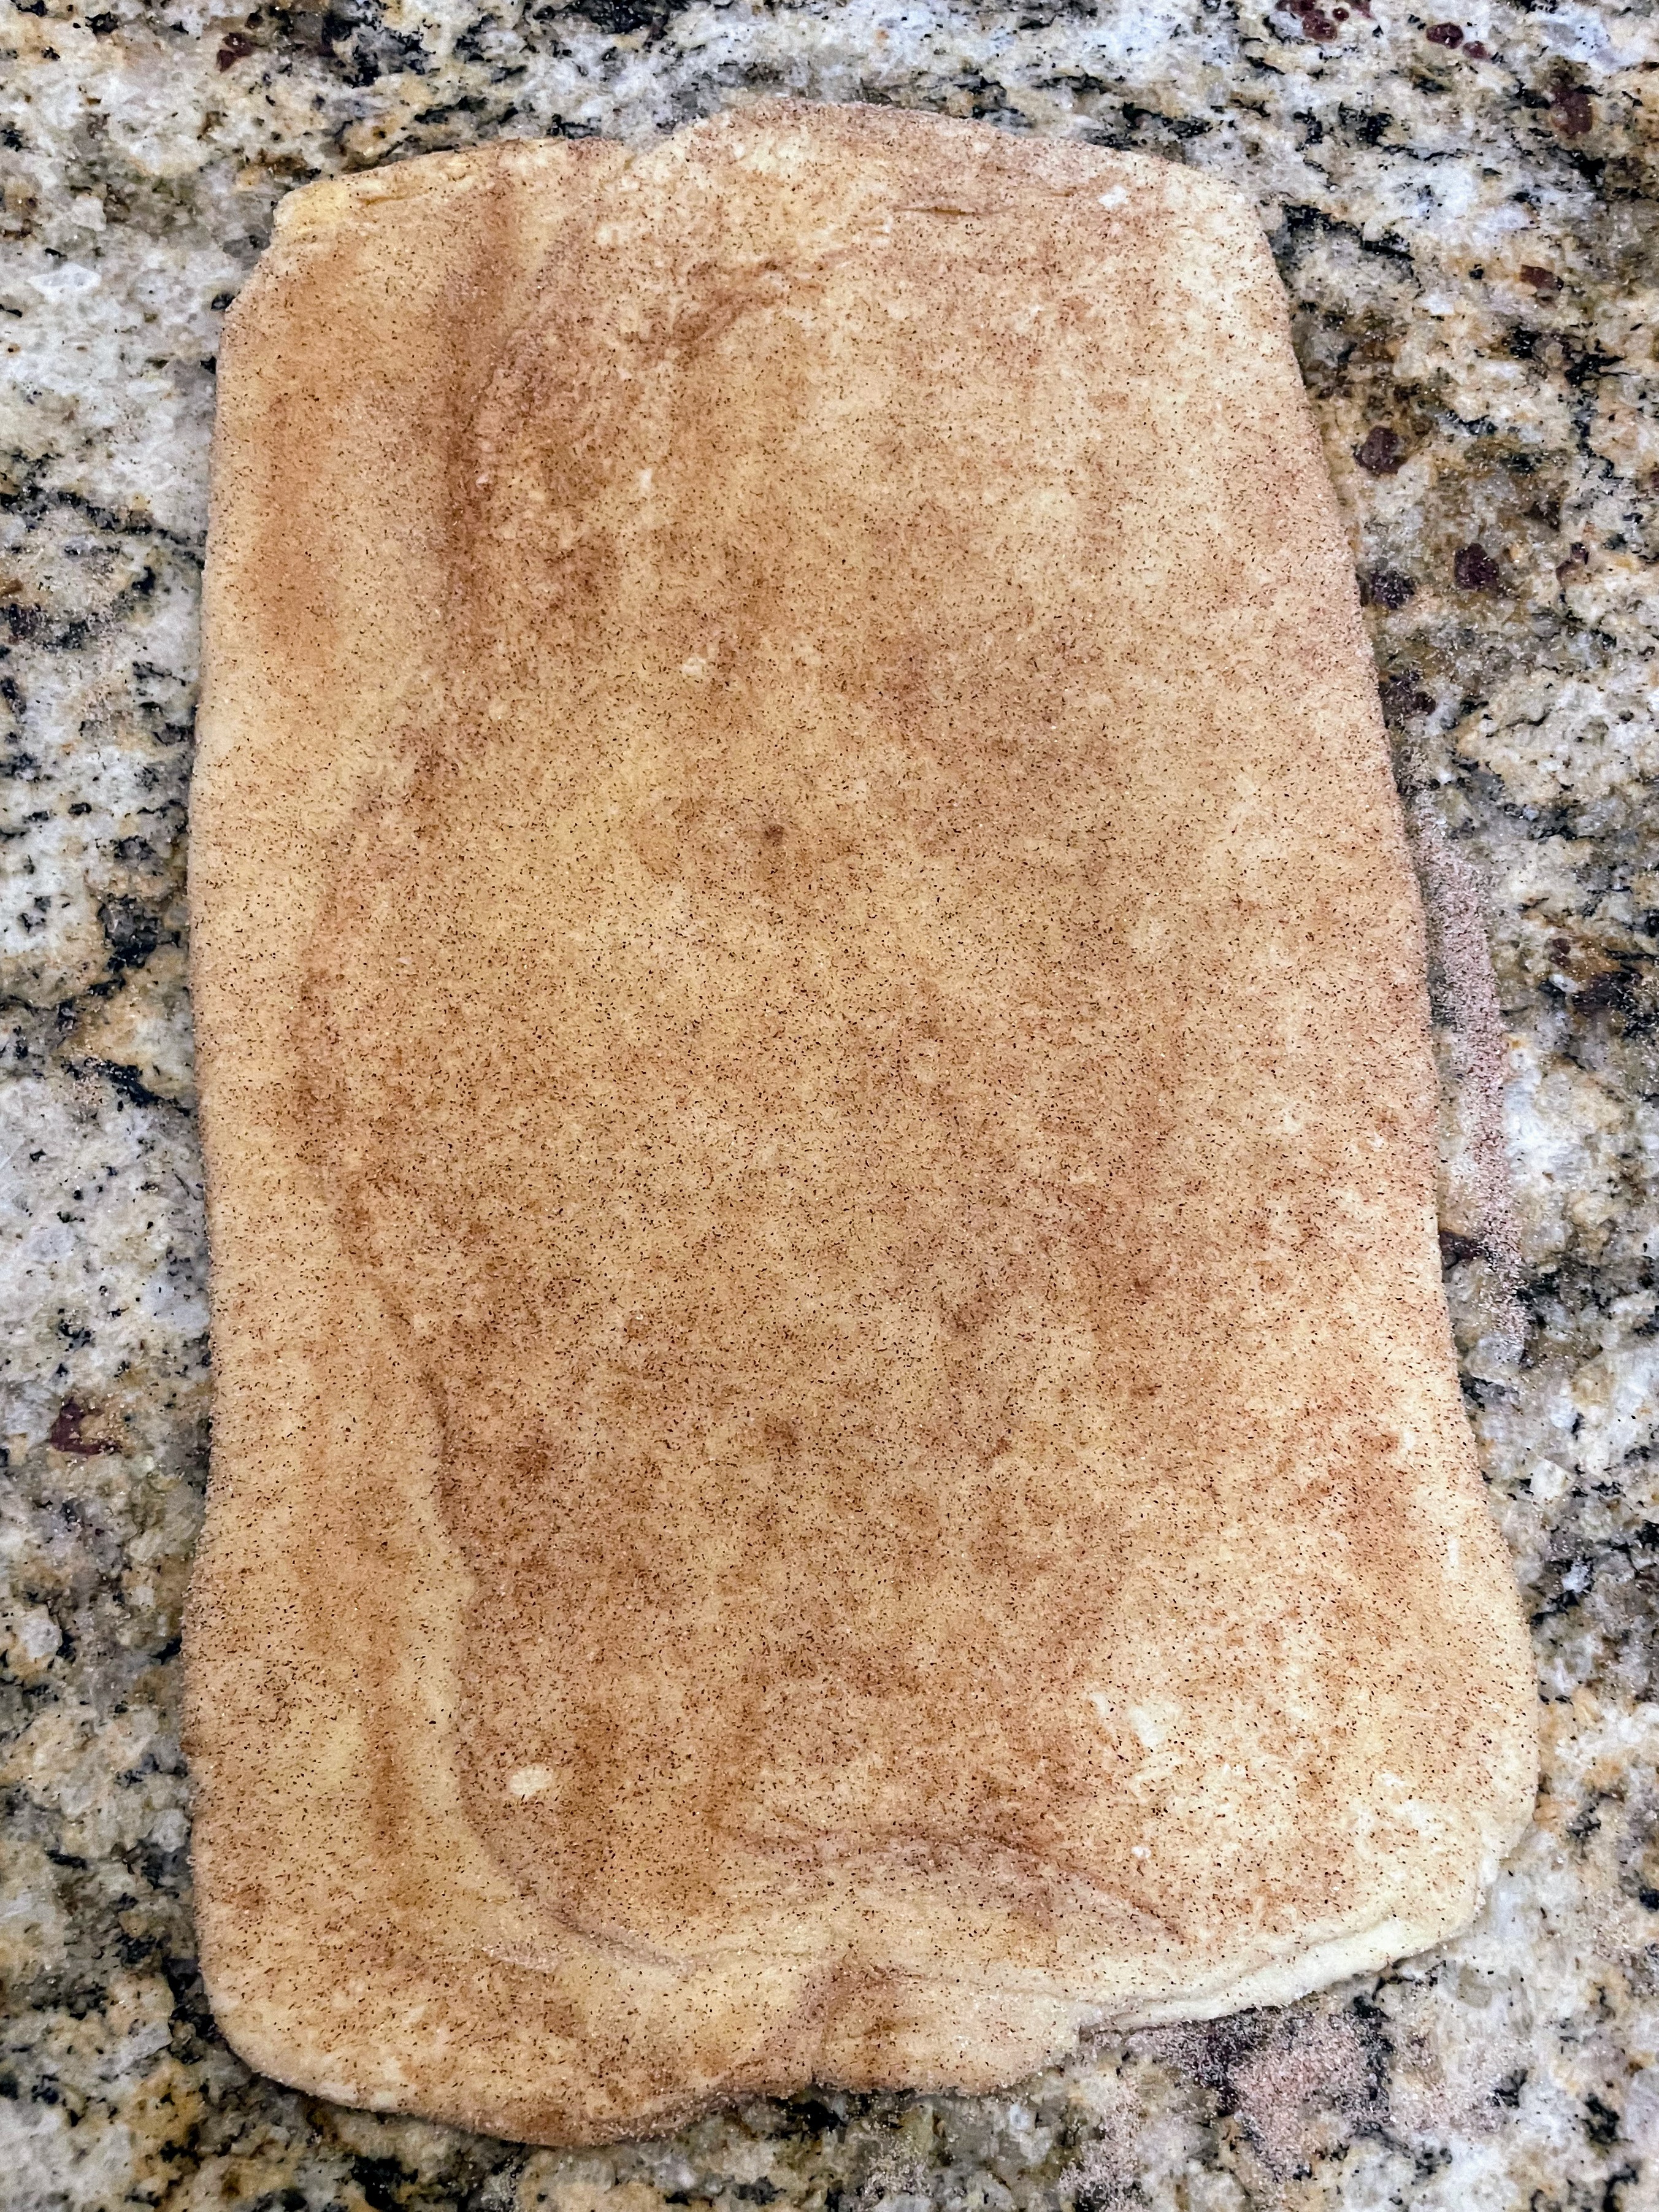
–Turn #3: Place the unwrapped packet of dough on a floured surface with the open, narrower edge facing you. Roll the dough out to a rectangle 12 in. wide x 20 in. long (30 x 50 cm.) [If making half a batch, roll the dough out to 6 x 10 in. (15 x 25 cm.); pinch cut edge closed before rolling]. Sprinkle the entire surface of the dough with 2/3 c. sugar [1/3 c. sugar for half batch], then press lightly to help it stick to the dough. Sprinkle with 1 tsp. cinnamon [1/2 tsp. for half batch], if using. Fold the top third down and bottom third up, again like folding a letter. If any sugar falls out, press it back into the folds. Place the packet of dough on a baking sheet, cover with plastic wrap, and refrigerate for 30 minutes.
–Turn #4: Place the unwrapped packet of dough on a floured surface with the open, narrower edge facing you. Roll the dough out to a rectangle 12 in. wide x 20 in. long (30 x 50 cm.) [If making half a batch, roll the dough out to 6 x 10 in. (15 x 25 cm.)]. Sprinkle the entire surface of the dough with 2/3 c. sugar [1/3 c. sugar for half batch], then press lightly to help it stick to the dough. Sprinkle with 1 tsp. cinnamon [1/2 tsp. for half batch], if using. Fold the top third down and bottom third up, again like folding a letter. If any sugar falls out, press it back into the folds. Place the packet of dough on a baking sheet, cover with plastic wrap, and refrigerate for 30 minutes.
Prepare the Muffin Tin: Generously grease the insides of a standard 12-cup muffin pan (or 6-cup muffin pan if making a half batch) with butter. Set aside.
Shape the Kouign-Amann: Remove the dough from the refrigerator and transfer it to the counter. Sprinkle a little extra sugar (and cinnamon, if desired) over the top of the dough; pat to press it in. Roll the dough out to a rectangle 8 in. wide by 24 in. long (20 x 60 cm.) [If making half a batch, roll the dough out to 8 x 12 in. (20 x 30 cm.).] Slice the dough down the long side to form two strips that are 4 in. wide. Cut each strip into 4 x 4-in. squares (10 x 10 cm.) to create 12 squares (or 6 squares if making a half batch).
If you are adding chocolate chips, arrange chocolate chips on each square. Note: You want to taste the buttery, salty, sweet pastry, so err on the side of fewer chocolate chips vs more. Fold the corners of each square toward the center. Pick up each pastry and tuck it firmly into the buttered muffin pan.
MAKE-AHEAD NOTE 3: At this point, you can cover the muffin pan with plastic wrap and refrigerate overnight. The next day, allow the pastries to come to room temperature and rise for 1 hour before baking.
Otherwise, cover the pan loosely with plastic wrap and let the pastries rise until slightly puffy, 30 to 40 minutes. Meanwhile, preheat the oven to 400 degrees F (200 C).
Bake the Kouign-Amann: Set the muffin pan on a rimmed baking sheet, place in the oven and immediately reduce the heat to 350 degrees F (180 C). Bake until the pastries are deep golden brown and tips are very dark brown, 40 to 45 minutes, rotating the pan halfway through baking.
Transfer the pan to a cooling rack and let the pastries stand until they are just cool enough to handle, about 5 minutes. Gently remove them from the muffin pan and set them on the cooling rack to finish cooling completely. The kouign-amann can be served warm or at room temperature.
Final note: The pastries are best served the same day they are made, but you can store them at room temperature in an air-tight container and they will be good for one more day; after that they will get soft. You can also freeze the baked pastries by letting them cool completely, wrapping them individually in plastic wrap, and placing them in a freezer-safe bag; freeze for up to 3 months. Thaw at room temperature or place in a 325-degree F (163 C) oven for 10 minutes.
Recently, my husband pointed out that we had TWO jars of cherry preserves, TWO jars of fig jam, and an unruly assortment of other jams, jellies, and preserves in the fridge. I was accused of jam overpopulation. I admitted to accidently opening a new jar of cherry preserves (my favorite) without realizing we already had one in the fridge, but I still maintain the other jars were not my fault…. However, in the spirit of providing a solution to this problem, I offered to make a ricotta crostata with what was left in one of the jars of cherry preserves. One less jar in the fridge, and attention diverted to dessert. A win-win.
Actually, a ricotta crostata is always a win-win; the sweet ricotta is beautifully creamy and you can use any preserves or jam of your liking, though the most traditional way of preparing this Italian sweet is with cherry preserves. Second, the dough for this crostata comes together in a food processor, adding speed and ease to the recipe’s many virtues. And finally, a crostata not only makes a great dessert, but a tasty breakfast as well — and a good accompaniment to afternoon tea or coffee.
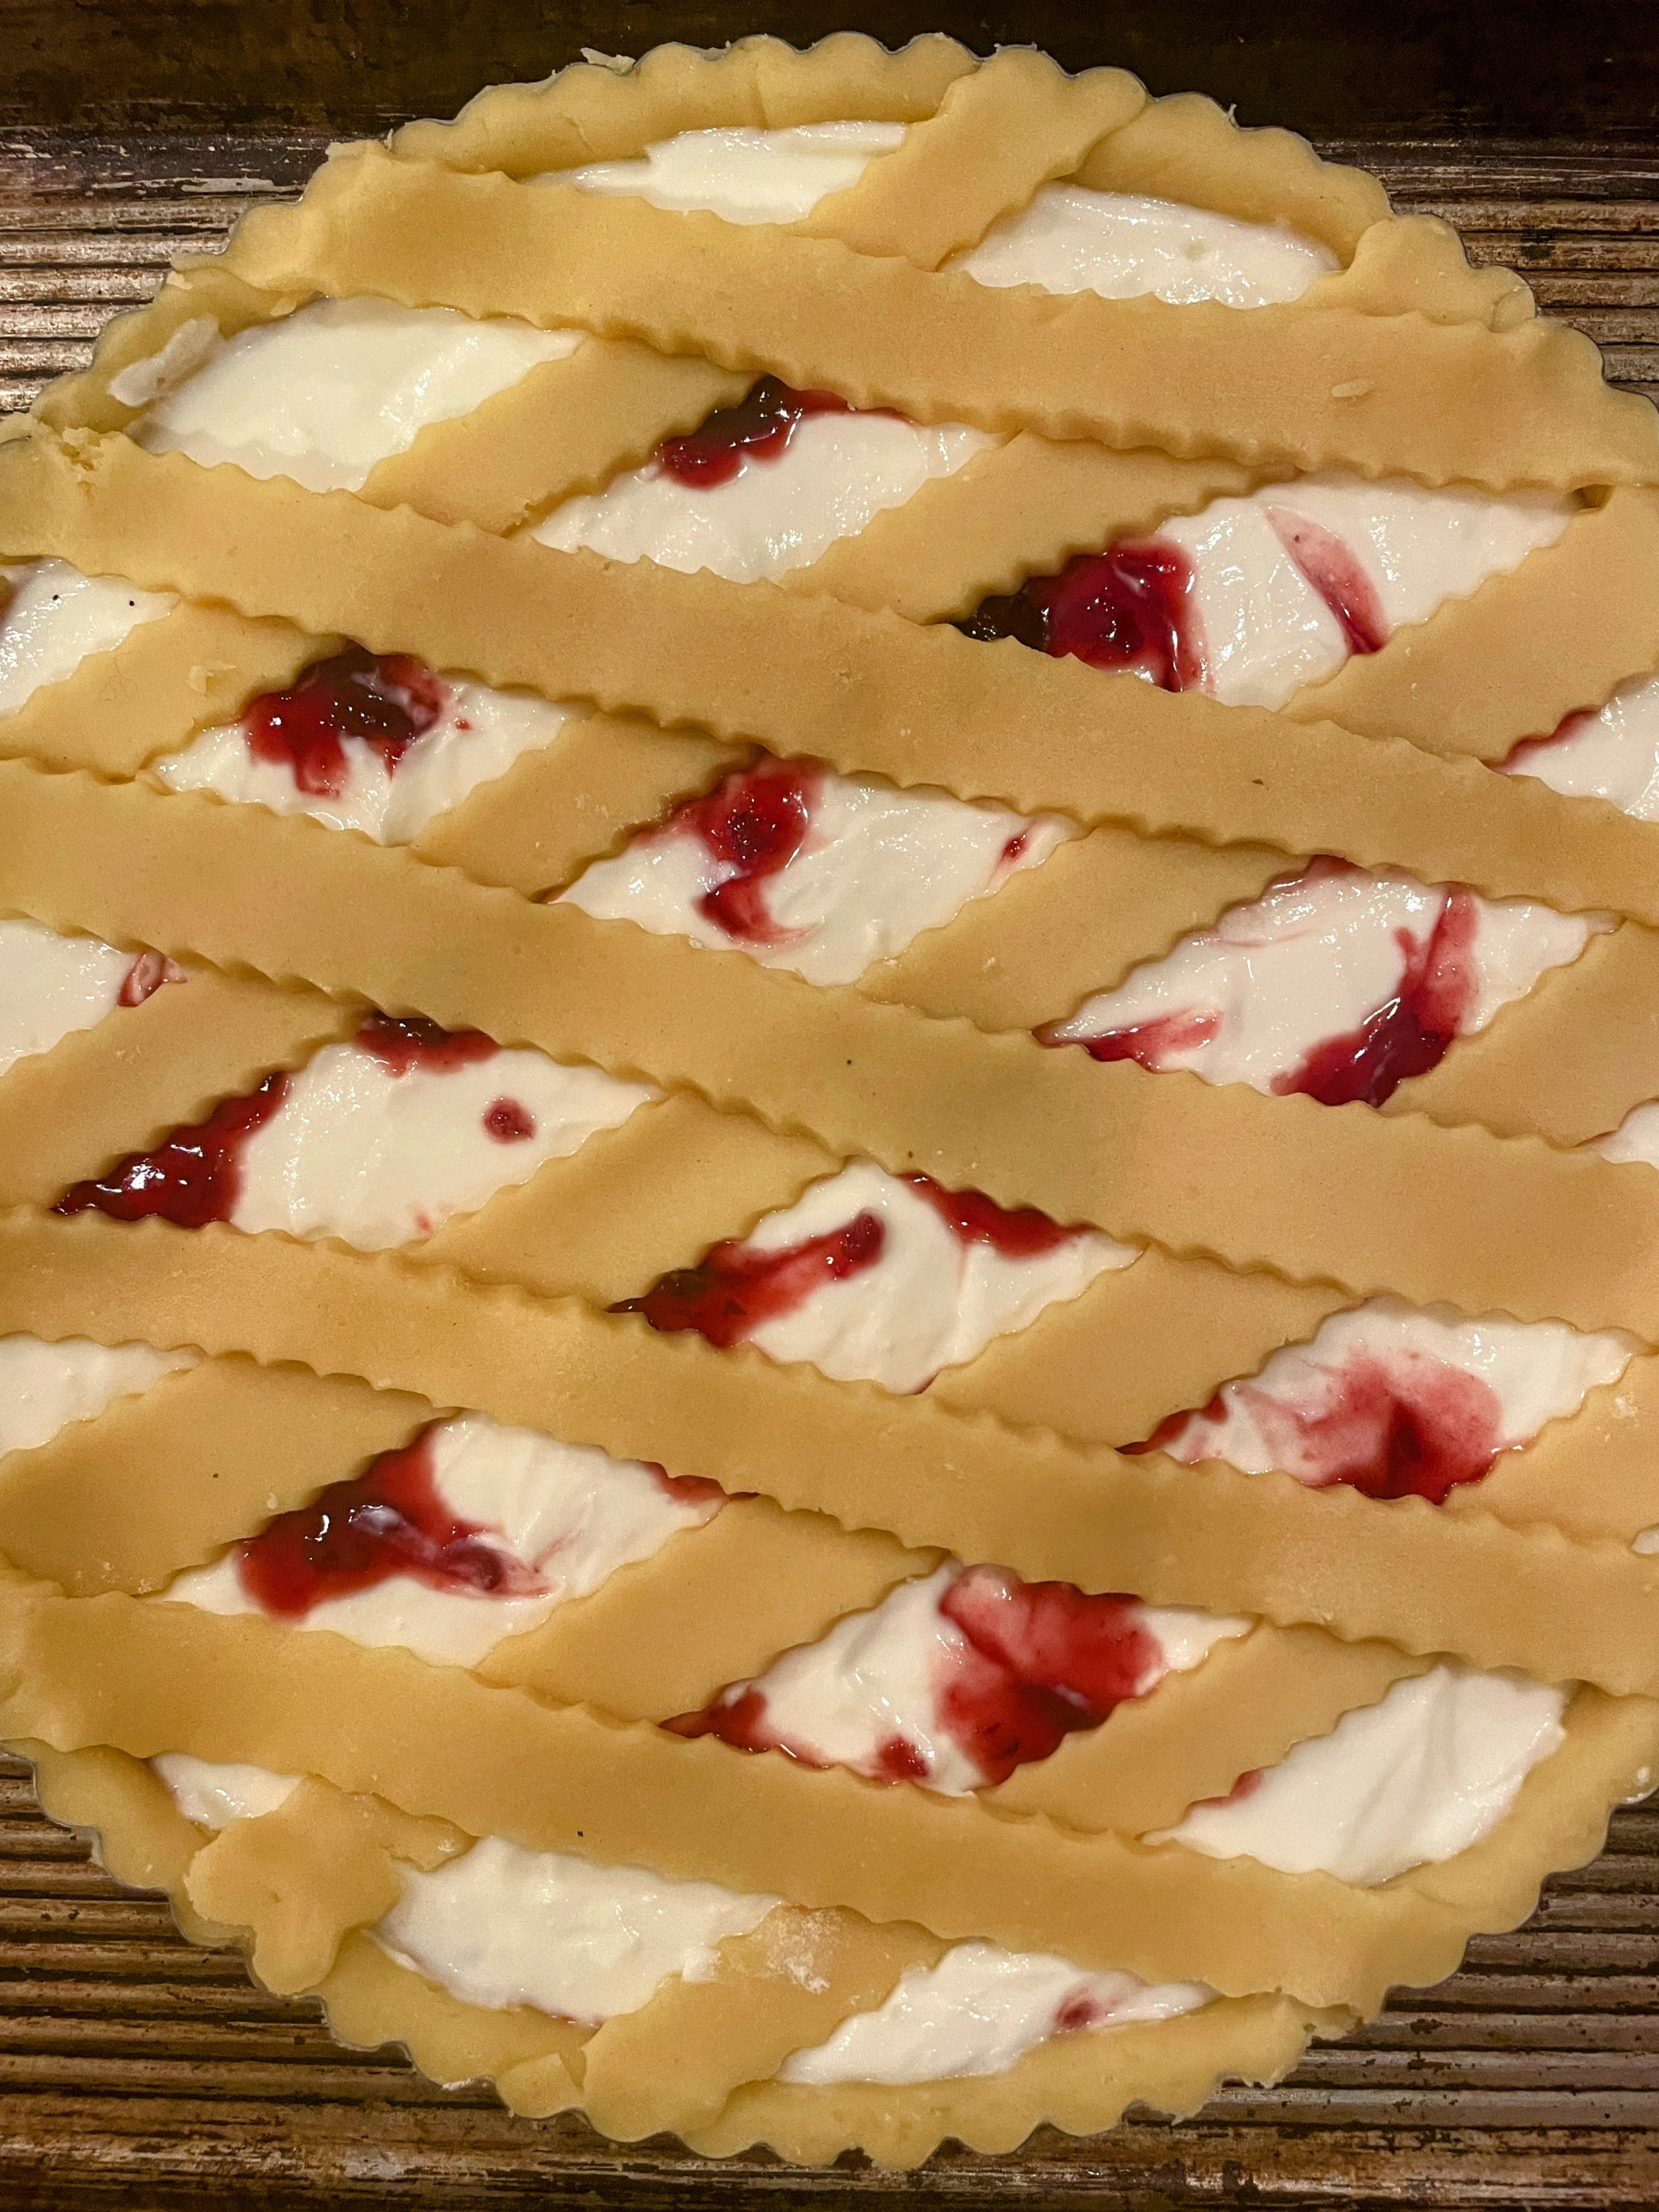
You can also let your creative side loose on the top crust; I made a very simple (unwoven) lattice with scalloped strips this time around.
Crostata Ricotta e Visciole Recipe inspired by (and translated from) Antonio Romano Runchef Note: This recipe is best made using a kitchen scale to weigh the ingredients.
Tart Dough: 225 gr. sugar (about 1 1/8 c.) grated zest of one lemon 250 gr. butter (2 sticks + 1 tbsp) 120 gr. eggs (I used 3 yolks + 2 whole eggs, carefully adding the white of the last egg until I got to 120 gr.) 1 tsp. vanilla pinch of salt 500 gr. flour (I used all-purpose; you can also use 00)
Filling: 450-500 gr. ricotta (16-oz. container); I try to find ricotta that is not super wet. Here in the U.S., I like Bel Gioioso Ricotta con Latte. I pour out any little liquid that may have collected in the container and dab the top with a paper towel to remove any extra moisture. 100 gr. sugar
250 gr. cherry preserves (about 3/4 c.)
Directions: 1. Place the sugar and lemon zest in a food processor and pulse until combined. 2. Cut the butter into cubes. (Note: An easy way to cut butter into cubes is to use a bench scraper; cut the sticks lengthwise into quarters, then chop into cubes. ) Add the butter cubes to the sugar in the food processor and continue to pulse until incorporated; the butter will look grainy. Add the eggs and vanilla and process until well combined. 3. Add the flour and sprinkle the pinch of salt over. Process just until a smooth dough forms.
4. Turn the dough onto a floured countertop and roll into a thick log. Pat into a rectangle, wrap in plastic film (or put in a sealable bag) and refrigerate for 2 hours. 5. Meanwhile, butter a tart pan. Make the ricotta filling by mixing the ricotta and sugar together; let it sit, stirring occasionally, until the sugar is fully incorporated.
6. Cut the dough into a 2/3 piece and a 1/3 piece. Return the 1/3 piece to the refrigerator. Roll the 2/3 piece into a circle about 3 inches wider than your tart pan. Carefully drape the dough over the pan, lifting it gently to tuck it into the inner diameter of the pan. If any dough overlaps the edge, press on it to crimp it off. Save the extra dough. 7. Spoon 2/3 of the preserves ( 1/2 c.) over the base of the tart. Carefully add the ricotta mixture, smoothing the top as best as possible. Dollop the remaining preserves across the top of the ricotta mixture and gently swirl.
8. Roll the remaining 1/3 piece of dough into a rectangle at least as long as the diameter of your tart pan. Cut into 10 strips, and lay the strips in a diamond pattern across the top of the tart. (You can also re-use any extra dough you have leftover from lining the tart pan, to make the 10 strips.)
9. Bake the crostata at 170C/340F for about 35 minutes, or until the lattice is golden. Let cool and then serve.
Sometimes, you need a pick-me-up in the form of caffeine + chocolate, a match made in heaven. These rich, moist brownies more than hit the spot. Pair them with a cup of coffee and you will be good to go for quite some time; perfect for a busy weekend afternoon!
Note: To make these, you will need a kitchen scale.
Brown Butter Espresso Brownies (recipe adapted from Julie Marie Eats)
Ingredients: 130 g (4.6 oz) granulated sugar 130 g (4.6 oz) brown sugar 3 large eggs, at room temperature 120 g (4.2 oz) butter 75 g (2.7 oz) dark chocolate chips 70 g (2.5 oz) neutral oil 1 ½ teaspoon vanilla extract 75 g (2.7 oz) all-purpose flour 35 g (1.3 oz) cocoa powder 1 tablespoon cornstarch 2 tablespoon instant espresso powder ½ teaspoon salt 75 g (2.7 oz) dark chocolate chips, to fold into the batter
Preparation: 1. Preheat the oven to 160ºC/ 325ºF. Spray a 20×20 cm (8×8 in) square pan with baking spray, line with parchment paper, and spray again with baking spray. 2. In a medium saucepan, add the butter and cook over medium/high heat until it is golden brown; it will take about 8-10 minutes. Pour the browned butter into a medium bowl, scraping out all the brown bits from the saucepan. Add the cocoa powder and whisk in. Add the chocolate chips, let sit for a few minutes, then stir until melted.
3. Stir together the flour, cornstarch, espresso powder, and salt.
4. Place the eggs, brown sugar, and granulated sugar in a large bowl and mix with an electric hand mixer until light and fluffy; this will take about 4 minutes.
5. Add the melted butter/chocolate mixture, plus the oil and vanilla, and mix until combined. Turn the hand mixer off, add the flour mixture to the batter, and gently mix everything on the lowest setting until combined, scraping down the sides of the bowl with a spatula.
6. Add the extra chocolate chips and gently fold them in. Pour the batter into the prepared baking pan and smooth the top. Bake for about 35-40 minutes. Let cool, then serve.
My sweet tooth has been fairly well documented on these pages, I think. Anything with chocolate? Check. Caramel? Check. Cinnamon, cardamom, nuts? Check. The list goes on.
But in recent years, I’ve tried to add more fruity desserts into the mix. This weekend, our son and daughter-in-law were visiting and I discovered my daughter-in-law loves fresh fruit tarts. So, decision easily made. Which was perfect, as I had long been wanting to tackle pastry cream (crème pâtissière, aka creme pat), because frankly, who among us who have watched the Great British Bake Off have not wanted to be able to whip up a creme pat at a moment’s notice? Plus–all those fruits count toward the 30-Plant Challenge, too! It was a win-win.
Note: For a first-time attempt, this tart turned out pretty well. But there are two things I will keep in mind for next time: 1. The original recipe I followed for the creme pat said to cook “until thickened,” which I did, but the pastry cream ended up just a tad soft. What you really must do is gently bring the egg-milk mixture to a boil and hold it there, stirring nonstop, for one minute. That will allow it to set perfectly; I’ve noted this in the revised recipe below. (Not that anyone minded my slightly softer creme pat; the entire tart was gone within 8 hours.) 2. I played with the design of the fruit and settled on a delicate-looking pattern (see all the photos). Next time, I won’t be so delicate. In fact, what you should do is completely cover the creme pat–you should not be able to see it at all. So, overlap the fruit, stand it on end, etc. What you want is a high fruit-to-pastry cream ratio.
With these notes in mind, here is the recipe:
Summer Fruit Tart
–Pastry cream (Crème pâtissière, creme pat): 2 c. whole milk 3/4 c. granulated sugar (if you like things barely sweet, use 1/2 cup; if you like things pretty sweet, use 1 cup) 6 egg yolks 1/4 c. cornstarch 1/4 tsp. salt 1 tbsp. butter 2 tsp. vanilla extract (or 2 tsp. vanilla bean paste, or 1 vanilla bean, scraped)*
–Tart crust: 7 tbsp. butter, softened 1/2 c. powdered sugar 1 egg 1/2 tsp. vanilla extract 1/4 tsp. salt 1 1/4 c. flour 1/4 tsp. baking powder
–Fruit: 4 c. fresh fruit, larger fruits cut into decorative pieces (strawberries, blueberries, blackberries, raspberries, mango, kiwi, etc.)
–Glaze: ¼ cup apricot jam (try to scoop out the least chunky bits) + 1 tablespoon water
Preparation: —Pastry cream: 1. Heat the milk in a medium saucepan over medium heat for about 7-8 minutes, until it reaches 180 degrees. (If you do not have a thermometer, watch for tiny bubbles to form in the milk, but don’t let the milk come to a full boil or it will scald.) Stir frequently as the milk heats up; you can get through the first part of Step #2 while the milk is beginning to warm up, but the milk will require your full attention — and stirring — as it gets hotter, to prevent scalding. When the milk is at the right temperature, take the saucepan off the stove, and place it on the counter near your work area.
*Note: If you prefer to use a scraped vanilla bean or vanilla bean paste instead of vanilla extract, you can add those to the milk right as you start the heating process, instead of afterward in Step #3.
2. In a large bowl, whisk together the egg yolks and sugar until light and creamy. (This process is called blanching and helps prevent lumps when you are later cooking the pastry cream.) Whisk in the cornstarch and salt.
Keep whisking the egg mixture, and pour in half of the hot milk that is in the saucepan. When all of the milk is incorporated, whisk in the remaining milk and return to saucepan. (This process tempers the eggs, which prevents them from scrambling; you are doing everything you can to end up with a smooth, delicious pastry cream).
3. Cook the egg/milk mixture on medium heat, whisking constantly, until it thickens and then comes to a boil. This will take a few minutes. Once the mixture comes to a boil, cook for 1 minute more, whisking nonstop. Whisk in the vanilla and butter until the butter is melted, then pour the pastry cream into a bowl. Press a piece of plastic wrap directly onto the surface of the pastry cream, then refrigerate for 2 to 3 hours.
—Tart crust: 1. Using a) a stand mixer with the paddle attachment, or b) an electric mixer, or c) a whisk (ie, by hand, which is what I did), cream the butter and powdered sugar together until pale and fluffy. Scrape down the sides of the bowl with a spatula and add the egg. Continue mixing until combined, scraping down the bowl as necessary. Add the vanilla and salt and mix until combined. Add the flour and baking powder and mix (or combine with a wooden spoon) until the dough comes together. Put a piece of plastic wrap on the counter, scrape the dough onto the plastic wrap, wrap tightly and chill at least 1 hour.
2. Preheat oven to 350 degrees. On a lightly floured piece of parchment paper, roll out the dough until it’s about 10 inches in diameter. Invert the dough over a 9-inch tart pan, unpeel from the parchment paper, and press the dough firmly into the bottom and up the sides of the pan. Trim any excess dough.
3. Crinkle up a new piece of parchment paper until it is nice and wrinkly and soft. Place it on top of the dough in the tart pan. Fill the pan with pie weights or dried beans or dried rice; bake for 12 minutes. Carefully lift up the parchment paper and empty the pie weights/beans/rice into a bowl to cool. Prick the base of the tart and return the tart to the oven. Bake 10 to 15 minutes longer, until golden brown. Cool completely.
—Fruit Tart: Fill the cooled tart crust with chilled pastry cream. Arrange the fruit in a decorative pattern. Be generous with the fruit and cover the pastry cream completely (which I did not do in these photos, but will do in the future.)
—Glaze: In a heat-proof small bowl, stir together the apricot jam with 1 tablespoon of water. Heat in the microwave for about 30 seconds, then stir again; the glaze should have gotten thin enough to spread. (If there are chunky bits in the glaze, strain it through a sieve.) Use a pastry brush to gently dab the fruit with the apricot glaze.
Since moving to Italy, I have become obsessed with fresh, soft ricotta. Ricotta is made from the whey left over from making other cheese (so, the second cooking–and hence the name ricotta, which means twice cooked). It can be made from cow’s milk, sheep’s milk, goat’s milk, or buffalo’s milk. Cow’s milk ricotta is more common, but I love the taste and texture of sheep’s milk ricotta (ricotta di pecora), which has a very high fat content and is a bit softer than the cow milk version.
Despite this slight preference, I have yet to meet a ricotta I do not like. I love it in pastas and in any savory incarnation–but I really, really love it sweet: in the ricotta cakes here in Rome, in Sicilian cannoli, in the Neopolitan sfogliatelle…the list goes on. Basically, I love sweet ricotta here, there, and everywhere. So for the past few weeks, I’ve been experimenting with making a ricotta dessert at home: mousse. It has been tough work.
This version is currently my husband’s favorite: coffee-flavored with ripples of gianduia, a dark chocolate-hazelnut spread that is a sleek, grown-up version of Nutella. The recipe is for two servings (based on 1/2 c. ricotta per person)–and can easily be multiplied. It yields a subtly flavored mousse that is not overly sweet, but the ingredients can easily be adjusted to your taste. Note: delicious as this is, it has one other thing going for it–it is a very quick dessert that can be made ahead and put in the refrigerator until later.
Coffee Ricotta Mousse with Gianduia Two servings
Mousse
1 tsp. instant espresso powder or instant coffee granules
1 tsp. vanilla
1 c. fresh, soft ricotta (preferably sheep’s milk ricotta–but use whatever is the best ricotta you can find)
2 rounded tbsp. sugar
3 tbsp. whole milk
Garnish
2 or more whole hazelnuts
chocolate-coated cookie sticks
Preparation 1. Dissolve the instant espresso powder (or instant coffee granules) in the vanilla.
2. Place the remaining mousse ingredients in a bowl and mash with a fork until soft and mousse-like; add the coffee/vanilla mixture and whisk to combine, eliminating as many lumps as possible.
3. Leave with a few lumps for a more rustic mousse, or, for a finer texture, use an electric whisk (such as a whisk attachment on an immersion blender) or a hand mixer and whisk until velvety smooth.
4. Place 2 heaping tbsp. mousse in the bottom of each mousse cup, dot with about 1 heaping tsp. gianduia, and swirl slightly. Repeat, for three layers total, using up all remaining ingredients in the final layer.
5. If preparing in advance, cover each mousse cup with aluminum foil and refrigerate.
6. Just before serving, garnish each mousse with a whole hazelnut and chocolate-coated cookie stick.
I love mangoes in any way, shape, or form–and so do my children, who used to line up for a chance to get the pit after I was done slicing the rest of the fruit. For years, I vowed to make mango mousse–but I always let myself be lured by the siren call of the chocolate version instead. Until recently, when I was making a Latin American dinner and wanted a Latin American dessert to go with it. And now I’ve been asking myself, why didn’t I try this sooner? This recipe, very slightly adapted from The South American Table by Maria Baez Kijac, calls for fresh mangoes, and like many other mousses, includes raw egg whites (so use the freshest eggs possible). It serves 8 regular dessert lovers, or 6 serious mango lovers. Note: the original recipe suggests serving the mousse with a raspberry coulis, but I am a purist who prefers an unadulterated mango flavor.
Mousse de Mango
1/4 c. fresh orange juice
1 envelope unflavored gelatin
2 large, ripe but firm mangoes, peeled, seeded, and chopped (2 c.)
3/4 c. sugar
2 tbsp. orange liqueur or rum
1 c. whipping cream
2 large egg whites
1/4 tsp. cream of tartar
Preparation
1. Place the orange juice in a small heat-proof bowl, sprinkle the gelatin over top, and let soften for 5 minutes. Set the bowl in a small saucepan with 1 inch of simmering water and heat until the gelatin is completely dissolved. Remove the bowl containing the gelatin mixture from the saucepan.
2. Place the mangoes in a blender or food processor and process until smooth. Add the sugar, liqueur/rum, and dissolved gelatin, and process again until smooth. Place the mango puree into a large bowl.
3. Whip the cream in a medium-size mixing bowl until soft peaks form. Beat the egg whites with the cream of tartar in another medium-sized bowl until soft peaks form.
4. Very gently fold half the whipped cream into the mango puree, followed by half the egg whites. Repeat, and mix gently until all the cream and egg whites have been incorporated.
5. Distribute the mousse among 6-8 dessert cups, cover, and refrigerate until thickened–about 30 minutes.
6. Enjoy!
We lived in Australia for four years and loved every minute of it, leaving behind dear friends and wonderful memories. One of those memories was of Pavlova, a beautifully light and sweet dessert named after the Russian prima ballerina Anna Pavlova, who toured Australia and New Zealand in the 1920s. There has been a long-standing debate based on primary and secondary sources and lots of national pride, as to whether the dessert was first created in New Zealand or Australia. Though the scales may have now tipped toward New Zealand (with the Oxford English Dictionary crediting the first written record of the recipe to New Zealand), it is a question that may never be satisfactorily answered; in an elegant diplomatic maneuver, the OED also lists the origin of pavlova as “Austral. and N.Z.”
For our family, the answer is simple: since we first encountered Pavlova in Australia, it will for us forever remain as one of our favorite Australian desserts.
The version in the photo below is a double recipe, prepared in a rimmed 18 x 12-inch jelly roll pan–which was a mistake. There was no easy way to get the meringue out and onto a serving platter without shattering it into pieces–so we served the Pavlova straight from the pan, lifting each piece off the baking/parchment paper with a thin spatula. It was a bit messier than usual, but due to the amazing decorating job by three enthusiastic teenagers, and to the fantastic blend of flavors that has made this such a beloved recipe, no one minded. In the future, though, I’ll remember to use an unrimmed baking sheet….
Pavlova 8 servings
6 large egg whites
pinch salt
1 1/2 c. + 1/8 c. sugar
2 tsp. cornstarch
1 tsp. white vinegar
1 1/2 c. cream
2 tsp. sugar
1 tsp. vanilla
1 large punnet strawberries, hulled and sliced
1 small punnet blackberries
1 small punnet raspberries
2 kiwis, peeled and sliced
Preparation
1. Preheat oven to 350 degrees.
2. Draw a 9″ circle on baking/parchment paper and place it on a baking sheet. Spray the paper with baking spray.
3. Combine egg whites and the pinch of salt in a very clean and completely dry large bowl, and beat until stiff peaks form (you can also use a stand mixer). Gradually add sugar, a tablespoon or two at a time, beating constantly, until the mixture is very glossy and the bowl can be held upside down without the meringue falling out. Gently whisk in the cornstarch and vinegar.
4. Using a spatula, spread the mixture onto the paper circle on the baking sheet; smooth the top with the spatula.
5. Place the baking sheet in the oven and bake the meringue for 5 minutes, then turn the heat down to 270 degrees and bake another 75 minutes, or until the outside of the meringue is crisp, but the inside is soft and chewy. Turn the oven off and leave the meringue in the oven, with the door ajar, for 15 minutes.
6. Slide the meringue, still on the baking paper, onto a rack and allow to cool completely. It will crack a bit when cooling; this is normal. Using two spatulas or a pizza peel, carefully lift the meringue off the baking paper and place on a serving platter.
7. Whip the cream with the sugar and vanilla until stiff peaks form. Try to use as little sugar in the whipped cream as your palate will allow, to offset the very sweet meringue.
8. Spread the whipped cream on the meringue and add the fruit in a decorative pattern. (The great thing about pavlovas is you can decorate them any way you like, with whatever fruit you prefer.)
There are some recipes you turn to again and again because they are deeply satisfying. This is one of them — a dark, rich chocolate Bundt cake heightened with hints of coffee and cinnamon. It is a frequently requested birthday cake at our house, made most recently for my son’s 21st birthday this week — with the addition of some Espresso Chip ice cream to complement the flavor.
Mexican Chocolate Cake with Chocolate Glaze
Cake
3 c. all purpose flour
1 1/2 c. sugar
1 tsp. salt
2 tsp. baking soda
4 tsp. cinnamon
1/2 c. cocoa powder
3 tsp. vanilla extract
2/3 c. canola oil
2 tbsp. white distilled vinegar
2 c. coffee at room temperature (or warm water mixed with 1-2 tbsp. instant espresso powder)
1-2 c. chocolate chips (preferably dark chocolate, if available)
Glaze
3/4 c. chocolate chips
3 tbsp. non-hydrogenated buttery spread such as Earth Balance/Smart Balance
1 tbsp. light corn syrup
1/4 tsp. vanilla
Preparation
Cake
1. Preheat oven to 350°. Generously grease (with vegetable shortening) and lightly flour a Bundt pan.
2. Mix dry ingredients in a bowl until thoroughly combined. Make a well in the center, and add wet ingredients. Stir until just combined, and fold in chocolate chips.
3. Pour into prepared pan and bake for 40-50 minutes, or until skewer inserted into cake comes out clean; be careful not to overbake.
4. Cool for about 20 minutes, then turn out onto plate or serving platter. Cool completely and top with Chocolate Glaze.
Glaze 1. Melt first three ingredients on low power in microwave, stir until smooth, add vanilla, and drizzle over cake.
Adapted from The Joy of Vegan Baking, by Colleen Patrick-Goudreau.
When I was in college, I sampled an exquisite confection that has forever remained seared on my memory: Torta Chilena. It was a cake with eight crispy layers filled with dulce de leche (caramelized sweet milk). I immediately requested the recipe from the Costa Rican lady who made it, and it has since followed me across continents and years to be pulled out on special occasions.
Torta Chilena is a beloved Costa Rican dessert. So why, you may ask, is it called a “Chilean Cake”? In Chile, a very similar dessert is called Torta Mil Hojas (“Thousand-Layer Cake”), which is itself a variation on the mille-feuille theme. But instead of being filled with custard, as the French versions are, the Latin American versions are filled with dulce de leche. Latin Americans love dulce de leche, so it is a natural adaptation. I surmise that a Chilean with a fondness for sweets settled in Costa Rica, made the dessert to great acclaim, and helped start the national craze for Torta Chilena. However this cake originated, I am deeply grateful.
Note: One popular way to make dulce de leche is to cook unopened cans of sweetened condensed milk in boiling water for 2-3 hours. The problem with this method is that the occasional can explodes. So, I’ve always preferred making it in the oven in a bain-marie (water bath, also known as a baño maría in Spanish).
Torta Chilena [Updated 12-15-12]
Pastry
2 c. flour (250 gr.)
1 tbsp. sugar
½ lb. butter (2 sticks, 227 gr.)
¼ + 1/8 c. white wine (90 ml.)
Dulce de Leche Filling
2 cans (14 oz./400 gr. each) sweetened condensed milk
powdered sugar
Preparation 1. Dulce de Leche filling: Heat oven to 425ºF/220ºC. Spray a glass casserole dish with cooking spray, pour both cans of condensed milk into it, cover the dish, and then set it in a deep roasting pan filled with enough water to rise slightly above the level of the condensed milk in the casserole dish. Bake covered for about 3 hours until golden brown (stirring vigorously 2-3 times during the latter part of the cooking process to avoid lumps). Set aside. This is the dulce de leche; you can make it ahead of time, but if you are not using immediately, refrigerate it and bring to room temperature before using.
2. Pastry: Put flour and sugar in a large bowl, cut in butter, then add ¼ c. (60 ml.) wine, mix thoroughly, then add remaining 1/8 c. wine (30 ml.). Mix thoroughly. Turn dough out onto well-floured surface, shape into a log and cut into 8 equal pieces. Roll each piece into a ball. Draw 9-inch (23 cm.) circles on baking/parchment paper (I used a plate and traced around it). Turn sheets of paper over so dough doesn’t come into contact with pen/pencil marks, then place 1 ball of dough in center of the circle, and use fingers to spread out to edges. Dough will be very thin.
3. Preheat oven to 300ºF/150ºC. Bake pastry circles until slightly golden (exact time will depend on your oven; start checking at about 8-10 minutes–the circles should look “cooked,” but not brown). When cool, very carefully remove each pastry circle from paper; circles will be wafer-like and fragile. Place a small dab of dulce de leche on a round platter, then gently position the first pastry circle on top. Press carefully to stabilize the circle on the platter, then spread with roughly 1/7 of the dulce de leche (doing so as lightly as possible). Put the next cooked pastry circle on top, spread with dulce de leche, and repeat with all the layers except the top one – sift powdered sugar on top of that one. Some layers may crack; press the pieces onto the dulce de leche base, and try to reserve the best layer for the top.
4. Enjoy.
*For another cake that features dulce de leche, see this recipe.


")


 on the sides; front-facing wall of opus mixtum (bands of brick and tufa), with lateral 'toothing' and a structural arch; plus rough-hewn travertine column--Portico of Claudius, Portus (c. 50 AD)")
")
 with lateral 'toothing' and putlog holes at the top--Trajan's warehouse, Portus (c. 100 AD)")
")
, Trajan's warehouse, Portus (c. 100 AD)")

