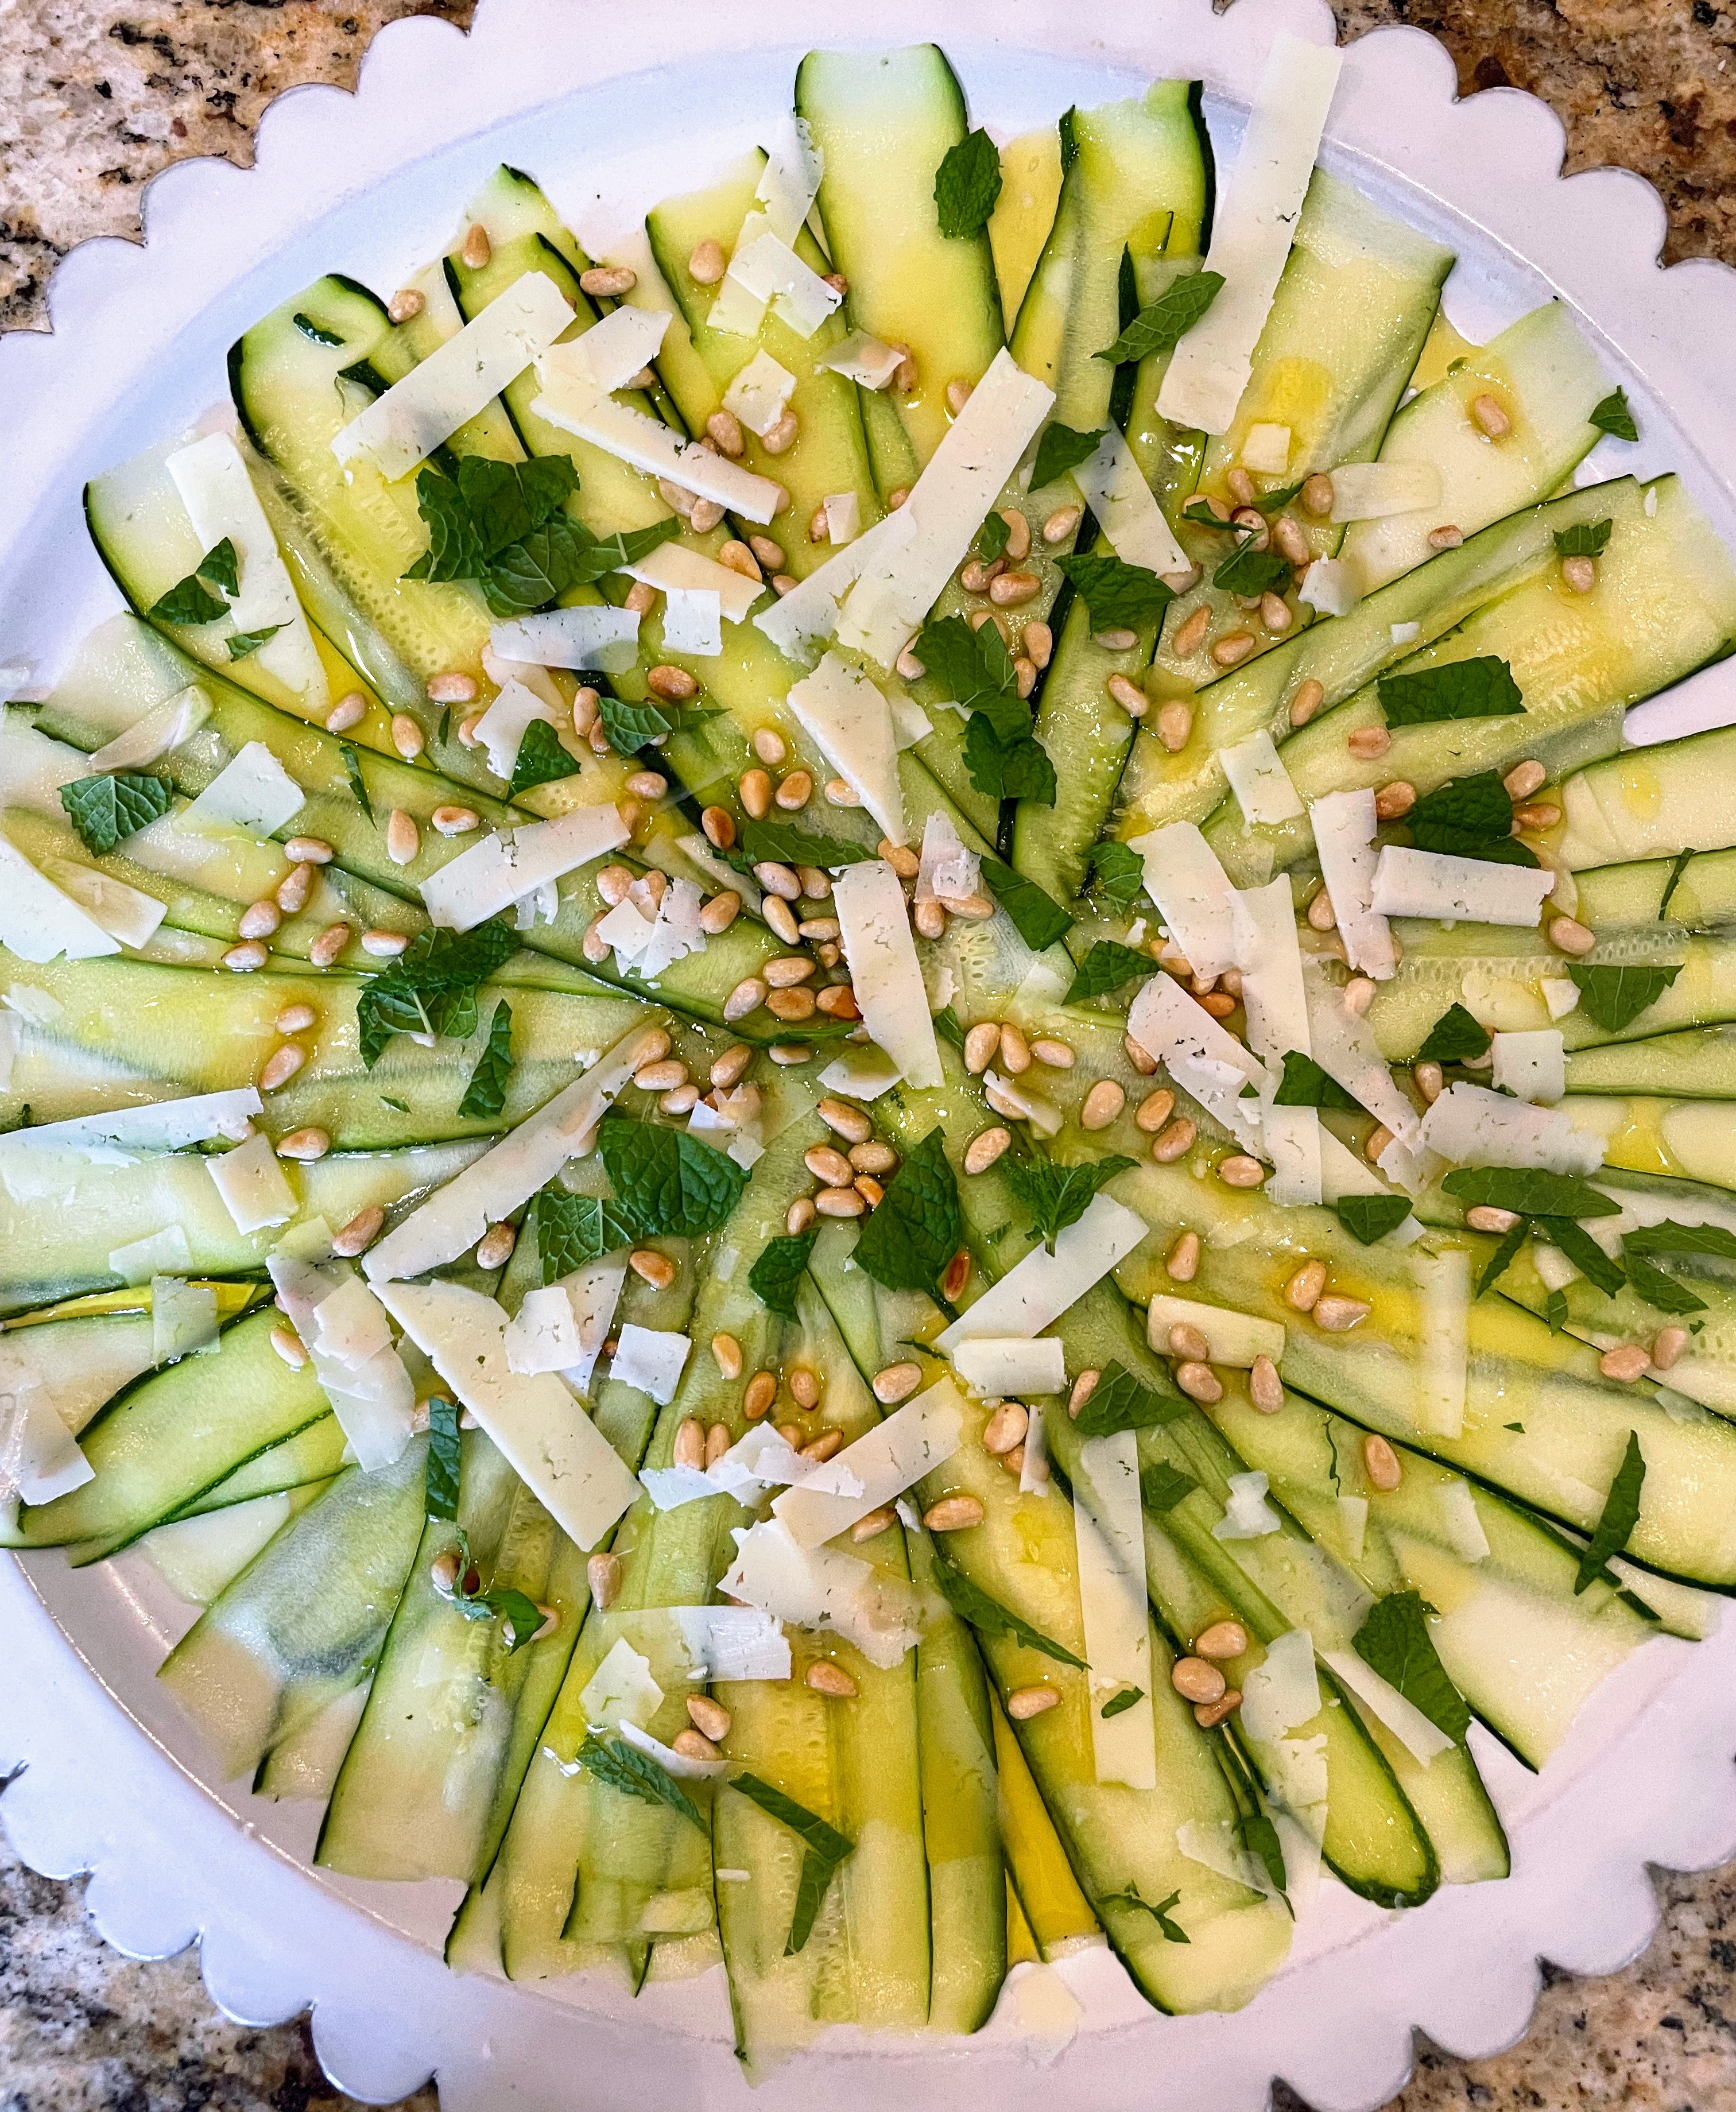
This refreshing, no-cook zucchini recipe (which I very slightly adapted from the New York Times) is just the thing when it’s hot outside, you have zucchini to use up, and you’d like to make an impression. It’s an unusual recipe in that the thinly-sliced zucchini is raw, though nicely marinated and softened in lemon juice (a bit like what happens with ceviche). Definitely worth a try.
Ingredients: 2 medium zucchini salt 2 garlic cloves, thinly sliced freshly squeezed juice of 1/2 lemon (or more, as needed) 2-3 tbsp. of the best olive oil you have 2 tbsp. toasted pine nuts torn or chopped fresh mint, to taste Optional: 1 tbsp. Parmesan (or Pecorino Romano) shavings, 1 tablespoon currants, 1 tsp. honey, and/or freshly ground black pepper
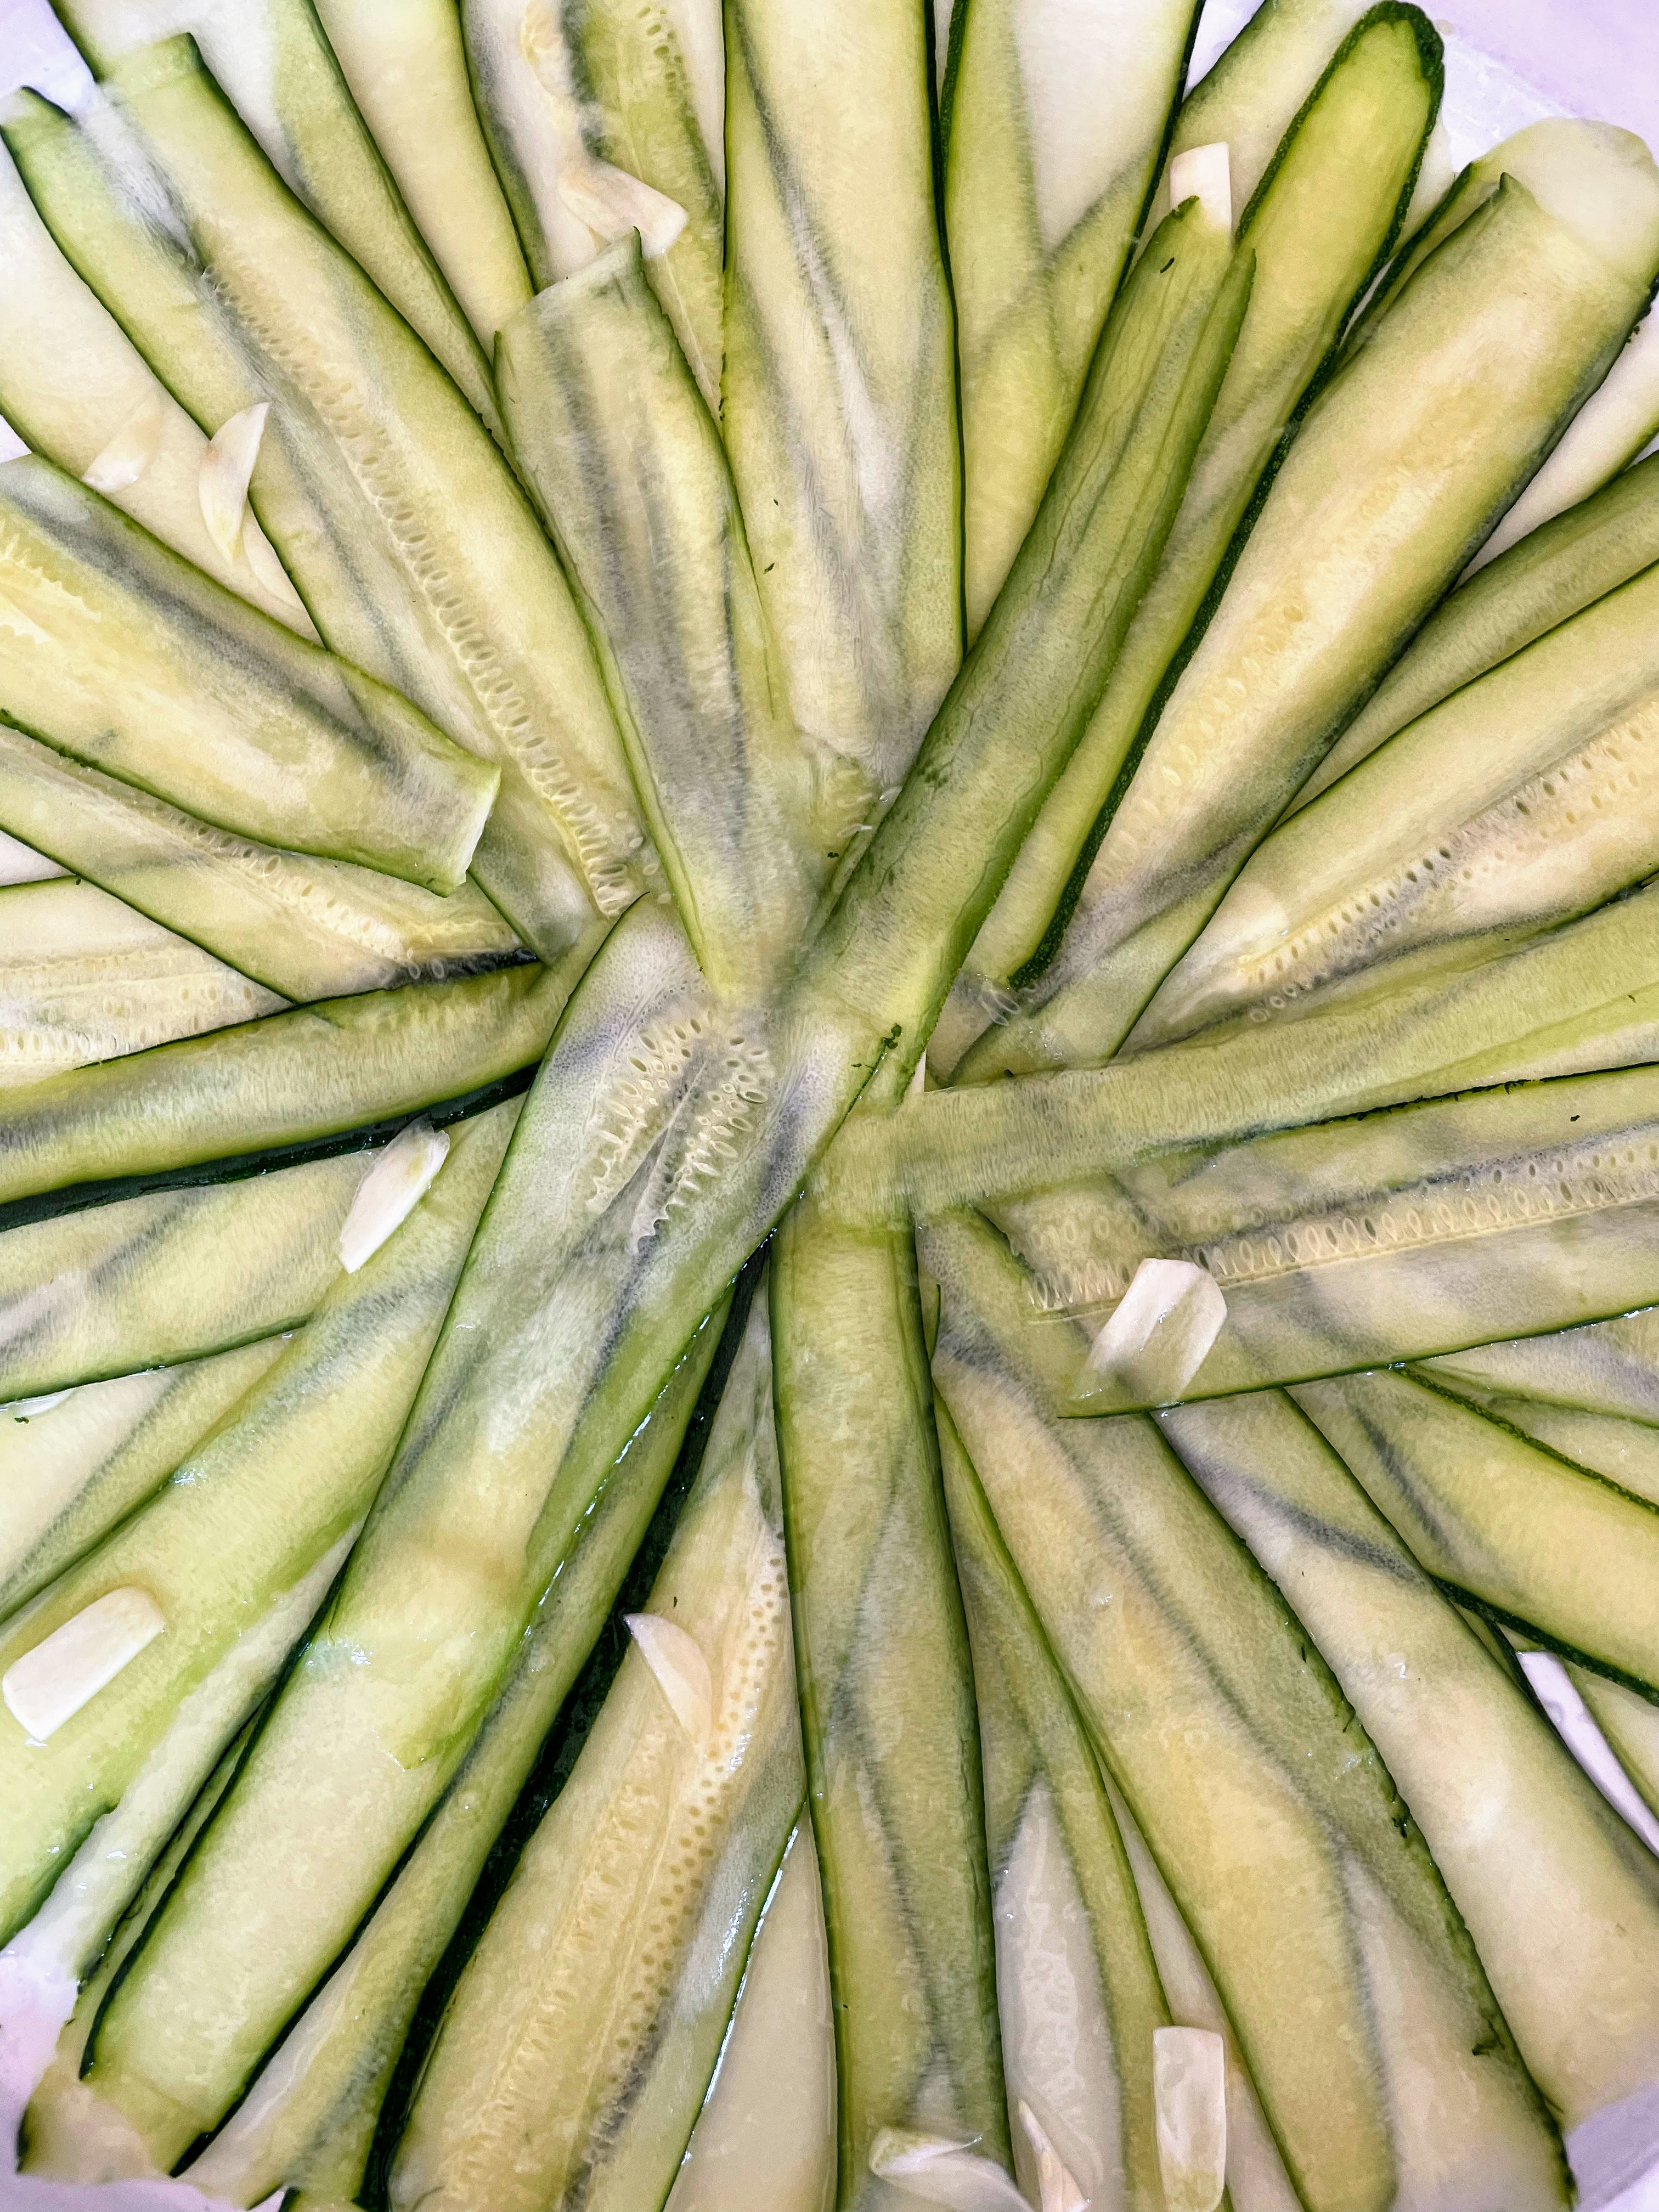
Directions: 1. Slice zucchini lengthwise with a mandoline or chef’s knife as thinly as you can, and sprinkle lightly with salt. Place in a colander for 30 minutes to remove the excess moisture, tossing occasionally. 2. Dry the zucchini on paper towels and arrange the slices in layers on a shallow platter or serving dish, adding slices of garlic between the layers, and drizzling each layer with some of the lemon juice (if you run out, squeeze some juice from the other half of the lemon).
3. Marinate, refrigerated, for at least 15 minutes and up to 1 hour. 4. Drizzle olive oil over and top with pine nuts and mint (and any of the optional ingredients, if using).
Looking for a stunning appetizer? Or a great accompaniment to, say, soup or a salad? Look no further than this pastry, which is as good to eat as it is to look at. It requires a little more effort than other things you can do with puff pastry, but is still relatively easy (and, more importantly, fun) to make. And anything that looks this delicious is worth it.
I love the original recipe as follows below. But, as you will see in some of the photos, I’ve played around with it at times. Once, I added a base layer of tomato pesto to see what that would be like, and used finely chopped red onions instead of the scallions I forgot to buy. Another time I did not have quite enough spinach, so I made up the weight by adding extra feta and shredded mozzarella. So tweak this recipe as you desire — or don’t; it will be delicious every time no matter how you prepare it.
Ingredients: 1 package (17.3-oz. /490 gr.) frozen puff pastry (= 2 sheets) 2 packages (10 oz/283 gr. each) frozen, chopped spinach — defrosted; see below 2 scallions (or about 1/4 of a white or red onion), finely chopped 2 tbsp. fresh dill, finely chopped 2½ oz. (70 gr.) feta cheese, crumbled ( = about ⅔ cup) 2 garlic cloves, crushed 1 lemon, zested 1 tsp. kosher salt, plus more ¼ tsp. freshly ground black pepper, plus more All-purpose flour (for rolling) 1 large egg, whisked (aka egg wash)
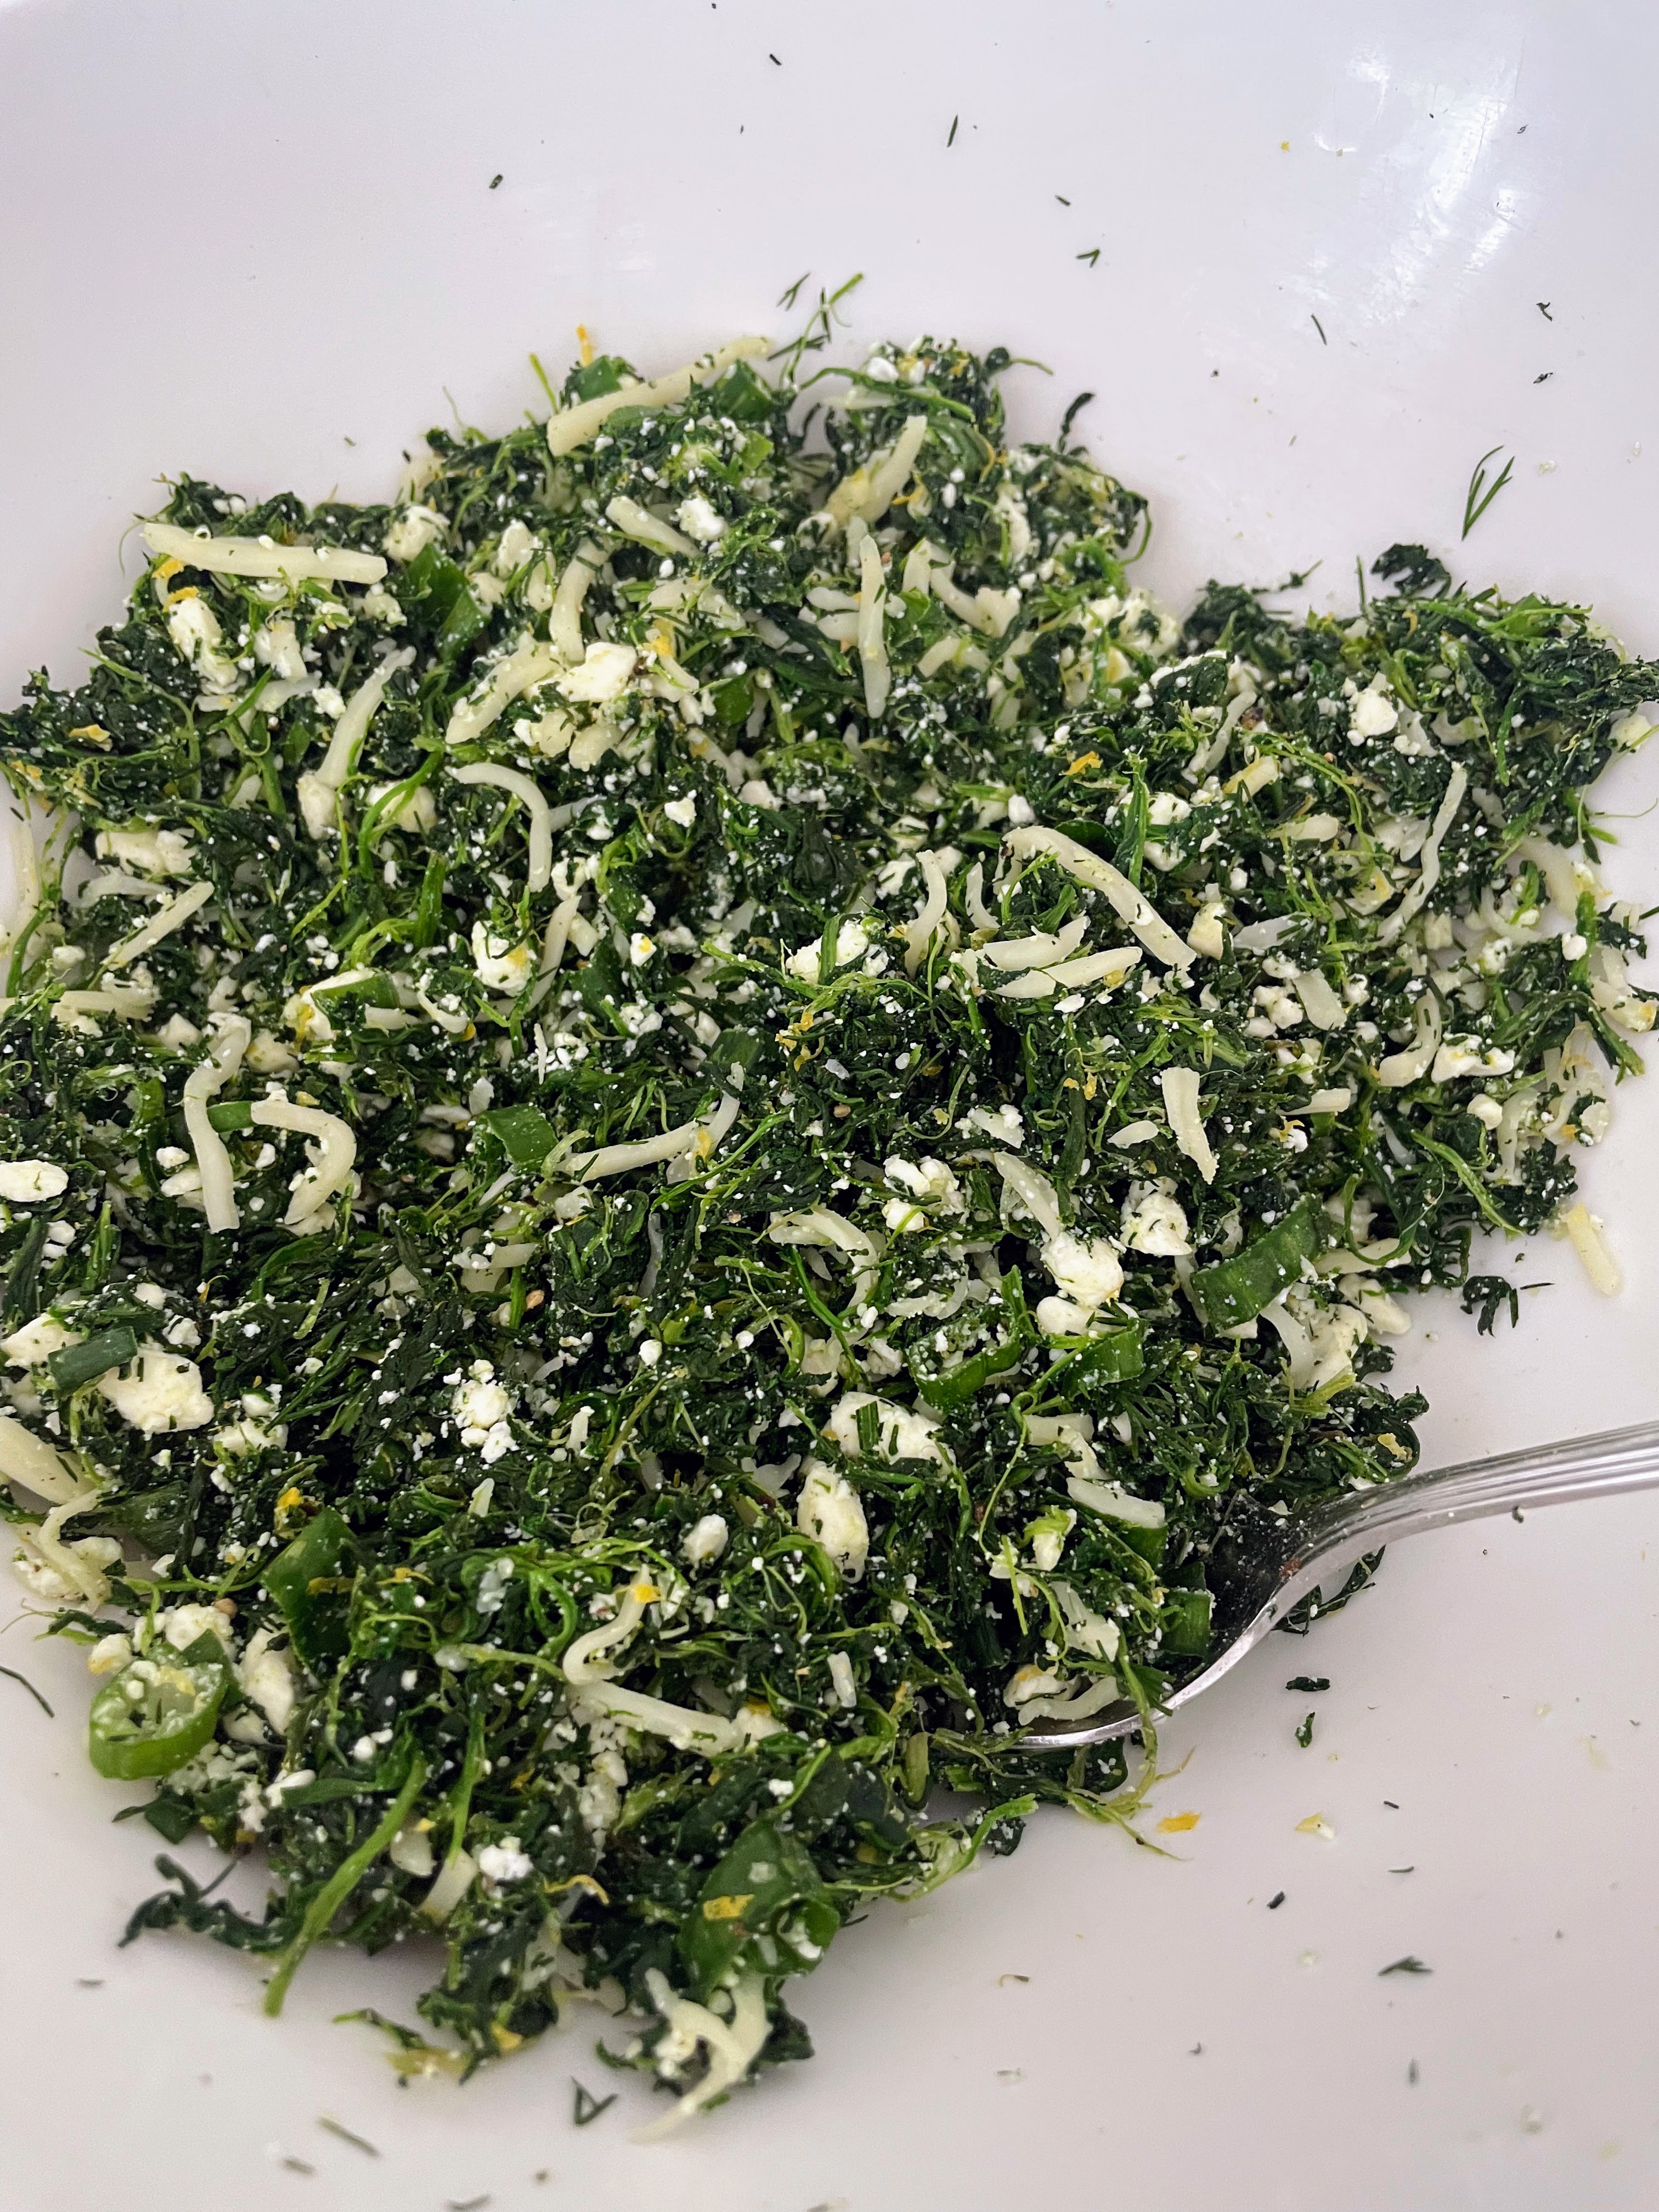
Preparation: 1. Defrost the frozen puff pastry and the frozen spinach in the fridge for at least 8 hours or overnight. (Note: Place the spinach packages in a leak-proof container, just in case.) 2. When you are ready to make the tart, place the defrosted spinach in a fine-meshed strainer, and press/squeeze to get as much of the liquid out as possible; you want it as dry as you can get it. 3. Add the spinach, scallions, dill, feta, garlic, lemon zest, salt, and pepper to a medium bowl. Stir to combine, making sure to break up any spinach clumps. I find it is easiest to use my (clean) hands to do this. You should have 2½ cups spinach mixture. (The photo below is from when I added mozzarella to make up for not having quite enough spinach.)
4. Find a round object that’s 10–12 inches (25-30 cm.) in diameter. I’ve used whatever I can lay my hands on, such as the lid of a Tupperware container or the lid of a large Dutch oven, each about 11 inches/28 cm. in diameter. 5. Place one of the pastry sheets on parchment paper (or on a well-floured counter if you prefer, or if you forgot you were supposed to roll it out on parchment paper…). Lightly dust the pastry with flour, both over and under. Roll it out in all directions and dust with more flour if needed, until it’s at least 1–2 inches (2.5-5 cm.) larger than your round object/lid. 6. Place the round object/lid over the pastry, press to indent, then use a sharp knife to trace the circle. Set aside the excess pastry. (Tip: You can save the excess pastry in the fridge for a couple days, tightly wrapped, then when the urge strikes you can tear it into small pieces, dust with cinnamon and sugar, and bake for a few minutes for a quick and delicious treat).
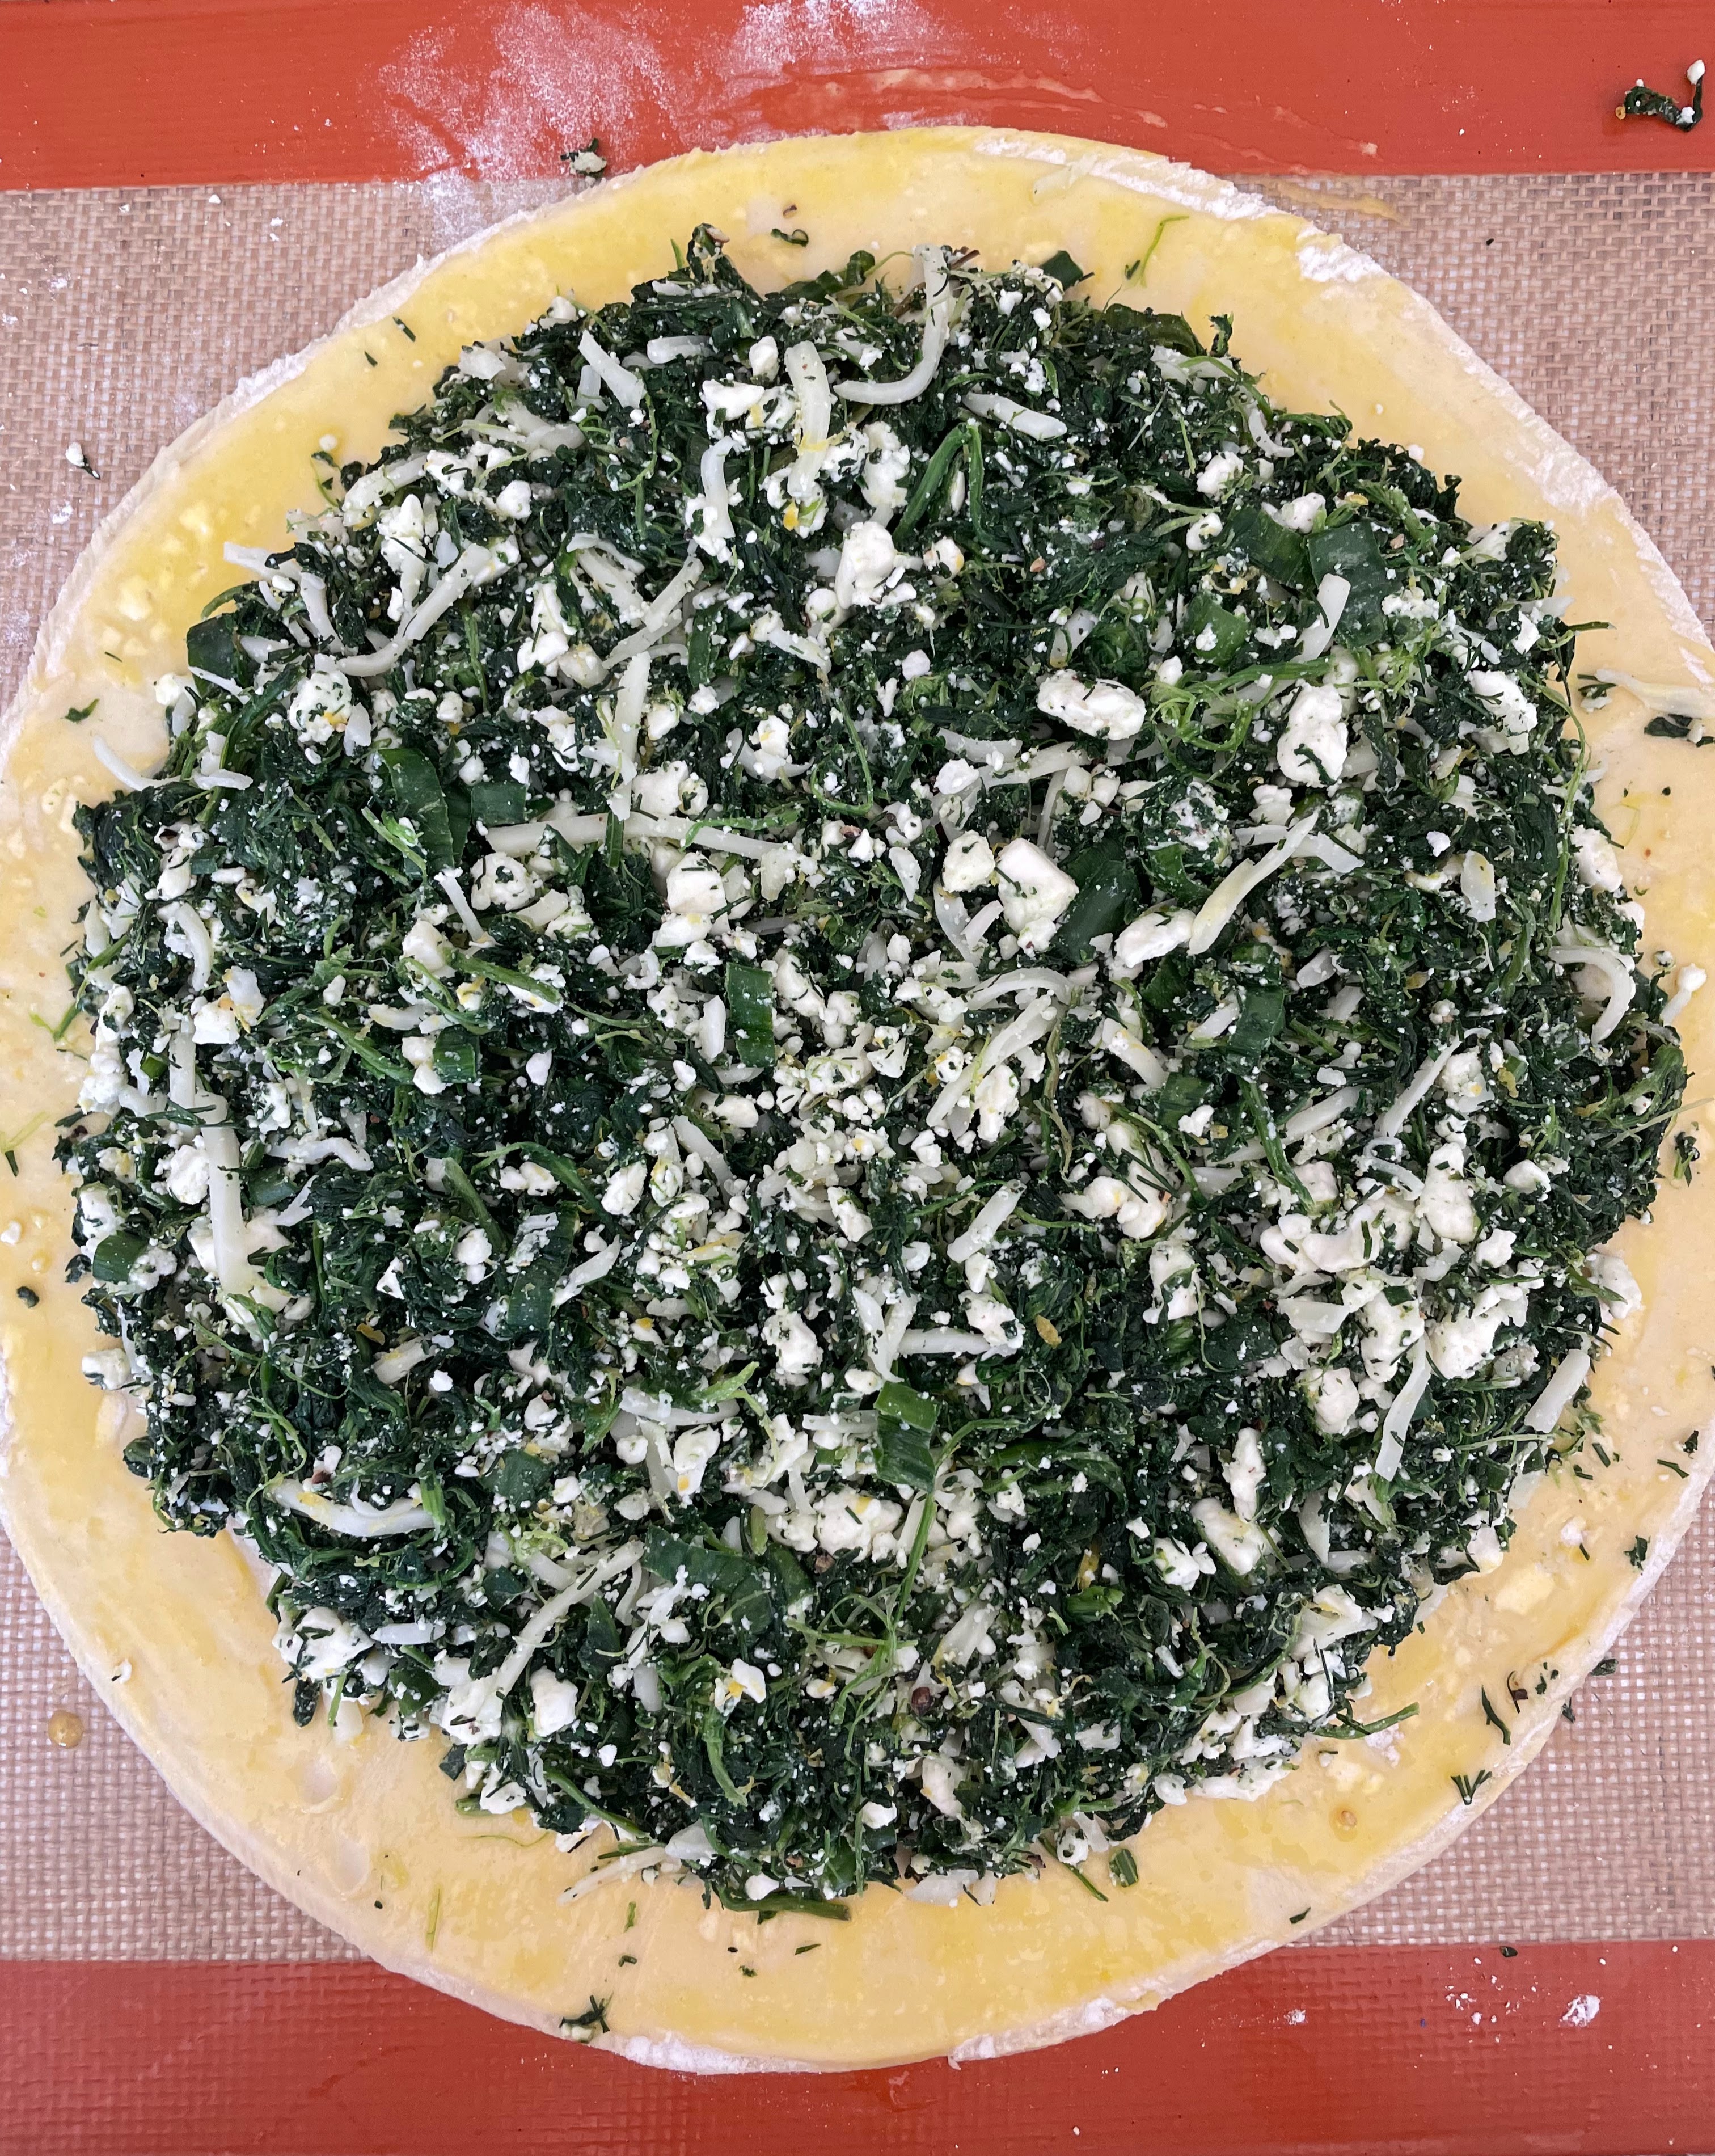
7. If you rolled your pastry directly on the counter, now is the time to 1) transfer your pastry round to some parchment paper (preferred) or to a baking mat (if you are out of parchment), and then to 2) place the whole thing on a baking sheet. Brush the egg wash all along the circumference of the pastry round; reserve remaining egg wash for later. Spread the spinach mixture over the pastry base, leaving a ½” border.
8. Cut out the second sheet of pastry, following the same directions as for the first one. Place the second round of pastry on top of the spinach mixture (if you’re having trouble moving it, fold it into quarters, then unfold it on top of the spinach) and press gently to seal. Using a small cup or shot glass (2 inches/ 5 cm. in diameter), make an indent in the very center. Your pastry might be slightly warm by now. If so, chill 10–20 minutes.
9. Once the pastry is cool, transfer the whole set-up, parchment/baking mat and all, to a work surface. With a chef’s knife, cut pastry into 4 quadrants, stopping when you reach the center circle. Cut each quadrant in half, then in half again, so that you have 16 spokes. (Note: If cutting on a baking mat, cut as gently as possible to avoid damaging the mat). Transfer the tarte with the parchment/baking mat back to sheet tray.
10. Working with one spoke at a time, pull gently away from the center (to extend the length of each piece), then twist to expose the spinach insides. Aim for three or four twists. Nudge them around to distribute evenly. it doesn’t matter if they look messy; they will all look beautiful when baked. Freeze the tarte until cold, 10–15 minutes.
11. Meanwhile, place a rack in the middle of the oven; preheat to 400°F/200°C. Brush the tarte all over with the reserved egg wash; season with salt and pepper. Bake the tarte until well browned, about 30–35 minutes.
Puff pastry is a culinary lifesaver, since pretty much anything tastes better when puff pastry is involved. Also, it’s a great way to use up all sorts of things in your fridge or cupboards. This week, I defrosted a package of puff pastry for a meal I did not end up making, and I needed to use it soon. So the scavenger hunt began. Amongst other things in the fridge, I spotted two pork sausage links, some mushrooms that were not going to make it much longer, and a bit of fresh spinach that was beginning to look not so fresh. On the counter, I could see some cherry tomatoes on the cusp of wrinkling. And in the cheese drawer were wedges of Gruyere and Pecorino Romano.
These ingredients reminded me of a sausage and mushroom pizza al taglio (pizza by the slice) I loved in Rome. So the solution was clear–I would make an ‘Avoid Food Waste/Clear Out the Fridge’ puff pizza al taglio. (Ok, honestly, this can also be called a puff pastry tart….) You can cut it into larger pieces for lunch or dinner, or cut it smaller ones to serve as an appetizer.
Note: This recipe is just a suggestion; you can put all sorts of things on top of puff pastry (like this beet and feta vegetarian option) and you will end up with something delicious. I often let fate and the contents of my fridge decide. With a little bit of extra effort, you can also make puffs, but I was feeling lazy and went freeform.
Ingredients
1 pkg. puff pastry (the kind I buy has two sheets of pastry; I used both) mushrooms, sliced (16 oz./450 gr.) garlic salt (optional) baby spinach, chopped (as much as desired; I only had a small handful) 2 pork sausages, casings removed cherry tomatoes, cut in quarters (as much as desired; I had about 10 cherry tomatoes to use) Gruyere cheese, grated (as much as desired) Pecorino Romano cheese, grated (as much as desired)
Preparation
1. Thaw your puff pastry (ideally, overnight in the fridge). 2. Preheat oven to 375 F (190 C). 3. Cook any ingredients that are likely to wet the puff pizza too much (or not cook fully while in the oven). For me, those ingredients were the mushrooms, spinach, and sausage. In a frying pan, I quickly sauteed the mushrooms in some olive oil and tossed them with garlic salt. I placed them on a dish, then cooked the sausage in the same pan until it was no longer pink, crumbling it as it cooked. The sausage went on another plate and the little spinach I had went into the pan; it almost disappeared before my eyes, but ended up being just enough to add a spot of additional color to the puff pizza.
4. Spray a rimmed baking sheet with olive oil cooking spray, or wipe a thin layer of oil over it. 5. Lay the puff pastry sheets down the center of the baking sheet, pressing the seam between the two together. Score the sides of the pastry with a sharp knife. This will allow the sides to rise into a crust. (I did not score the short sides as I was able to press them up against the baking sheet rim where they formed their own crust.)
6. Layer your prepped ingredients onto the puff pastry, taking care to not place anything past the score lines: I started with a little Gruyere, then the mushrooms, sausage, tomatoes, and spinach, ending with a bit more Gruyere and some Pecorino Romano. I tend to go lightly on the cheeses as I want the flavors of the other ingredients to shine, but feel free to add as much as you like.
7. Bake for 25-30 minutes, or until puff pastry and cheeses are golden. Using a firm spatula, lift one edge of the pizza up and check the bottom; you want to be sure it, too, is golden. 8. Remove, let sit for a minute or two, then cut into individual pieces. Enjoy!
Much to the dismay of one son in particular when he was younger, there is almost no way, shape, or form of zucchini I don’t like; I cooked it often when he was little. Back in those days of juggling work and young kids, I usually sauteed zucchini slices in olive oil, with salt, pepper, and maybe some basil and/or a sprinkle of Parmesan or Pecorino Romano: a quick and easy side dish that I still love. But it was not one my son enjoyed…. However, times change. He now prepares zucchini frequently for his daughter, who likes it a lot. So the family tradition continues!
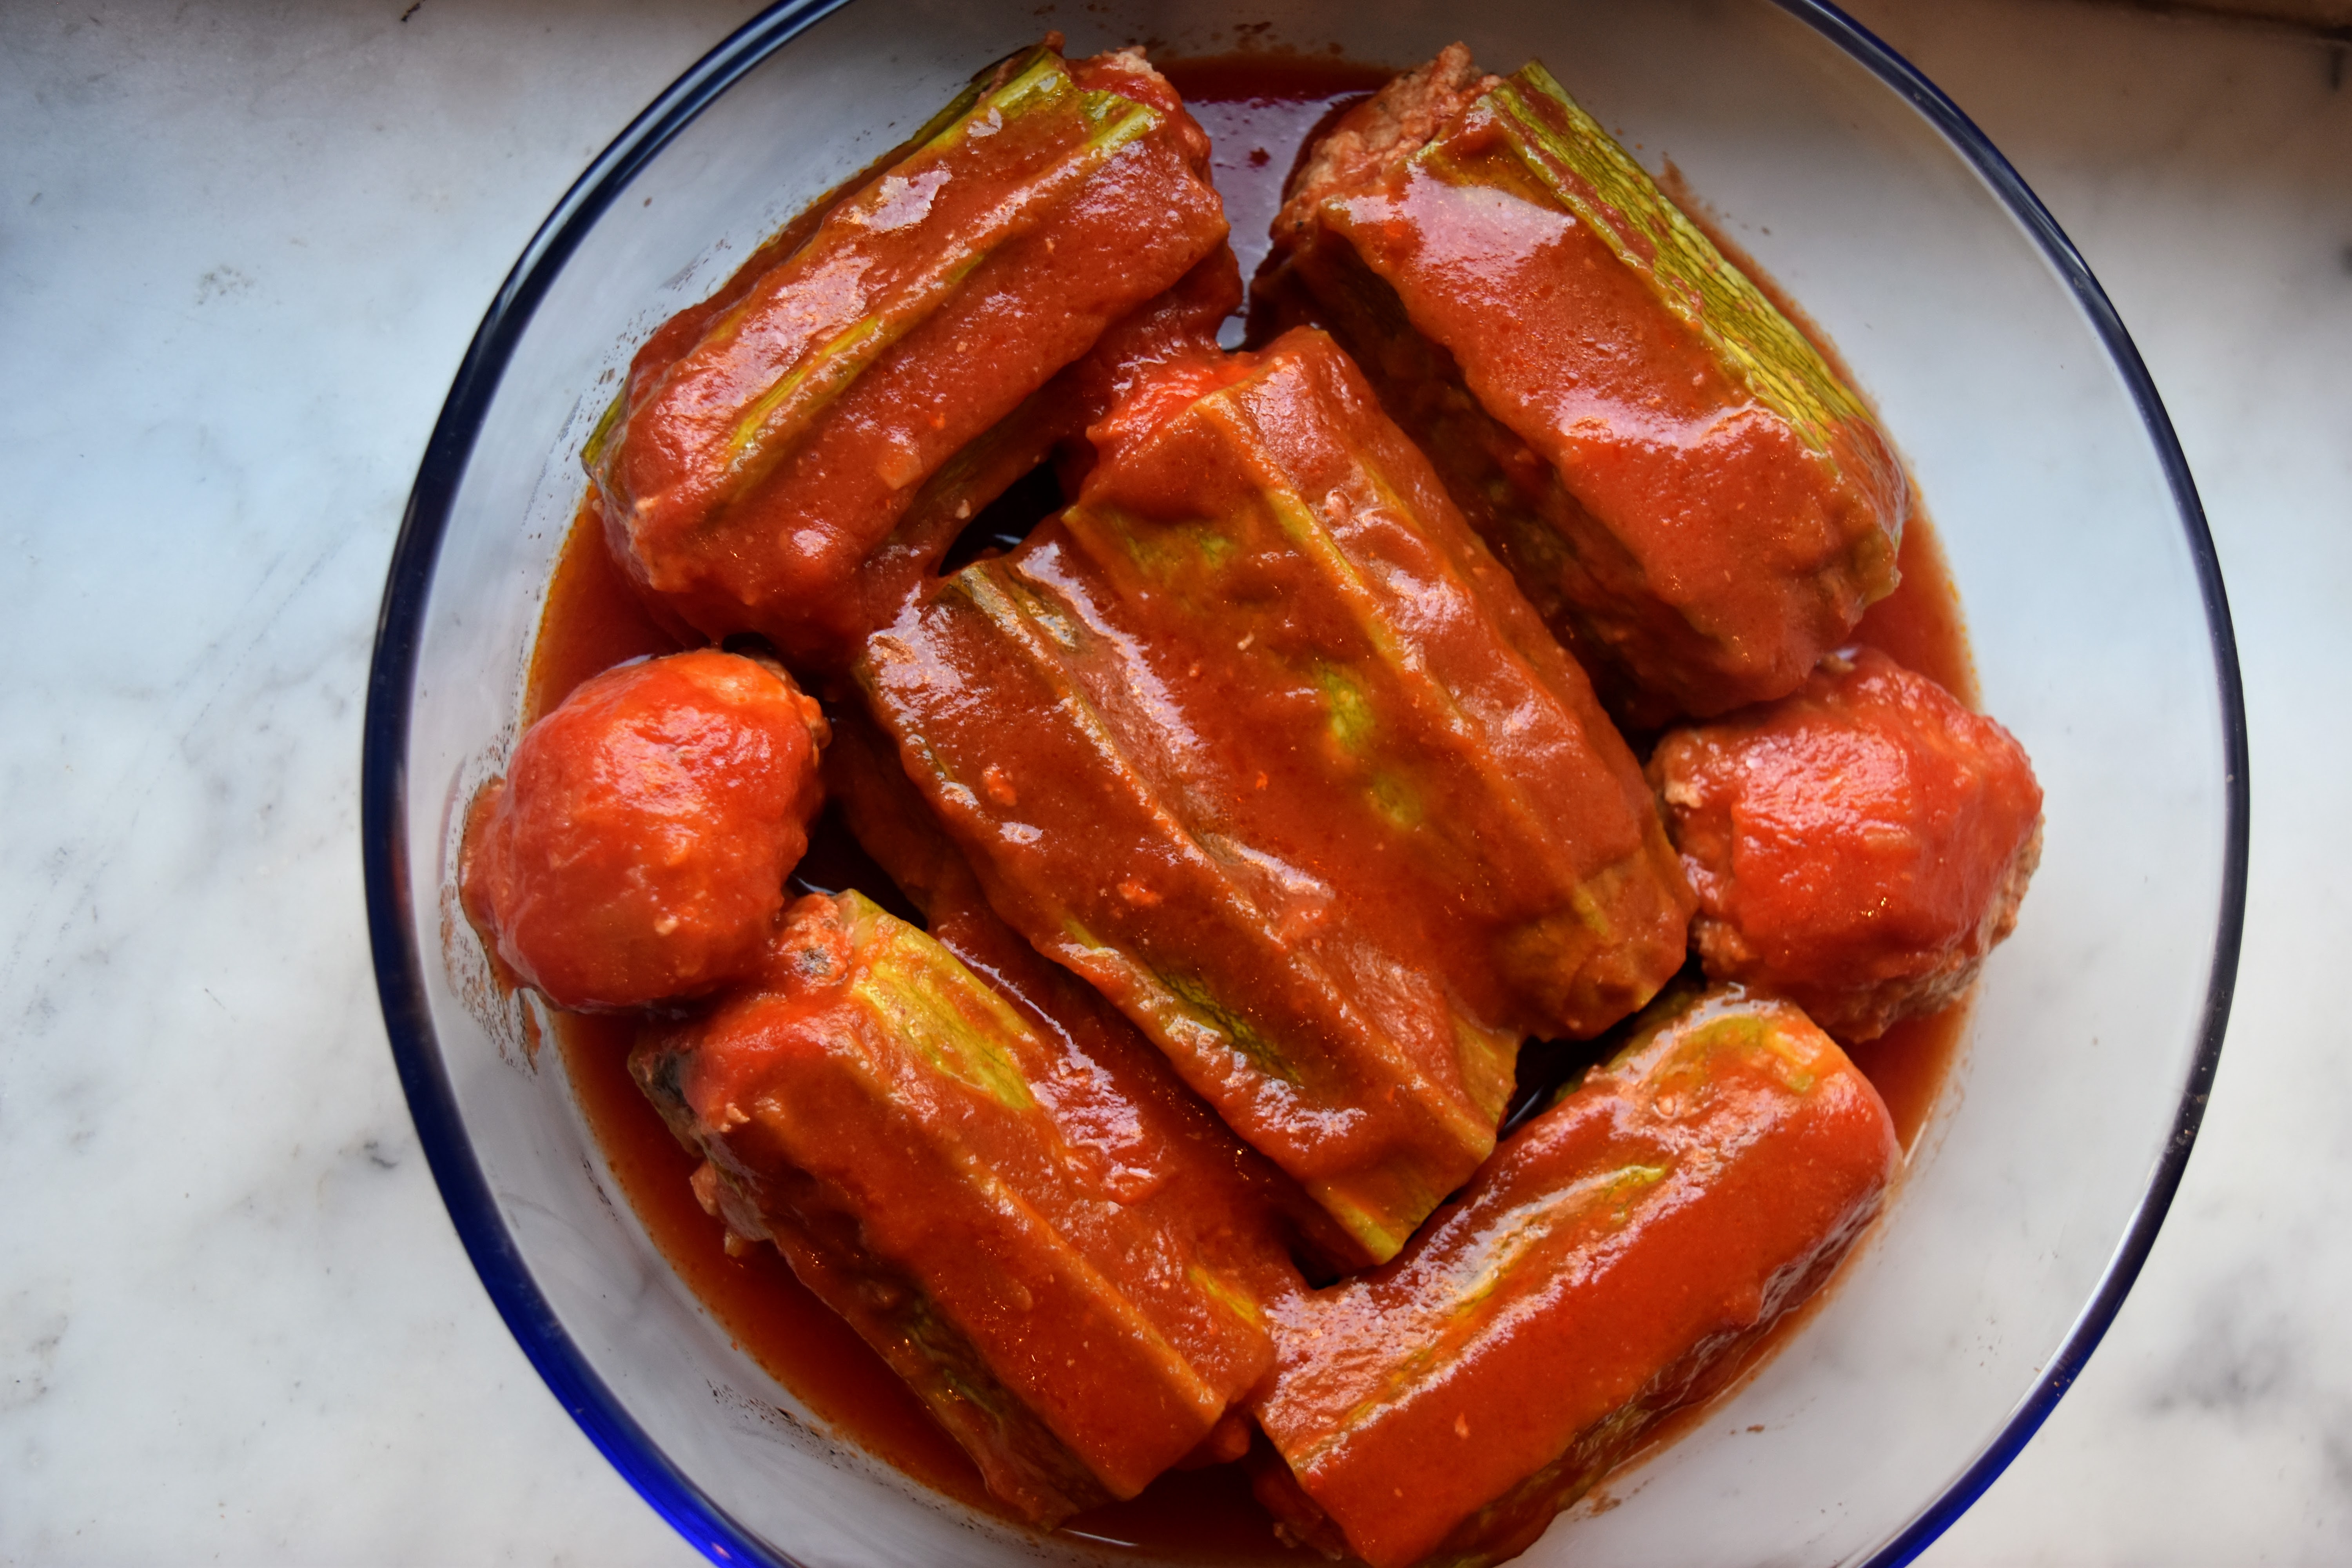
This stuffed zucchini dish is one I learned from an Italian friend when we lived in Rome. It is especially good as the weather gets colder. Note: I’ve made this dish many times, in Rome and here in the US. The photos in this post come from various times; some show Roman zucchini (Costata romanesco zucchini–which is lighter green, more speckled, and ridged) and others show the darker, smoother zucchini more typically found in the U.S. (see first photos below). Both are delicious!
Fun fact: In Italian, the word “zucchini” does not exist. The vegetable has a feminine name: one single vegetable is called a zucchina, and multiple ones are zucchine. I’m not entirely sure how we in the U.S. ended up using a masculine plural form for both singular and plural versions of a “feminine” vegetable, but there you have it. To complicate things, other English-speaking countries call the vegetable “courgette,” which comes from the French word for marrow, which is actually a big zucchini (ok, a big zucchina).
Ingredients
4 zucchini, as equal in length and diameter as possible
olive oil 1/2 onion, finely diced 1 carrot, grated 4-5 innermost, tenderest stalks of celery (with leaves), finely diced 1 lb (450 gr) ground pork (or other ground meat of choice) 2 garlic cloves, minced 1 tsp. (6 gr) table salt freshly ground pepper 1 egg, lightly beaten 1/3 c. (36 gr) panko breadcrumbs 1/2 c. (110 gr) grated Pecorino Romano (or Parmesan) cheese nice handful of parsley, finely chopped nice handful of basil leaves, finely chopped
About 32-40 oz (940 ml-1.1 liters) marinara sauce (such as Rao’s), or tomato passata (such as Mutti), or any marinara/passata/tomato sauce of your preference
Preparation
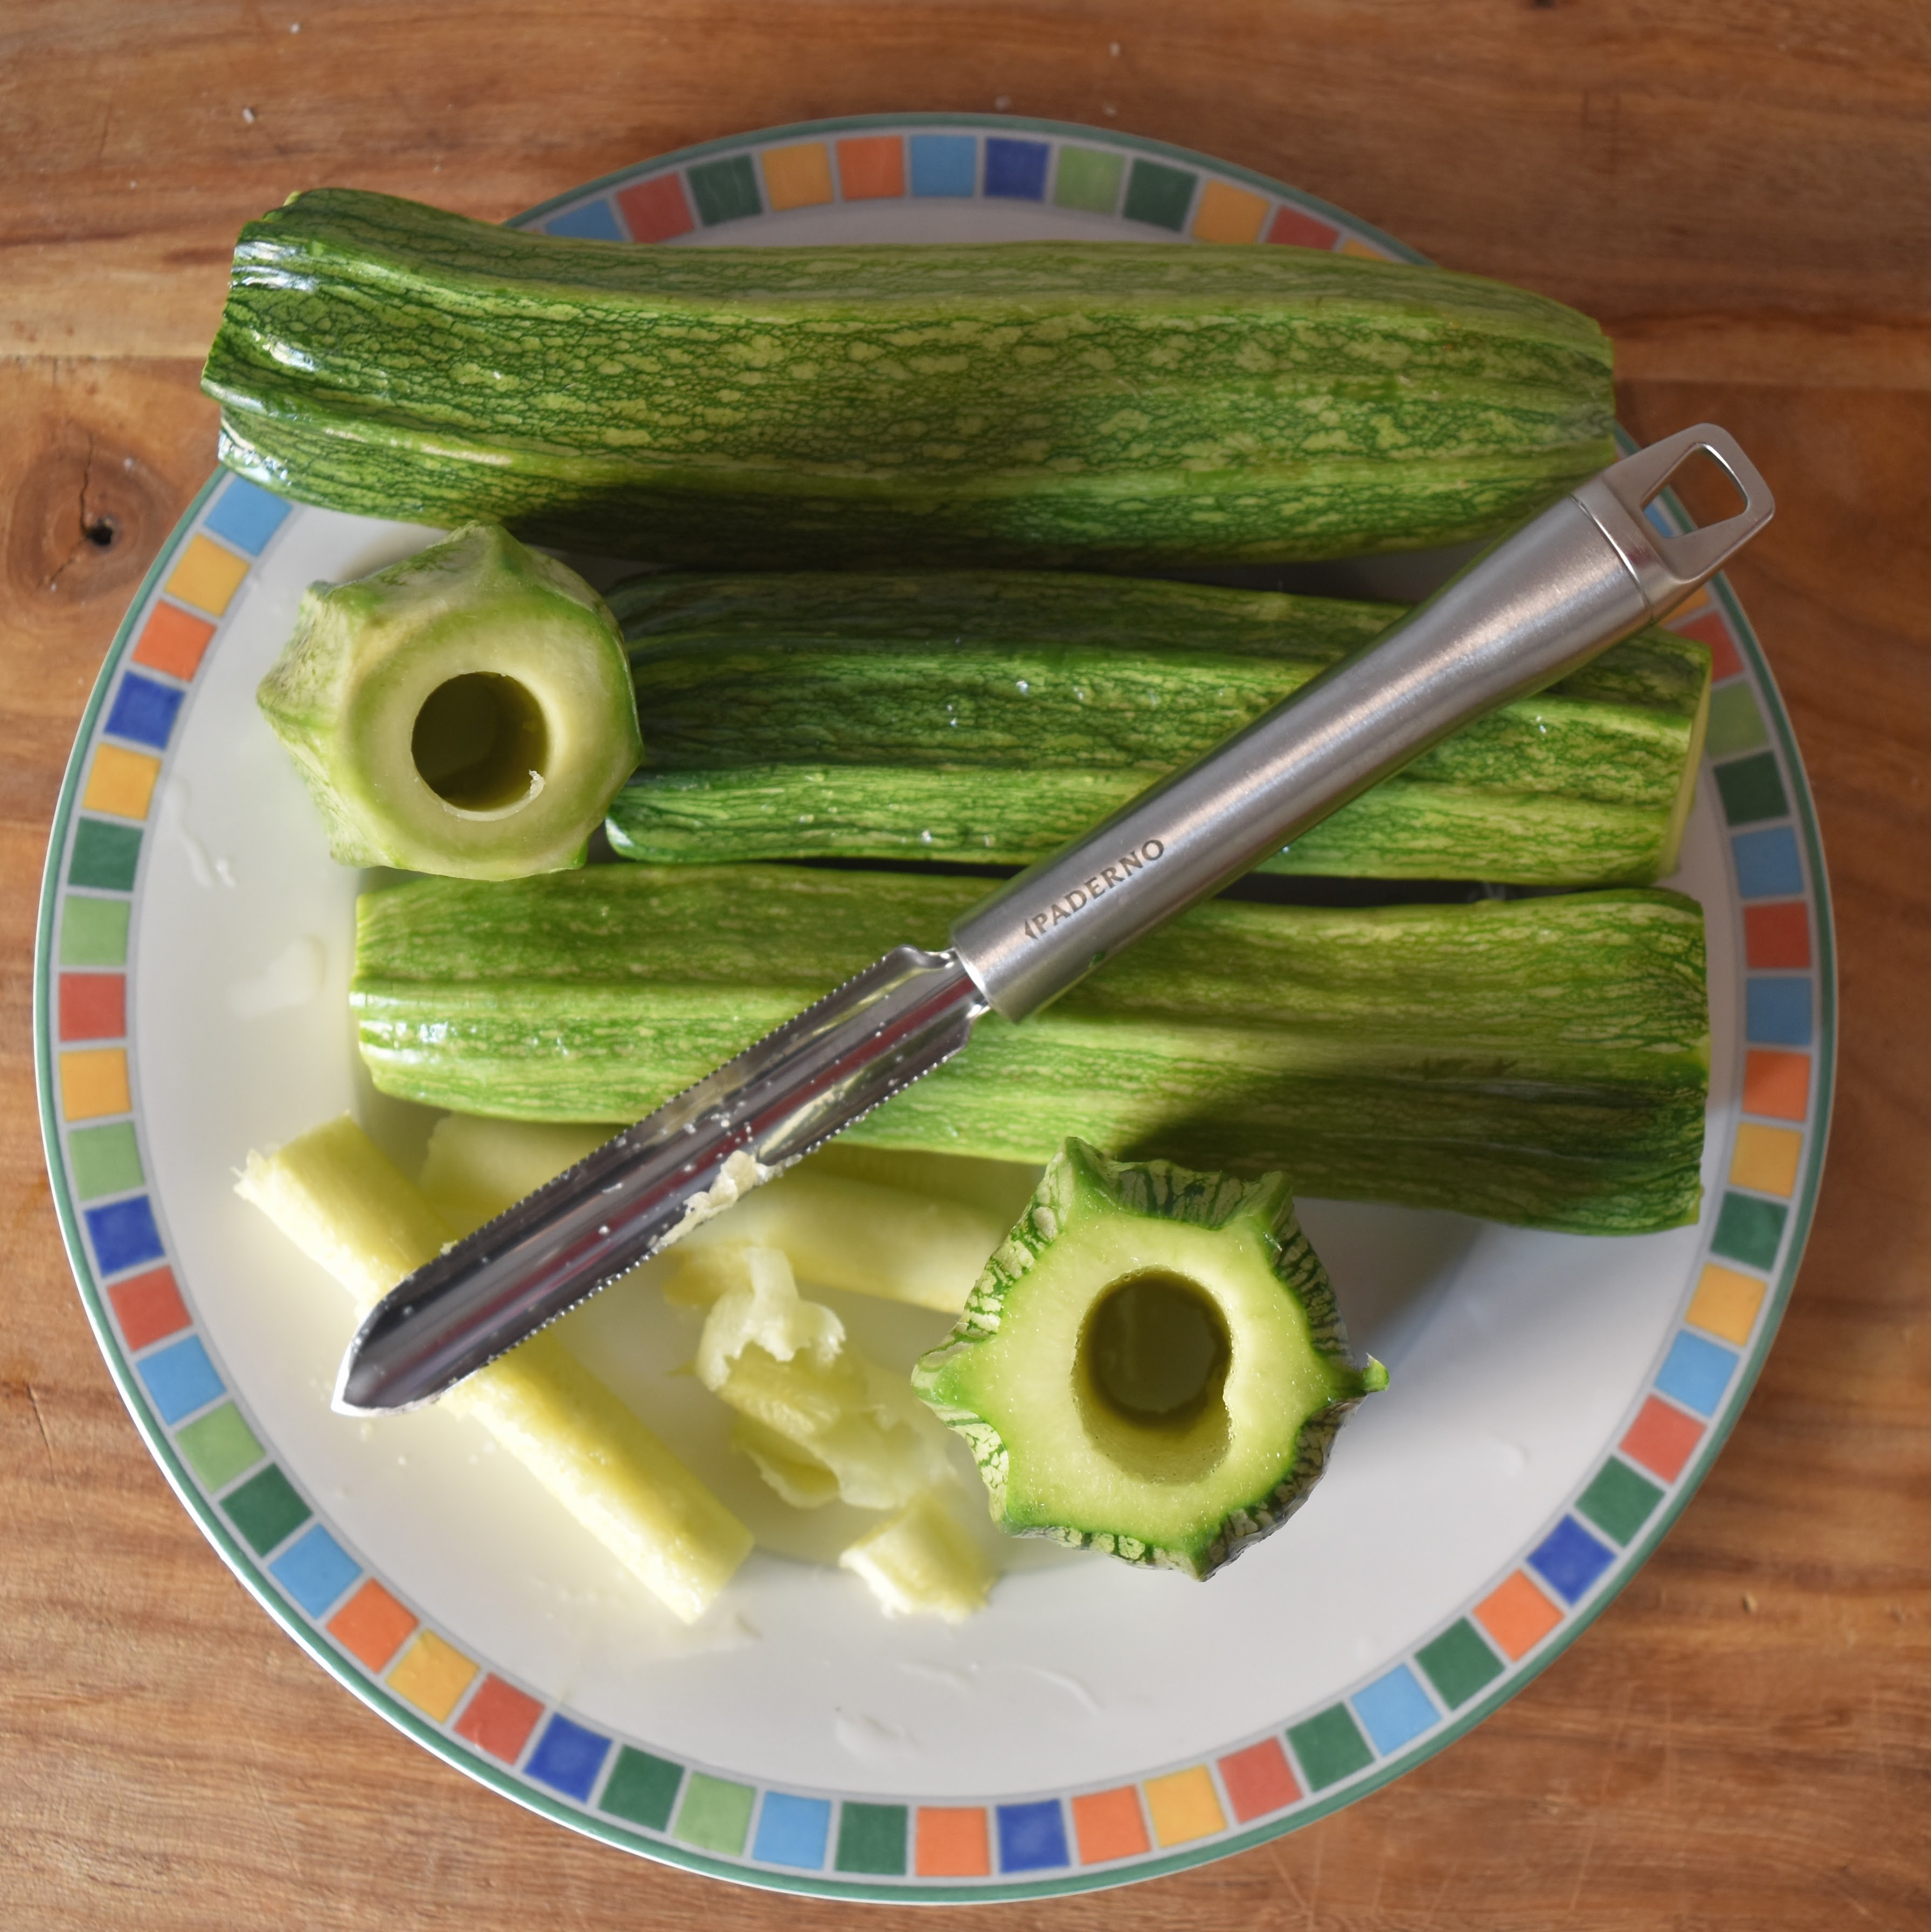
1. Cut each zucchini into 3 equal sections, then core each section. Finely dice the cores (the inner parts) and set aside.
2. Drizzle some olive oil into a skillet, and sauté the onion, carrots, and celery/celery leaves until almost soft. Add the diced zucchini innards, and cook until just tender. Place the veggies in a mixing bowl and let cool.
3. Add the remaining filling ingredients and mix well.
4. Pour the marinara sauce or passata into a Dutch oven or pot that is large enough to hold all zucchini pieces upright in a single layer. Start by adding sauce to a depth that is half the length of each zucchini piece. So, if your zucchini pieces are 4 inches/10 cm long, then add about 2 inches/5 cm depth of sauce to the pot. The sauce will rise up as you add the zucchini pieces to it.
5. With clean hands, take a small handful of filling and stuff the filling into the cored zucchini pieces with your fingers (you may need to stuff both ends). If you have extra filling, shape it into mini meatballs.
6. Nestle the stuffed zucchini pieces (and any meatballs) into the sauce in the pot. If needed, add more sauce so that it comes close to the tops of the zucchini pieces.
7. Bring to a simmer over high heat, then cover the pot and lower the heat to a simmer. Cook for about 30 minutes or until the zucchini are tender.
8. Serve with extra grated cheese sprinkled on top, if desired. Enjoy!
Years ago, I learned to make some Lebanese dishes from watching (and helping) college friends cook a few classics, but my main teacher was a cookbook called Lebanese Cuisine by Madelain Farah. The version I have is from 1979, meaning it predates the internet. (And no, I wasn’t in college in 1979; I bought the cookbook some years later). Despite there being so many delicious Lebanese recipes now available online, I still find myself going back to this well-loved, well-spattered, paperback cookbook for some of my favorites. It has accompanied me on many moves and is now held together with tape.
Ms. Farah was a straightforward recipe writer; no coddling of the reader for her. In her recipe for Baba Ghanoush (which she calls Baba Ghannuj, as there are many ways to spell it), the first instruction is written this way: “Eggplant may be baked or grilled over a flame until well done.” There’s a lot of room for interpretation in those instructions…. Ms Farah was also a proponent of mashing the ingredients, either with a potato masher or a wooden mallet. I now use a food processor, which may be anathema in some quarters, but it produces a silky smooth dip.
So, this recipe takes its inspiration from Madelain Farah’s, with a few twists: I added smoked paprika and cumin, which play on the smokiness of the eggplant and really help bring out its flavor. And I use a faster blending technique.
Baba Ghanoush
Ingredients: 2 medium eggplants (2 lb/900 gr total). Note:Ms Farah called for one large eggplant, but the larger the eggplant, the more seeds there are, so I prefer using two smaller ones. (Since I grow eggplant in my garden each summer, I can pick them at just the right size!). olive oil
2 cloves of garlic, minced (we like garlic in our house; you can use 1 clove as the recipe originally called for) 1/4 c. (60 gr.) tahini 1/4 c. (60 ml.) lemon juice, or more to taste 1/4 tsp. smoked paprika 1/4 tsp. cumin 1/2 tsp. salt, to taste 1 tbsp. (15 ml.) water (optional)
To garnish: –chopped fresh flat-leaf parsley –smoked paprika and cumin (or, substitute the paprika and cumin with sumac, which is a more traditional topping and one Ms. Farah suggested; both options taste great) –olive oil
Preparation:
Cooking method #1: Preheat the oven to 450 degrees F (230 degrees C). Cut the eggplant(s) in half lengthwise, and brush a generous amount of olive oil on the cut sides. Place the cut sides down on a large baking sheet (use a rimmed one as the eggplant will get juicy). Bake for about 30-45 minutes until the eggplant is dark golden brown and very, very soft.
Cooking method #2: Grill the eggplant(s) cut side down on a barbecue, until golden and soft, taking care not to completely incinerate them (some burnt bits are ok and add to the flavor, but a carbonized eggplant is a step too far; I say this from experience).
Flip the eggplants over and let cool.
Scoop out the eggplant pulp and place in the bowl of a food processor, carefully removing any skin that may have made its way in, too. Also, check for big clumps of seeds; individual seeds are fine and will get blended right up, but I like to take out any big clusters if I see them, to ensure a smoother dip.
Add the remaining dip ingredients and process until nice and smooth, adjusting the ingredients to suit your taste. If the dip is too thick, you can add more lemon juice or a spoonful of water.
Pour the dip into a serving bowl. Sprinkle with chopped parsley and more smoked paprika and cumin (or use sumac instead); drizzle with olive oil.
Serve with pita bread, pita chips, and/or veggies — or use in a Middle Eastern wrap as a substitute for hummus. I also love putting Baba Ghanoush, lamb kafta, and some tabouli in a pita and calling it a meal.
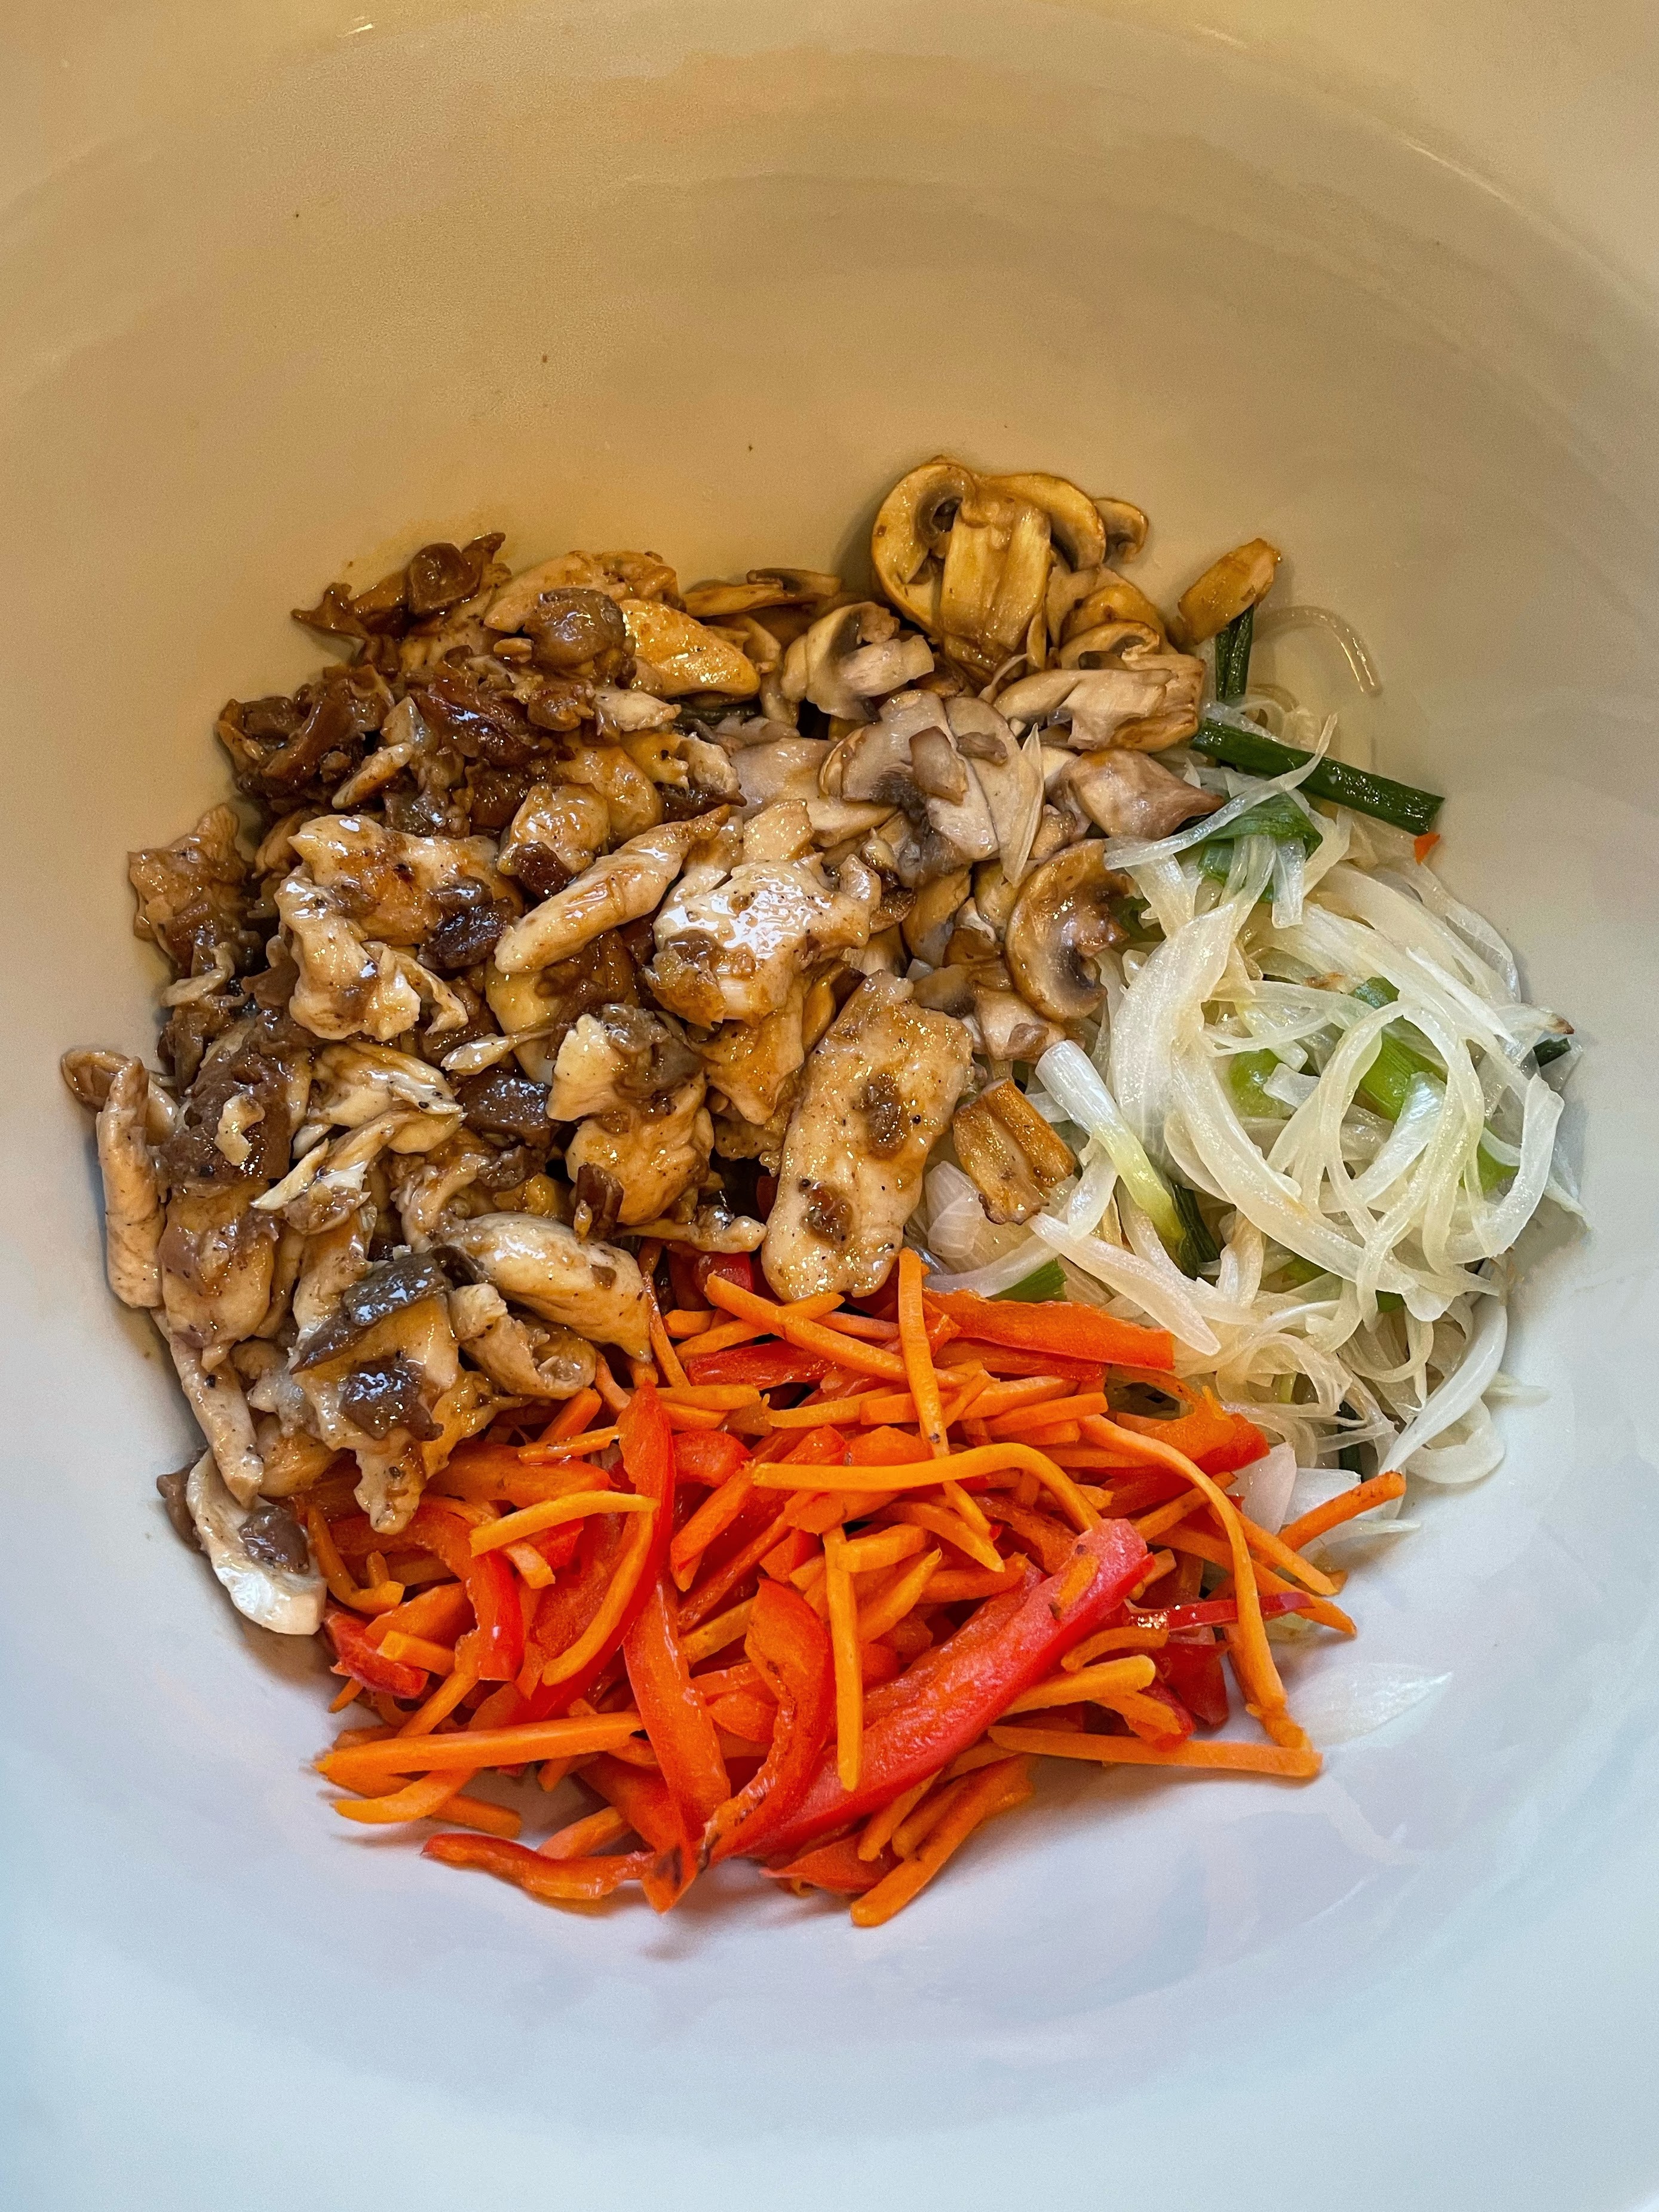
Let me start by saying that chicken is not traditional in this recipe, but it’s what I had on hand when I got the urge to make this; japchae takes a bit of effort and I didn’t have time to add a grocery trip into the mix, too. Amazingly, though, I had almost all the other ingredients, and had been dreaming of this dish for a while. I’ve loved it since my college days, when there was a hole-in-the-wall Korean restaurant around the corner from where I lived (what bliss). But what made me have to make this dish, right now, was watching a K-Drama one weekend that had tantalizing views of the protagonists eating japchae…. After salivating through a few episodes, I knew what we had to have for dinner.
If you haven’t ever had japchae (jap means to mix, and chae means vegetables), you are in for a treat. The glassy, sweet potato starch noodles (dangmyeon) are slippery, chewy, savory and a bit sweet, and are tossed with so many good things.
If that weren’t enough, this dish gives you options: you can make the japchae a day or two ahead of time (quickly stir-frying before serving), and you can serve it warm or at room temperature.
I used a recipe from the incomparable Maangchi, with a few alterations:
First, I substituted chicken for the beef or pork. Plus, I used 1.5 times what the original recipe called for (6 oz vs 4 oz).
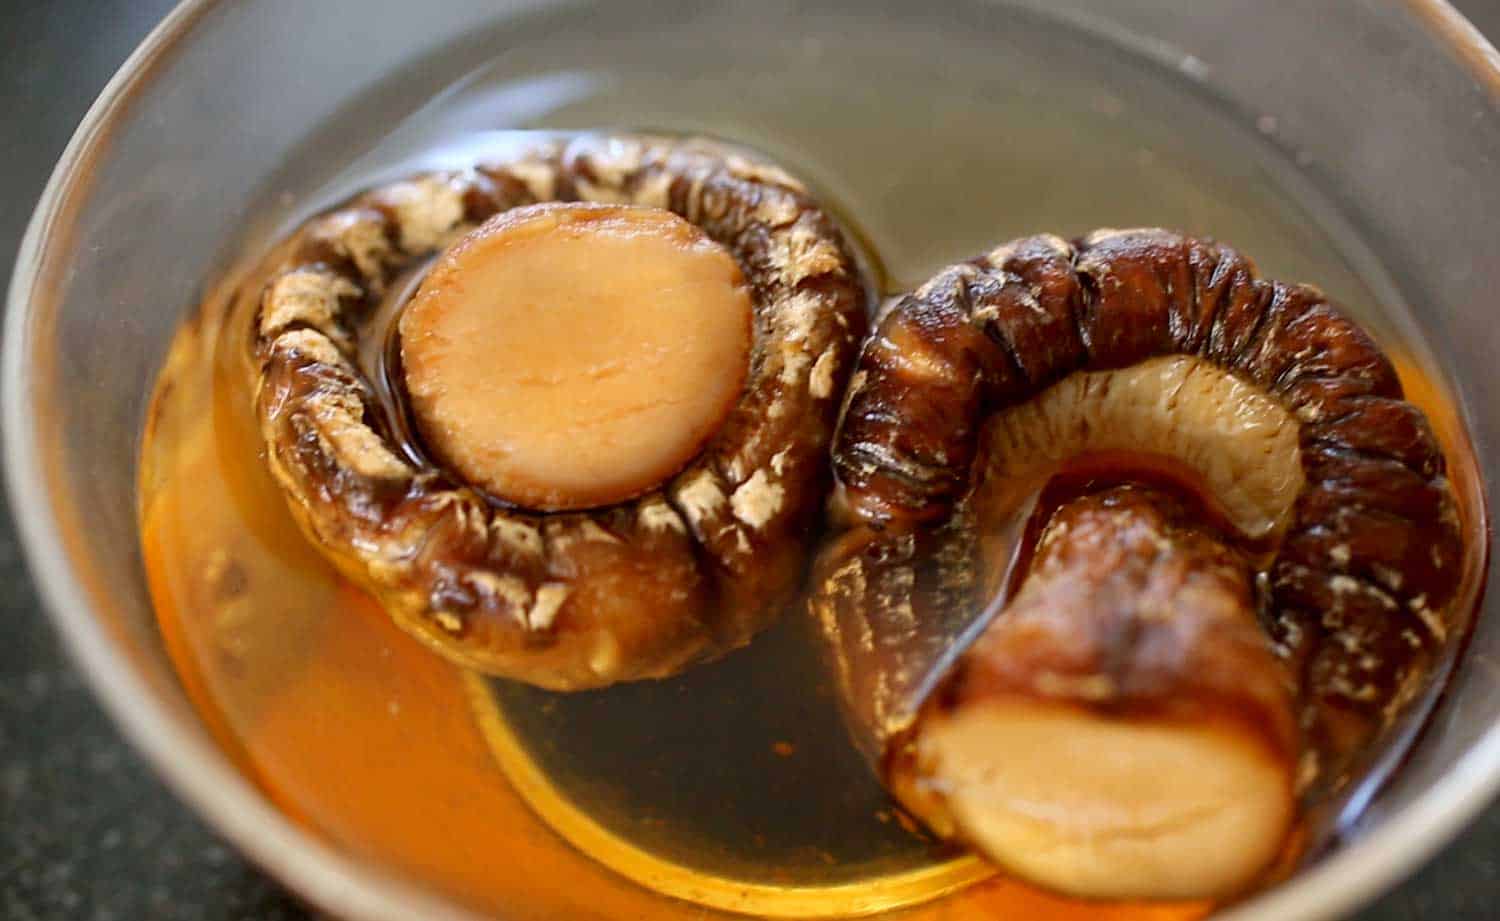
Then, just when I was patting myself on the back for having everything else, I realized I had dried porcini mushrooms, vs dried shitake. Still delicious in this dish.
Finally, I made 1.5 times the final sauce ingredients (a mixture of garlic, soy sauce, sugar, black pepper, and toasted sesame oil) as that sauce is my favorite and I had to have a little more of it. And I also drizzled a little of the strained porcini soaking liquid into the sauce, too, for extra umami.
Note: This recipe is killer. But this is not Maangchi’s easy version of japchae; this version takes commitment to cook all the veggies separately. So plan on making it when you have the time to give it the loving attention it deserves.
4 ounces beef, filet mignon (or pork shoulder), cut into ¼ inch wide and 2½ inch long strips
2 large dried shiitake mushrooms, soaked in warm water for 2 to 3 hours, cut into thin strips
2 garlic cloves, minced
1 tablespoons plus 2 teaspoons sugar
2 tablespoons plus 1 teaspoon soy sauce
2 tablespoons toasted sesame oil
1 tablespoon toasted sesame seeds
1 large egg
4 ounces spinach, washed and drained
4 ounces of dangmyeon (sweet potato starch noodles)
2 to 3 green onions, cut crosswise into 2 inch long pieces
1 medium onion (1 cup), sliced thinly
4 to 5 white mushrooms, sliced thinly
1 medium carrot (¾ cup), cut into matchsticks
½ red bell pepper, cut into thin strips (optional)
ground black pepper
kosher salt
vegetable oil
Directions
Marinate the beef and mushrooms:
Put the beef and shiitake mushrooms into a bowl and mix with 1 clove of minced garlic, 1 teaspoon sugar, ¼ teaspoon ground black pepper, 2 teaspoons soy sauce, and 1 teaspoon of toasted sesame oil with a wooden spoon or by hand. Cover and keep it in the fridge.
Make the egg garnish (jidan):
Crack the egg and separate the egg yolk from the egg white. Remove the white stringy stuff (chalaza) from the yolk. Beat in a pinch of salt with a fork.
Add 1 teaspoon of vegetable oil to a heated nonstick pan. Swirl the oil around so it covers the pan, and then wipe off the excess heated oil with a kitchen towel so only a thin layer remains on the pan.
To keep the jidan as yellow as possible, turn off the heat and pour the egg yolk mixture into the pan. Tilt it around so the mixture spreads thinly. Let it cook using the remaining heat in the pan for about 1 minute. Flip it over and let it sit on the pan for 1 more minute.
Let it cool and slice it into thin strips.
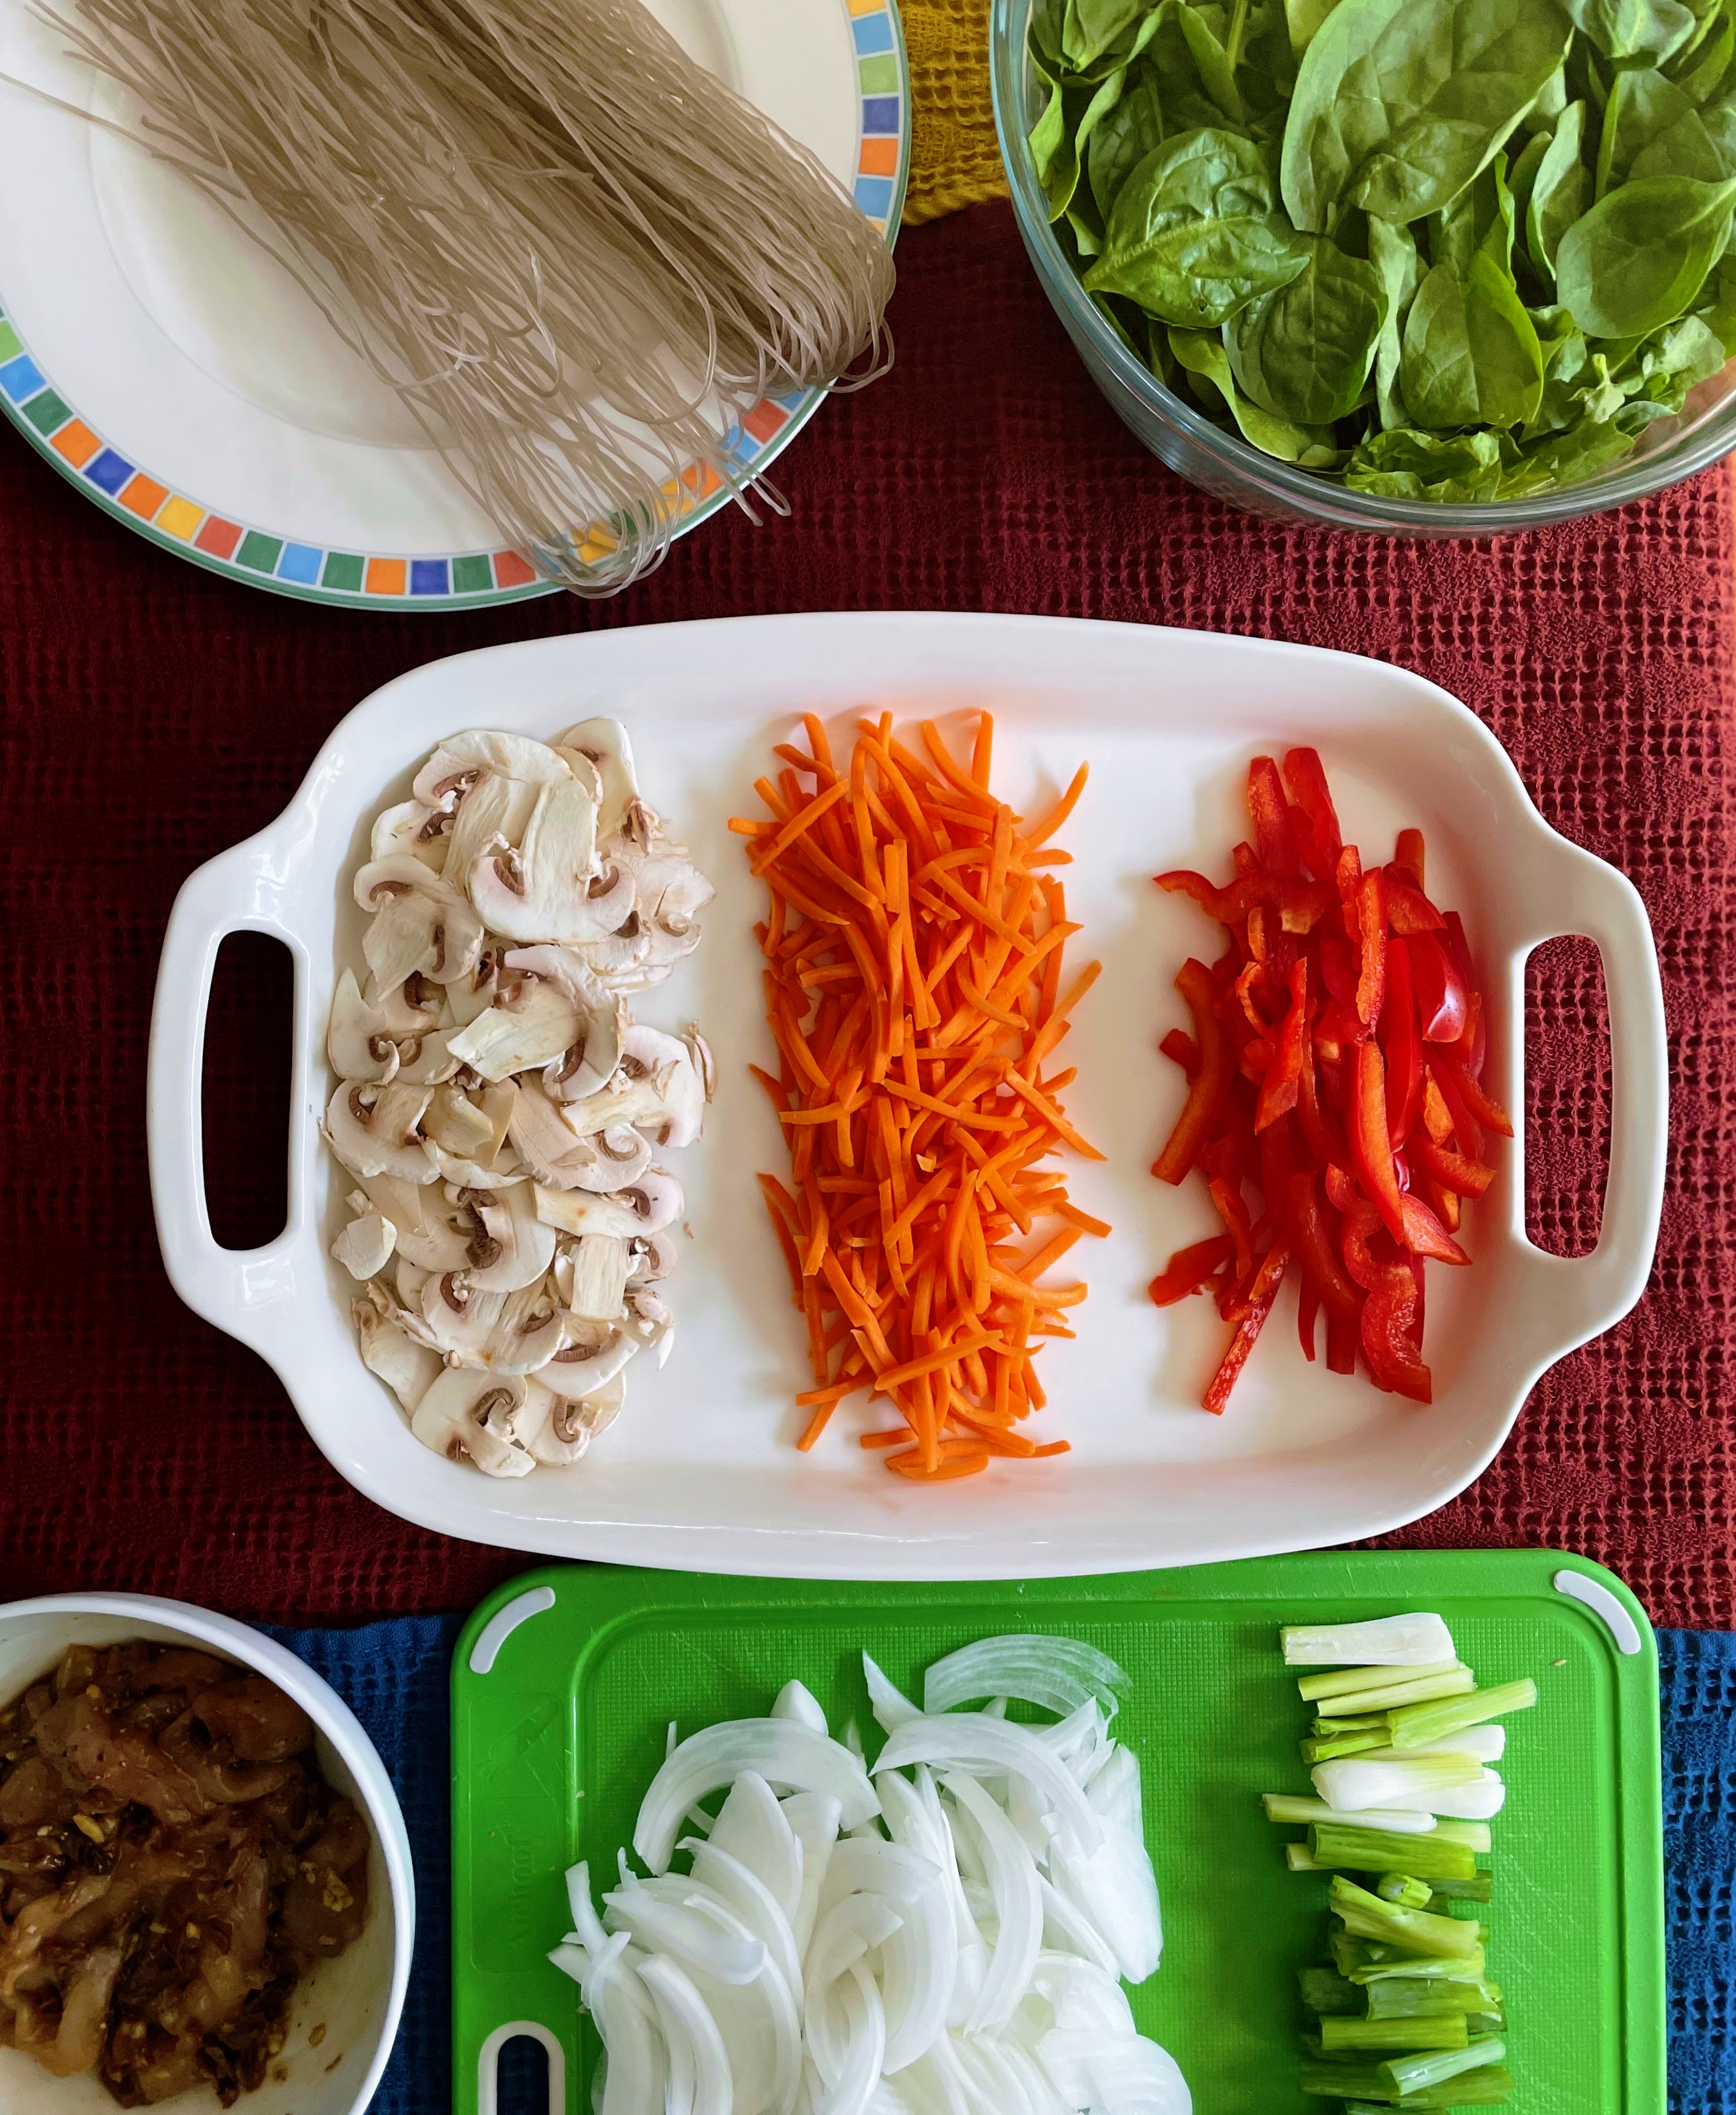
Prepare the noodles and vegetables:
Bring a large pot of water to a boil. Add the spinach and blanch for 30 seconds to 1 minute, then take it out with a slotted spoon or strainer. Let the water keep boiling to cook the noodles.
Rinse the spinach in cold water to stop it from cooking. Squeeze it with your hands to remove any excess water. Cut it a few times and put it into a bowl. Mix with 1 teaspoon soy sauce and 1 teaspoon toasted sesame oil. Put it into a large mixing bowl.
Put the noodles into the boiling water, cover and cook for 1 minute. Stir them with a wooden spoon so they don’t stick together. Cover and keep cooking for another 7 minutes until the noodles are soft and chewy.
Strain and cut them a few times with kitchen scissors. Put the noodles into the large bowl next to the spinach. Add 2 teaspoons toasted sesame oil, 1 teaspoon soy sauce, and 1 teaspoon sugar. Mix well by hand or a wooden spoon. This process will season the noodles and also keep the noodles from sticking to each other.
Heat up a skillet over medium high heat. Add 2 teaspoons vegetable oil with the onion, the green onion, and a pinch of salt. Stir-fry about 2 minutes until the onion looks a little translucent. Transfer to the noodle bowl.
Heat up the skillet again and add 2 teaspoons vegetable oil. Add the white mushrooms and a pinch of salt. Stir-fry for 2 minutes until softened and a little juicy. Transfer to the noodle bowl.
Heat up the skillet and add 1 teaspoon vegetable oil. Add the carrot and stir-fry for 20 seconds. Add the red bell pepper strips and stir-fry another 20 seconds. Transfer to the noodle bowl.
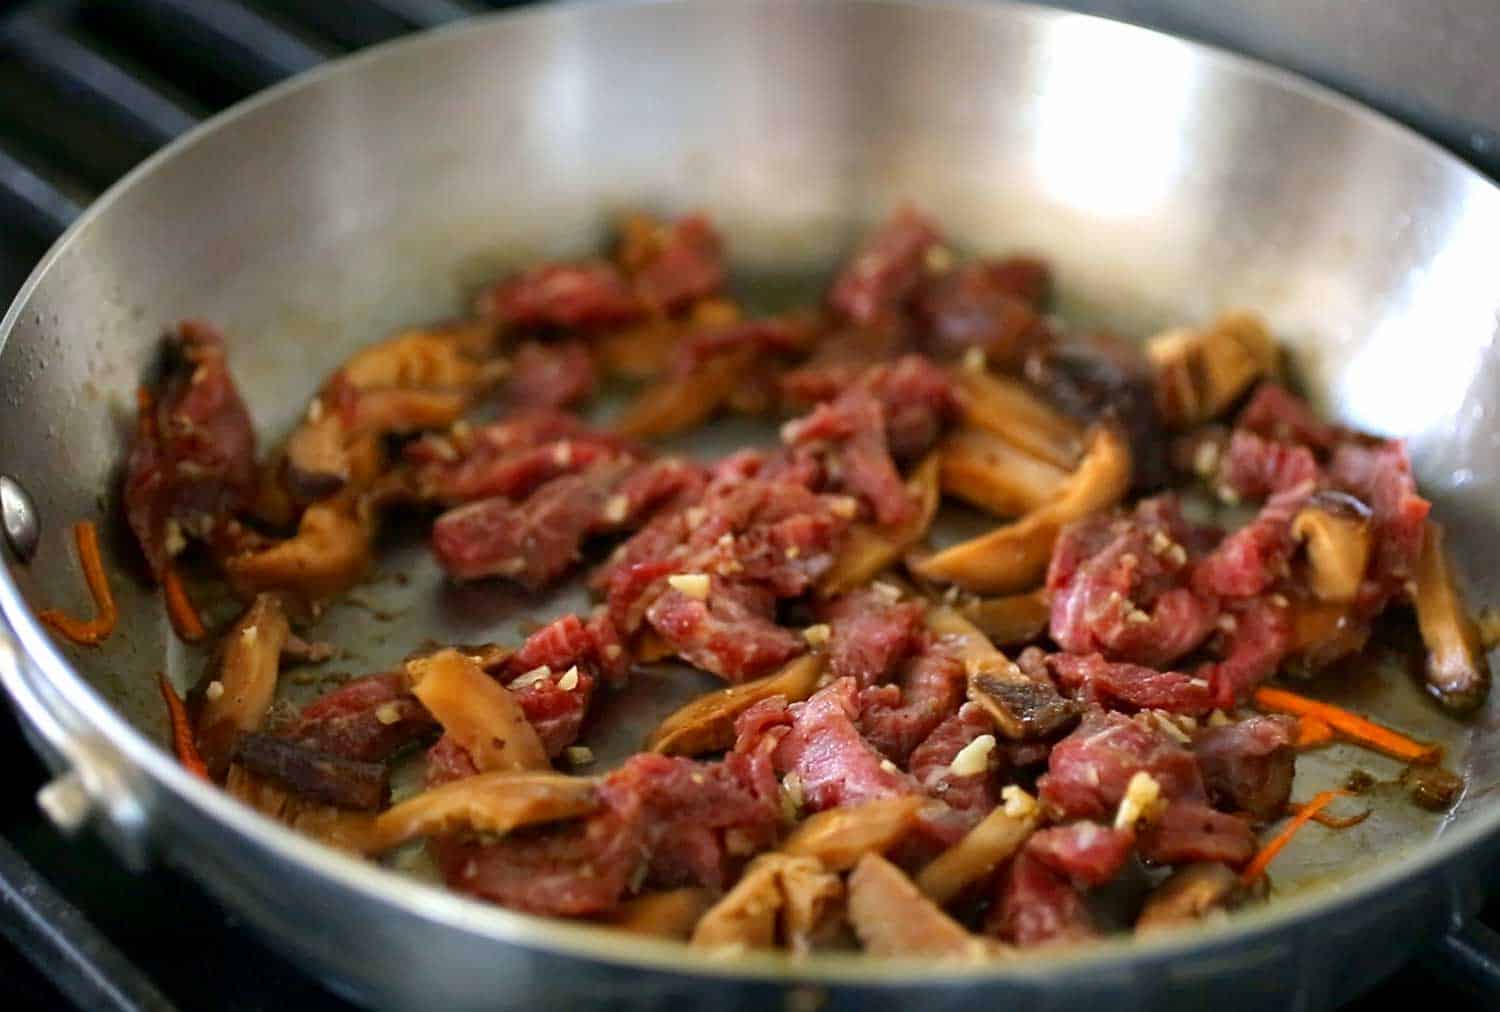
Heat up the skillet and add 2 teaspoons vegetable oil. Add the beef and mushroom mixture and stir fry for a few minutes until the beef is no longer pink and the mushrooms are softened and shiny. Transfer to the noodle bowl.
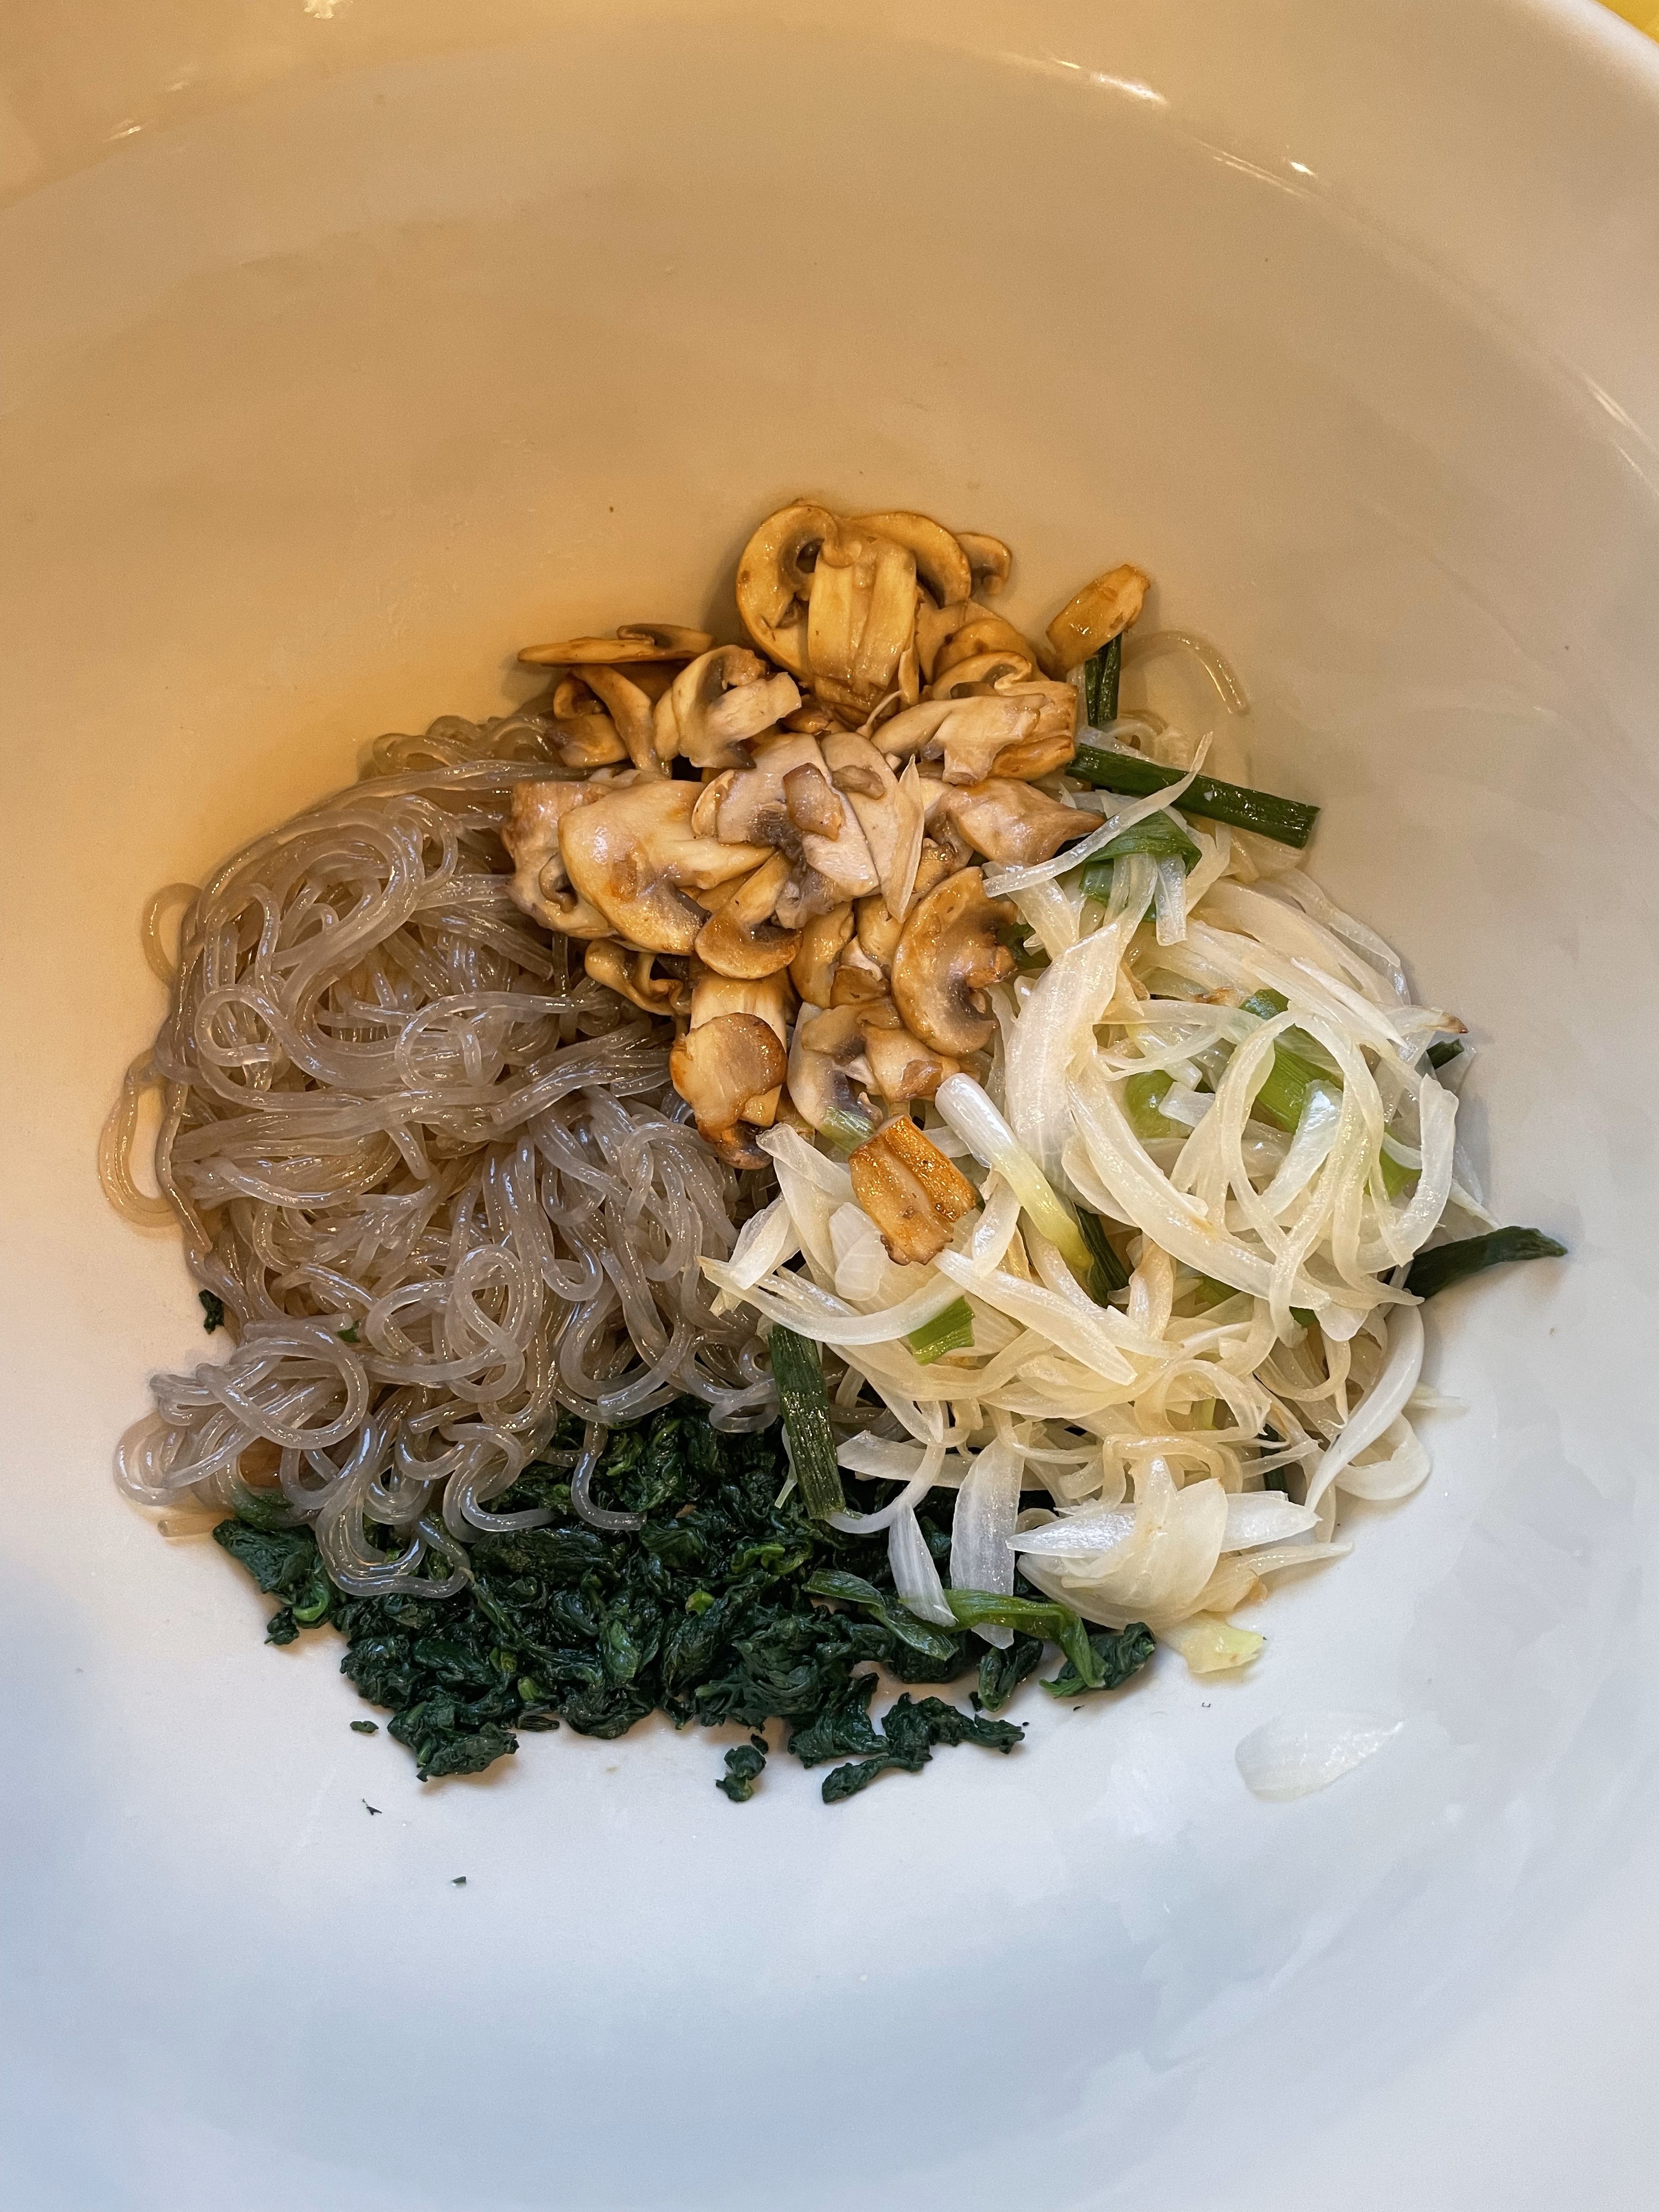
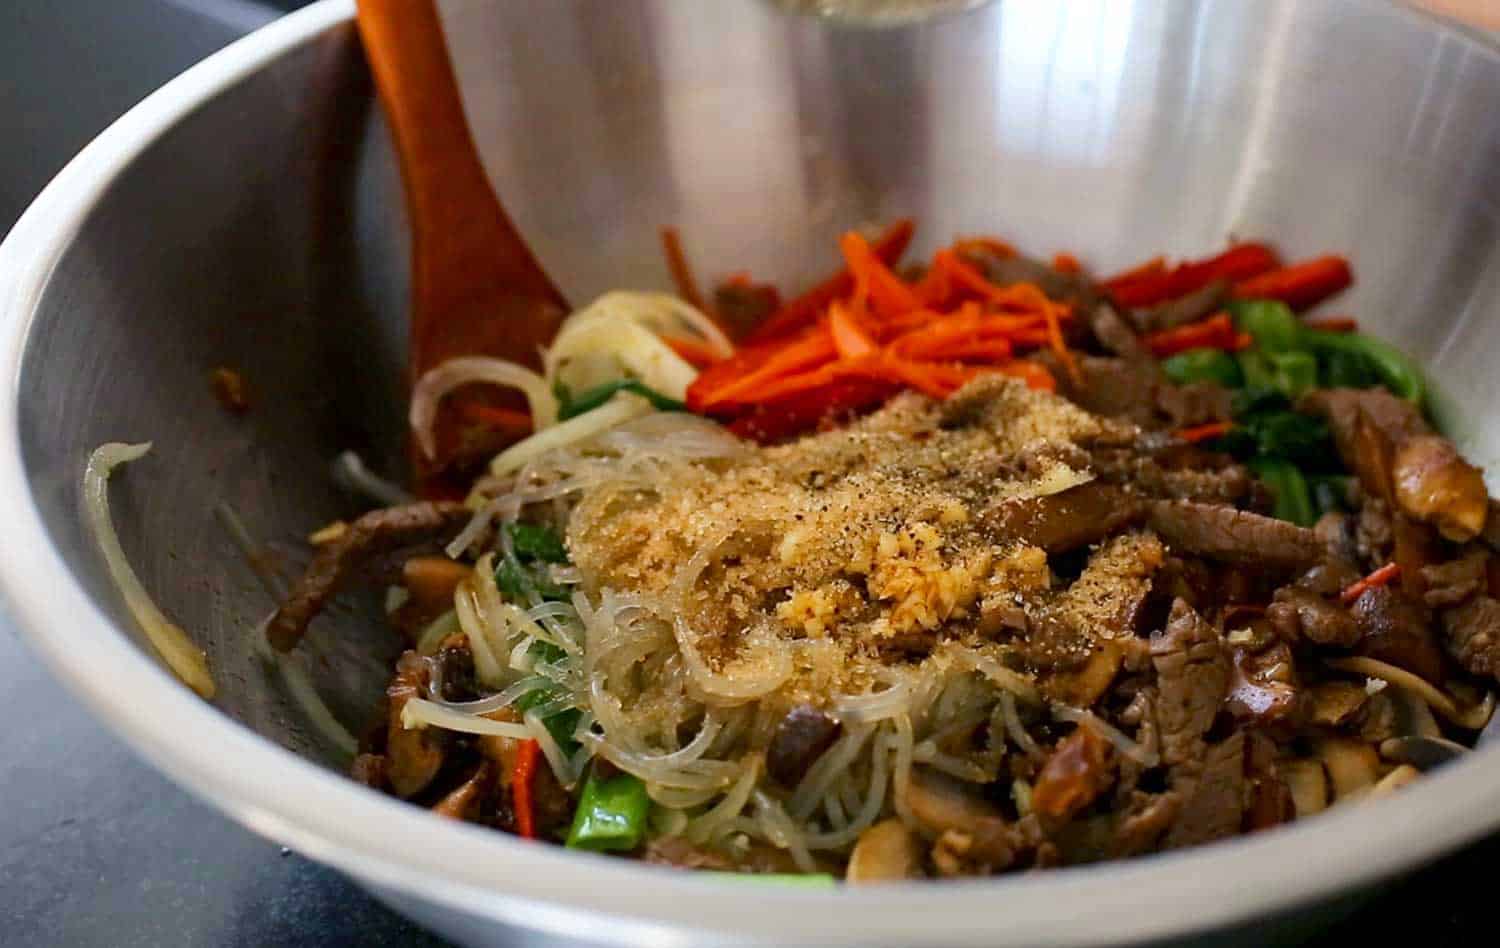
Layering the cooked ingredients in the bowl
Mix and serve:
Add 1 minced garlic clove, 1 tablespoon soy sauce, 1 tablespoon sugar, ½ teaspoon ground black pepper, and 2 teaspoons of toasted sesame oil to the mixing bowl full of ingredients. Mix all together by hand.
Add the egg garnish and 1 tablespoon sesame seeds. Mix it and transfer it to a large plate and serve.
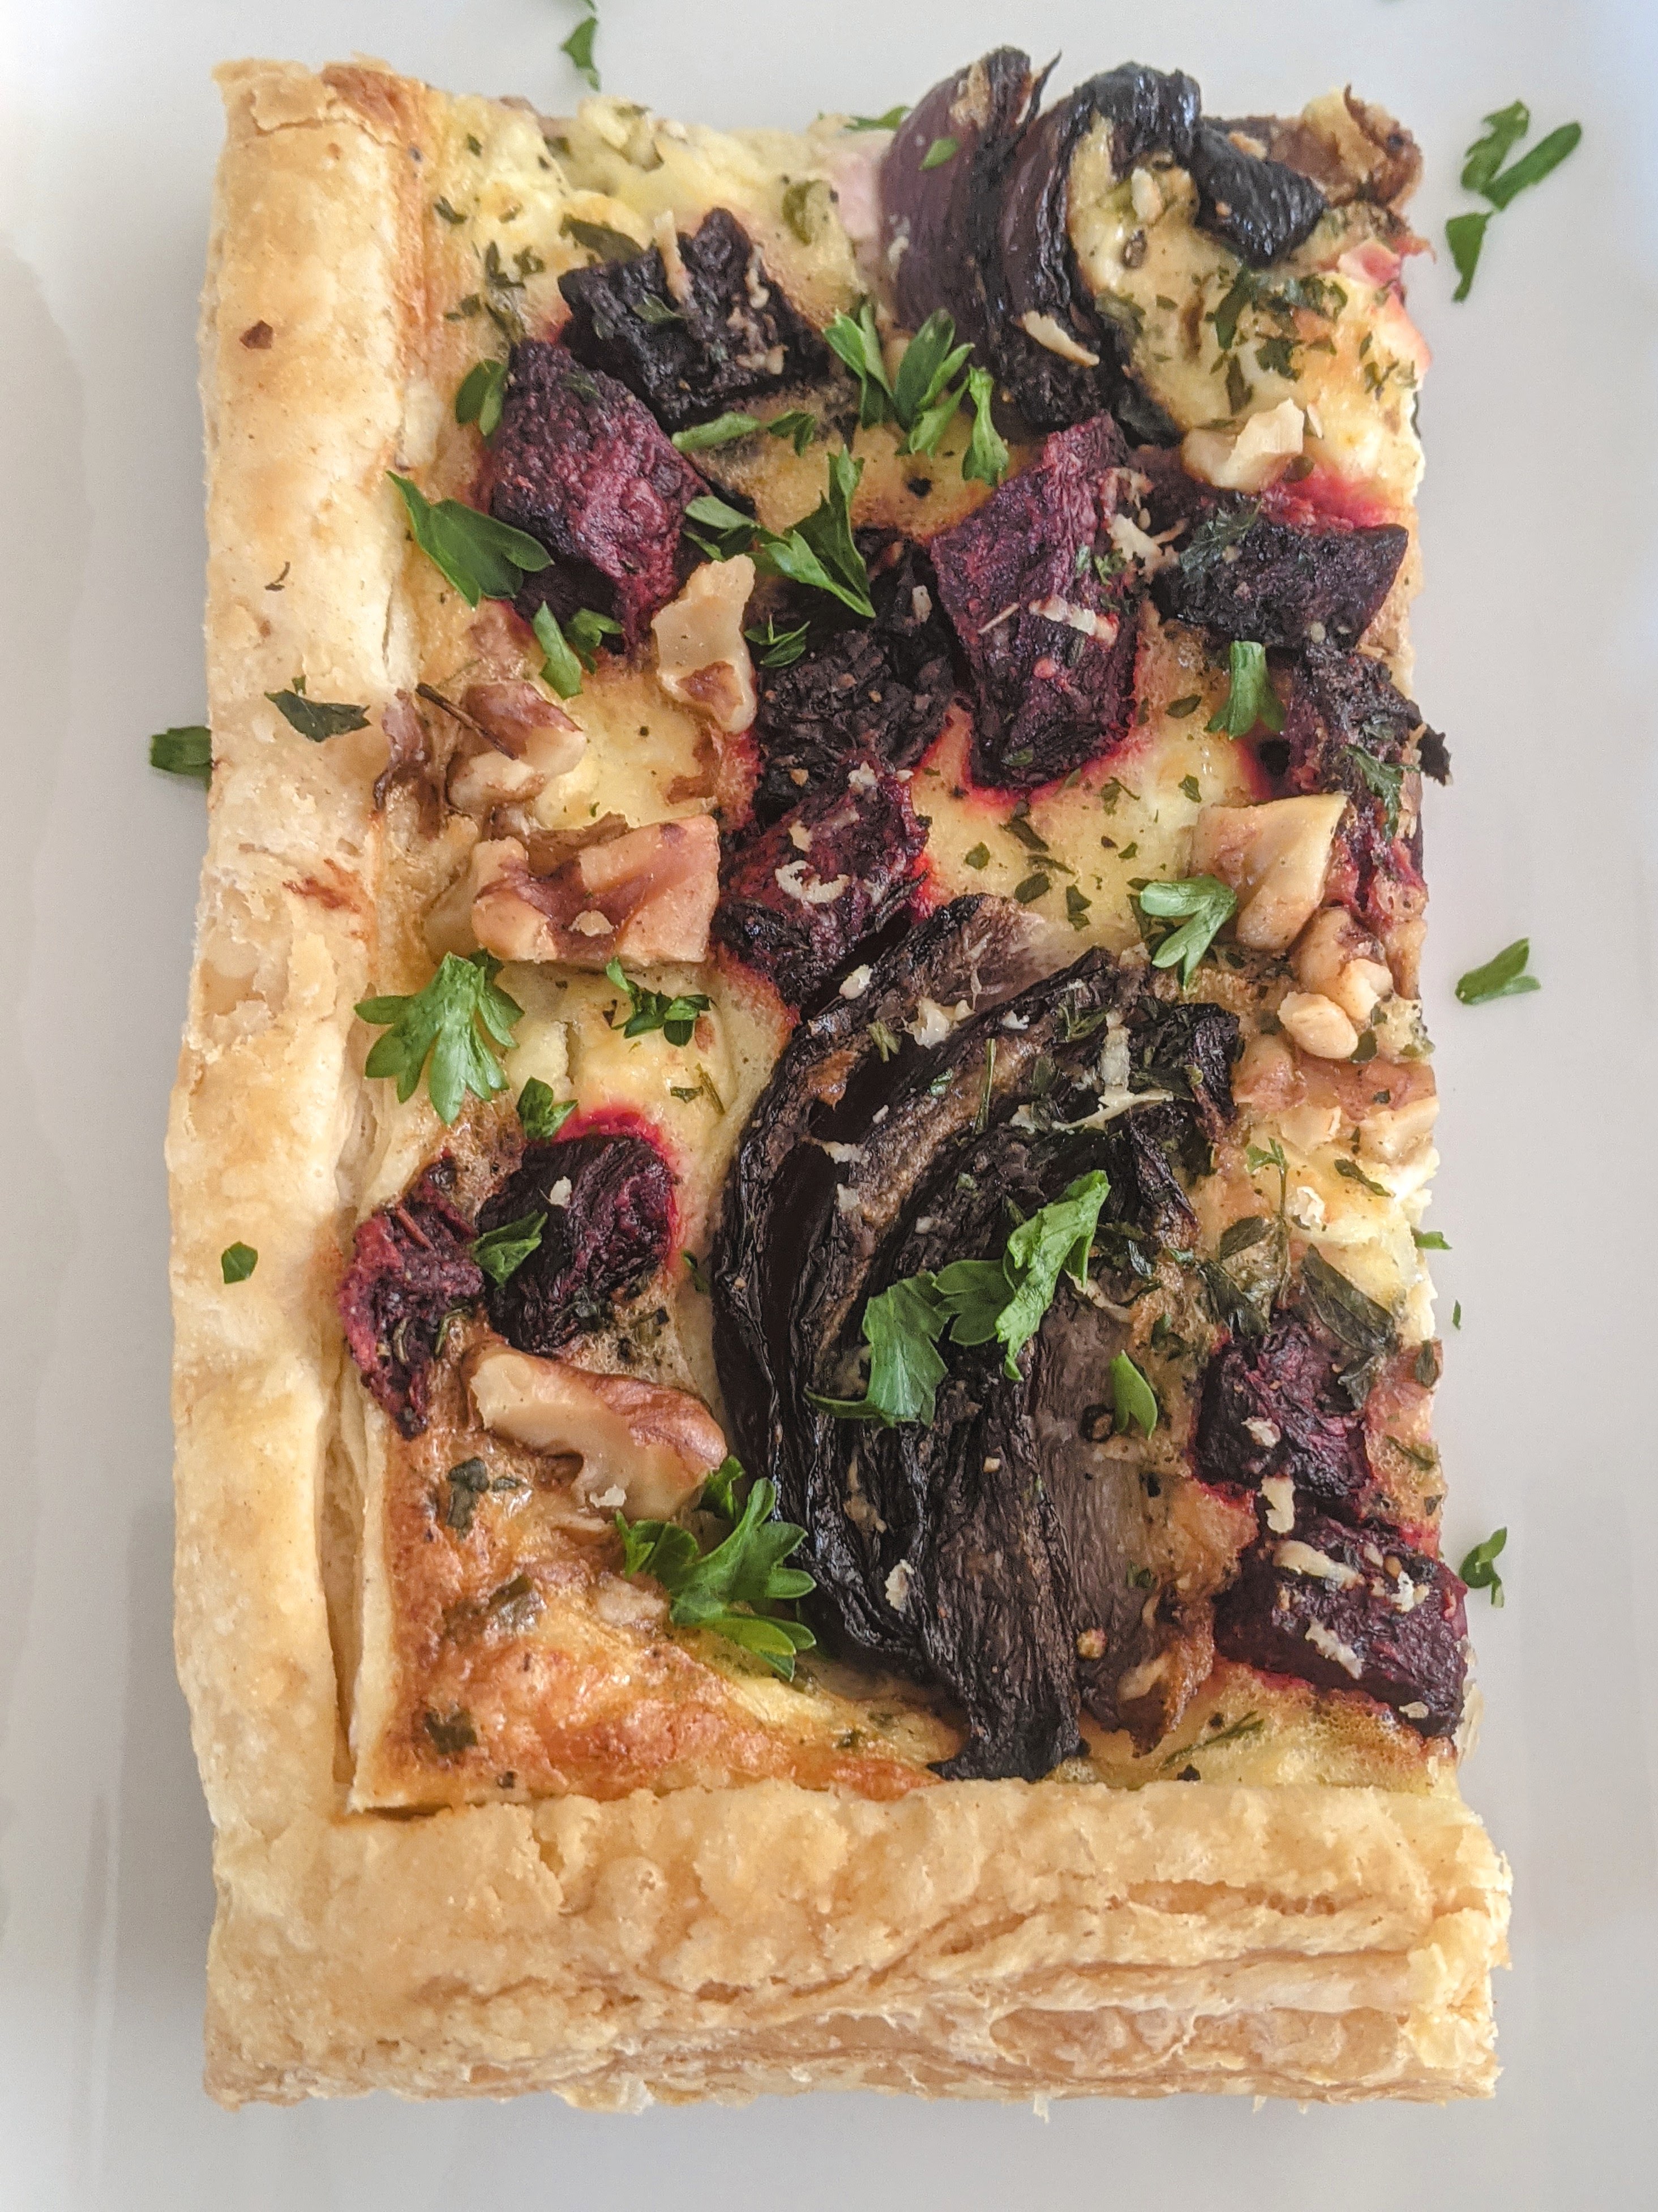
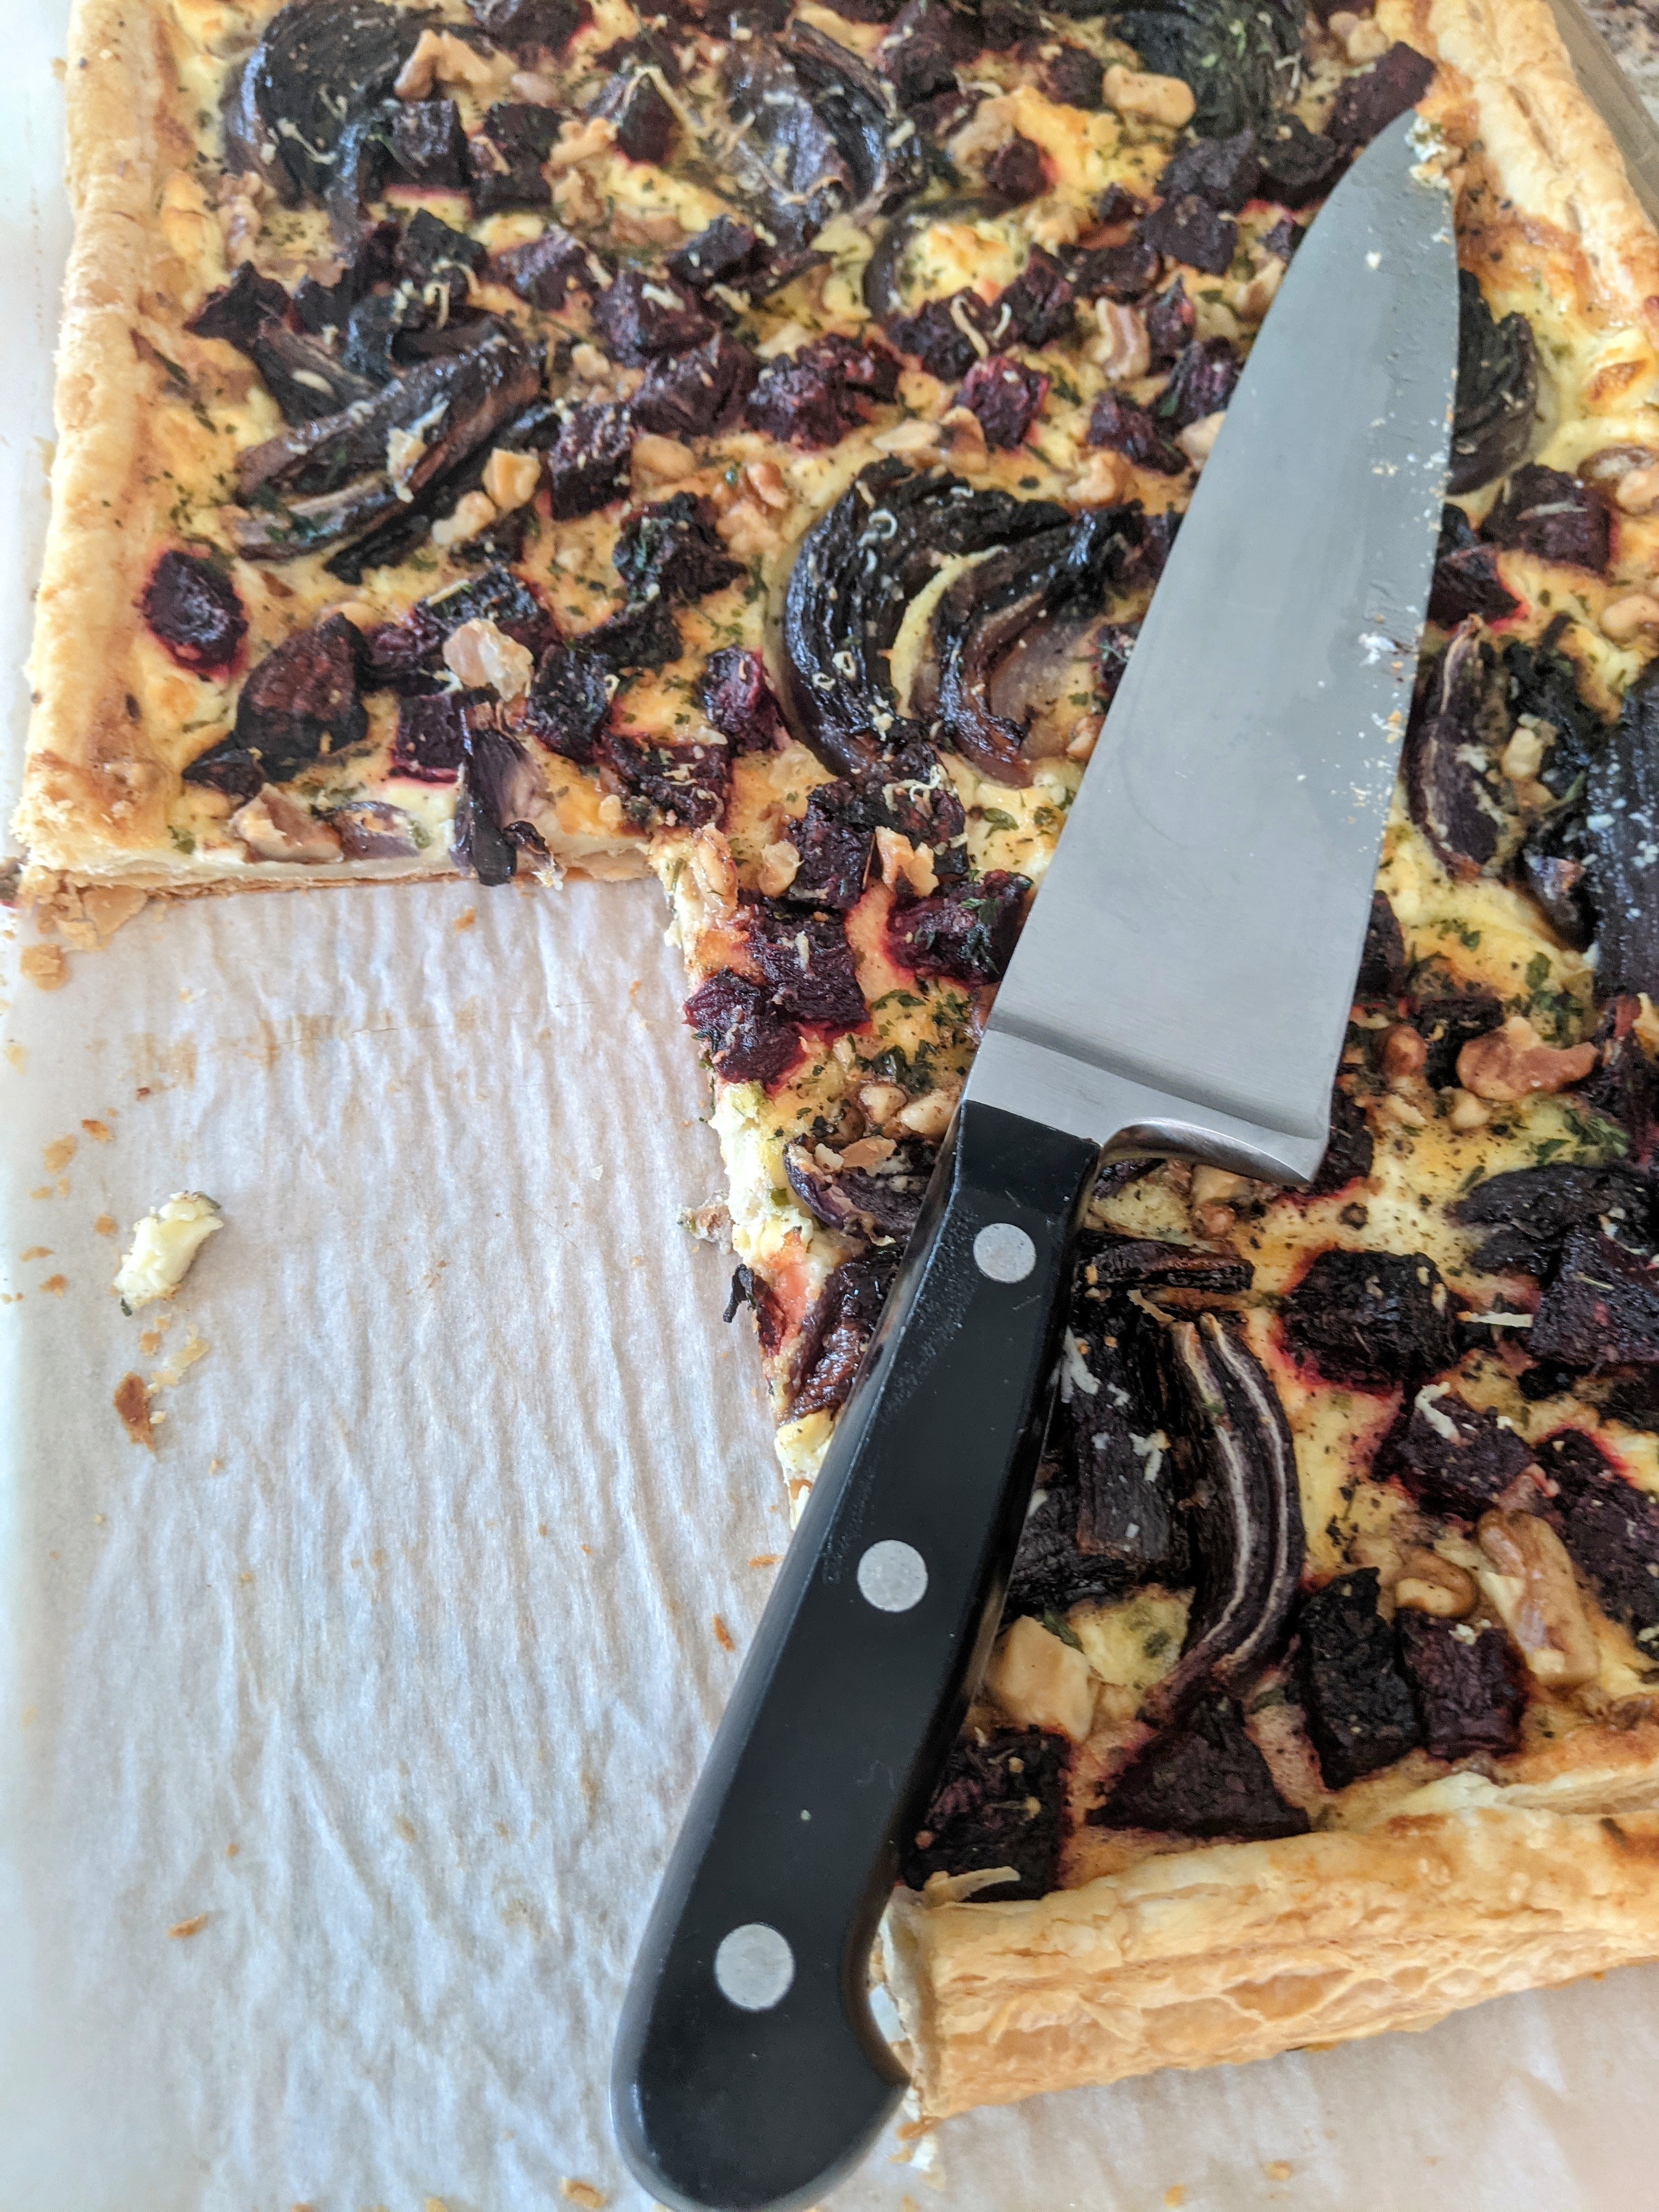
I realized a bit late that today is Pi Day, 3/14 (March 14). Our daughter is a huge fan of Pi Day baking, so I wanted to see if I could come up with a savory pie without having to go to the grocery store. Luckily, beets can keep in the fridge for a long, long time, and I recalled that two of them had been living in our crisper drawer for at least a month. Were they still good? Yes, they were. That meant the main ingredient for my pie was set. What goes beautifully with beets? Feta and walnuts. Both were miraculously on hand. As was a red onion that needed to be used, too, lending itself nicely to the red theme. So far, so good. Then I checked the freezer. Excellent: the puff pastry I thought I had in there was there, so I took it out to thaw. Pie ingredients all available!
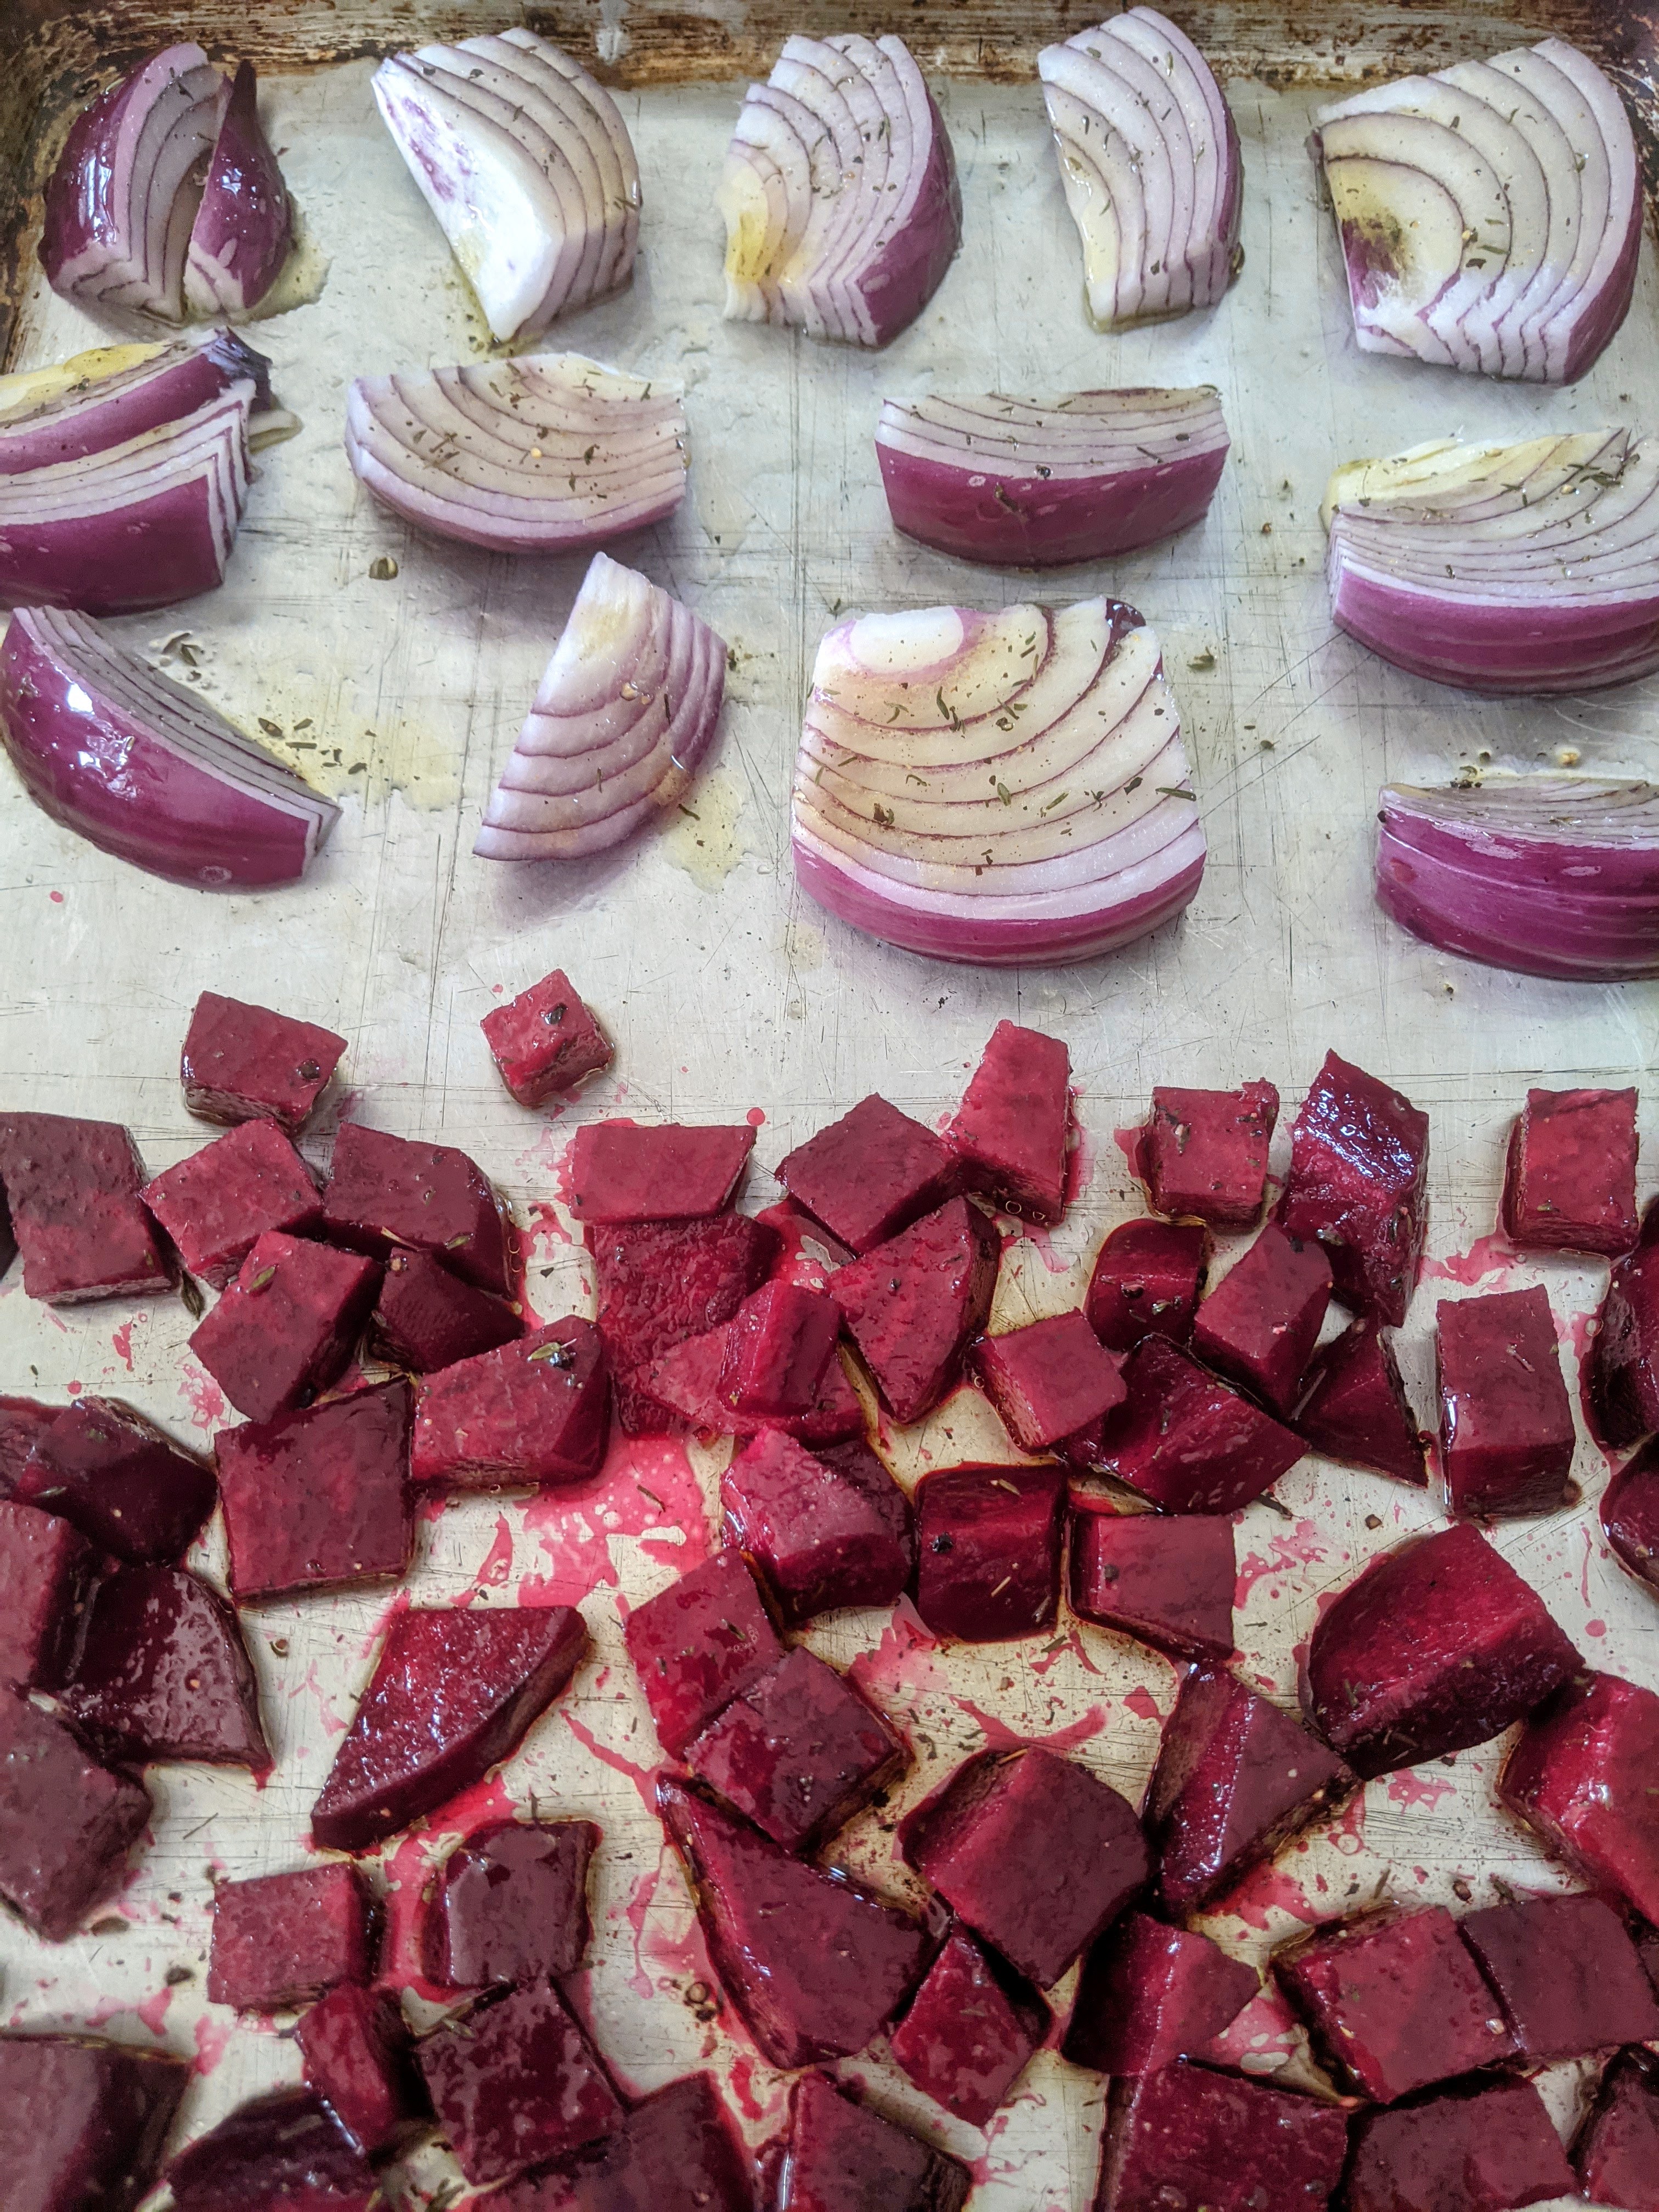
Like most things involving pre-made puff pastry, this is a pretty easy recipe. The most complicated step (which is not hard, just messy) is peeling and dicing the raw beets. Prepare them on a plastic cutting board or a surface that will not stain. And beware of your hands. I washed my hands with soap and water after peeling each beet, then after dicing each beet, and then a final time for good measure–and my hands escaped unblemished. You could also use gloves. Or you could not worry about it, and then have time (on your hands) to admire a potent natural dye….
Roasted Beet and Red Onion Tart with Feta and Walnuts 6-8 servings
Ingredients
1 pkg. (17.3 oz./490 gr., usually comes with two sheets) puff pastry (pasta sfoglia, pâte feuilletée)–thawed
Two large raw beets (about 1.1 lb./ 500 gr. total), peeled and diced into medium-sized pieces
1 large red onion, cut in half, then each half cut into about 5-6 wedges
1. Preheat oven to 400 degrees F / 200 degrees C. 2. In a medium bowl, toss the diced beets with 1 tbsp. olive oil, a pinch of salt and pepper, and 1/4 tsp. thyme. 3. Lightly oil a large baking sheet (I used a half sheet) and spread the beets onto 2/3 of the sheet. 4. Place the red onion wedges on the other 1/3 of the baking sheet. Brush the onion wedges with olive oil, then sprinkle with salt, pepper, and more thyme.
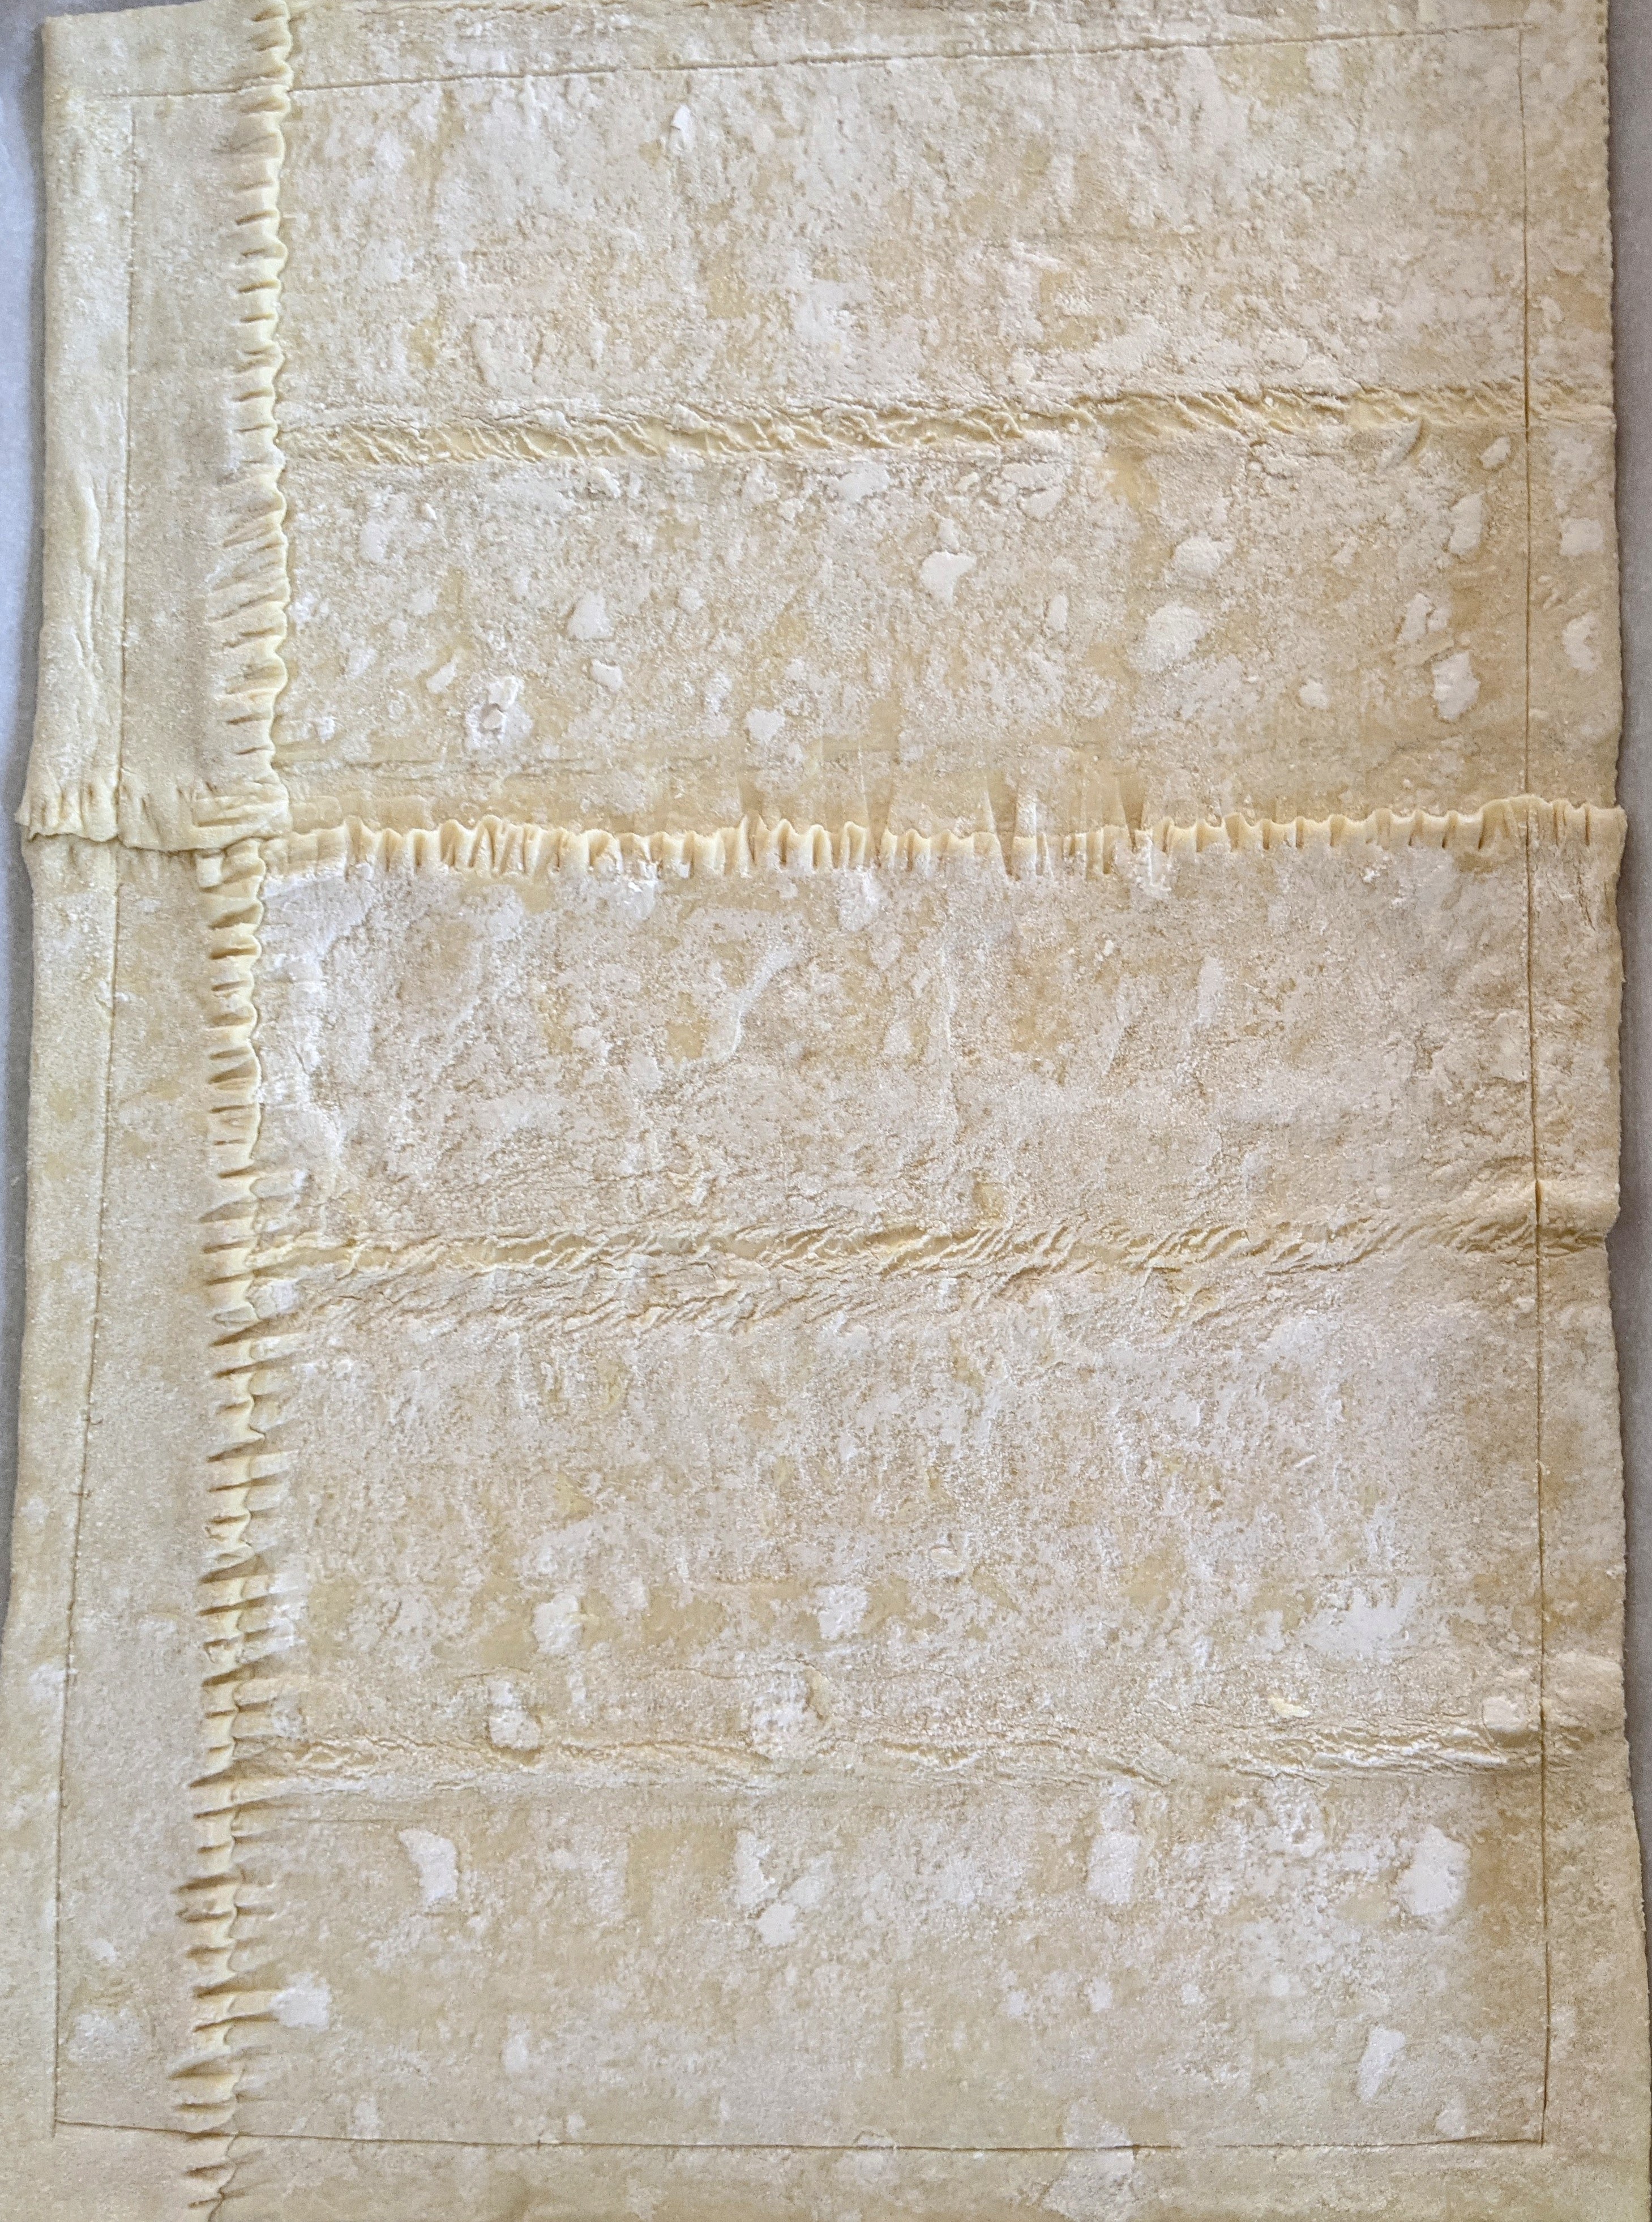
5. Bake the vegetables for about 25-30 minutes or until the onions are soft and look slightly grilled. Carefully remove the onions and place them on a plate to cool. Roast the beets for 10 more minutes until they are soft and golden looking (ie, about 40 minutes total), then place them on a plate to cool slightly, too. 6. Lower the oven temperature to 375 degrees F / 190 C. 7. Line another baking sheet with parchment paper (I used another half sheet pan, but if you do not have one, you can use two smaller baking pans) . Unfold the thawed puff pastry sheets and arrange them on the parchment paper to fill up the pan as best as possible. Note: Depending on the size of your baking pan, this will require some cutting and pressing to fill the pan properly. With a sharp knife, score the edge of the pastry all the way around, creating a 1/2-inch border, but don’t cut the pastry all the way through. Here’s what my pastry looked like when I was done (if you aren’t in the mood for jigsaw puzzles, you could also place a puff pastry sheet on each of two smaller pans):
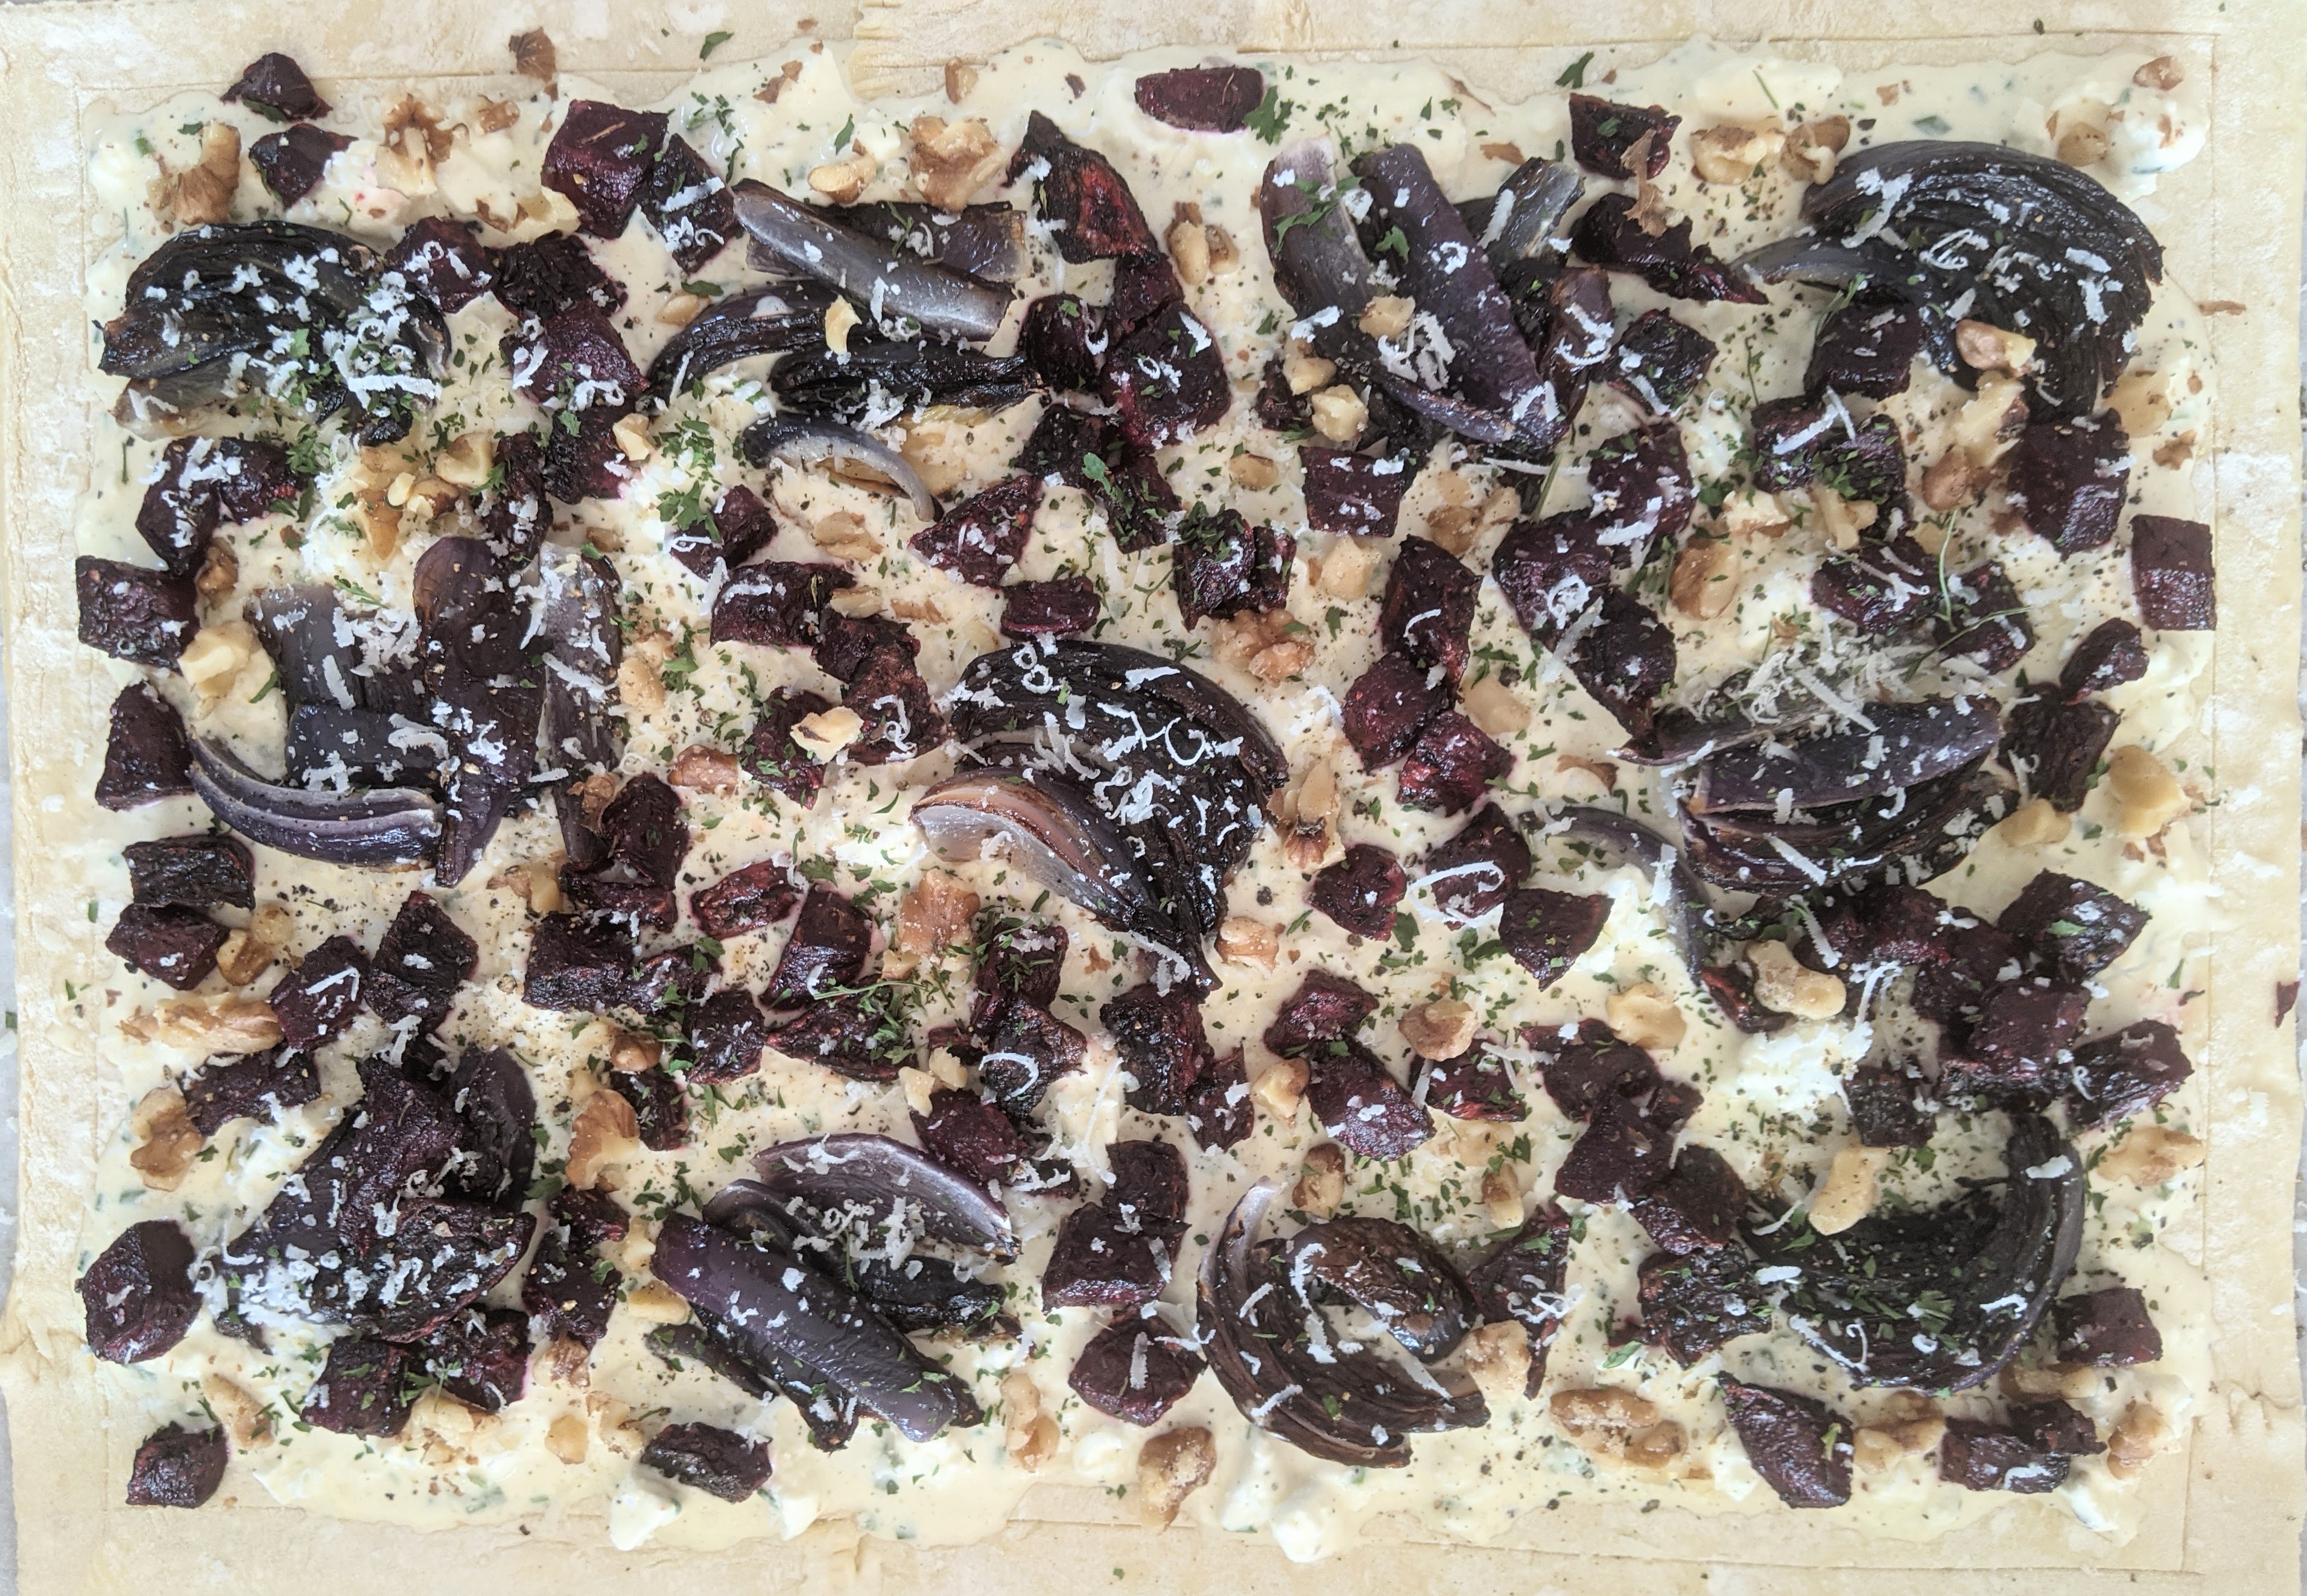
8. Make the feta base. Combine the feta, cream, egg, garlic, chives, and black pepper, and mash together. Prick the pastry, then spread the feta mixture over it, being carefully not to go past the border.
9. Arrange the beets and onion wedges on top of the feta mixture, sprinkle with Pecorino Romano cheese (or Parmesan), then scatter the walnuts around. Sprinkle dried parsley and more ground pepper over the top. If you really love cheese, you could spoon some extra crumbled feta over the top, too.
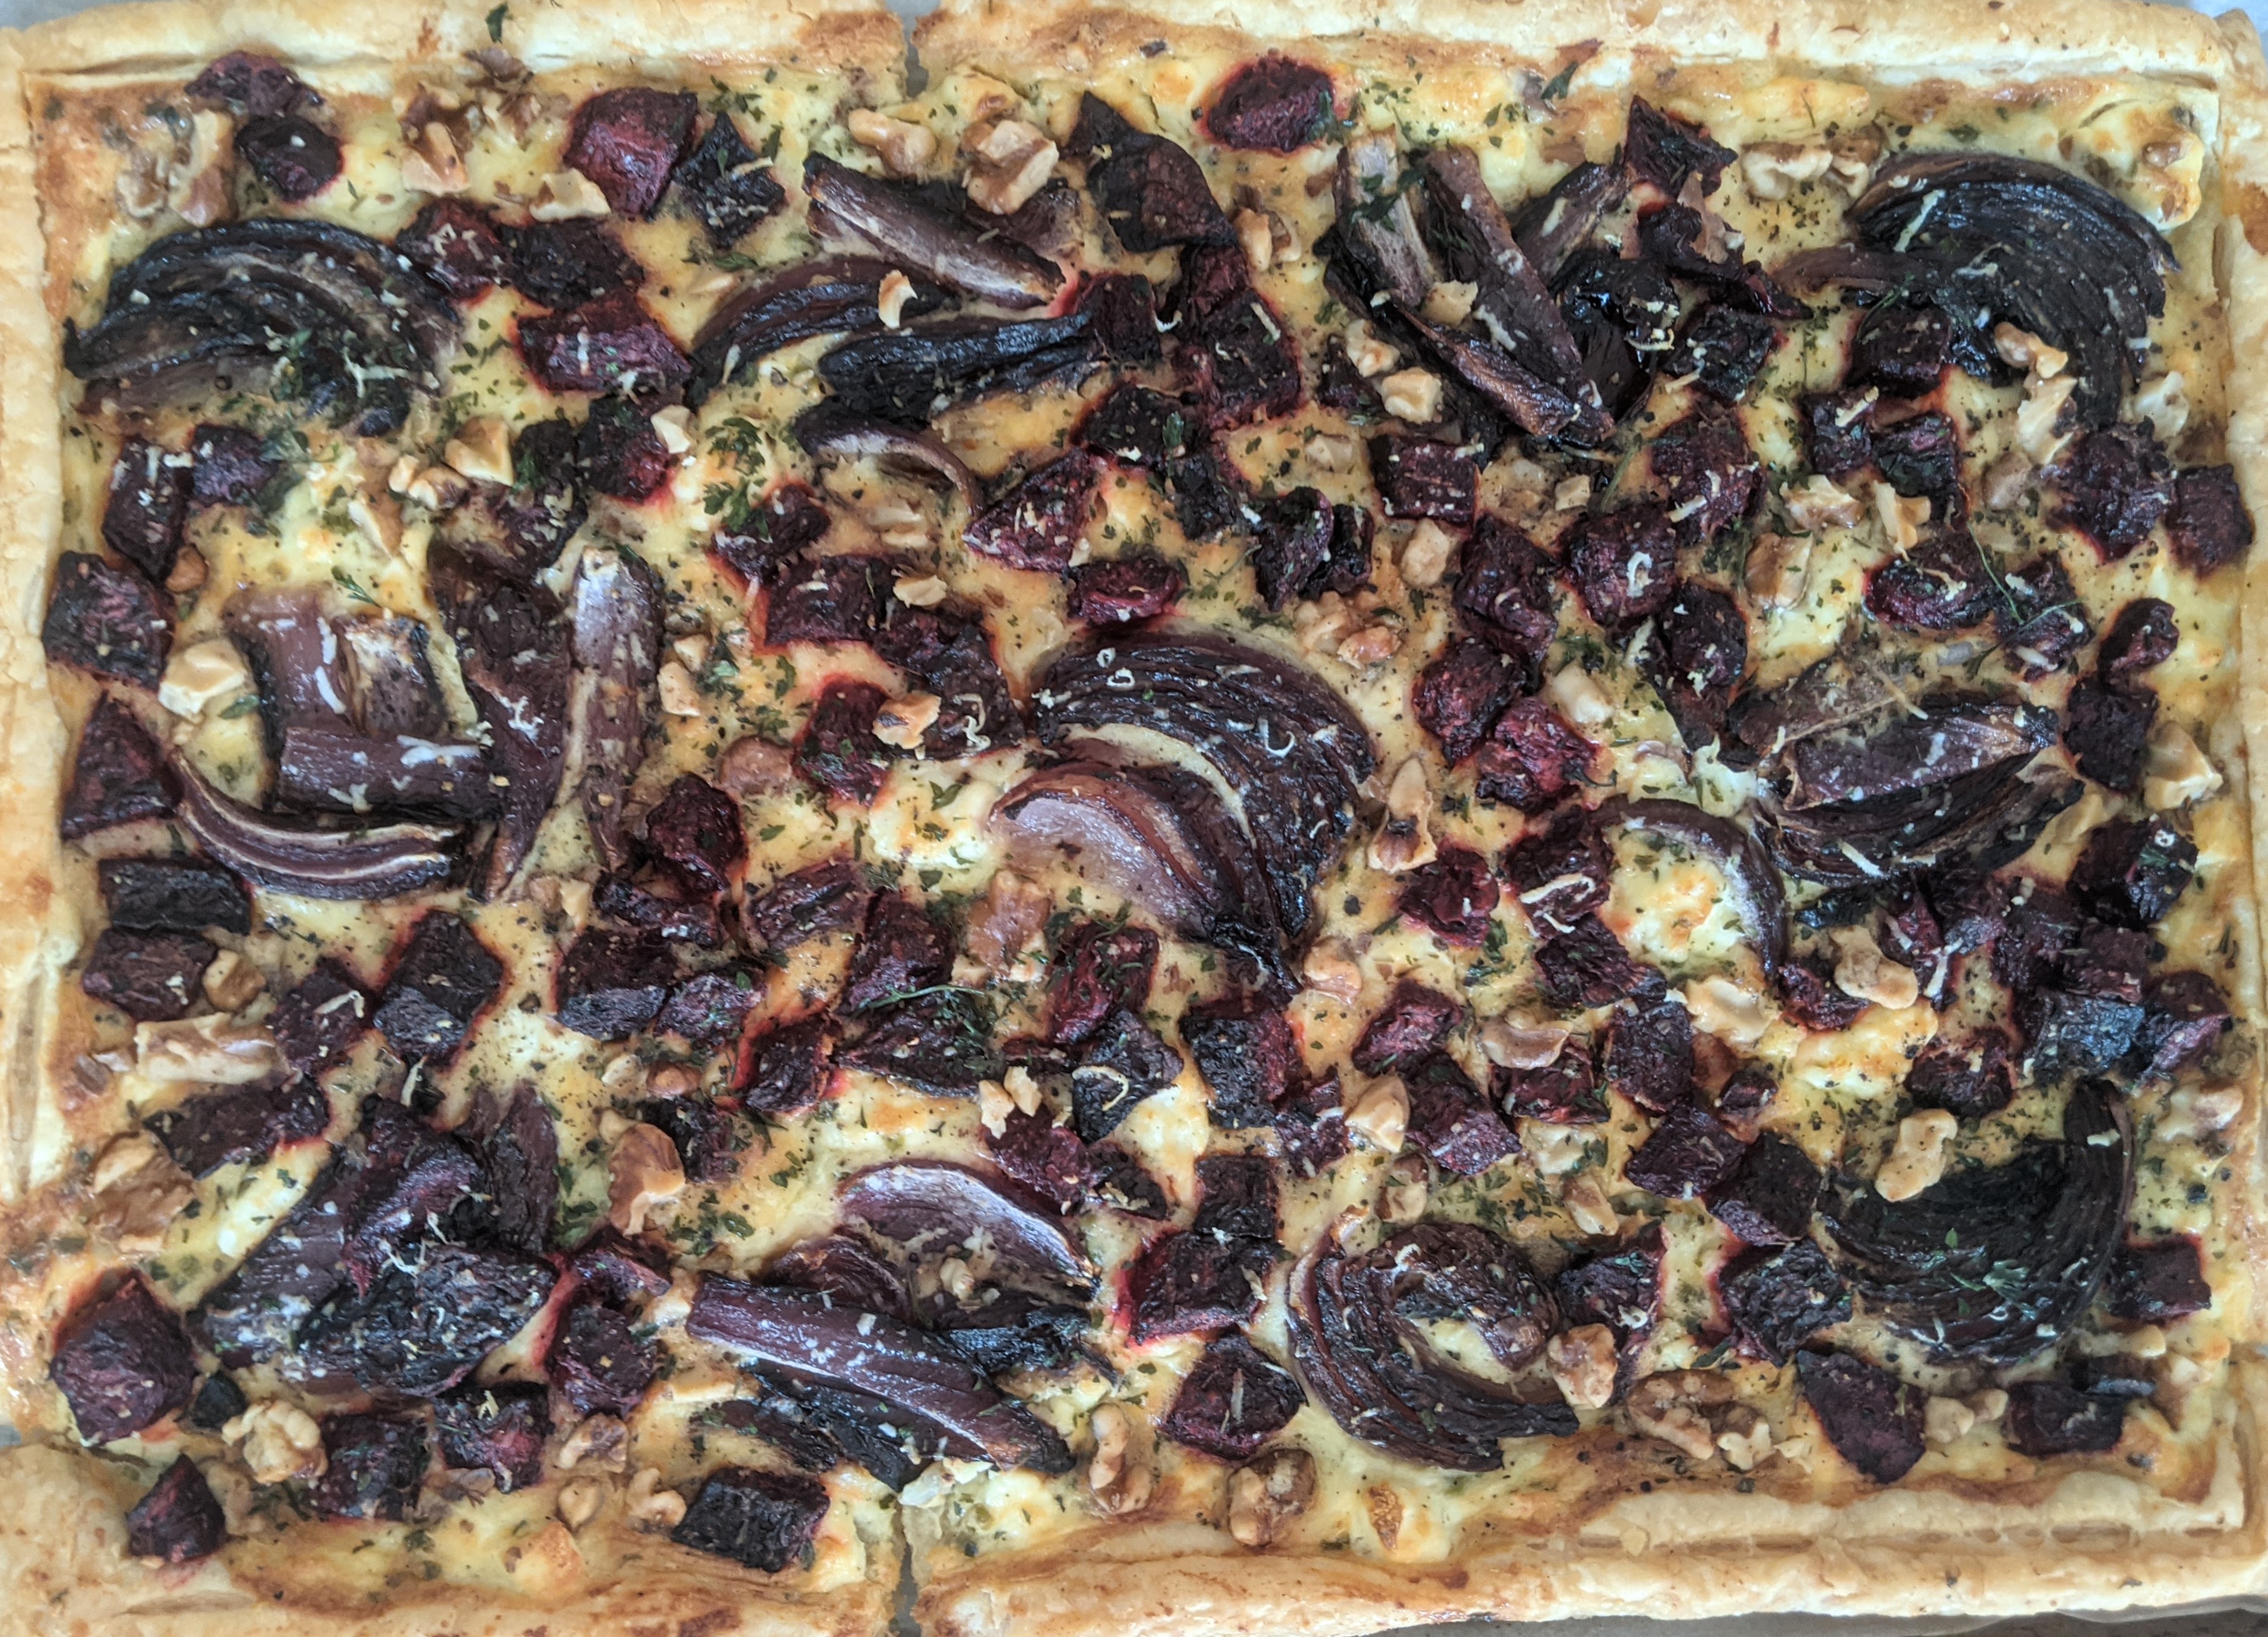
10. Bake the tart for 30 minutes or until the edges and bottom are golden. Let cool for a few minutes, then sprinkle with fresh chopped parsley and serve with peppery greens (like arugula, though a spring mix would do, too) drizzled with a balsamic vinaigrette.
You’ve vowed to eat more leafy greens, and you’re doing a great job adding more collard, kale, mustard greens, spinach, and other leafy greens to your diet. In Italy, where I live, those other greens would also include borage, broccoli rabe, chicory, escarole, watercress, and wild greens. But as you munch your way through one high-fiber, high-mineral, high-vitamin leafy green after another, there comes a day when you realize that, much as you love them all, one sautéed leafy green looks much like another. You have fallen into a green rut. That’s when Swiss Chard comes to the rescue. With Swiss Chard, you can have your leafy greens and ruby-red stems, too (if you get the right kind; chard stems can be white, yellow, or red).
Swiss Chard, or bietina/bietola in Italian, is widely eaten in Italy and around the Mediterranean. Why, you may ask, is it called Swiss Chard? No one knows. It’s not Swiss. But the plant may have first been described by a Swiss botanist, so that could be the answer–though it’s possible a German botanist actually did the describing first. It is one of those common plant-name oddities, like Jerusalem Artichoke.
This recipe uses tender, baby red Swiss Chard. If the chard you have is bigger/older, you may need to cut the leaves off the stalks, and add the chopped stalks to the skillet first, to give them more cooking time.
Recipe: Sautéed Baby Red Swiss Chard 2-3 servings
1 1/2 lb. (3/4 kg.) baby red Swiss Chard
olive oil
2 cloves garlic, chopped
chili flakes/crushed red pepper
salt and pepper
Preparation
1. Trim the stalks by cutting them off the root end of the bunch of chard. Most stalks should be thin and tender. With larger stalks, take a knife and carefully remove the stringy part by peeling down the center of the stalk.
2. Wash the greens in plenty of cold water, swishing and swirling to remove any dirt or grit. Drain in a colander.
3. Drizzle some olive oil around the bottom of a heavy skillet; add the garlic, chili, and salt; grind some pepper over; and cook the garlic and chili over medium-high heat for about a minute. Add the chard, stirring occasionally to make that sure none of the leaves get stuck to the bottom of the skillet, and that all leaves get cooked. As with all greens, what looks like a huge amount will soon cook down to a fraction of its former volume. If the pan seems too dry, add a bit more olive oil.
4. Check the seasonings, and serve either warm or at room temperature.
Sometimes, you need comfort food. While home today with a very sore throat and not much food in the fridge, I wondered what to make for lunch. It needed to be soft. It needed to make me feel better. It needed to be made from the few items I could scrounge up, and it needed to be prepared quickly. There was only one possibility: Spaghetti with Ricotta and Pecorino Romano, a double dose of sheep-milk heaven — and ready in less than 15 minutes. Perfect.
Spaghetti with Ricotta and Pecorino Romano
This is a free-form recipe; you can adjust any of the ingredients to suit your tastes. The quantities below are for one hungry pasta lover, but this dish could serve two people if part of a multi-course meal.
¼ lb. (113 grams) spaghetti, fettucine, tonnarelli, or other pasta
1 tbsp. (14 grams) butter, cut into small pieces
¼-1/3 cup (28-38 grams) grated Pecorino Romano cheese
fresh, coarsely ground black pepper, to taste
2 ¼ oz. (64 grams) sheep’s-milk ricotta, crumbled or cut into small pieces (* use the best, freshest ricotta you can find)
Preparation
Start boiling lightly salted water in a generously sized pot. When the water comes to a boil, add the spaghetti and cook just until al dente—often that’s about 1 minute less than indicated on the package.
Meanwhile, place the pieces of butter in an unheated skillet or large bowl next to the pasta pot. Add the Pecorino Romano cheese, grind black pepper over top (to your liking), and sprinkle 2 tbsp. cooking water around the sides of the skillet or bowl.
When the spaghetti is done, quickly scoop it out of its cooking water with a pasta ladle and drop it into the skillet or bowl. Don’t shake off all the cooking water; it is an essential ingredient. Stir and swirl the spaghetti vigorously to melt the butter, the Pecorino Romano cheese, and the cooking water into a light sauce. Add more cooking water if the pasta appears too dry.
Check the seasonings (adding salt and more ground pepper if needed), gently fold in the ricotta, and serve immediately, with additional grated Pecorino Romano on the side.
There are probably as many versions of this soup as there are Bolivian families, and all of them likely to be delicious, but this is the version that has evolved at our house over the years. I love the bright-red color that comes from the tomato and chili pastes; it brightens even the coldest, most dreary day. I also love the soup’s many layers of flavor, each one contributing to the overall symphony. It’s even better the next day, so it’s a great make-ahead dish. And it’s very adaptable: make a vegetarian version by eliminating the beef/lamb, adding more veggies, and using vegetable broth/bouillon. Or substitute quinoa for the wheat if gluten is an issue.
Bolivian Soup with Wheat Berries (Sopa de Trigo)
Wheat/Hominy: 1/3-1/2 c. (60-95 gr.) dry wheat berries/trigo pelado
1 can (14 oz./400 gr.) cooked hominy/mote blanco, undrained, OR 1/2 c. (60 gr.) dried cracked hominy/maiz blanco trillado–see photo below
½ c. freeze-dried potato/black chuño (optional)
Soup broth:
12 c. (3 liters) beef broth
1 lb. (500 gr.) meaty, bone-in beef or lamb
1 large onion, halved
1 large tomato, quartered
2 carrots, peeled and halved
2 bay leaves
beef bouillon cubes (optional)
Soup Vegetables:
3/4 c. (100 gr.) frozen petite peas
2 large carrots, julienned
3 large potatoes, julienned (it’s traditional to julienne both the carrots and the potatoes, but I have been known to dice both instead…)
Note: If using the optional freeze-dried potato/chuño, soak it in warm water overnight prior to making the soup. Before adding it to the soup in step #5, drain it and squeeze as much water out as possible. If necessary, chop into small pieces.
Place the wheat berries (and, if using, the dried hominy) in a medium saucepan, cover with several inches of water, and bring to a boil. Reduce heat, cover, and simmer for about 60-90 minutes or until both wheat and hominy are soft. Drain and set aside. If using canned hominy, pre-cook only the wheat, and add the undrained canned hominy to the soup in step #5.
Meanwhile, add the broth and meat/bones to a large pot and bring to a low simmer, skimming periodically until no more foam is produced. Add the halved onion, quartered tomato, halved carrots, and the bay leaves and continue simmering slowly until the vegetables are soft, about 30 minutes. Check the seasonings and add beef bouillon cubes to taste, if needed.
Remove the beef/lamb to a dish and let cool. Strain the broth through a fine-meshed sieve into a large bowl, mashing the tomato pieces to extract any remaining liquid. Return the broth to the pot and discard the vegetables.
Shred the meat, discarding the bones and any fat, and add the shredded meat to the pot along with 1 c. of the cooked wheat, the hominy, the freeze-dried potato/chuño (if using), and the peas, carrots, and potatoes. Bring to a low simmer and cook for 15 minutes.
Meanwhile, prepare the sofrito: Heat the olive oil in a skillet over medium-high heat, add the onion, and cook until soft and slightly golden. Add the remaining ingredients to the skillet and cook for a few minutes, stirring frequently, to make a fragrant paste. Add the paste to the soup pot, stir to mix, and continue simmering the soup, covered, for 15 minutes or more to develop the flavors and ensure all vegetables are soft. If the soup seems too thick, add more water. If it needs more salt, add another bouillon cube.
Serve with the sliced green onions and herbs sprinkled on top, and with plenty of crusty bread.


 on the sides; front-facing wall of opus mixtum (bands of brick and tufa), with lateral 'toothing' and a structural arch; plus rough-hewn travertine column--Portico of Claudius, Portus (c. 50 AD)")
")
 with lateral 'toothing' and putlog holes at the top--Trajan's warehouse, Portus (c. 100 AD)")
")
, Trajan's warehouse, Portus (c. 100 AD)")

