

Lately, we have been lulled into thinking spring is around the corner, with a warm day or two and lots of sun — only to be brought back to our cold, overcast, wet or sometimes snowy reality. This state of affairs got me thinking about (ie, longing for) flowers, and sunflowers in particular. If you grow sunflowers, you may know all there is to know about them. I did not, though I did learn very early on that our intrepid squirrels could scale our giant sunflowers under cover of darkness and chew off the beautiful heads, leaving decapitated 9-foot stalks in their scheming rodent wake.
I did know a few other things, such as the origins of the scientific name for the common sunflower: Helianthus annuus. Helianthus comes from the Greek “helios,” meaning sun, and “anthos,” meaning flower. Sunflowers are also heliotropic, ie, young sunflowers follow the sun’s position from sunrise to sunset. They do this until they reach maturity, at which point they stay facing East, which allows the sunflowers to get warmer more quickly (and thus, to attract more pollinators).

Another thing I knew was that each sunflower head is made of hundreds and maybe thousands of smaller flowers, which means it is an inflorescence (same as alliums). The bright yellow (or sometimes, red or rusty orange) petals surrounding the sunflower head are called ray florets. The real, tiny flowers are in the central part of the flower head and are called disc florets. In the photos below, you can see the dark brown anthers of the disc florets topped with pollen; each of these flowers will produce a sunflower seed.
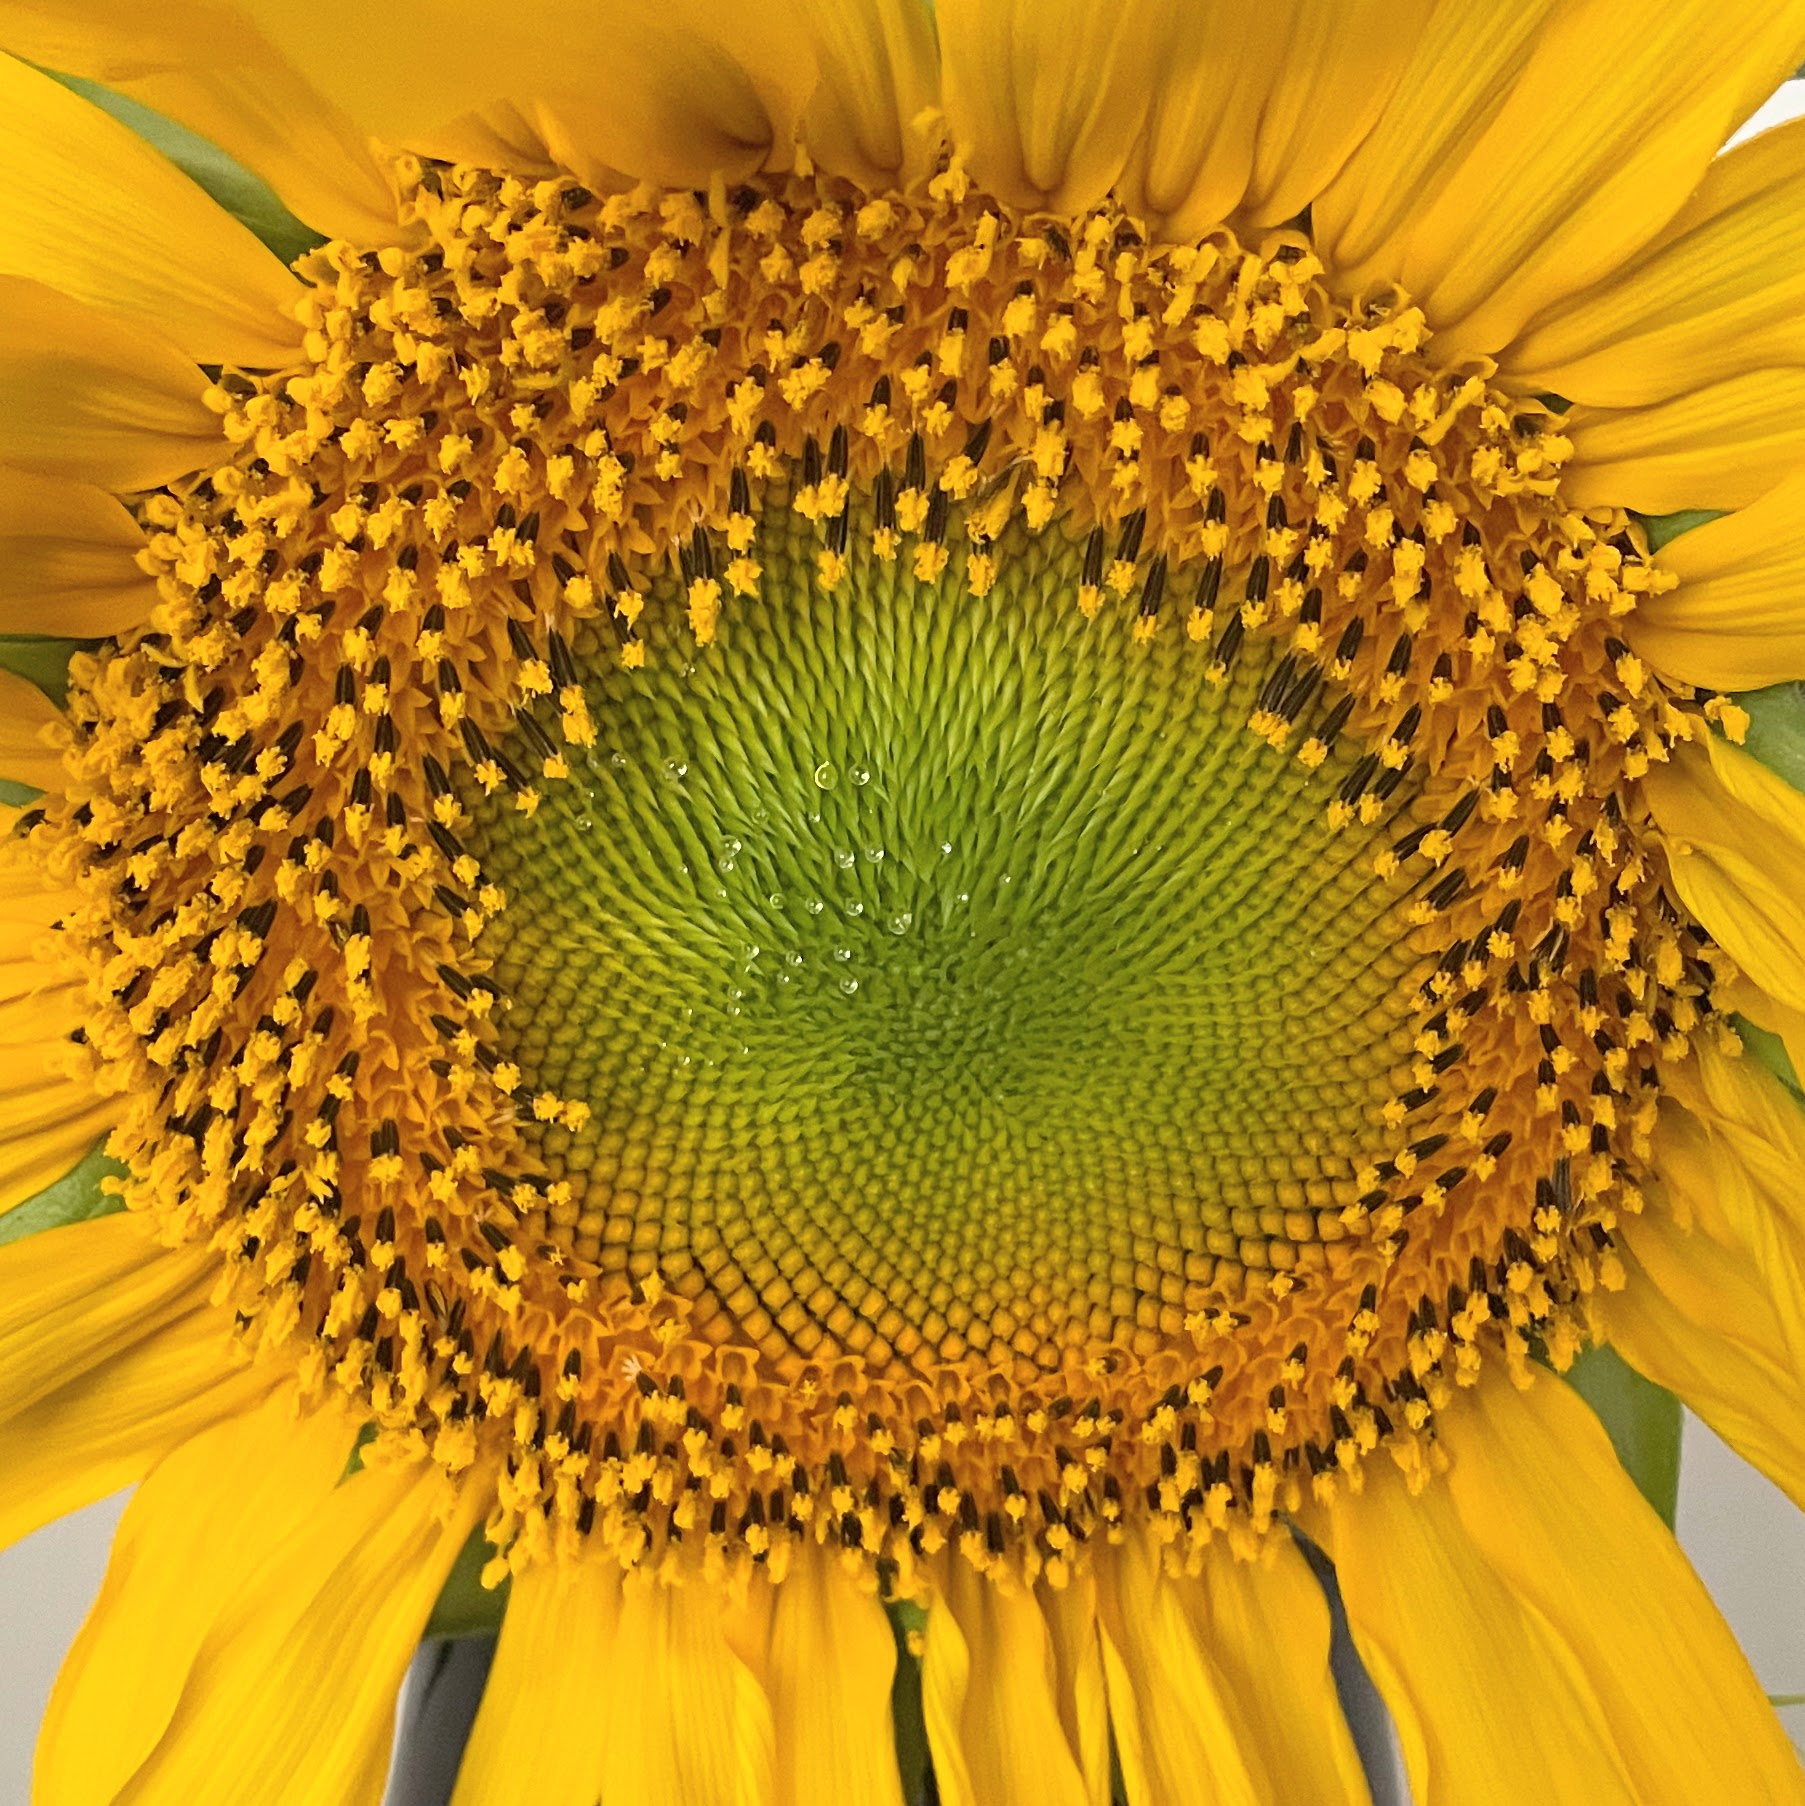

Finally, one last thing I knew, but did not really think about until now is that the sunflower’s disc florets are arranged in a spiral pattern that follows the Fibonacci sequence, a mathematical sequence in which each number is the sum of the two preceding ones. If you count the spirals in a sunflower head (which can be done in different ways), you will usually end up with a Fibonacci number (0, 1, 1, 2, 3, 5, 8, 13, 21, 34, 55, …). Why? Because the pattern makes efficient use of available space for seed formation. The growing seeds press on each other, creating geometric patterns. The Fibonacci sequence is found everywhere in nature (such as in pineapples, pinecones, broccolo romanesco, sea shells, tree branches, storms, galaxies, and even the distribution of seeds in a raspberry, to name just a few occurrences).
This is where my knowledge of sunflowers ended. Then, I discovered a couple more reasons to admire them:
1. Every part of a sunflower — not just the seeds — can be eaten:
- Sunflower sprouts can be used in the same way as alfalfa or bean sprouts, in a stir fry or a spring salad or Thai salad.
- Jerusalem artichokes (aka sunroots, sunchokes) are a type of sunflower whose roots are edible; prepare them as you would other root vegetables: roast, sauté, fry, mash, or puree them — or shred or slice them raw.
- Sunflower stalks can be eaten like celery when small and slender. You can also make flour from the stalks. (OR… dry the stalks and use them to support other plants in the garden the following year.)
- Younger, smaller sunflower leaves can be eaten in salads, and older, bigger leaves can be boiled and sauteed like collards or other leafy greens; removing the central rib may make them a little less bitter. Some people also prepare tea from dried sunflower leaves and/or petals.
- The flowers (ie, ray florets) are edible; try them in a salad.
- The opened (giant) sunflower heads (not fully mature, with seeds that are still white) can be grilled, if you are feeling particularly adventurous.
- The unopened sunflower heads can be prepared in a way similar to artichokes.
2. Sunflowers can absorb some serious toxins. Because of this ability, they are called hyperaccumulators. When a reactor exploded at the Chernobyl Nuclear Power Plant in Ukraine in 1986, it released radioactive elements into the environment; thousands of sunflowers were planted to help remove these elements from the soil and ponds near the disaster site. Using plants to cleanse the environment is called phytoremediation. Today, sunflowers are the international symbol for nuclear disarmament (and as the national flower of Ukraine, they are also symbols of solidarity, resilience, and hope).


 on the sides; front-facing wall of opus mixtum (bands of brick and tufa), with lateral 'toothing' and a structural arch; plus rough-hewn travertine column--Portico of Claudius, Portus (c. 50 AD)")
")
 with lateral 'toothing' and putlog holes at the top--Trajan's warehouse, Portus (c. 100 AD)")
")
, Trajan's warehouse, Portus (c. 100 AD)")

