Tag Archives: appetizer

Recipe: No-Fail, No-Knead Focaccia

22 Sep

This is a recipe I turn to time and again when serving Italian antipasti. It is the quick version of a Bon Appetit recipe, cutting the first rise time from 8-24 hours, to just 3-4. Even with the shorter first rise, this recipe has never failed me. I start the focaccia in the morning and it is ready at meal time, with only a few brief interventions in between while I am making other dishes. If you do have more time, definitely make the original, longer version. But if you need a quicker focaccia fix, search no further.

Note: Wherever possible, it is best to weigh key ingredients on a kitchen scale to preserve the correct ratios between them.

No-Fail, No-Knead Focaccia

Ingredients:
¼ oz. (7 gr.) active dry yeast
2 tsp. honey
2.5 c. (590 ml.) lukewarm water
22 oz. (625 gr.) all-purpose flour
5.5 tsp. (about 16 gr.) Diamond Crystal kosher salt
6 tbsp. extra-virgin olive oil, divided, plus more for hands
butter
Maldon sea salt flakes
fresh rosemary (optional)

Preparation:

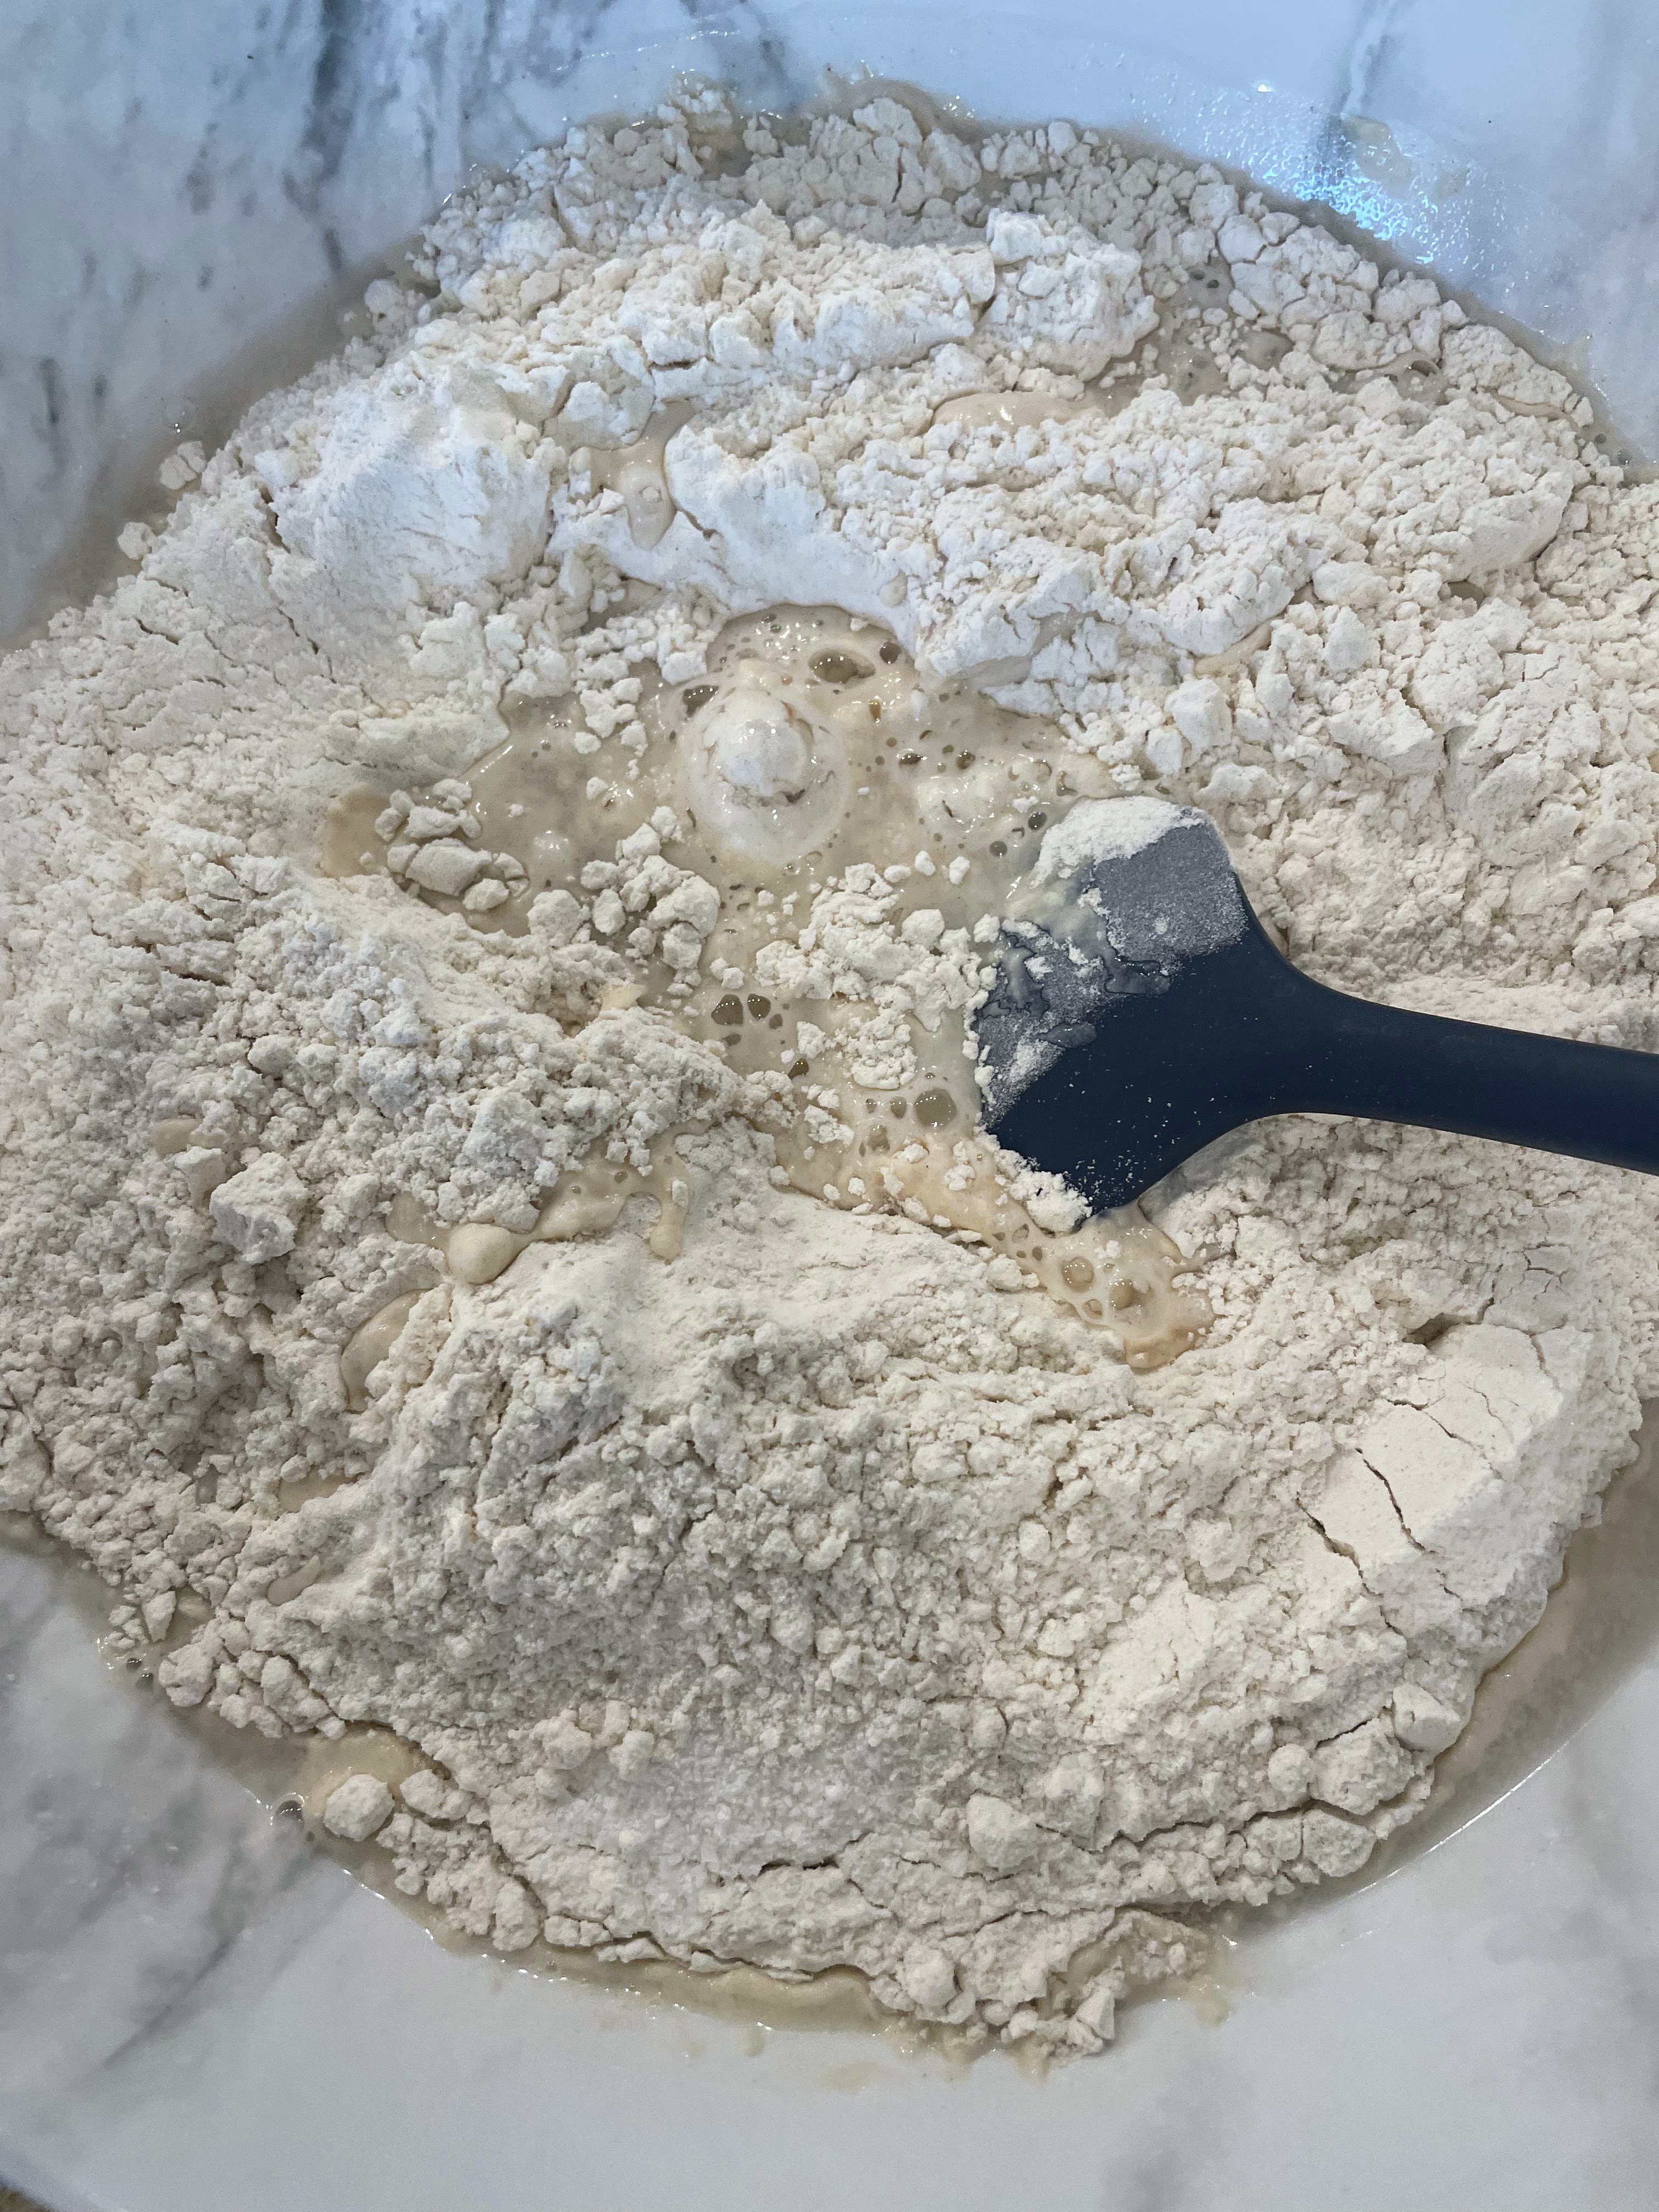
1. Whisk the honey and lukewarm water in a medium bowl; add the yeast, whisk again, and let sit 5 minutes (the mixture should look foamy or at least creamy; if it doesn’t, you should start again with new yeast).

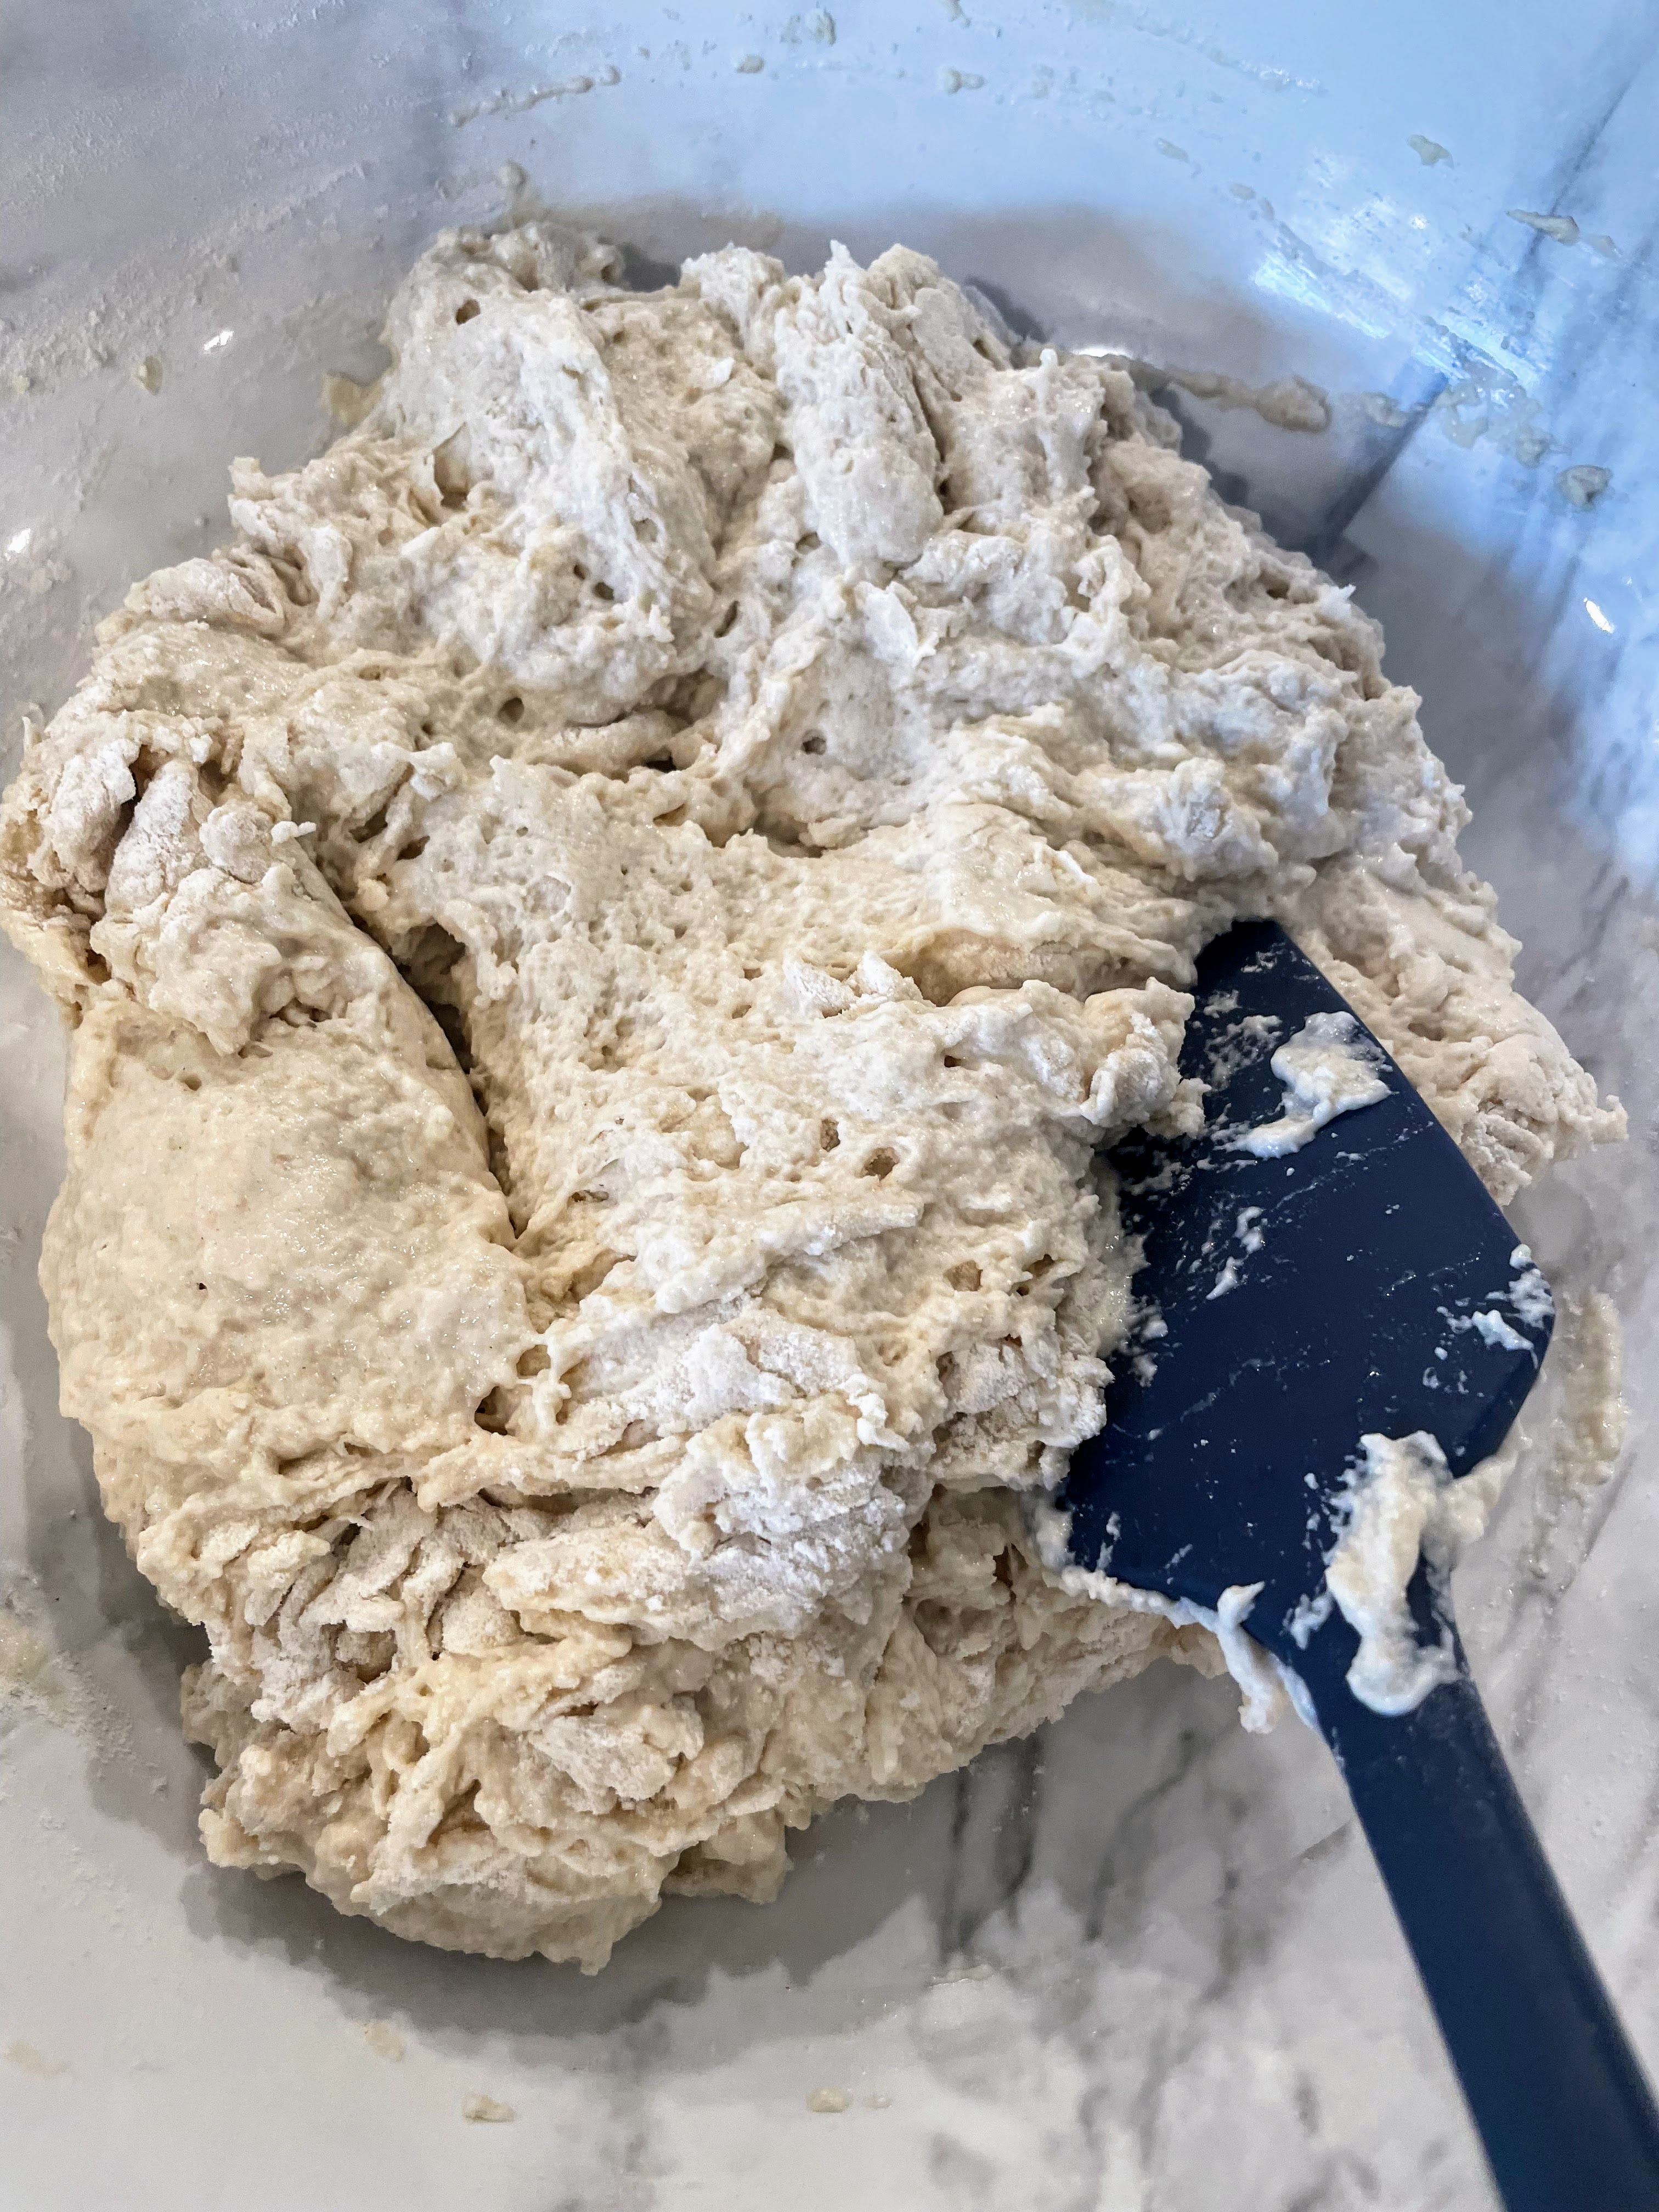
2. Add the all-purpose flour and kosher salt and mix with a rubber spatula until a shaggy dough forms and no dry streaks remain.

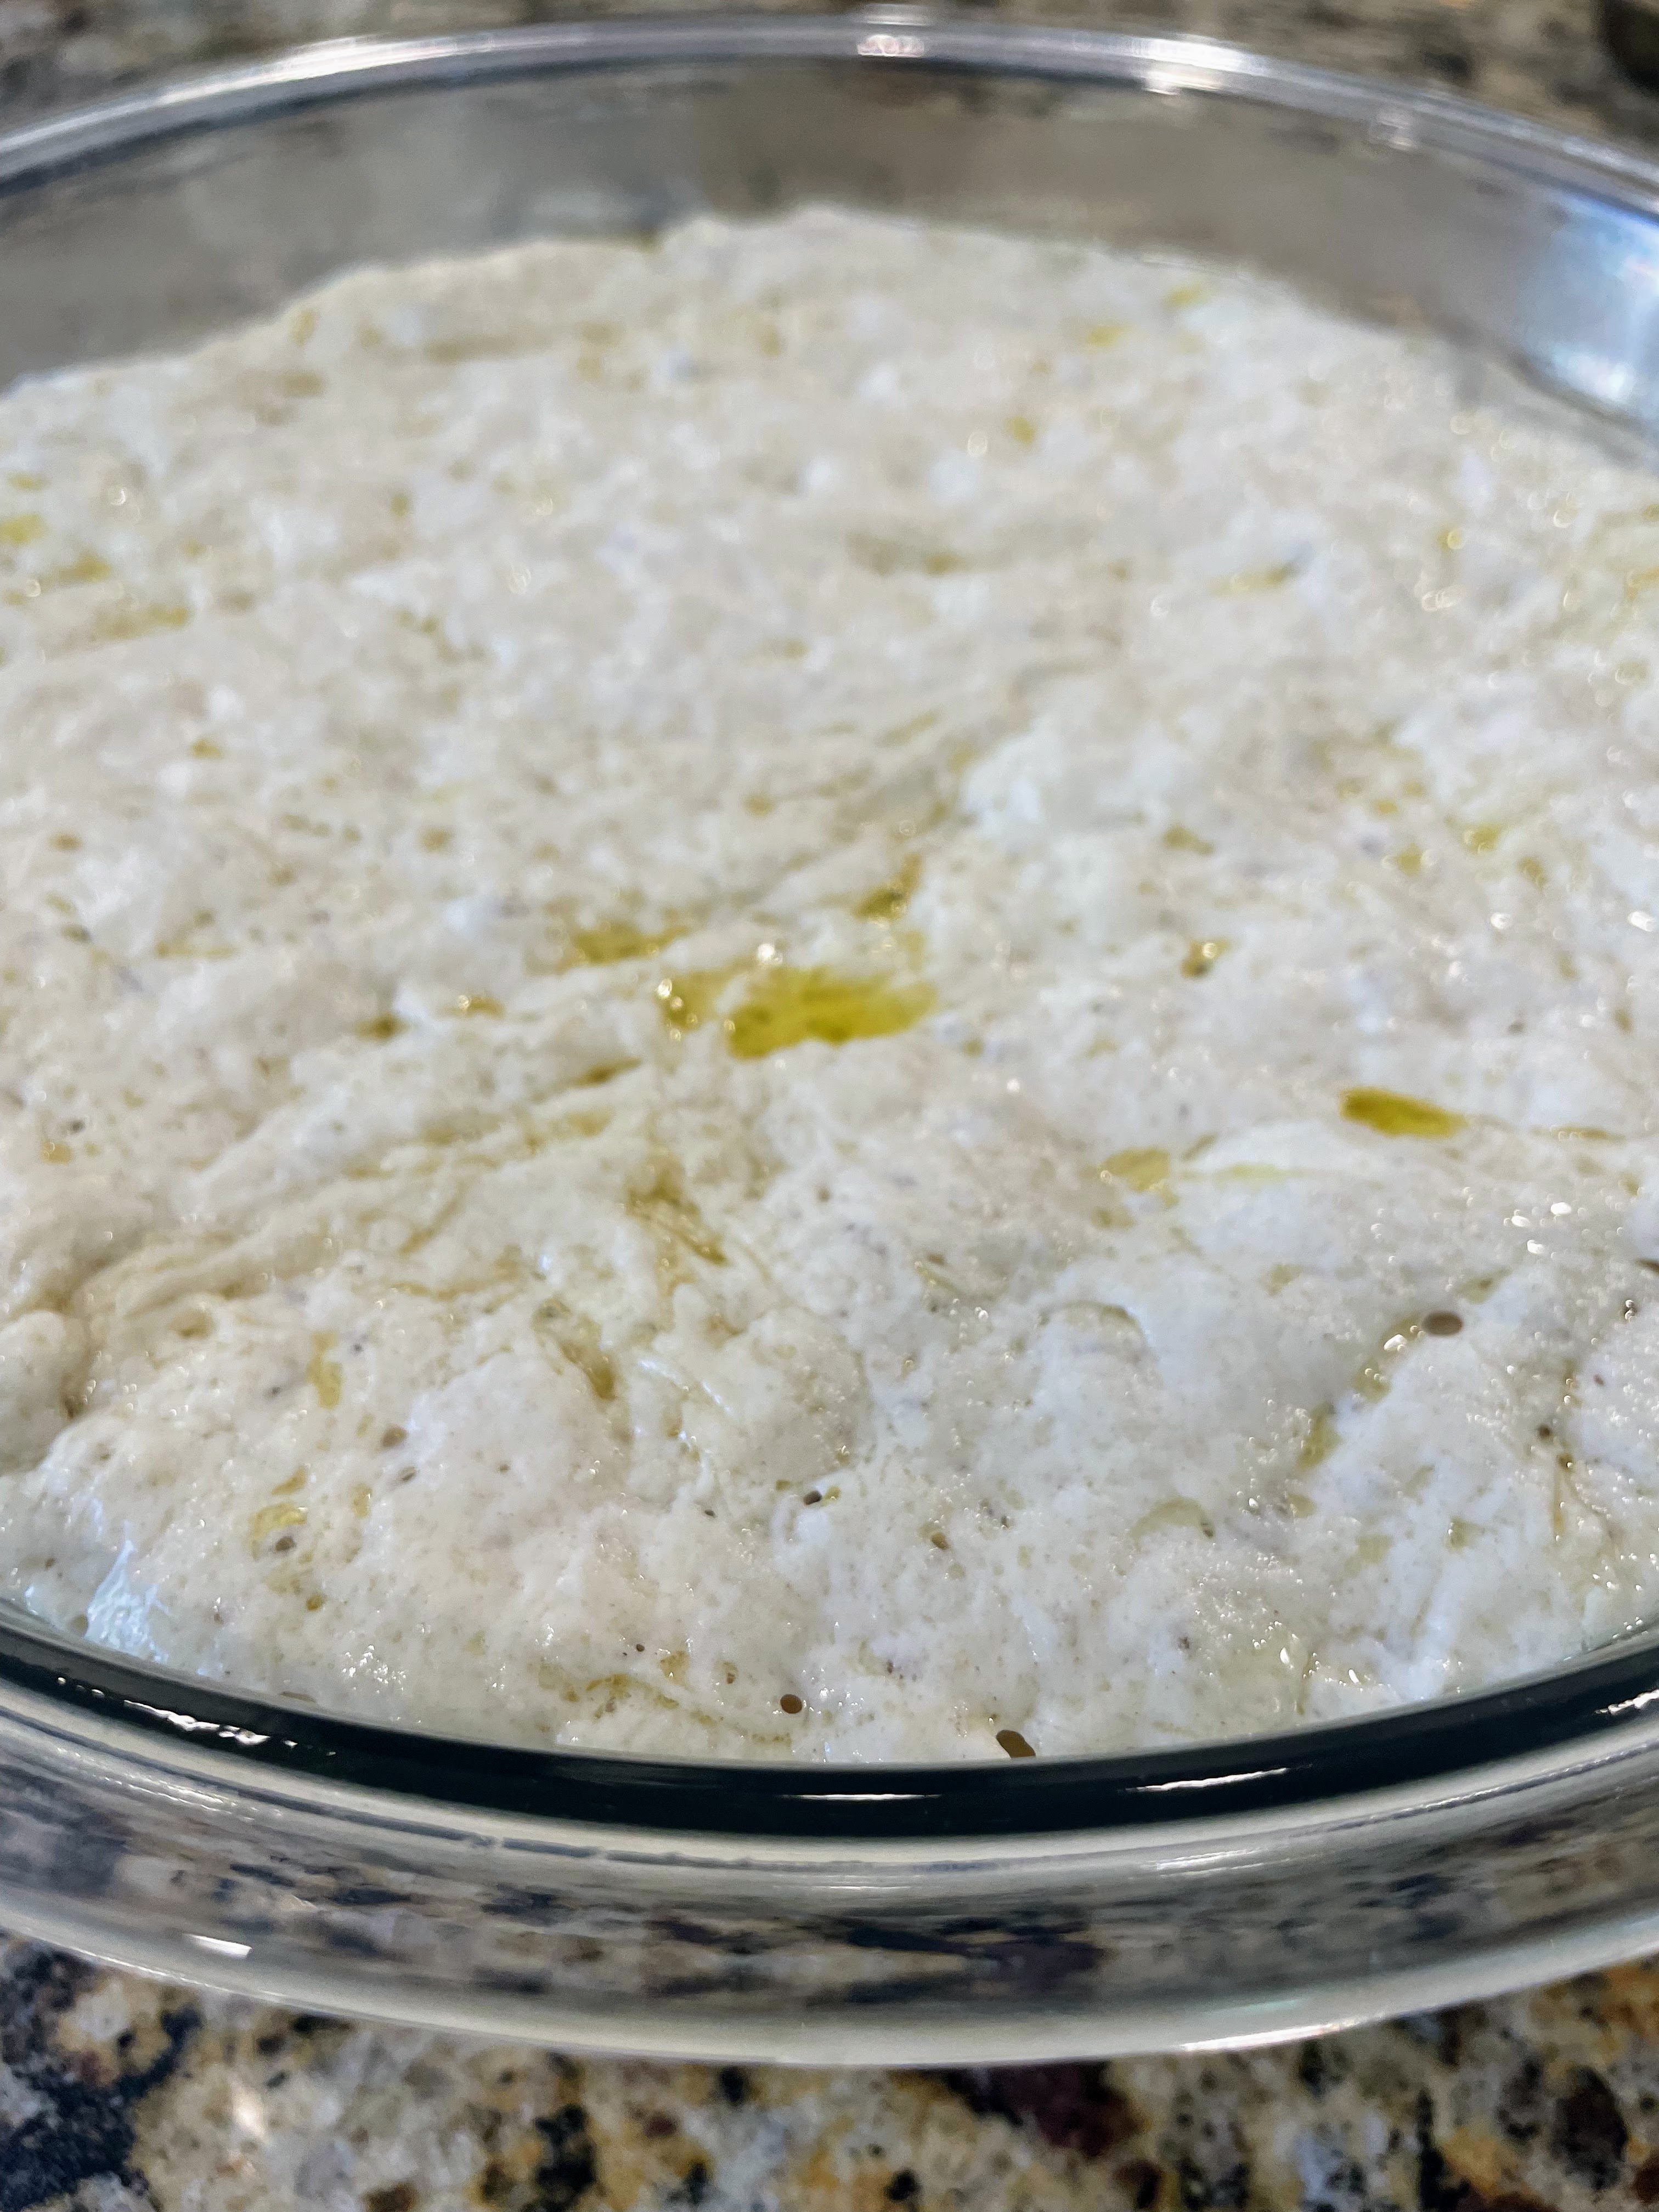
3. Pour 4 tbsp. of the extra-virgin olive oil into a large bowl, as the dough will rise a lot. Transfer the dough to the bowl and turn to coat in oil. Cover with a lid or plastic wrap and let rise at room temperature until doubled in size, 3–4 hours. This is the first rise (quick version).

4. Generously butter a half-sheet (18×13 in./45×33 cm.) rimmed baking sheet. The butter will ensure that your focaccia doesn’t stick. After buttering, pour 1 tbsp. extra-virgin olive oil into the center of the sheet.

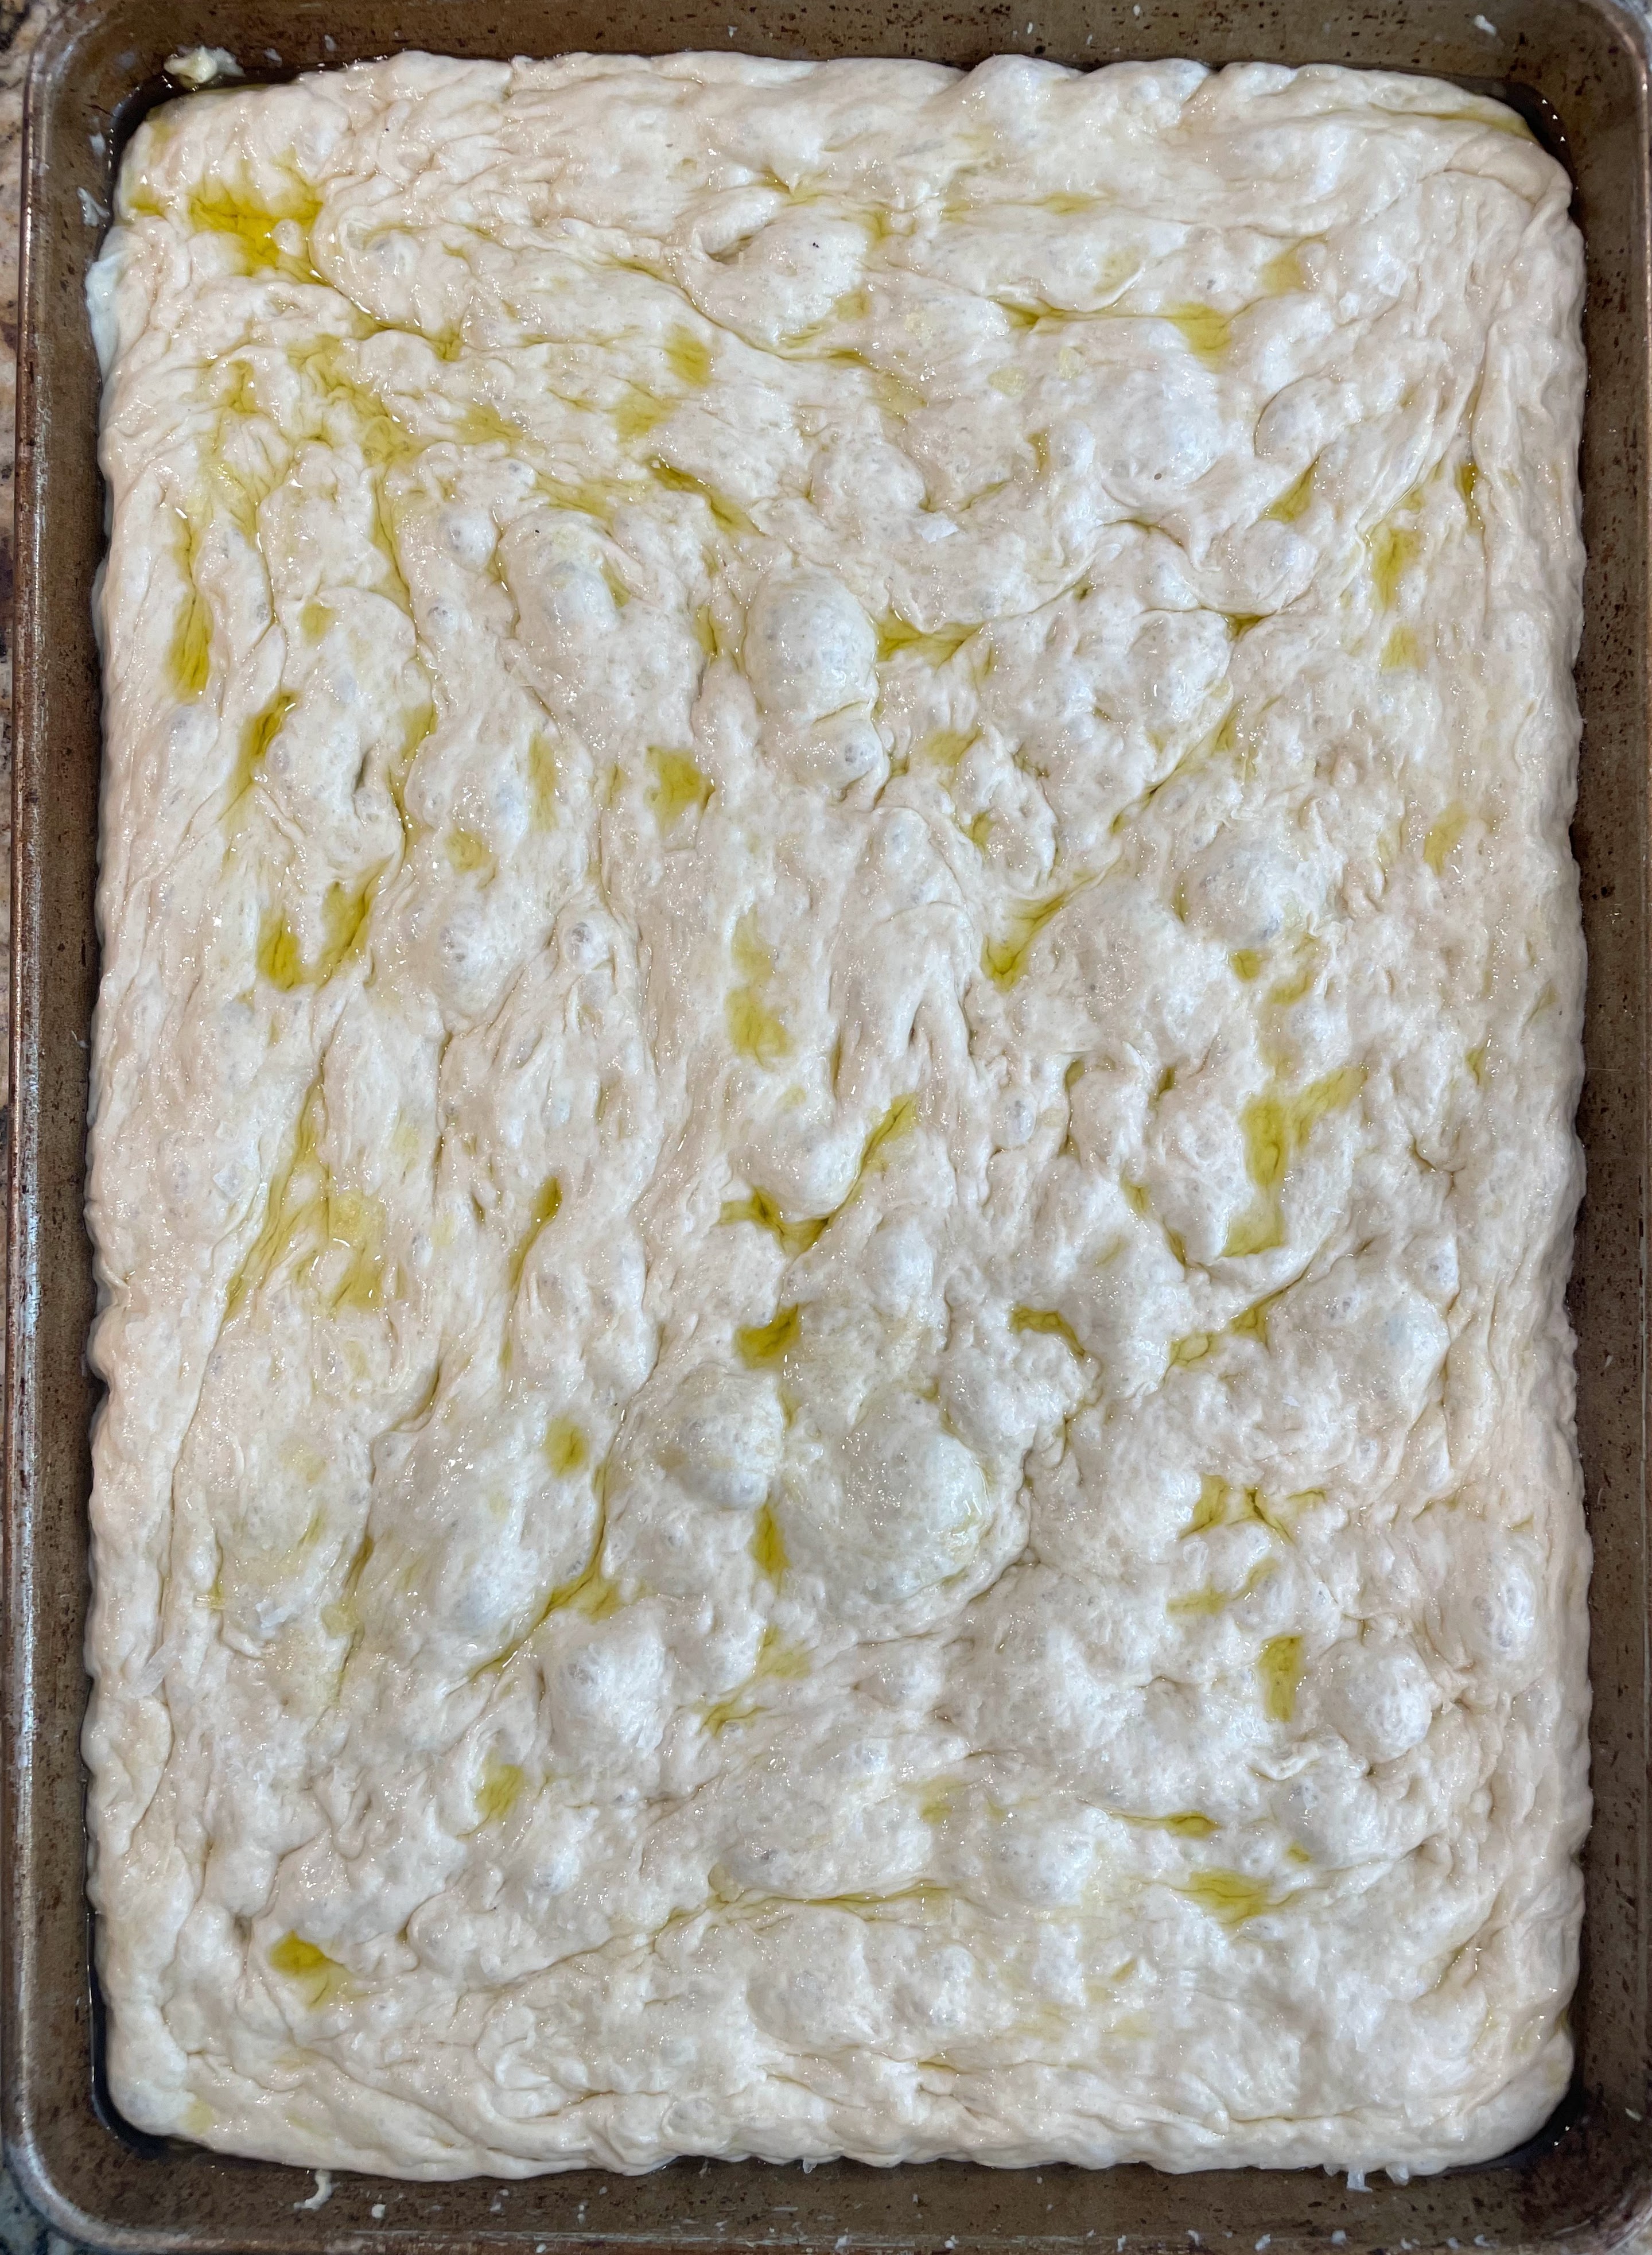
5. Keeping the dough in the bowl and using a fork in each hand, gather up the edges of the dough farthest from you and lift up and over into center of bowl. Give the bowl a quarter turn and repeat the process. Do this two more times until you have made it all the way around the bowl; you want to deflate the dough while slowly forming it into a rough ball. Transfer the dough to the buttered baking sheet. Pour any oil left in the bowl over and turn the dough to coat. Let rise, uncovered, in a warm, dry spot until doubled in size, at least 1½ hours and up to 4 hours. This is the second rise. By the end of it, the dough should have expanded toward the edges of the baking sheet.

6. Place a rack in the middle of the oven; preheat to 450F/230C.

7. To see if the dough is ready, poke it with your finger. It should spring back slowly, leaving a small indentation. If it springs back quickly, the dough isn’t ready. (If at this point the dough is ready to bake but you aren’t, you can chill it up to 1 hour.)

8. Lightly oil your hands. Gently stretch the dough to completely fill the sheet. Dimple the focaccia all over with your fingers, creating very deep depressions in the dough (reach your fingers all the way to the bottom of the pan). Drizzle with the remaining 1 tbsp. extra-virgin olive oil and sprinkle with the flaky sea salt (and rosemary, if using). Bake the focaccia until it is puffed and golden brown all over, 20–30 minutes.

Photos below are from two different bakes; one with flaky salt only, the other with rosemary and coarsely ground salt as I didn’t have the Maldon at the time. Both versions are delicious–you really can’t go wrong.

9. The focaccia is best the day it is made, but is delicious toasted the next day, too. My current favorite toppings: burrata and good-quality anchovies. Or burrata and mortadella. Or burrata and marinated tomatoes or marinated roasted peppers. Or no toppings at all….

Recipe: Tarte Soleil (Sun-Shaped Spinach Feta Tart)

11 May

Looking for a stunning appetizer? Or a great accompaniment to, say, soup or a salad? Look no further than this pastry, which is as good to eat as it is to look at. It requires a little more effort than other things you can do with puff pastry, but is still relatively easy (and, more importantly, fun) to make. And anything that looks this delicious is worth it.

I love the original recipe as follows below. But, as you will see in some of the photos, I’ve played around with it at times. Once, I added a base layer of tomato pesto to see what that would be like, and used finely chopped red onions instead of the scallions I forgot to buy. Another time I did not have quite enough spinach, so I made up the weight by adding extra feta and shredded mozzarella. So tweak this recipe as you desire — or don’t; it will be delicious every time no matter how you prepare it.

Tarte Soleil
(adapted from Bon Appetit)

Ingredients:
1 package (17.3-oz. /490 gr.) frozen puff pastry (= 2 sheets)
2 packages (10 oz/283 gr. each) frozen, chopped spinach — defrosted; see below
2 scallions (or about 1/4 of a white or red onion), finely chopped
2 tbsp. fresh dill, finely chopped
2½ oz. (70 gr.) feta cheese, crumbled ( = about ⅔ cup)
2 garlic cloves, crushed
1 lemon, zested
1 tsp. kosher salt, plus more
¼ tsp. freshly ground black pepper, plus more
All-purpose flour (for rolling)
1 large egg, whisked (aka egg wash)

Preparation:
1. Defrost the frozen puff pastry and the frozen spinach in the fridge for at least 8 hours or overnight. (Note: Place the spinach packages in a leak-proof container, just in case.)
2. When you are ready to make the tart, place the defrosted spinach in a fine-meshed strainer, and press/squeeze to get as much of the liquid out as possible; you want it as dry as you can get it.
3. Add the spinach, scallions, dill, feta, garlic, lemon zest, salt, and pepper to a medium bowl. Stir to combine, making sure to break up any spinach clumps. I find it is easiest to use my (clean) hands to do this. You should have 2½ cups spinach mixture. (The photo below is from when I added mozzarella to make up for not having quite enough spinach.)

4. Find a round object that’s 10–12 inches (25-30 cm.) in diameter. I’ve used whatever I can lay my hands on, such as the lid of a Tupperware container or the lid of a large Dutch oven, each about 11 inches/28 cm. in diameter.
5. Place one of the pastry sheets on parchment paper (or on a well-floured counter if you prefer, or if you forgot you were supposed to roll it out on parchment paper…). Lightly dust the pastry with flour, both over and under. Roll it out in all directions and dust with more flour if needed, until it’s at least 1–2 inches (2.5-5 cm.) larger than your round object/lid.
6. Place the round object/lid over the pastry, press to indent, then use a sharp knife to trace the circle. Set aside the excess pastry. (Tip: You can save the excess pastry in the fridge for a couple days, tightly wrapped, then when the urge strikes you can tear it into small pieces, dust with cinnamon and sugar, and bake for a few minutes for a quick and delicious treat).

7. If you rolled your pastry directly on the counter, now is the time to 1) transfer your pastry round to some parchment paper (preferred) or to a baking mat (if you are out of parchment), and then to 2) place the whole thing on a baking sheet. Brush the egg wash all along the circumference of the pastry round; reserve remaining egg wash for later. Spread the spinach mixture over the pastry base, leaving a ½” border.

8. Cut out the second sheet of pastry, following the same directions as for the first one. Place the second round of pastry on top of the spinach mixture (if you’re having trouble moving it, fold it into quarters, then unfold it on top of the spinach) and press gently to seal. Using a small cup or shot glass (2 inches/ 5 cm. in diameter), make an indent in the very center. Your pastry might be slightly warm by now. If so, chill 10–20 minutes.

9. Once the pastry is cool, transfer the whole set-up, parchment/baking mat and all, to a work surface. With a chef’s knife, cut pastry into 4 quadrants, stopping when you reach the center circle. Cut each quadrant in half, then in half again, so that you have 16 spokes. (Note: If cutting on a baking mat, cut as gently as possible to avoid damaging the mat). Transfer the tarte with the parchment/baking mat back to sheet tray.

10. Working with one spoke at a time, pull gently away from the center (to extend the length of each piece), then twist to expose the spinach insides. Aim for three or four twists. Nudge them around to distribute evenly. it doesn’t matter if they look messy; they will all look beautiful when baked. Freeze the tarte until cold, 10–15 minutes.

11. Meanwhile, place a rack in the middle of the oven; preheat to 400°F/200°C. Brush the tarte all over with the reserved egg wash; season with salt and pepper. Bake the tarte until well browned, about 30–35 minutes.

Recipe: Easy Puff Pizza ‘al Taglio’

25 Feb

Puff pastry is a culinary lifesaver, since pretty much anything tastes better when puff pastry is involved. Also, it’s a great way to use up all sorts of things in your fridge or cupboards. This week, I defrosted a package of puff pastry for a meal I did not end up making, and I needed to use it soon. So the scavenger hunt began. Amongst other things in the fridge, I spotted two pork sausage links, some mushrooms that were not going to make it much longer, and a bit of fresh spinach that was beginning to look not so fresh. On the counter, I could see some cherry tomatoes on the cusp of wrinkling. And in the cheese drawer were wedges of Gruyere and Pecorino Romano.

These ingredients reminded me of a sausage and mushroom pizza al taglio (pizza by the slice) I loved in Rome. So the solution was clear–I would make an ‘Avoid Food Waste/Clear Out the Fridge’ puff pizza al taglio. (Ok, honestly, this can also be called a puff pastry tart….) You can cut it into larger pieces for lunch or dinner, or cut it smaller ones to serve as an appetizer.

Note: This recipe is just a suggestion; you can put all sorts of things on top of puff pastry (like this beet and feta vegetarian option) and you will end up with something delicious. I often let fate and the contents of my fridge decide. With a little bit of extra effort, you can also make puffs, but I was feeling lazy and went freeform.

Ingredients

1 pkg. puff pastry (the kind I buy has two sheets of pastry; I used both)
mushrooms, sliced (16 oz./450 gr.)
garlic salt (optional)
baby spinach, chopped (as much as desired; I only had a small handful)
2 pork sausages, casings removed
cherry tomatoes, cut in quarters (as much as desired; I had about 10 cherry tomatoes to use)
Gruyere cheese, grated (as much as desired)
Pecorino Romano cheese, grated (as much as desired)

Preparation

1. Thaw your puff pastry (ideally, overnight in the fridge).
2. Preheat oven to 375 F (190 C).
3. Cook any ingredients that are likely to wet the puff pizza too much (or not cook fully while in the oven). For me, those ingredients were the mushrooms, spinach, and sausage. In a frying pan, I quickly sauteed the mushrooms in some olive oil and tossed them with garlic salt. I placed them on a dish, then cooked the sausage in the same pan until it was no longer pink, crumbling it as it cooked. The sausage went on another plate and the little spinach I had went into the pan; it almost disappeared before my eyes, but ended up being just enough to add a spot of additional color to the puff pizza.

    4. Spray a rimmed baking sheet with olive oil cooking spray, or wipe a thin layer of oil over it.
    5. Lay the puff pastry sheets down the center of the baking sheet, pressing the seam between the two together. Score the sides of the pastry with a sharp knife. This will allow the sides to rise into a crust. (I did not score the short sides as I was able to press them up against the baking sheet rim where they formed their own crust.)

    6. Layer your prepped ingredients onto the puff pastry, taking care to not place anything past the score lines: I started with a little Gruyere, then the mushrooms, sausage, tomatoes, and spinach, ending with a bit more Gruyere and some Pecorino Romano. I tend to go lightly on the cheeses as I want the flavors of the other ingredients to shine, but feel free to add as much as you like.

    7. Bake for 25-30 minutes, or until puff pastry and cheeses are golden. Using a firm spatula, lift one edge of the pizza up and check the bottom; you want to be sure it, too, is golden.
    8. Remove, let sit for a minute or two, then cut into individual pieces. Enjoy!

    Recipe: Baba Ghanoush

    30 Sep

    Years ago, I learned to make some Lebanese dishes from watching (and helping) college friends cook a few classics, but my main teacher was a cookbook called Lebanese Cuisine by Madelain Farah. The version I have is from 1979, meaning it predates the internet. (And no, I wasn’t in college in 1979; I bought the cookbook some years later). Despite there being so many delicious Lebanese recipes now available online, I still find myself going back to this well-loved, well-spattered, paperback cookbook for some of my favorites. It has accompanied me on many moves and is now held together with tape.

    Ms. Farah was a straightforward recipe writer; no coddling of the reader for her. In her recipe for Baba Ghanoush (which she calls Baba Ghannuj, as there are many ways to spell it), the first instruction is written this way: “Eggplant may be baked or grilled over a flame until well done.” There’s a lot of room for interpretation in those instructions…. Ms Farah was also a proponent of mashing the ingredients, either with a potato masher or a wooden mallet. I now use a food processor, which may be anathema in some quarters, but it produces a silky smooth dip.

    So, this recipe takes its inspiration from Madelain Farah’s, with a few twists: I added smoked paprika and cumin, which play on the smokiness of the eggplant and really help bring out its flavor. And I use a faster blending technique.

    Baba Ghanoush

    Ingredients:
    2 medium eggplants (2 lb/900 gr total). Note: Ms Farah called for one large eggplant, but the larger the eggplant, the more seeds there are, so I prefer using two smaller ones. (Since I grow eggplant in my garden each summer, I can pick them at just the right size!).
    olive oil

    2 cloves of garlic, minced (we like garlic in our house; you can use 1 clove as the recipe originally called for)
    1/4 c. (60 gr.) tahini
    1/4 c. (60 ml.) lemon juice, or more to taste
    1/4 tsp. smoked paprika
    1/4 tsp. cumin
    1/2 tsp. salt, to taste
    1 tbsp. (15 ml.) water (optional)

    To garnish:
    –chopped fresh flat-leaf parsley
    –smoked paprika and cumin (or, substitute the paprika and cumin with sumac, which is a more traditional topping and one Ms. Farah suggested; both options taste great)
    –olive oil

    Preparation:

    Cooking method #1: Preheat the oven to 450 degrees F (230 degrees C). Cut the eggplant(s) in half lengthwise, and brush a generous amount of olive oil on the cut sides. Place the cut sides down on a large baking sheet (use a rimmed one as the eggplant will get juicy). Bake for about 30-45 minutes until the eggplant is dark golden brown and very, very soft.

    Cooking method #2: Grill the eggplant(s) cut side down on a barbecue, until golden and soft, taking care not to completely incinerate them (some burnt bits are ok and add to the flavor, but a carbonized eggplant is a step too far; I say this from experience).

    Flip the eggplants over and let cool.

    Scoop out the eggplant pulp and place in the bowl of a food processor, carefully removing any skin that may have made its way in, too. Also, check for big clumps of seeds; individual seeds are fine and will get blended right up, but I like to take out any big clusters if I see them, to ensure a smoother dip.

    Add the remaining dip ingredients and process until nice and smooth, adjusting the ingredients to suit your taste. If the dip is too thick, you can add more lemon juice or a spoonful of water.

    Pour the dip into a serving bowl. Sprinkle with chopped parsley and more smoked paprika and cumin (or use sumac instead); drizzle with olive oil.

    Serve with pita bread, pita chips, and/or veggies — or use in a Middle Eastern wrap as a substitute for hummus. I also love putting Baba Ghanoush, lamb kafta, and some tabouli in a pita and calling it a meal.

    Recipe: Walnut-Pomegranate Dip (Muhammara)

    31 Jan

    In the world of dips, hummus reigns supreme–but there is another Middle Eastern dip that also has lots of protein and lots of tang, and is equally easy to make. Although, now that I think of it, I realize it’s been a while since I made my own hummus; my local grocery store now devotes entire refrigerator sections to it and I have gotten lazy. This is a sad state of affairs–because hummus is really incredibly easy to make…. But back to the Muhammara. It gets its protein from the walnuts and its tang from pomegranate molasses, which you can find in Middle Eastern and Indian grocery stories and at a certain national, upscale grocery-store chain that shall not be named. Roasted red peppers also add to the slightly sweet undertones of this dip, which deserves a spot on any appetizer palette. This recipe comes from Bon Appetit magazine.

    Muhammara
    Walnut-Pomegranate Dip (Muhammara)

    1 c. walnuts
    ½ c. roasted red bell peppers from a jar, drained (reserve the liquid)
    1/3 c. panko (Japanese bread crumbs)
    2 tbsp. extra-virgin olive oil
    1 tbsp. pomegranate molasses
    1 tsp. cumin
    1/2 tsp. dried crushed red pepper

    Preparation
    1. Blend/process all ingredients until coarsely ground. (Add a bit more panko or walnuts if too thin, or roasted red pepper liquid or molasses if too thick.)

    Food processor
    2. Place the dip in a serving bowl. Drizzle some olive oil over the top–or for extra tang, mix together a bit of olive oil and pomegranate molasses and drizzle that instead.

    Note: This is what pomegranate molasses looks like, if helpful.

    PM

    Recipe: Crackers with Cheddar and Fig

    24 Sep

    The pairing of sharp cheddar and sweet fig is another match made in gastronomic heaven. This recipe–though it hardly deserves to be called that–is an embarrassingly simple way to bring the two together. Take out a few crackers or crispy flatbreads (or cut a few slices off a baguette), top with a small wedge of cheddar, and add a dollop of fig spread or jam* for a delicious snack. Or, put some of the fig spread in a tiny bowl and place it on a larger cheese board, along with the cheddar.

    For a Spanish variation on the theme, pair Manchego cheese with membrillo, a lovely fruit paste made with quince.

    *  I can get fig spread at my local store, and now always keep a jar in the fridge; if you make your own spread or jam, even better!

    Recipe: Turkish Feta Dip with Paprika

    27 Apr

    Fantastic on its own, this dip is even better as the basis for many delectable creations, from mini appetizer stacks to a range of sandwiches (try it on some crusty bread or a cracker, topped with Eggplant with Garlic Vinaigrette and some Roasted and Marinated Bell Peppers). The cheese, yogurt, and walnuts provide a protein boost, but that’s not why you’ll want to eat this. You’ll want it for the nice tang and the endless possibilities. You can adapt it any way you like: more or less garlic or chili flakes, mint instead of parsley, walnuts or no walnuts, etc. Now that I think of it, this dip would probably be nice with some chopped Kalamata olives mixed in, too.

    Turkish Feta Dip with Paprika

    8 oz. feta cheese, crumbled
    1 tsp. paprika
    1 clove garlic, minced
    1/4 c. chopped walnuts
    1 tbsp. olive oil
    4 tbsp. plain yogurt
    1 tsp. fresh lemon juice
    sprinkle red chilli flakes (crushed red pepper)
    1 tbsp. chopped fresh parsley (or 1 tsp. dried mint)

    Preparation

    1. Place the feta in a medium bowl and mask with a fork. Sprinkle with paprika and mix in garlic.
    2. Toast the walnuts in a 350-degree oven for about 5 minutes. Remove and crush finely with a mortar and pestle (or in a bag using a rolling pin), then add to feta mixture in bowl.
    3. Add remaining ingredients and mix well to combine. If dip appears too thick, add a bit more yogurt.
    4. Optional: drizzle with olive oil before serving.
    5. Serve with crusty bread, pita bread, pita chips, toasted pita with zaatar, or any other cracker.

    Recipe: Sausage, Fennel, and Mushroom Pastry Puffs

    6 Mar

    Puff pastry is a magical ingredient. If you have some in the freezer, you will be able to pull together a savory meal or a sweet dessert in barely more time than it takes to cook the pastry once it has thawed. If you are someone who makes puff pastry from scratch, my hat is off to you. I may get there one day, but for now I am happy to rely on the prepared kind. In this recipe, the onion and fennel almost melt together, adding a subtle layer of flavor to the sausage and mushroom. And crisp, flaky pastry makes everything better.

    Sausage, Fennel, and Mushroom Pastry Puffs
    Yield: 12 puffs

    1 pkg. puff pastry (about 17.5 oz. = 2 sheets), almost thawed
    2 tbsp. olive oil
    1 lg. onion, finely chopped
    1 bulb fennel, trimmed, cored, and finely chopped
    8 oz. mushrooms, trimmed and chopped
    sprinkle red chili flakes
    salt & pepper
    6 links sweet Italian turkey sausage (1.5 lb.), casings removed
    6 tbsp. grated Parmesan or Pecorino Romano cheese
    chopped parsley (optional)

    Preparation

    1. Let puff pastry thaw while you make the filling — but before the pastry comes to room temperature, unfold it and slice each sheet vertically into three sections along the fold lines (each sheet is folded like a letter), then cut each section in half. After cutting up both sheets, you will have 12 small rectangles of pastry. It is easier to cut the pastry, and to maintain the rectangular shapes, when the dough is still a tiny bit frozen. Set the pastry rectangles to one side in a single layer (if they are touching each other, they may stick together).

    2. Heat olive oil over medium heat in a large skillet and add onions and fennel. Cook until onion is soft; add chili flakes (if using) and season with salt and pepper. Add mushrooms to the onion/fennel mixture and cook until liquid is released and mixture is relatively dry. Add the sausage, and cook until all liquid has evaporated, breaking up sausage as much as possible. Check seasonings, then let mixture cool for a few minutes.

    3. Preheat oven to 400 degrees. Spray a 12-cup muffin tin with cooking spray. Place one pastry rectangle into each muffin cup; the edges will drape over, which is fine–the end result will be somewhat free form. Distribute the filling among the muffin cups, sprinkle parsley (if using) and about 1/2 tbsp. Parmesan/Romano on top of each puff, and bring the pastry edges over the filling to loosely cover.

    4. Bake until golden, about 30 minutes. Let cool for 5-10 minutes before serving.

    Recipe: Chicken Satays with Peanut Sauce

    20 Aug

    This is the dish I was beginning to prepare yesterday when I got side-tracked by my daughter’s lovely Mediterranean Wrap.

    I first tasted these satays at a friend’s house when we were living in Australia. I could not get enough of the peanut sauce and I could not get over that fact that our friend had made it from scratch. Even now, I’m happy to just have the sauce on rice after the satays have all disappeared, which they will do soon after making their initial appearance. I usually serve the satays with some diced cucumber sprinkled with seasoned rice vinegar and crushed red pepper.

    If  threading satays and making sauce seems like too much, just marinate boneless chicken breasts (or thighs) in the marinade and throw on the grill for a delectable dinner; the chicken by itself is also fantastic.

    This recipe is originally from an Australian Women’s  Weekly cookbook. Note the time needed to marinate the chicken.

    Chicken Satays with Peanut Sauce
    Makes about 20+ satays

    2 lb. (or about 1 kg.) chicken breast, cut in half horizontally, then cut into thin strips

    Marinade
    4 tsp. soy sauce
    2 tsp. honey
    1 tsp. chili powder
    2 tsp. cumin
    4 tbsp. canola oil
    1.5 tsp. curry powder

    Peanut Sauce
    1-2 tbsp. canola oil
    1 finely chopped onion
    2 cloves garlic, minced
    ½ tsp. chili powder
    1 tsp. ground ginger
    4 oz. low-sodium roasted peanuts, very finely chopped (or crushed with a mortar and pestle)
    1/4-1/2 cup (60-120 ml.) cider vinegar
    1 tsp. salt or soy sauce
    3 tbsp. creamy peanut butter
    1/3 cup fruit chutney (Major Grey, mango)
    ¾ cup (177 ml.) lite coconut milk
    1/8 cup (25 gr.) sugar; you can use brown sugar if preferred**

    Marinade: Combine marinade ingredients in large bowl with lid. Add chicken, coat well, cover, and marinate in refrigerator overnight (or at least for a few hours). If you will be using wooden skewers, soak in water for at least 30 minutes before cooking the chicken.

    Sauce: Cook onion and garlic in oil until onion begins to turn golden. Add spices and peanuts, and cook for 2 minutes. Add remaining ingredients and bring to boil; reduce heat and simmer slowly for 30 minutes or until mixture thickens, stirring occasionally. Cover and keep warm.

    After the chicken has marinated, thread the  strips onto skewers. Grill or broil chicken. Serve satays with peanut sauce (and cucumber salad if desired) as an appetizer, or add rice to make into a meal.

    ** [Note Feb. 2013: I recently made the sauce and forgot to add the sugar — and discovered it tasted great without it; use the sugar if you like the sauce to be a bit sweeter.]

    Recipe: Red Lentil Dip

    30 Jun

    If you love hummus but would like something a little different, here’s a recipe that is equally nutritious and great with pita chips, pita bread, or crackers. Adapted from Cooking Light, this dip has a light curry flavor. Red lentils turn yellow when cooked; the turmeric brings out the golden color.

    Red Lentil Dip
    Makes about 2 1/2 cups

    1 c. dried small red lentils
    1 bay leaf
    3 tbsp. olive oil
    1 c. finely chopped red onion
    2 tbsp. pine nuts
    3 garlic cloves, minced
    1 tsp. salt
    1 tsp. ground coriander
    1/2 tsp. ground cumin
    1/2 tsp. ground turmeric
    1/8 tsp. chilli flakes
    1 tbsp. tomato paste
    3 tbsp. fresh lemon juice

    Place lentils and bay leaf in a large saucepan; cover with water to 2 inches above lentils. Bring to a boil. Reduce heat, cover saucepan, and simmer about 10 minutes or until tender, adding water if needed. If any water remains after lentils are fully cooked, drain well. Discard bay leaf.

    Heat oil in a small skillet over medium-high heat. Add onion and saute until translucent; add pine nuts and garlic and cook 5 minutes or until nuts are lightly browned. Stir in spices and cook 5 minutes, stirring occasionally. Fold in tomato paste and lemon juice.

    Add onion mixture to lentils in saucepan and puree with an immersion blender, or use a food processor and process until smooth.