The very last of my basil has flowered, so today I headed out and harvested all the remaining good leaves. It took a while, but the sun was warm on my back, the bees were buzzing gently by, and the smell of the basil as I plucked each leaf one by one, was intoxicating. There are worse ways to spend part of an October morning.
My aim? To make a few batches of pesto to freeze. But the end result looked (and smelled) so good, I couldn’t wait; I decided to use one batch tonight. It will get drizzled over a Sausage, Kale and Bean soup, the thought of which is already making me hungry!
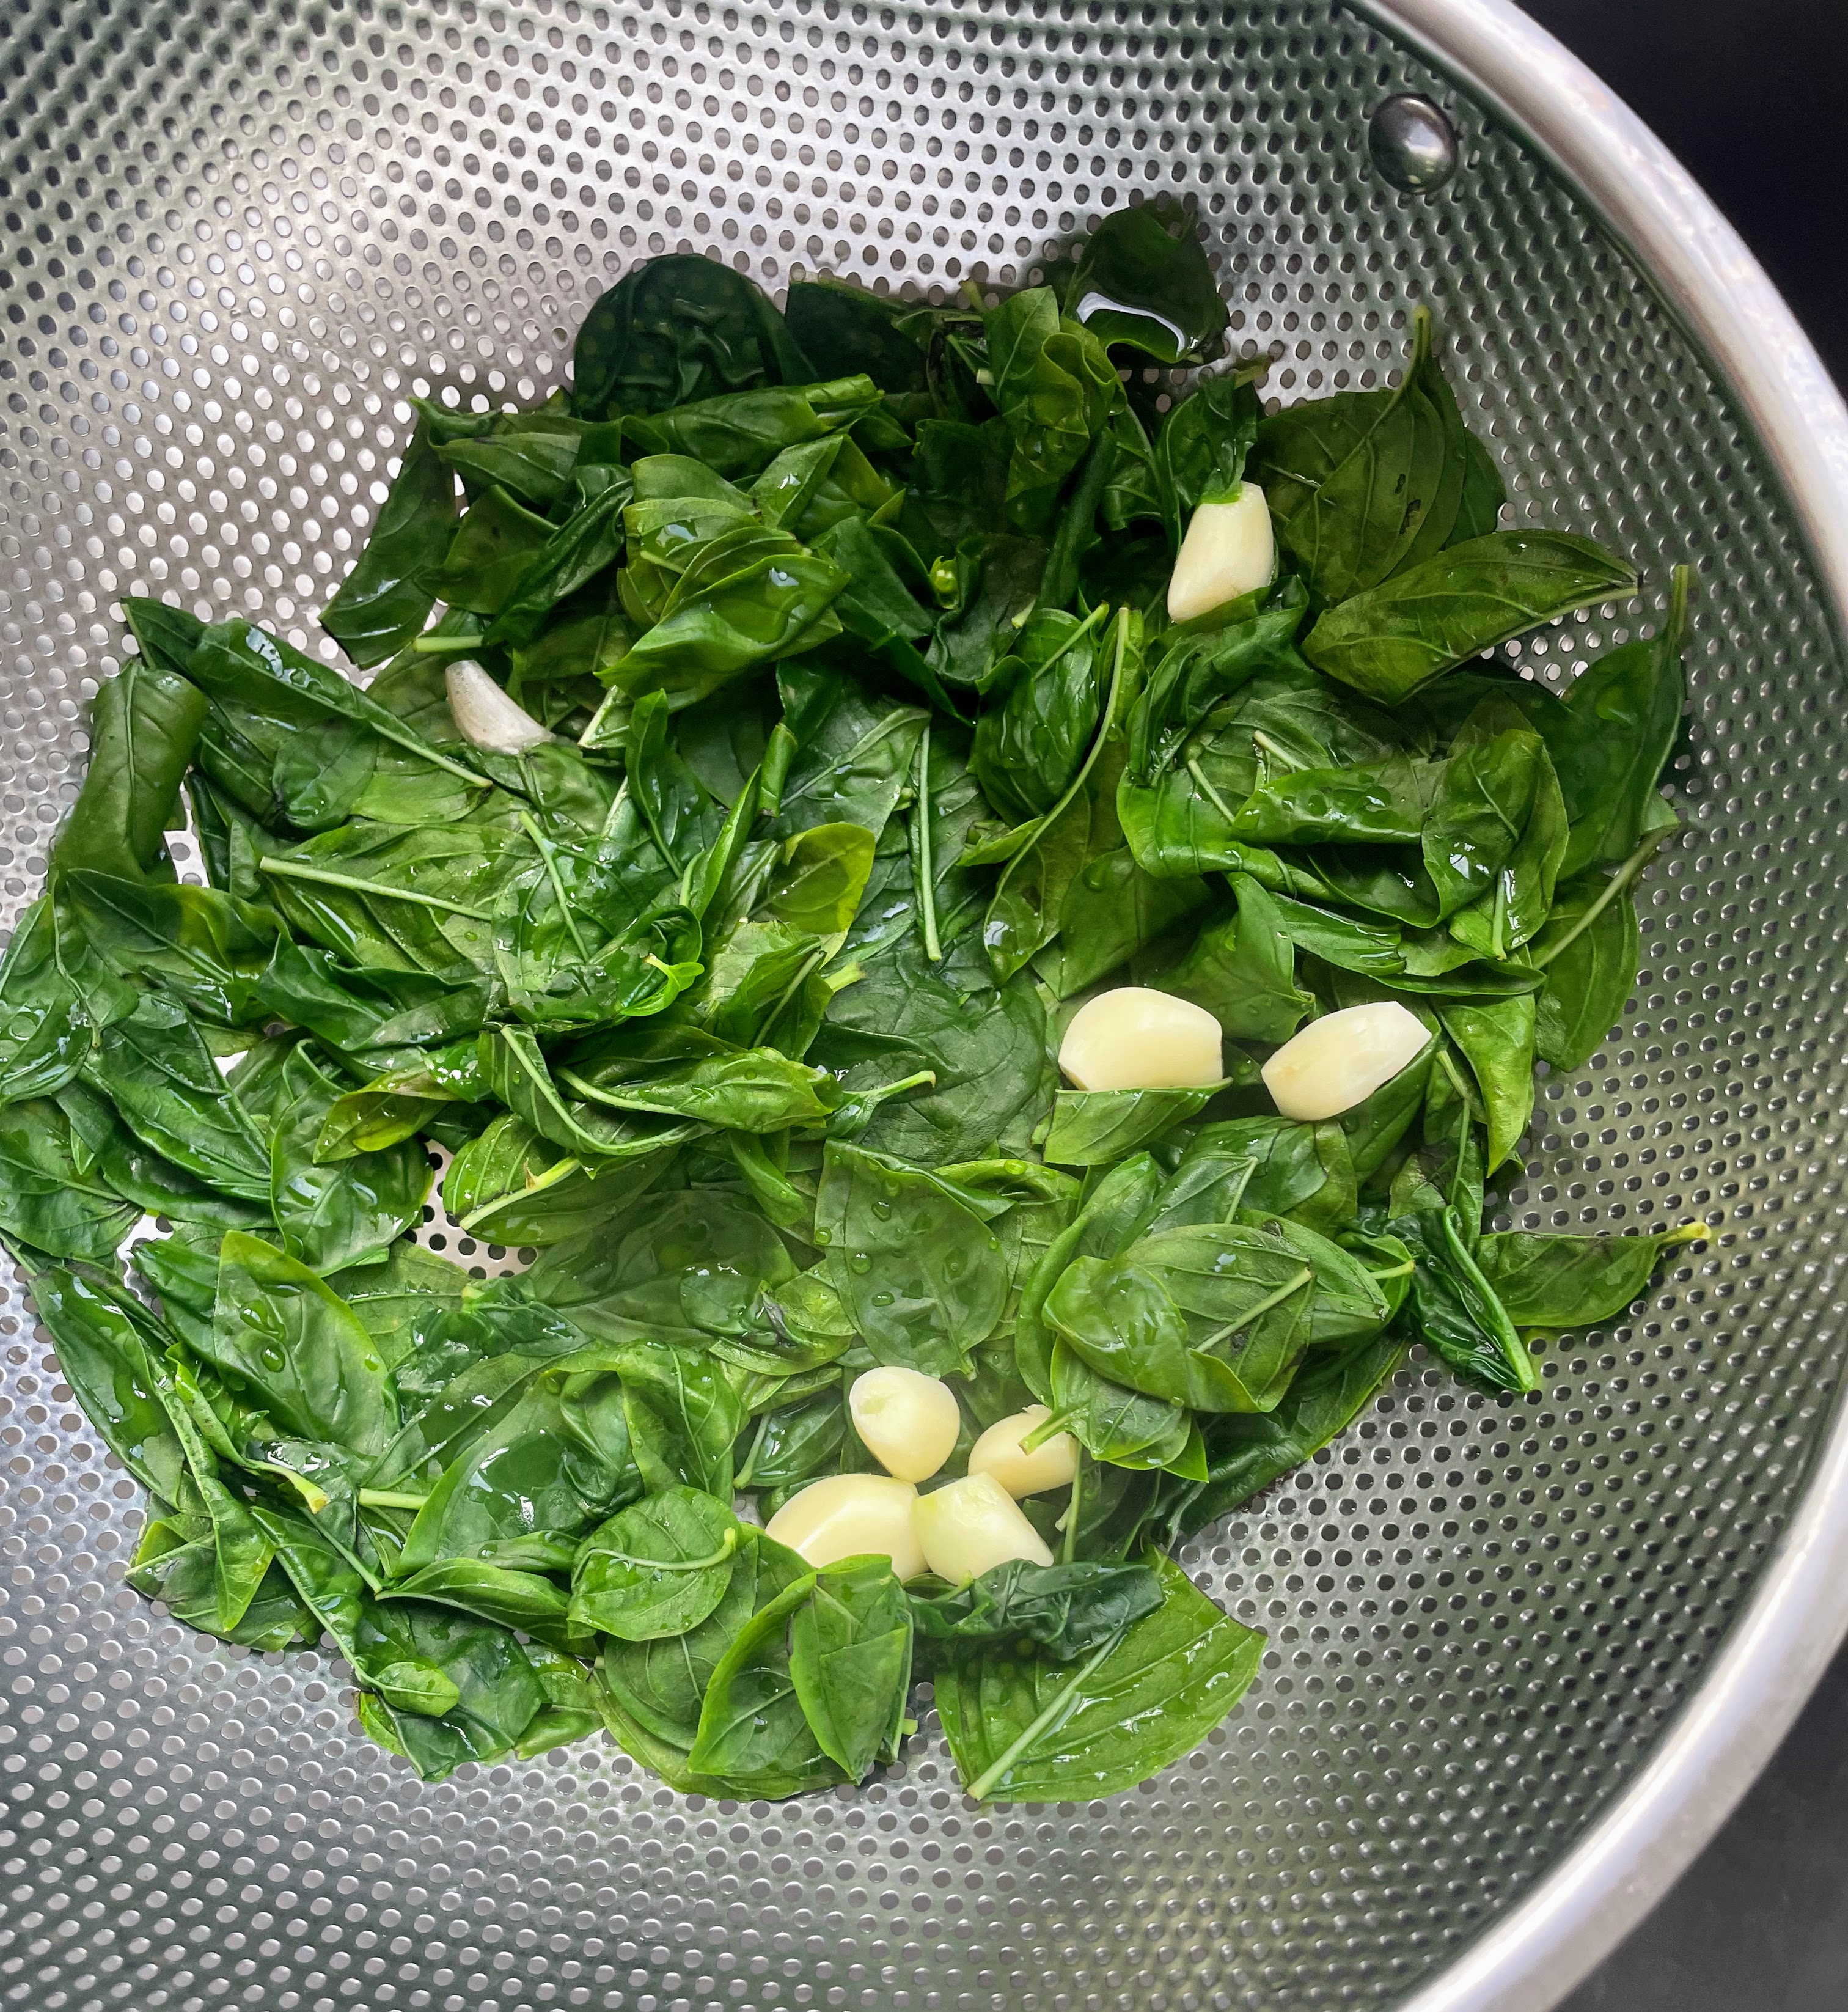
This recipe calls for blanching the basil, which I find is a key way to get the greenest color. Today, I used another trick, too: I added a handful of baby spinach leaves that needed using up as spinach also amplifies the emerald factor. The addition of a few drops of lemon juice makes the pesto a bit brighter, too; I almost feel like it makes the pesto taste greener (is that possible?).
Note: When I am making pesto to freeze, I do not add the cheese or lemon juice. Instead, I add both those things later on to the thawed pesto. So the photos below are pre-cheese, and thus, represent a vegan version that would be delicious on its own, too.
Bright Green Pesto (makes 2 cups total = 3 batches)
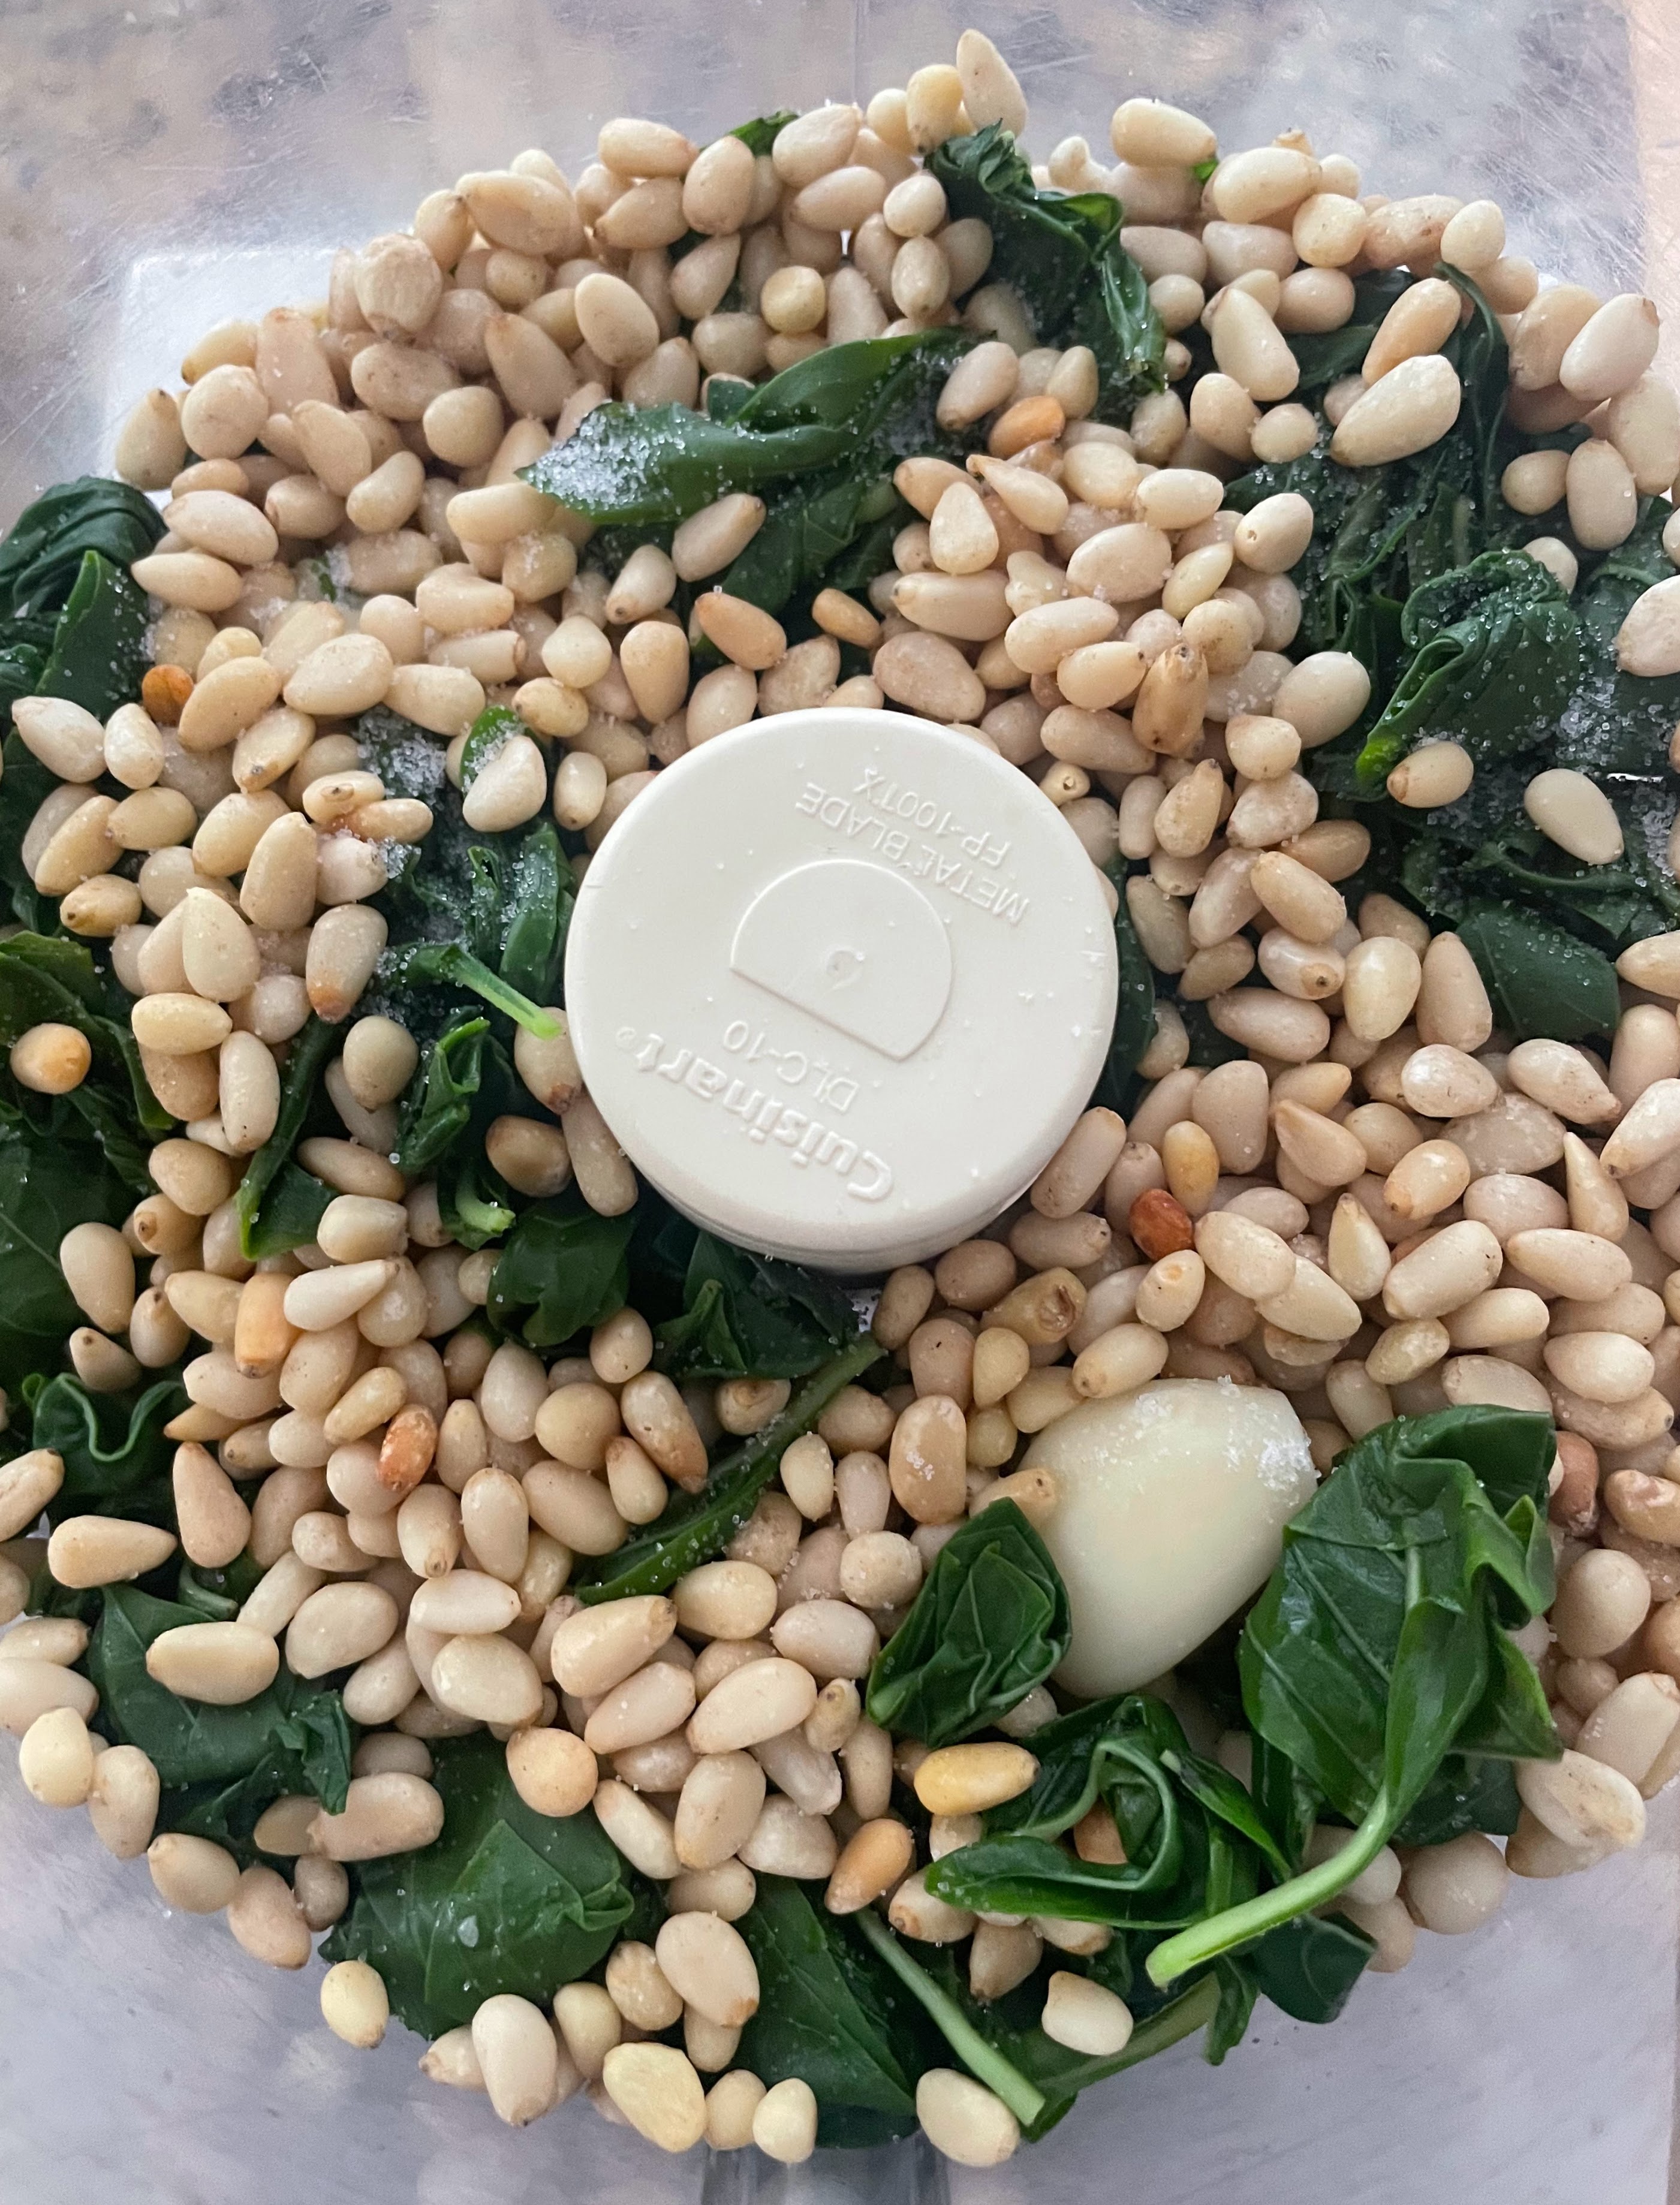
6 c. (slightly compressed but not packed) fresh basil leaves (about 120 gr.); can substitute up to 1 c. baby spinach leaves 3/4 c. toasted pine nuts 6 large garlic cloves 1/2 tsp. salt 1 c. extra-virgin olive oil *1.5 c. freshly grated Pecorino Romano cheese (preferred) or Parmesan *lemon juice, to taste
Preparation
1. Set a large pot of water to boil. 2. Pick over the basil leaves to make sure there are no blemishes (or stems). Fill a large bowl with ice water and set aside. When the water in the pot is boiling, add the basil and garlic, and push down on the basil leaves with a slotted spoon (to submerge them), just until they turn bright green. This blanching process should take less than a minute.
3. Immediately drain the basil and garlic in a colander, and then set the colander in the bowl of ice water to stop the cooking.
4. Once the spinach is cold, remove the colander from the bowl, set in the sink, and let the basil and garlic drain for a few minutes. Then place the basil and garlic on a clean dish towel and pat as dry as possible.
5. Put the basil and garlic in a food processor, add the pine nuts and salt, and pulse until the mixture is finely chopped and begins to come together. With the food processor still running, slowly pour in the olive oil and process until smooth.
6. If using the pesto the same day, add the cheese and lemon juice, and pulse again very briefly, just long enough to combine. Do a quick taste test to gauge lemon and salt levels; add more if needed. You can also add a bit more olive oil if the pesto seems too thick.
*7. If freezing the pesto, omit the cheese and lemon juice, divide the pesto among three freezer-proof containers, and freeze. When you want to use a batch, thaw it fully and let it come to room temperature. Prior to using, add 1/2 cup grated cheese and a few drops of lemon juice, and mix well. Do a quick taste test to gauge lemon and salt levels; add more if needed. You can also add a bit more olive oil if the pesto seems too thick.
I love recipes that can do double duty. This one’s dual role came about by accident when I was pondering what to make for dinner one recent busy weeknight. We first had the very delicious sausage cheese dip on a weekend while watching a football game, but had some leftovers. So, when staring at the contents of my fridge a couple days later, I thought: “Sausage and cheese? Both those things go very well with pasta…. hmmm.” And I had a zucchini that I needed to use, too. Thus, Sausage Cheese Dip Rigatoni with Zucchini was born. And it was good! Both recipes follow.
Original Sausage Cheese Dip (left), Sausage Cheese Dip Pasta with Zucchini (right)
Sausage Cheese Dip (based on a recipe from Natasha’s Kitchen) Note: This serves 4 without leftovers (2 with leftovers)
Ingredients 1/2 lb. (226 gr) mild Italian sausage, removed from casing 2 garlic cloves, minced pinch onion powder salt and pepper to taste 4 oz (113 gr) cream cheese, cut into cubes (no need to soften) 10 oz (283 gr) can diced tomatoes with green chilies 1/2 cup corn (I cut the corn off one previously cooked cob, but frozen would also work) 4 oz (113 gr) sharp cheddar or similar cheese, shredded
Preparation 1. Drizzle a small amount of olive oil in a medium skillet. Brown sausage over med/high heat, breaking it apart with a wooden spoon, until browned. If the sausage generates a lot of grease, drain the grease. 2. Add the garlic, onion powder, and some pepper, and cook over medium heat for one more minute, stirring through. 3. Add the cream cheese cubes and stir until melted and incorporated. 4. Add the undrained tomatoes, corn, and shredded cheddar. Cook, stirring occasionally, just until bubbly and cheese is melted. Check seasonings, and add salt or pepper as needed. 5. Remove from heat and serve with tortilla chips. The kind that look like scoops are perfect for this dip. (Note: The photo below also includes Cumin-Scented Black Bean Salad.)
Sausage Cheese Dip Pasta with Zucchini (serves 2 hungry people)
Ingredients 5.3 oz (150 gr) pasta of choice (I used mezzi rigatoni) olive oil 1 zucchini, diced 1 cup Sausage Cheese dip cream or milk (if needed) Pecorino Romano or Parmesan cheese, grated salt and pepper to taste
Preparation 1. Bring salted water to a boil and cook pasta as directed for al dente. 2. While water is coming to a boil, drizzle some olive oil into a large skillet. Add diced zucchini and cook over medium-high heat until zucchini starts to get golden around the edges. 3. Add the sausage cheese dip and stir until warm and melted. Check the consistency; add a splash of cream or milk if too thick. If too thin, add some grated Pecorino Romano or Parmesan cheese. 4. When pasta is ready, drain, and add to sauce in skillet, along with more grated cheese. Check the seasonings, and add salt or pepper as needed. 5. Serve immediately.
I’m a fairly equal-opportunity eater; I’m happy with all kinds of food, even airplane food. Yes, I admit it: I actually look forward to seeing what’s on the menu when I’m flying. But I absolutely cannot eat airplane pasta. It is always too soft, and I have been conditioned (spoiled?) to need a bit of “bite” to my pasta.
Luckily, today I’m writing about a pasta dish I would gladly eat many times over: Ragù Bolognese. I’ve been making some form of this since college, and have even provided a quick(er) version of it on this blog, more suited to a weeknight meal. But now I want to point you to a more traditional/authentic recipe that is my go-to for fall and winter weekends when I have more time. It is from the Washington Post, whose author tested six well-known ragu bolognese recipes before settling on a new version combining the best elements of her favorite three recipes. I am so glad she did all that testing, because since I read the article in the Post two years ago, I stopped searching for the perfect ragù myself; for me, this one is it.
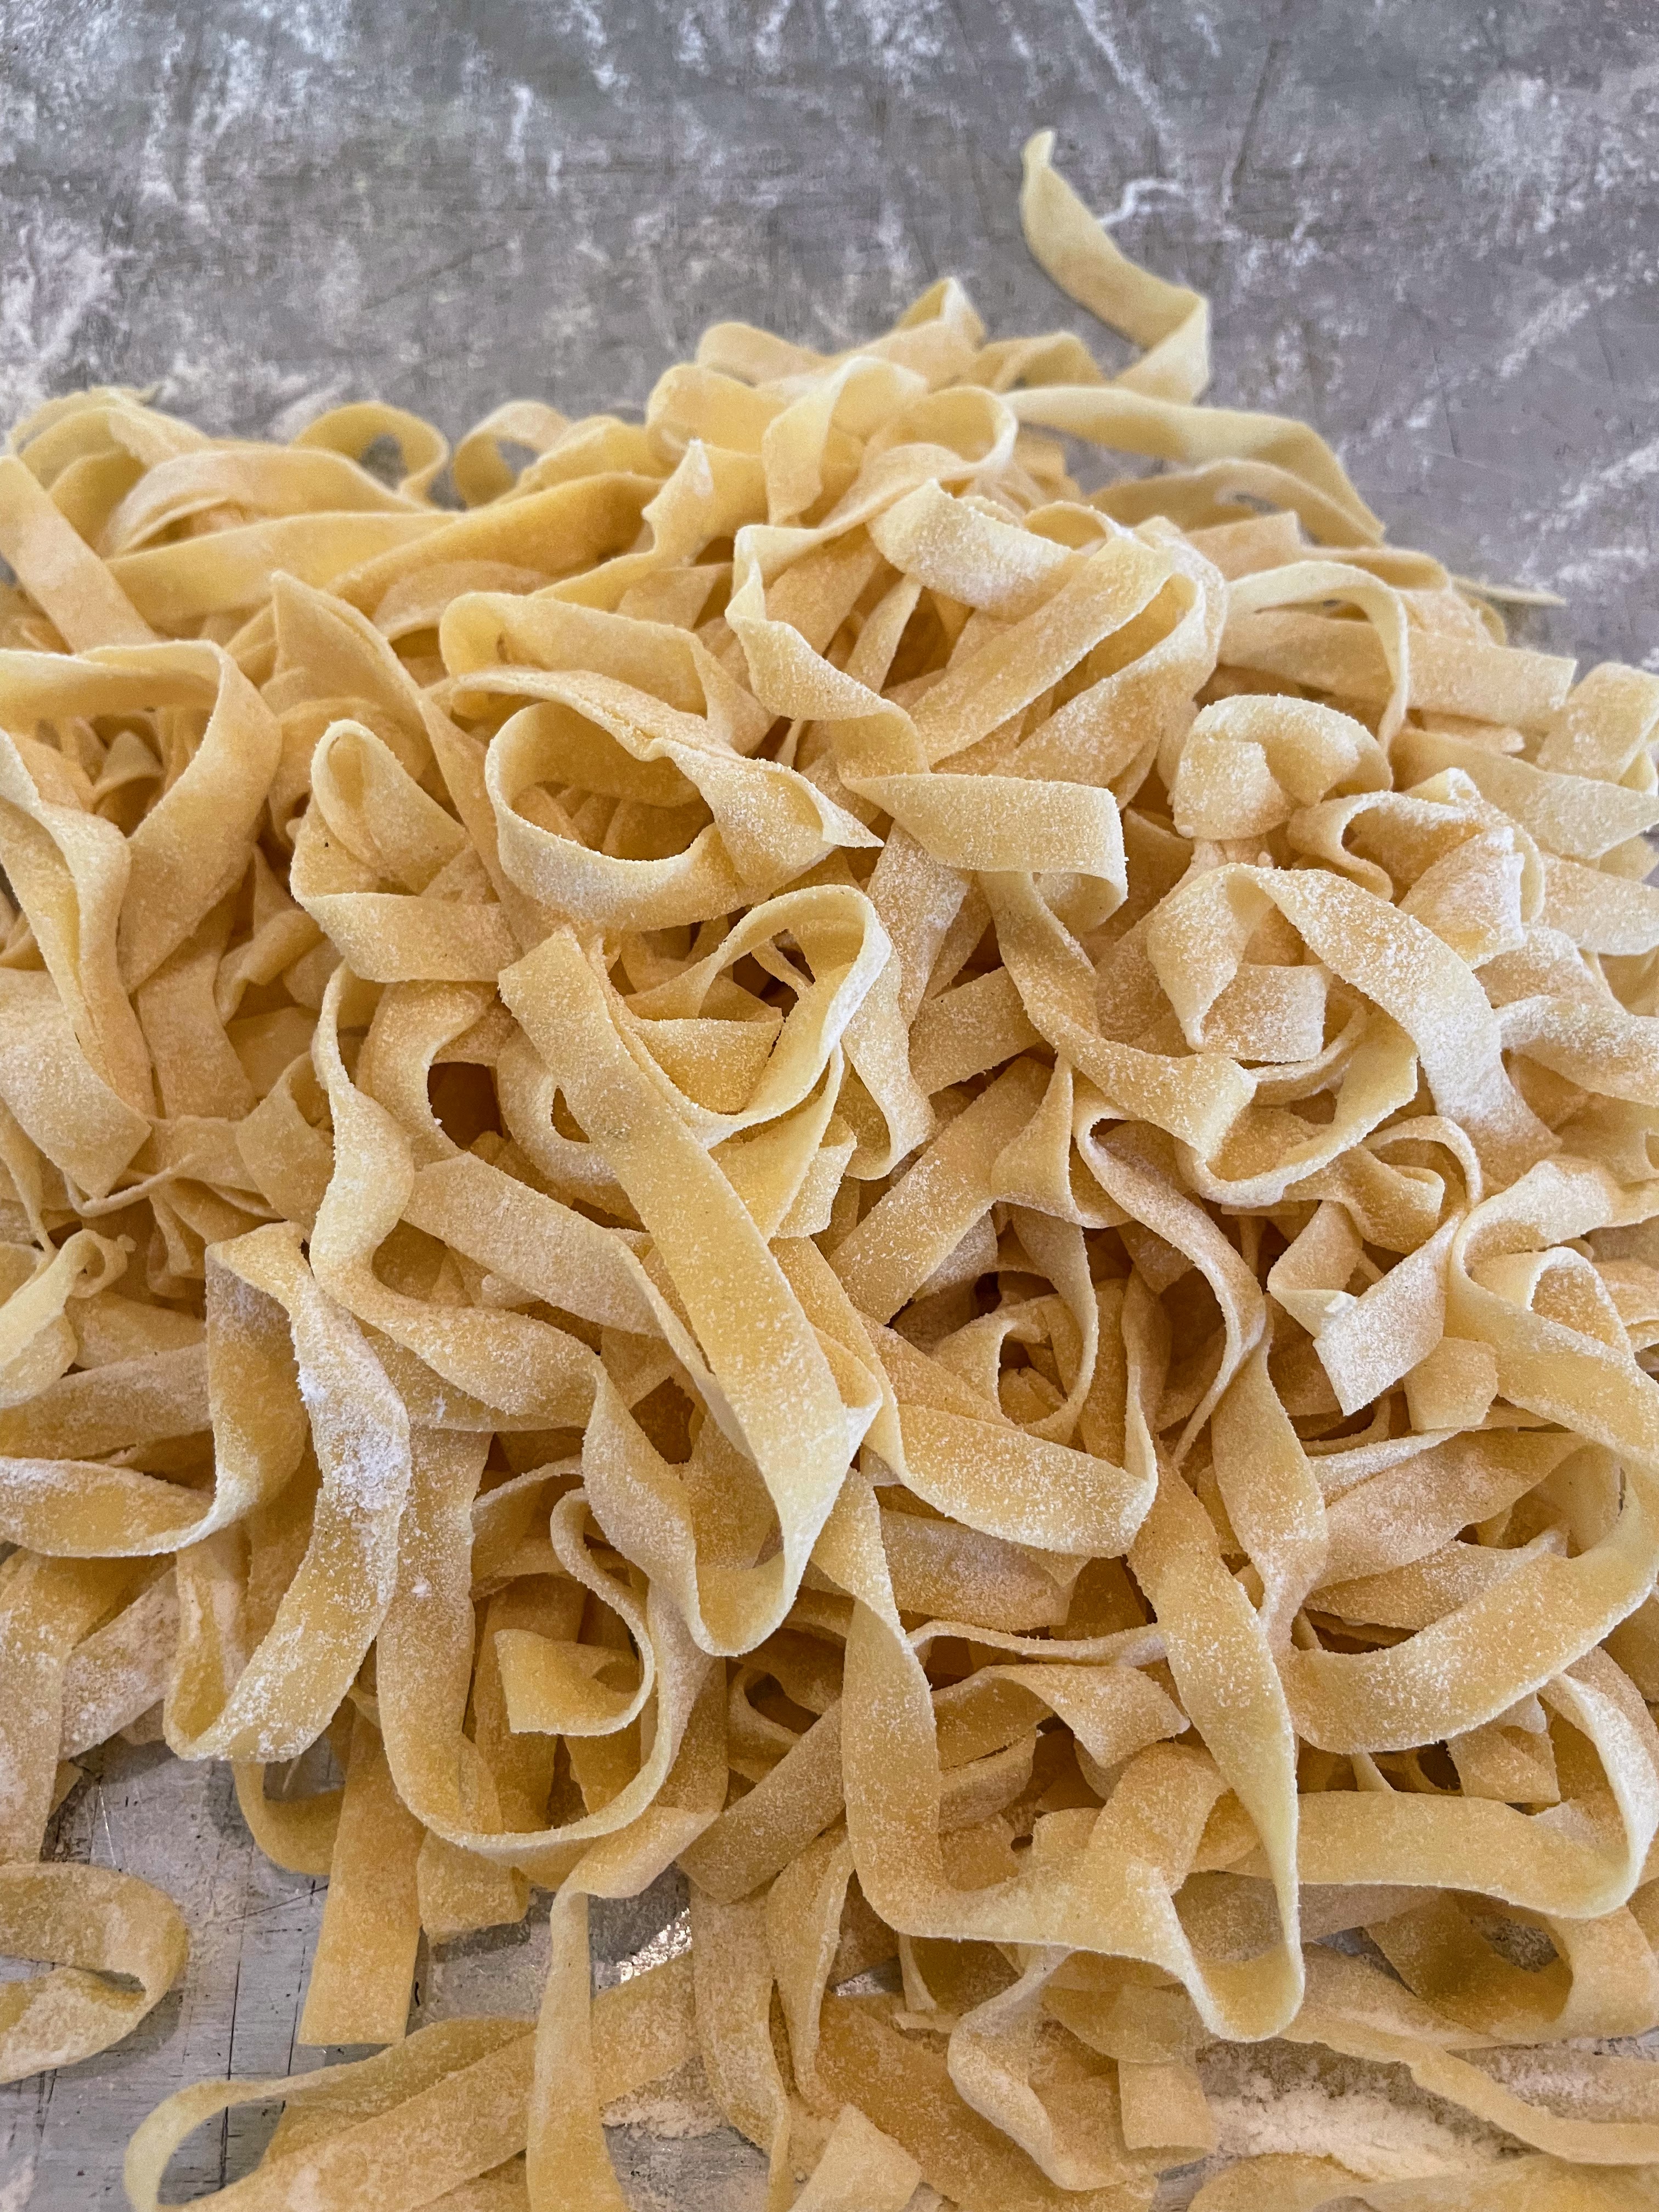
The first time I made it, I also decided to make the pasta to go with it. It was the dead of winter, we were fairly snowbound, and I had not used my pasta-making equipment in a while, so I decided to go for it, using a New York Timesrecipe for the pasta dough (see below, including the notes). But then I returned to my lazy ways the other times I’ve made this ragù and used store-bought pasta instead, which did not fill me with quite the same sense of satisfaction, but allowed me to focus on other tasks. If you do have the time and inclination to make your own pasta, then definitely try it. You will be proud of your accomplishment.
Notes: 1) The ragù recipe takes about five hours to make–though most of that time is slow simmering time. You don’t need to be actively engaged for those five hours, but you will need to tend to the ragù every so often. If you are making the pasta yourself, you can also do that during the ragù cooking time. 2) I found it is best to weigh the vegetables for the ragù, as that is most accurate; a medium onion or celery stalk can mean different things to different people. 3) The ragù is delicious the next day, too, so you can make it ahead. I also try to freeze some each time, to use for future lasagna fillings.
4 oz (113 gr) cubed pancetta 3 large garlic cloves 6 tbsp (85 gr) unsalted butter, divided 1 medium onion (8-9 oz/226-255 gr), very finely chopped 1 medium carrot (4-5 oz/113-141 gr), grated 2 medium celery stalks with tender leaves, if any (about 3 oz/85 gr), very finely chopped 1 lb (454 gr) ground beef, 80% lean, 20% fat 1 lb (454 gr) ground pork 3 cups (710 ml) chicken broth 1 cup (237 ml) dry white wine, such as pinot grigio 1 teaspoon (3 gr) kosher salt 1 pinch grated nutmeg 1 cup (237 ml) whole milk 2 tablespoons (32 gr) tomato paste 1 cup (237 ml) tomato puree/passata (such as Pomi or Mutti) Freshly ground black pepper
Preparation: 1. In a mini food processor, combine the pancetta and garlic, pulse a few times to break up the pieces, then process until it becomes a smooth paste.
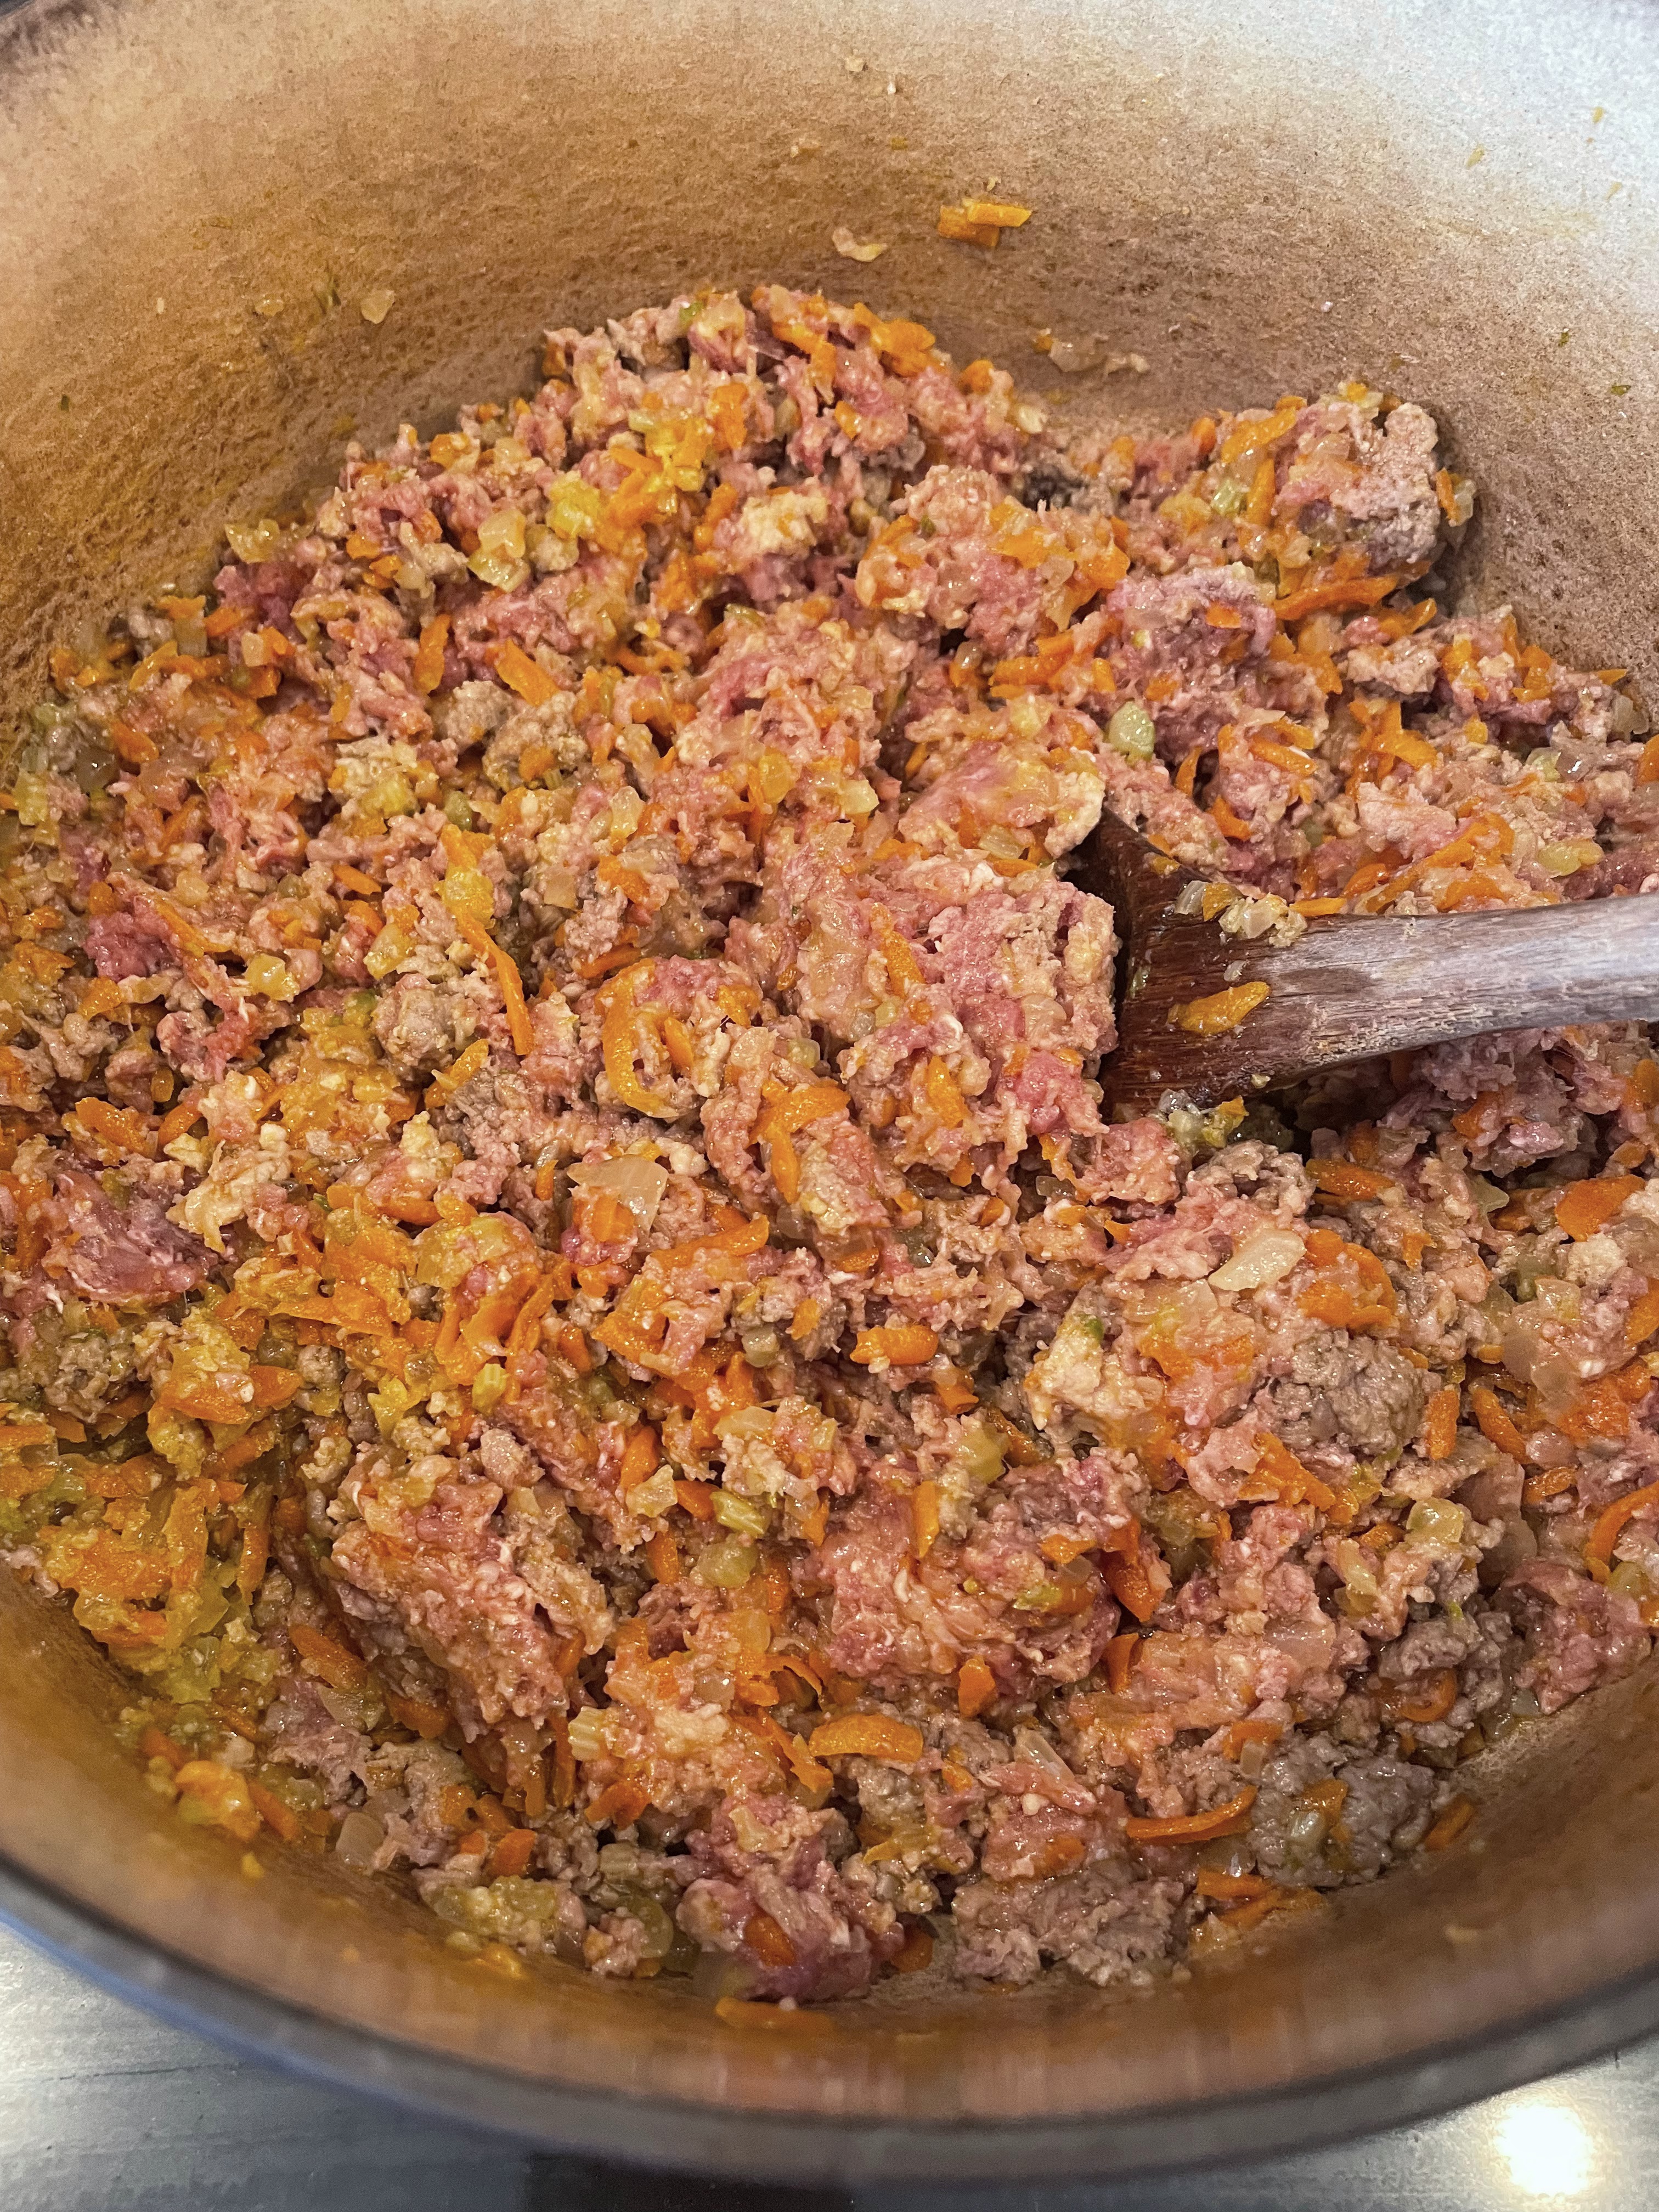
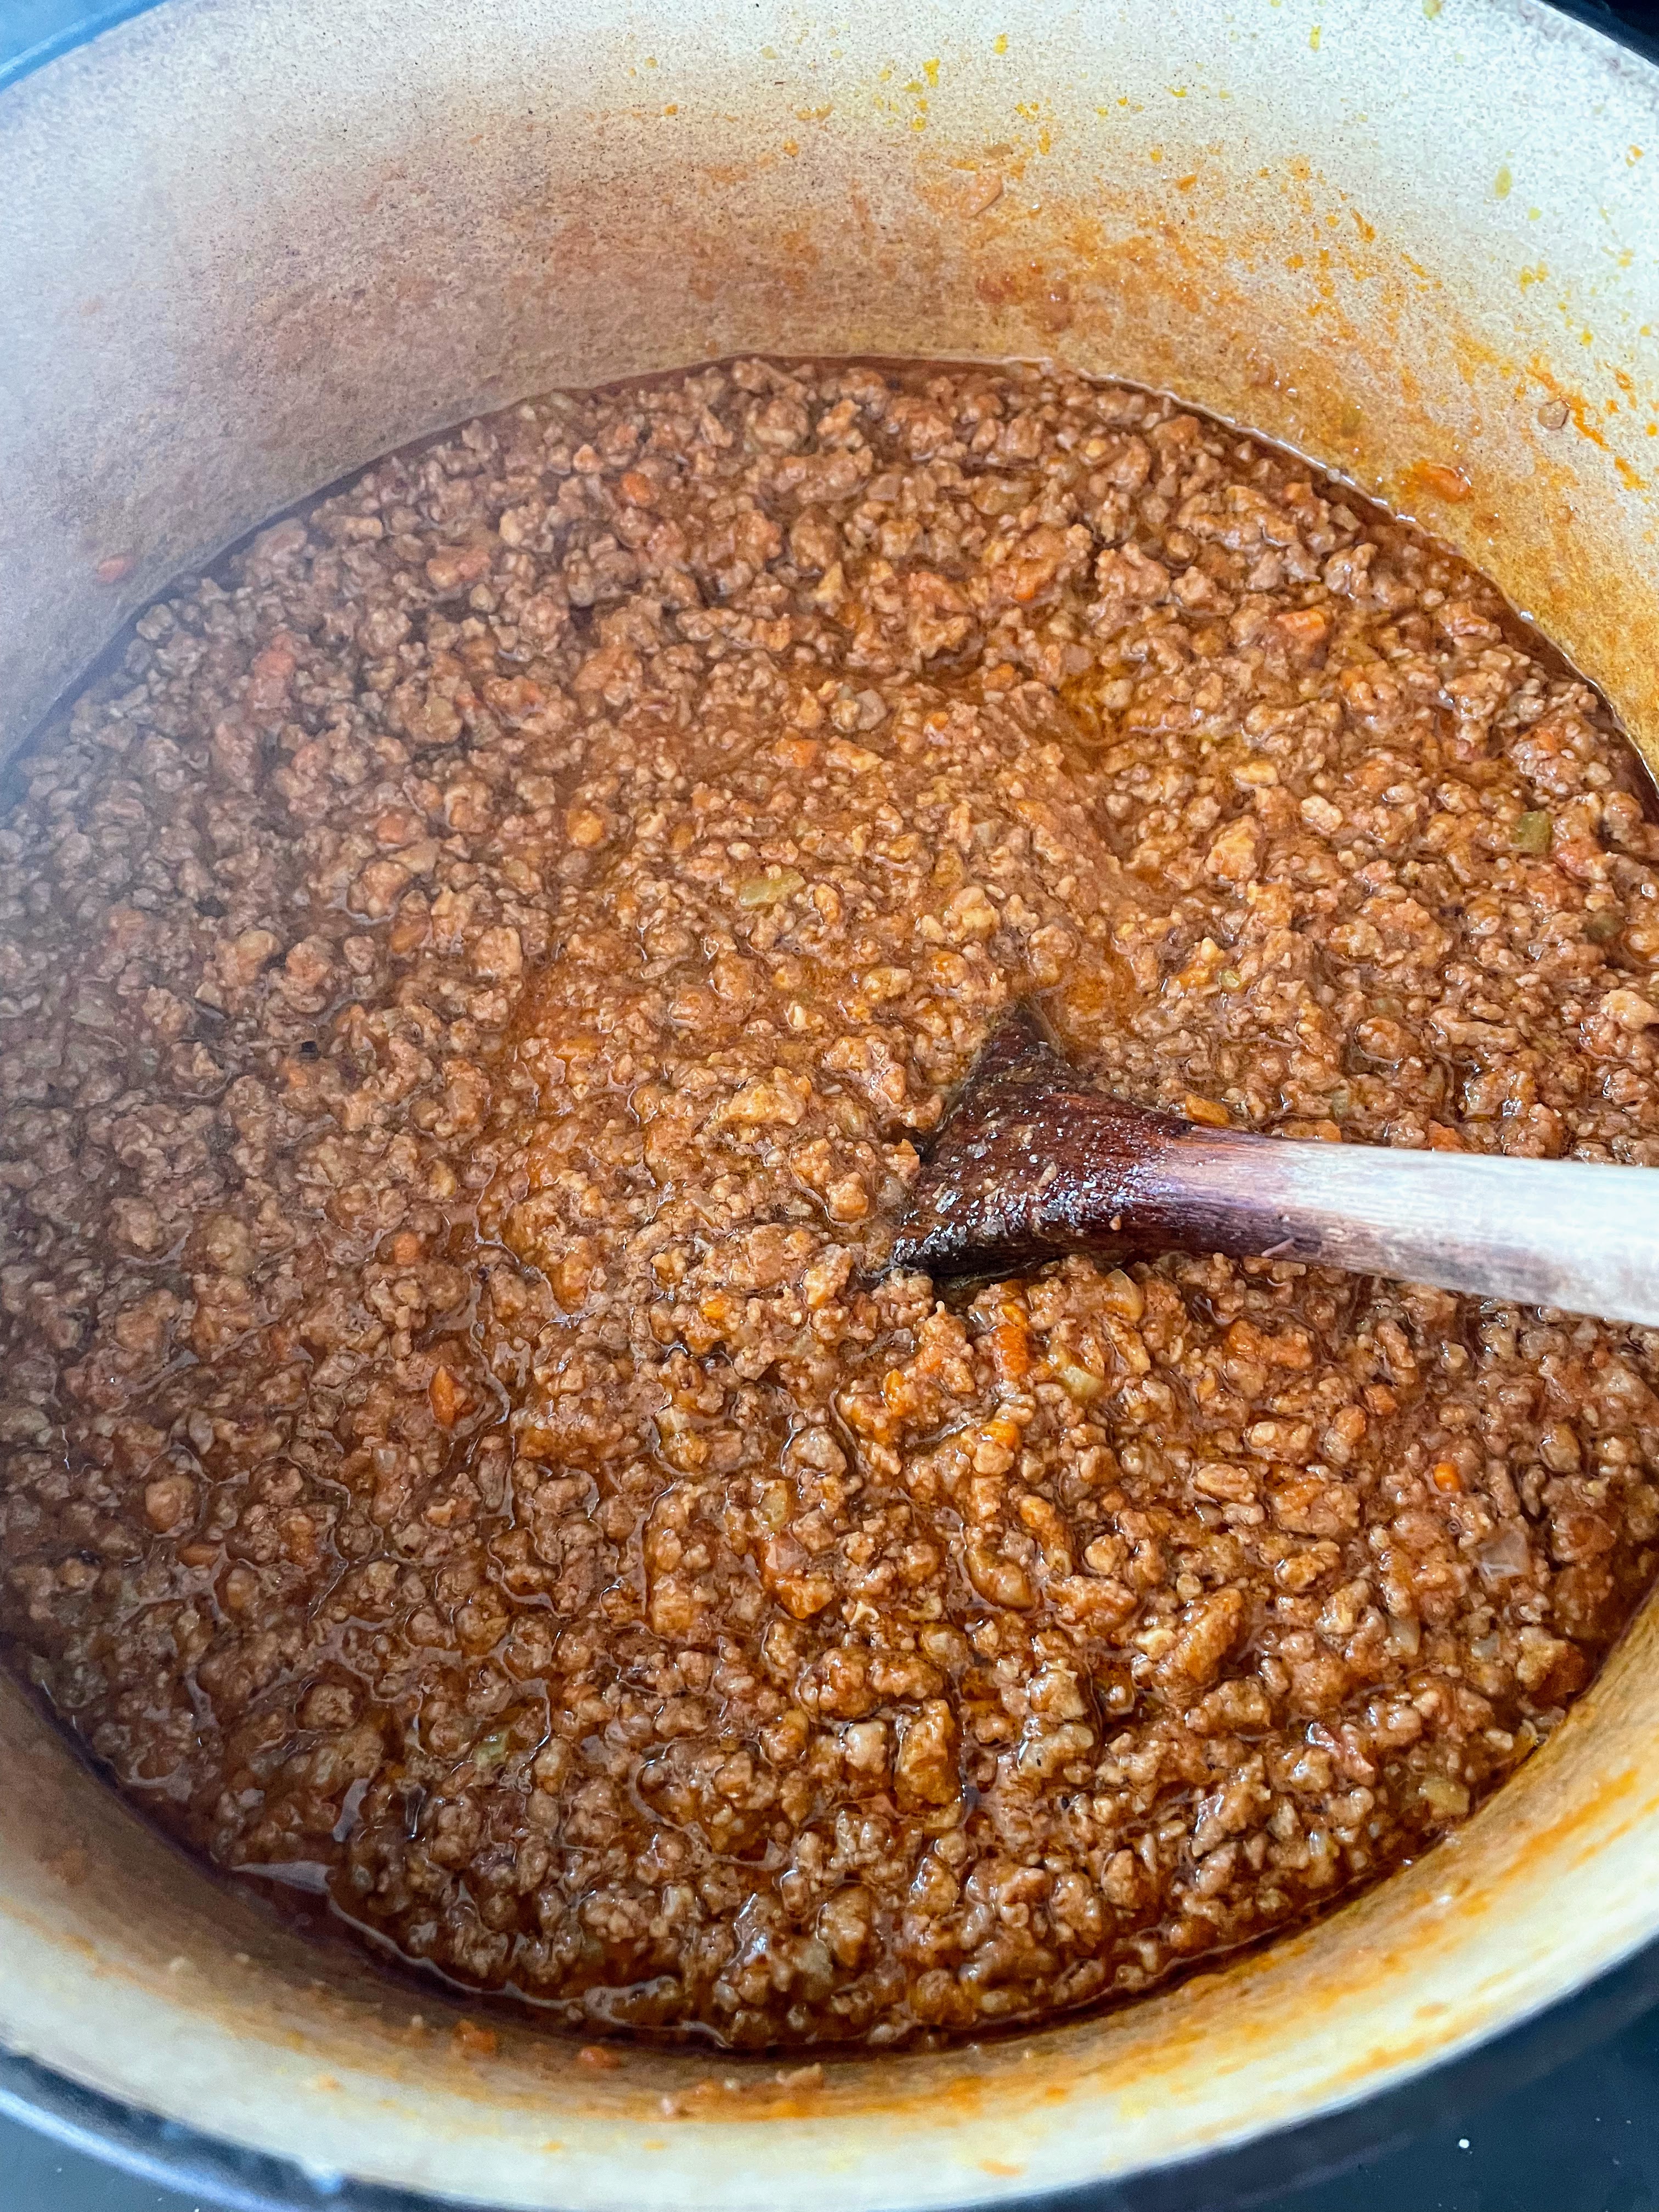
2. Scrape the paste into a large, wide Dutch oven or other heavy-bottomed pot, along with 2 tablespoons of the butter. Melt them together over medium heat, spreading the paste around with a wooden spoon so the pancetta fat begins to render. Cook until the fat is mostly rendered, about 4 minutes, stirring occasionally. Add the onion, carrot and celery — the soffritto — and cook slowly over medium-low heat, stirring frequently enough so the soffritto doesn’t brown — until the onion is soft, translucent and pale gold, about 15 minutes. 3. Add the ground beef and pork to the pot, increase the heat to medium, and break up the meat with a wooden spoon as much as possible. Once the meat starts to faintly sizzle, reduce the heat to medium-low. Let the meat brown slowly, stirring occasionally and continuing to break up any remaining clumps, for about 1 hour, until evenly browned and burnished.
4. When the meat is nearly done browning, in a medium saucepan over high heat (or in the microwave), heat the broth until simmering; cover and keep hot over low heat until ready to use. Increase the heat under the browned meat to medium-high and stir in the wine, scraping up any browned bits or deposits on the bottom of the pan. Cook and stir until the wine is mostly soaked in and evaporated, about 3 minutes. Stir in the salt and nutmeg, reduce the heat to medium-low and add the milk, cooking and stirring until it is barely visible, about 3 minutes. 5. Measure 2 cups of the hot broth and dissolve the tomato paste in it. Stir the broth with paste into the meat sauce, then stir in the tomato puree. (Keep the unused broth handy in the pot in case you need to reheat it and add more to the sauce later.) Partially cover the pot and let the sauce simmer slowly and gently, stirring occasionally, until it is thick and all the components begin to melt together, about 2 hours.
Left: Earlier in the simmering phase. Right: Later, as sauce has thickened more.
6. Stir the sauce — if it looks at all dry, reheat the remaining broth, ladle in a little more, about 1/2 cup, and stir. Continue to simmer gently, uncovered, stirring occasionally and adding a little more broth or water as needed to keep the sauce sumptuously saucy, until the vegetables have completely melted into the sauce, about 1 hour. 7. Cut the remaining 4 tablespoons of butter into a few pieces and stir them into the sauce; add about 20 grinds of black pepper and stir that in, too. Taste, and season with more salt and/or pepper, if desired.
Note from NYT: “Using the “00” flour gives the silkiest, softest pasta while bread flour will give you more of a satisfying chew, and all-purpose lands you squarely in the middle.” Note from me: I made this first with “00” flour, and it was delicious, but as you now know, I need more “bite” to my pasta. So I prefer to make it with bread flour if I have it, or all-purpose otherwise.
2 1/4 cups (290 gr) all-purpose flour, bread flour, or “00” flour, more as needed 1 tsp (3 gr) kosher salt 2 whole large eggs 3 egg yolks 1 tbsp (15 ml) extra-virgin olive oil, more as needed
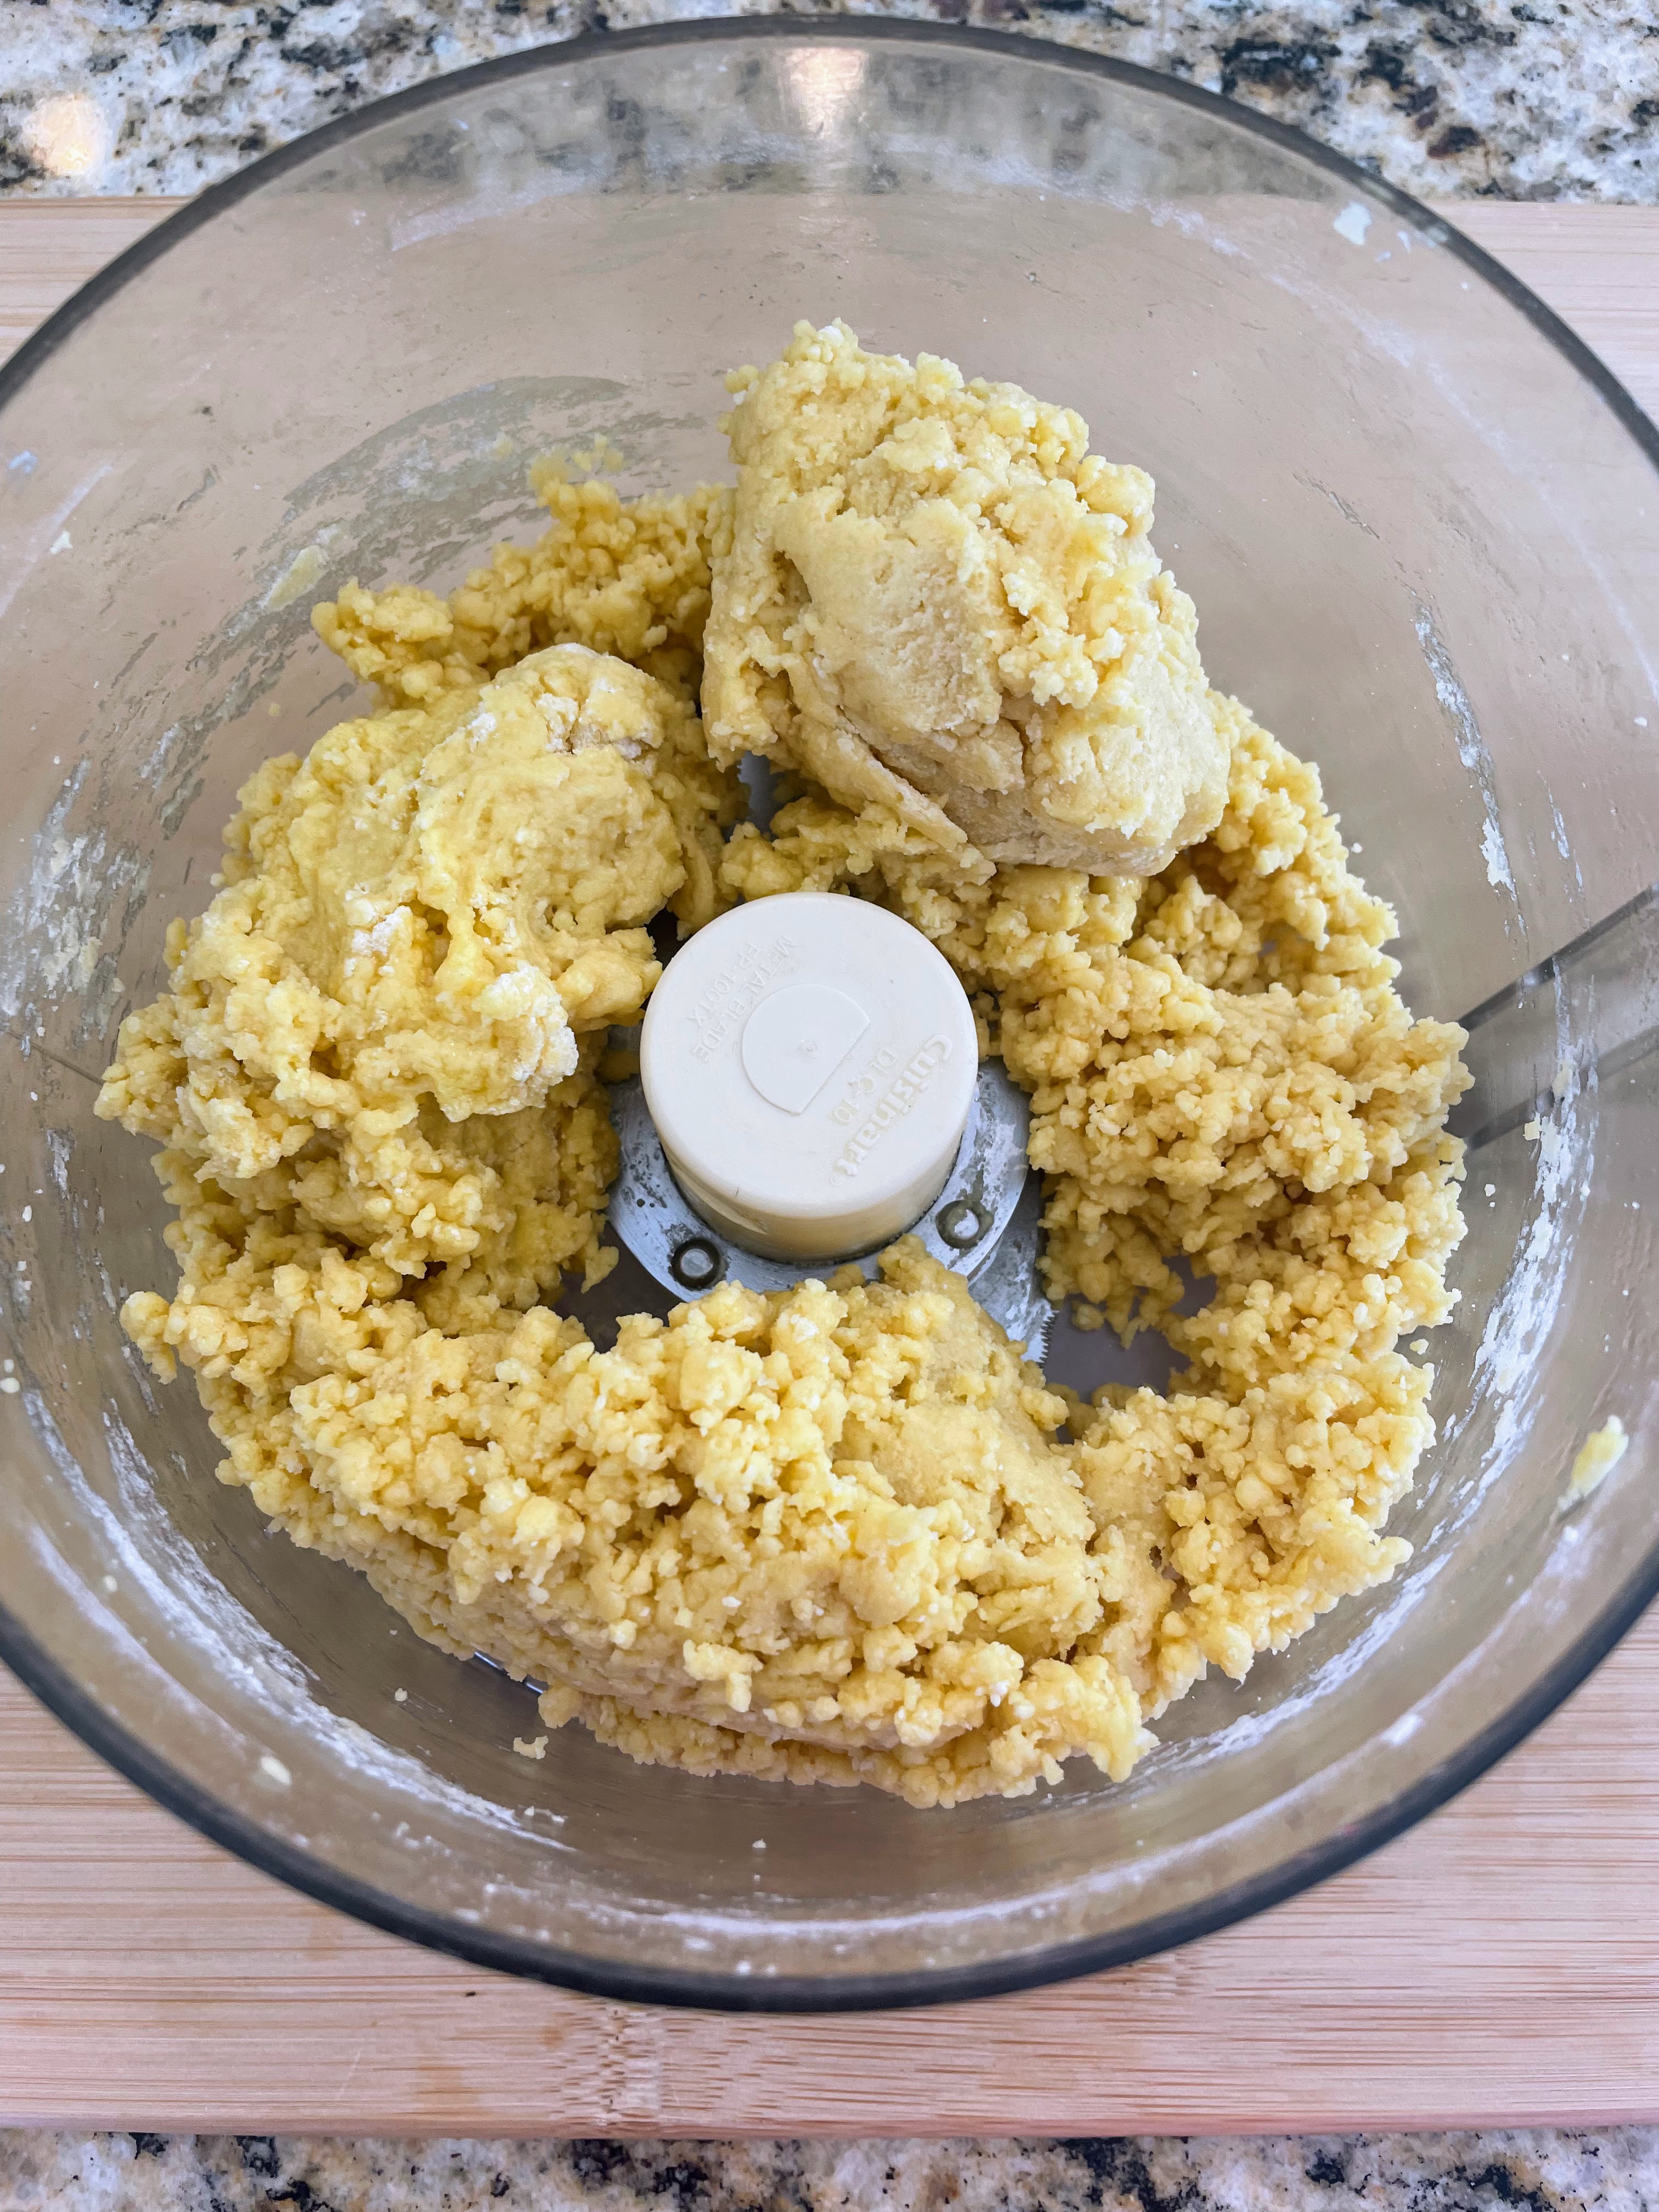
Preparation: 1. In a food processor, pulse together flour and salt. Add eggs, yolks, and oil and run the machine until the dough holds together. If dough looks dry, add another teaspoon olive oil. If dough looks wet, add a little flour until dough is tacky and elastic.
2. Dump dough onto a work surface and knead briefly until very smooth. Wrap in plastic and rest at room temperature for 2 hours or in the fridge overnight.
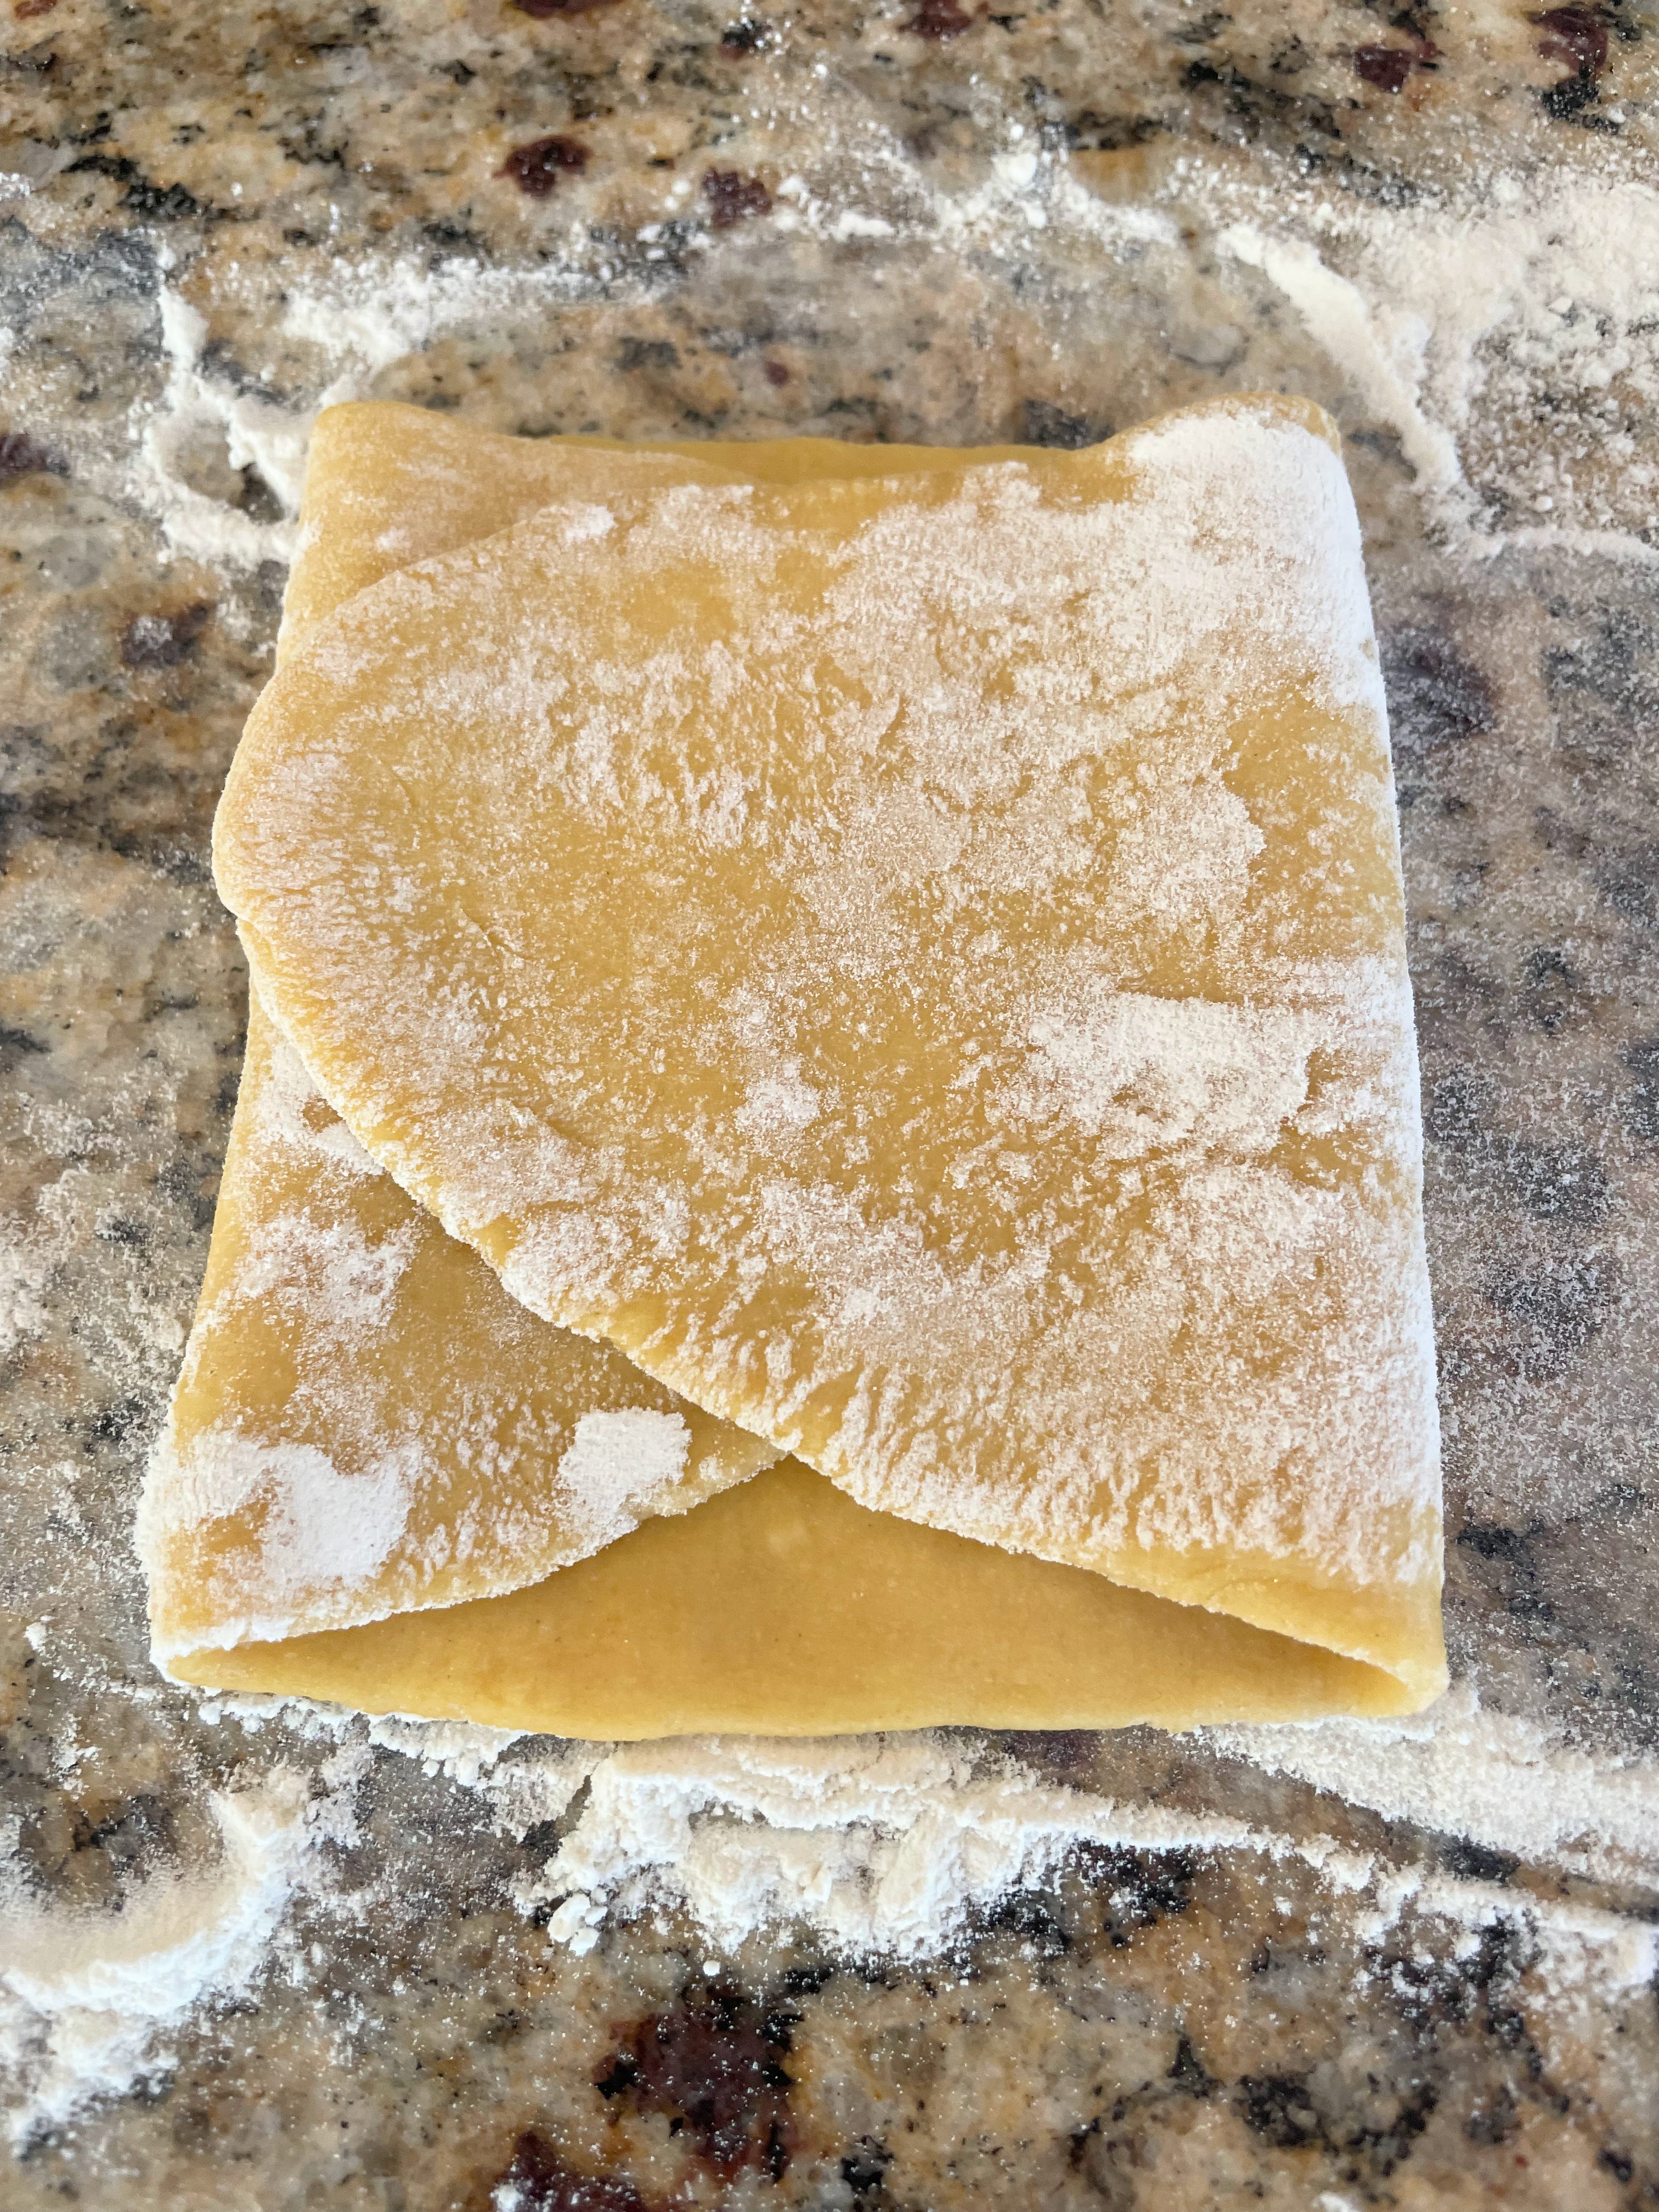
3. Cut the dough into 4 pieces, keeping them covered with plastic wrap or a dish towel when not in use. (If you’re rolling the dough out by hand, rather than using a pasta machine, cut it into 2 pieces instead.) Using a pasta roller set to the thickest (widest) setting, roll one piece of dough out into a sheet. Fold the sheet in thirds like a letter and pass it through the machine 2 more times on the same setting.
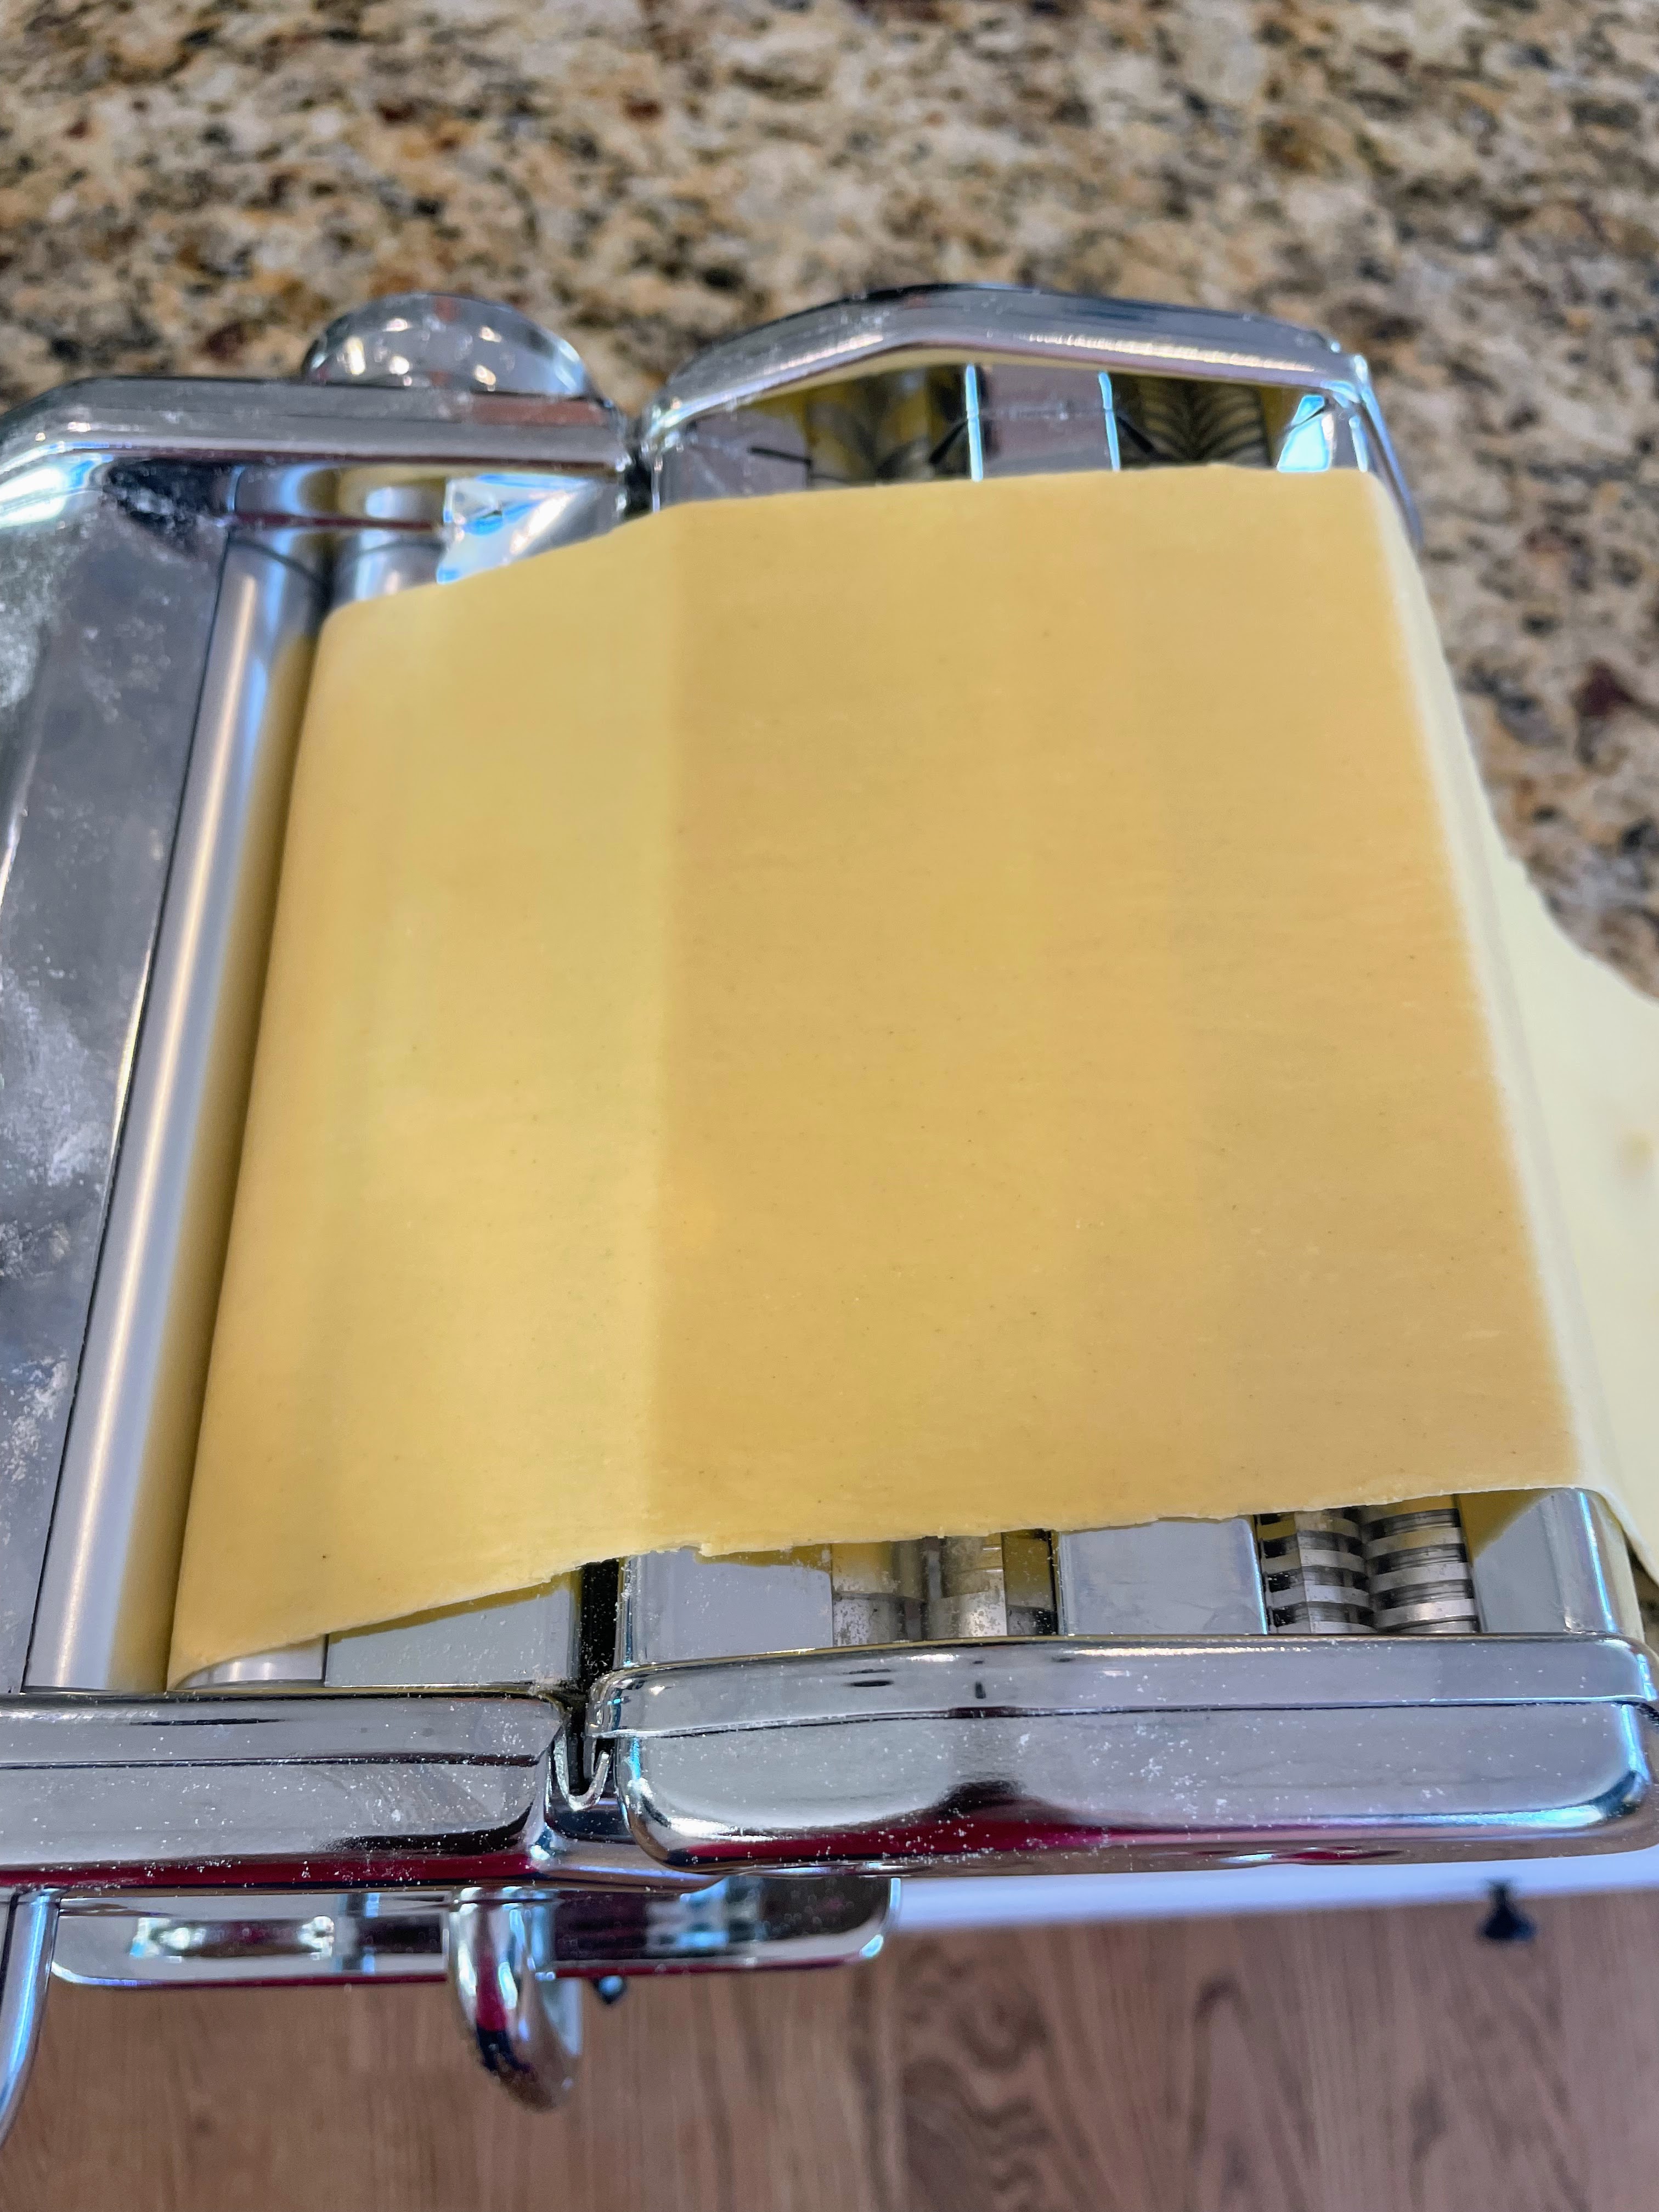
4. Reduce the setting, and repeat rolling, passing it through the machine 2 or 3 times before going to the next setting. For pappardelle and fettuccine, stop rolling after the dough has gone through setting #6. 5. Shape the pasta. For pappardelle, cut rolled pasta into 1-inch-wide strips. For fettuccine, run the rolled sheets through the fettuccine setting on your roller. Place cut pasta on a flour-dusted sheet tray and cover with a dish towel while rolling and cutting the remaining dough. Make sure to sprinkle flour over the cut pasta before you place another layer on top. If not using immediately, cover the sheet pan with a dish towel to keep the dough supple.
6. Bring a large pot of well-salted water to a boil, add fresh pasta and boil for 60-90 seconds, depending on thickness of the pasta. Drain well.
Sometimes, you need comfort food. While home today with a very sore throat and not much food in the fridge, I wondered what to make for lunch. It needed to be soft. It needed to make me feel better. It needed to be made from the few items I could scrounge up, and it needed to be prepared quickly. There was only one possibility: Spaghetti with Ricotta and Pecorino Romano, a double dose of sheep-milk heaven — and ready in less than 15 minutes. Perfect.
Spaghetti with Ricotta and Pecorino Romano
This is a free-form recipe; you can adjust any of the ingredients to suit your tastes. The quantities below are for one hungry pasta lover, but this dish could serve two people if part of a multi-course meal.
¼ lb. (113 grams) spaghetti, fettucine, tonnarelli, or other pasta
1 tbsp. (14 grams) butter, cut into small pieces
¼-1/3 cup (28-38 grams) grated Pecorino Romano cheese
fresh, coarsely ground black pepper, to taste
2 ¼ oz. (64 grams) sheep’s-milk ricotta, crumbled or cut into small pieces (* use the best, freshest ricotta you can find)
Preparation
Start boiling lightly salted water in a generously sized pot. When the water comes to a boil, add the spaghetti and cook just until al dente—often that’s about 1 minute less than indicated on the package.
Meanwhile, place the pieces of butter in an unheated skillet or large bowl next to the pasta pot. Add the Pecorino Romano cheese, grind black pepper over top (to your liking), and sprinkle 2 tbsp. cooking water around the sides of the skillet or bowl.
When the spaghetti is done, quickly scoop it out of its cooking water with a pasta ladle and drop it into the skillet or bowl. Don’t shake off all the cooking water; it is an essential ingredient. Stir and swirl the spaghetti vigorously to melt the butter, the Pecorino Romano cheese, and the cooking water into a light sauce. Add more cooking water if the pasta appears too dry.
Check the seasonings (adding salt and more ground pepper if needed), gently fold in the ricotta, and serve immediately, with additional grated Pecorino Romano on the side.
After our visit to Sora Margherita, I found I could not get the broccoletti ripassati out of my mind. Soft, delicately sweet and nutty, redolent of roasted garlic and chilies, it was a perfect wintery comfort food, and I wanted to replicate it at home.
So last week I went in search of a nice Broccolo Romanesco. It is in the Brassica oleracea family, along with broccoli, Brussels sprouts, cabbage, cauliflower, collard greens, and kale. Not to be confused with regular broccoli (Brassica oleracea Italica Group), Romanesco broccoli (Brassica oleracea Botrytis Group) is bright green and pointy and has been grown in Italy for centuries. It is most closely related to cauliflower and tastes a bit like it–though it is richer and more tender. And while it is sometimes labelled “broccoflower,” it should not be confused with the other, more common “broccoflower” that looks just like a green cauliflower. By now, I’m sure you are confused…. But rest assured, if you see a swirly, pointy, highly decorative Broccolo Romanesco, you will immediately know it is the one that is not like the others.
And if you do see one, grab it, take it home, and make some Broccoletti Ripassati; you won’t regret it. You can it eat it as a side dish, on its own (pictured up top as an oh-so-good, next-day lunch eaten with a spoon)–or mixed into pasta with some of the cooking liquid, as is very common in Rome.
Broccoletti Ripassati
1 head Romanesco broccoli
roughly 8 c. chicken or vegetable broth (I used water and chicken bouillon cubes at slightly less than full strength)
1/4 c. olive oil, plus extra as needed
freshly ground black pepper
1/4-1/2 tsp. chili flakes, or to taste
4 medium garlic cloves, minced–plus another 2 cloves, minced (optional)
2 tsp. red wine vinegar
salt & pepper to taste
Preparation
1. Trim the broccoli, cut it in half, cut out the core, and separate each half into florets.
2. Bring the broth to a boil and simmer the florets in the broth until they are soft enough to be pierced with a fork–it should take less than 10 minutes.
3. Drain the florets, reserving 1 c. of the cooking water.
4. Heat the olive oil in a large, heavy skillet over medium-high heat and grind some black pepper over the top. Add the chili flakes, cook for about a minute, then add the 4 cloves of minced garlic. Cook for about 30 seconds while stirring, then add the broccoli and stir to coat it with the garlic.
5. Cook for about 15 minutes, stirring periodically and scraping up any bits from the bottom of the skillet, until parts of the broccoli turn very slightly golden. During the course of this second cooking, the broccoli will begin to disintegrate, which is perfect.
6. If the broccoli gets too dry, add some of the reserved cooking liquid and/or olive oil. You do not want the broccoli to be either too wet or too oily; you want it to be soft, moist, and almost slow roasted.
7. Sprinkle the red wine vinegar over the broccoli and cook until the vinegar has evaporated. Add the remaining 2 cloves of minced garlic, and cook for another 5 minutes (the first batch of garlic contributes to the slow-roasted taste; this batch adds a little extra kick–but it’s optional).
8. Season to taste and serve.
One of the pleasures of being in a new place is tasting local dishes and then trying to figure out how to make them. In Italy, part of the fun lies in consulting butchers, greengrocers, cheese purveyors, wine merchants, and really, any Italian who eats, because they are all happy to offer advice. As soon as the days grew cooler, I knew what I wanted to make: Coda alla Vaccinara (Oxtail Stew) served over rigatoni–an old-style dish appearing on many Roman menus.
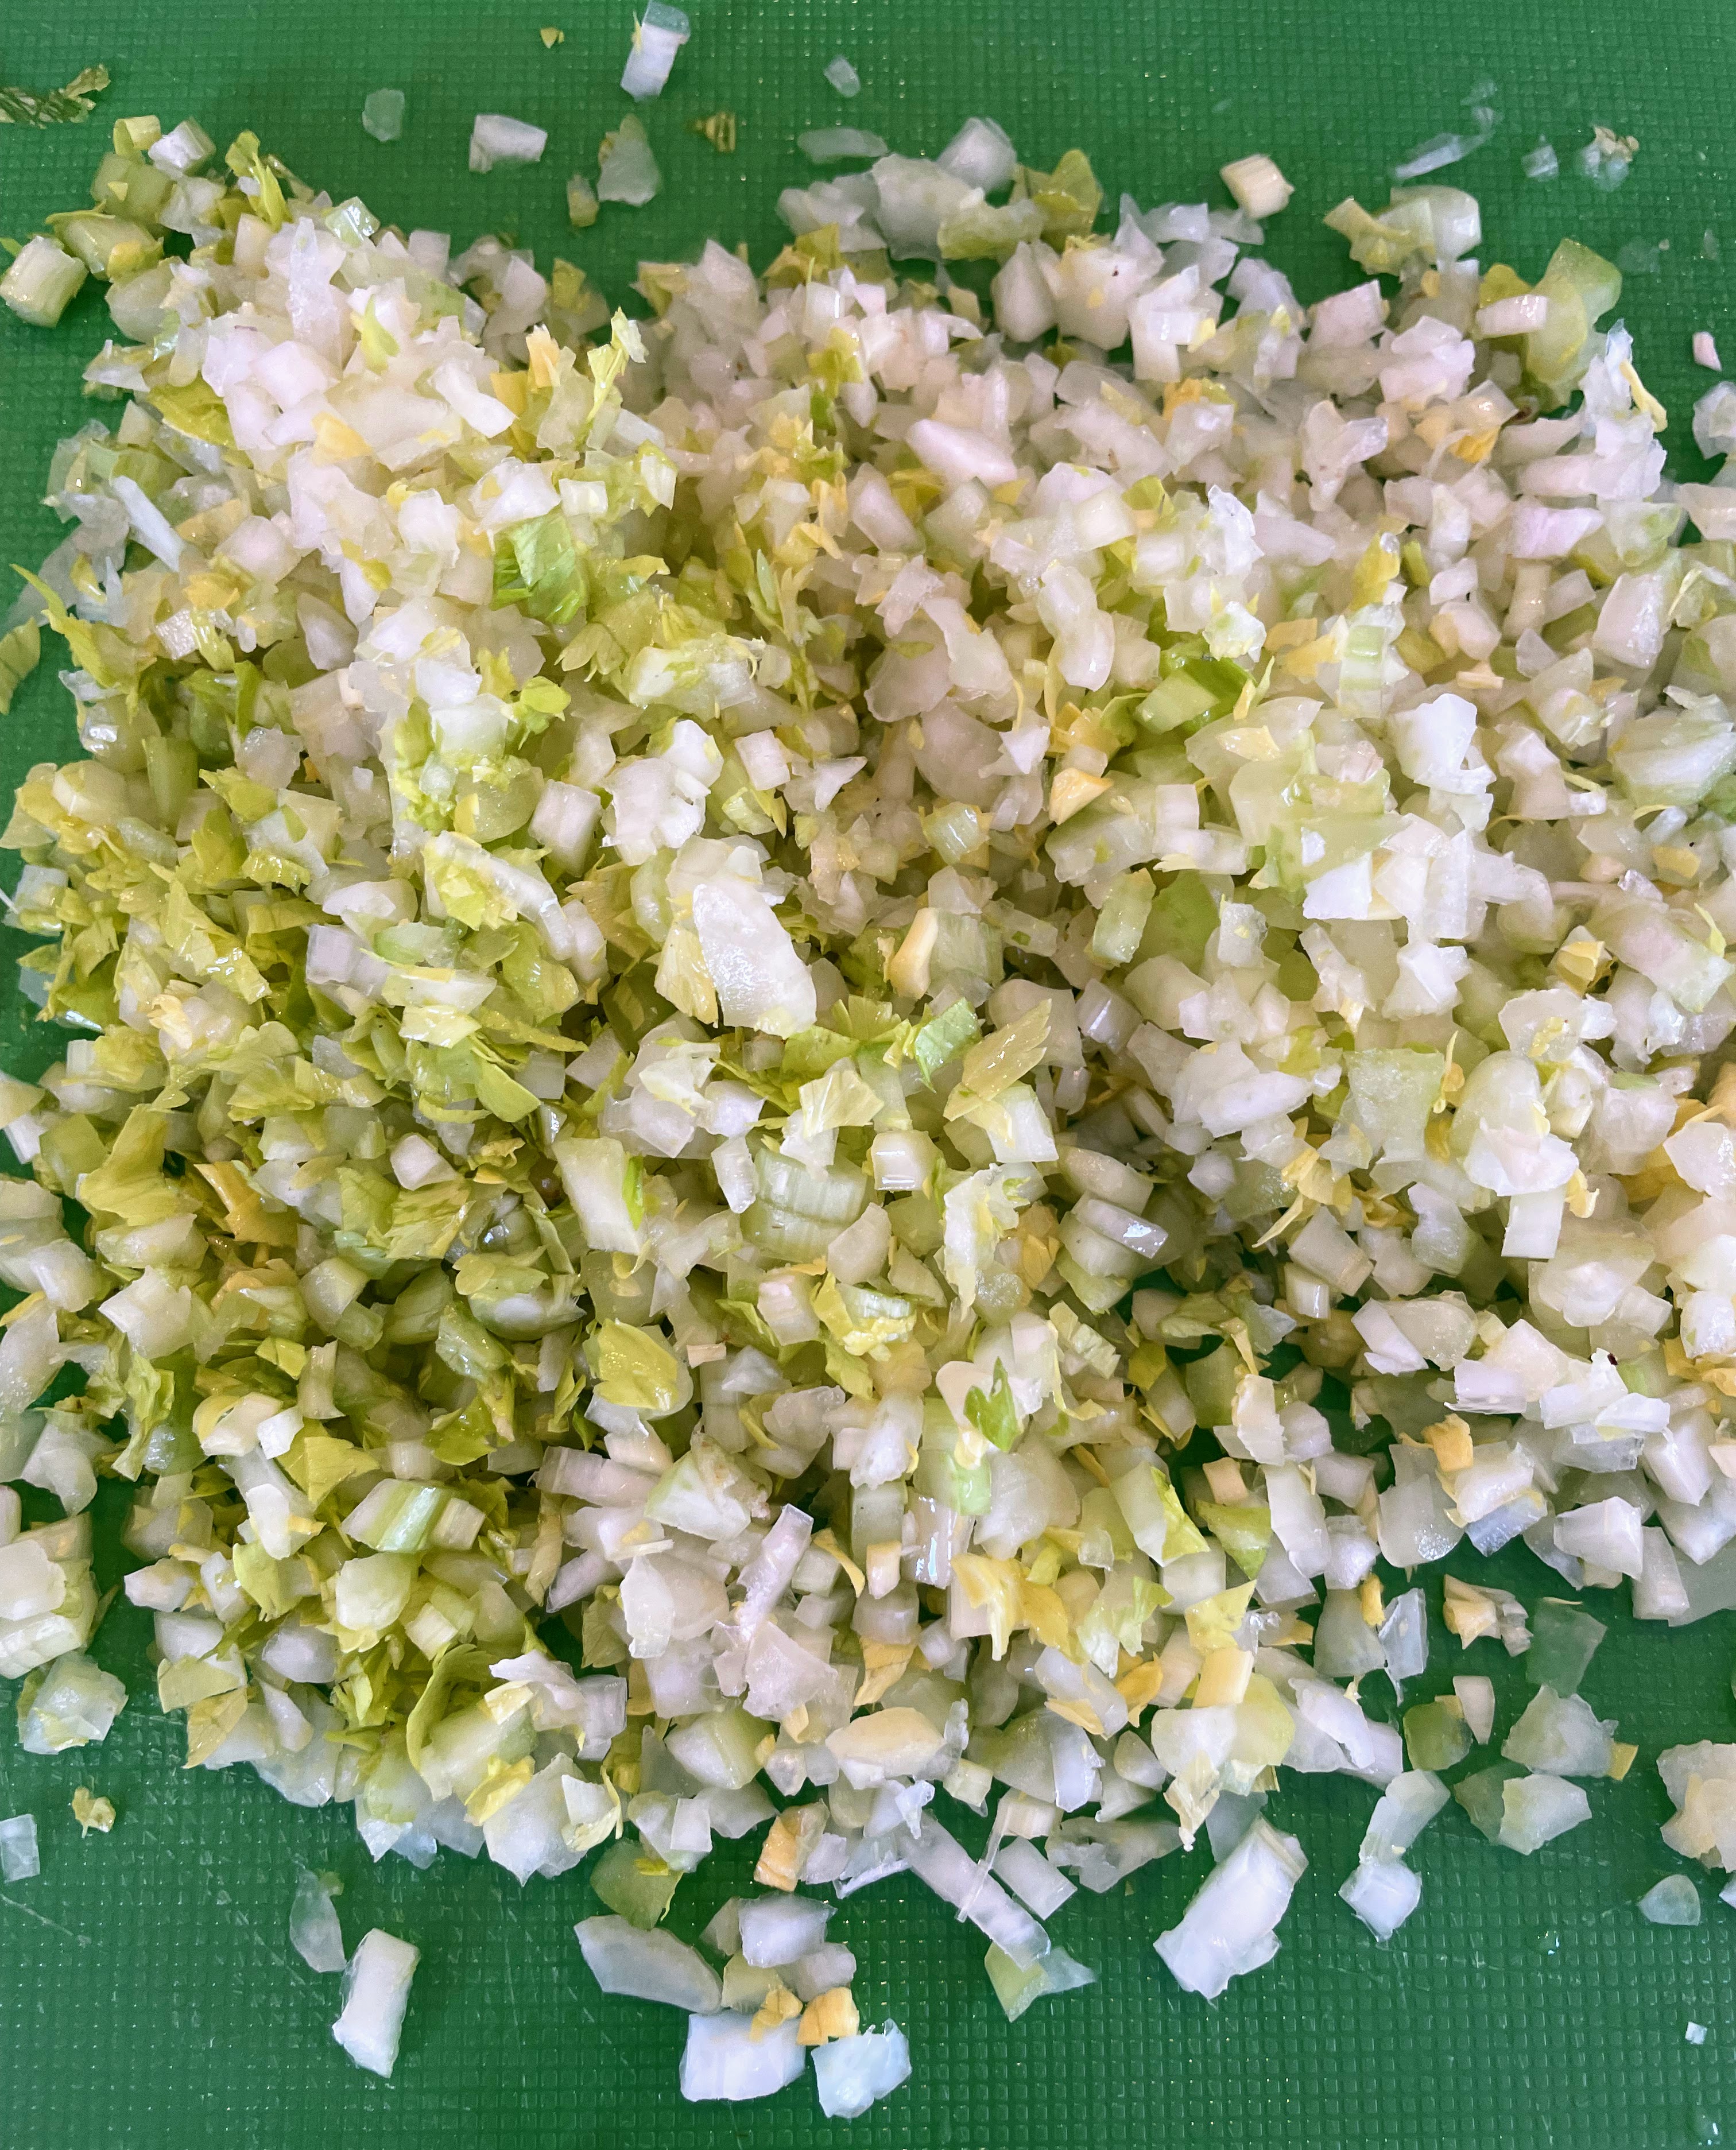
In previous times, the slaughterhouse workers of Testaccio (the vacccinari) were given offal and oxtails to pad their slim salaries. Their wives rose to the challenge and created dishes that made the most of the available ingredients. In Coda alla Vaccinara, the oxtails are braised in a sauce made with pancetta, lots of celery, onions, carrots, tomatoes, wine, and spices, though the stew is open to interpretation; everyone I asked prepares the dish in a slightly different way. Some people make it with red wine instead of white, some add water, some forego the carrot, some add raisins. Large pieces of celery are de rigueur, but in a rebellious break from tradition (and knowing I wanted to turn the entire stew into a sauce), I finely diced all the celery and survived to tell the tale.
However, I did not escape looks of shock and dismay on the faces of two Italian friends when I mentioned I had added a pinch of cinnamon to the stew. “Cinnamon? CINNAMON? No. NO.” But I say “Yes.” In addition to cloves, cinnamon very frequently appears in recipes for Coda, which is meant to have a warm-scented, delicately sweet undertone. So here is the resulting recipe, a hearty interpretation perfect for autumn and winter. And following on the advice of Alessandro Volpetti (and I’m happy to take the word of anyone at Volpetti’s), I topped the Coda with grated Ricotta Salata cheese, one of my favorites. But omit the cinnamon if you prefer, top with Parmesan or Pecorino Romano instead–this dish is yours to interpret.
Rigatoni with Oxtail Sauce (con Coda alla Vaccinara)
1-2 tbsp. olive oil
2.2 lb. (1 kg.) oxtails
salt and pepper
4 oz. (about 112 grams) pancetta, cubed
1 large onion, finely chopped
1 large carrot, finely diced (or coarsely grated)
5 stalks celery, finely diced
5 cloves garlic, minced
1 bay leaf
1/8 -1/4 tsp. chili flakes
4 whole cloves (or 1/8 tsp. ground)
¼ tsp. ground cinnamon
1.5 tbsp. tomato paste
1.5 c. white wine
1 large (28 oz./800 grams) can peeled Italian tomatoes
fresh parsley and marjoram (or oregano)
tiny pinch sugar
Preparation
1. Lightly season the oxtail pieces with salt and pepper. Heat the olive oil in a large Dutch oven, then brown the oxtail pieces, turning them on all sides. Remove from the pot and place in a bowl.
2. Add the pancetta to the pot and cook until mostly crispy and the fat has rendered; do not drain the fat. Add the onion, carrot, and celery and cook until soft, deglazing the pot as you go. Sprinkle the onion mixture with more black pepper, add the garlic and bay leaf, and cook for a couple of minutes. Add the chili flakes, cloves, and cinnamon and cook for a minute or two while stirring. Add the tomato paste and the wine. Simmer gently for about 5 minutes to reduce the liquid slightly.
3. With clean hands, take a peeled tomato from the can and crush it into the stew; repeat with all the tomatoes. This is a very satisfying technique—but moderation is key; if you are too enthusiastic, you may end up shooting tomato bits across the kitchen. If you prefer a slightly less visceral experience, you can cut the tomatoes while in the can, or remove them and dice, adding all the tomatoes and all the tomato sauce/juice from the can to the pot.
4. Mix in the pinch of sugar, nestle the oxtail pieces into the vegetable mixture, pour in any liquid from the bowl they were in, sprinkle with more black pepper, and then scatter some of the herbs on top.
5. Cover the pot and simmer on low heat for about 3 hours, or until the meat is very tender when pierced with a fork (it may take longer depending on the oxtails). Remove the oxtails, place on a dish, let cool, then pull off as much meat from the bones as possible (this will require some patience). Return the shredded meat to the sauce; keep warm.
6. Cook the rigatoni according to package instructions until al dente, drain, return to its pot, and then mix in the Coda sauce. Scatter more fresh herbs on top and serve with the grated cheese.
Few things beat the taste of a tomato that’s come straight from the garden. And cherry tomatoes offer that extra, satisfying little pop as you bite into them. The photo below shows our first harvest of the season, but the tomatoes in this bowl won’t make it into any recipe; these sun-warmed beauties are all going to be eaten just as they are–as a snack straight from Nature. However, there is a reason these tomatoes are called Sweet 100s: before long, I’ll be wondering what to do with all of them. I see lots of salads on the horizon, as well as our favorite Pasta with Cherry Tomatoes, Fresh Mozzarella, and Basil. And cherry tomatoes would also work in Roasted Tomatoes, Onions, and Garlic with Basil–though I’d start cooking the onions and garlic first, adding the cherry tomatoes toward the end of the roasting time. I detect a common theme in both recipes: basil. And now that I recall, last I saw it, our basil was in danger of being overtaken by the flowering oregano that has run riot in the herb garden…. Time for some triage in the name of good eats!
It is bold and zesty thanks to the spicy chicken chorizo and the tangy Pecorino Romano,
It isn’t a typical tomato- or cream-based pasta dish,
It contains pine nuts (a heavenly food, but one to be used sparingly because of the cost), and
It is another way to use up some of that bumper crop of zucchini (… if you’ve had your fill of Chocolate Chunk Zucchini Squares).
I made this tonight in about 20 minutes–and yes, I did add the pine nuts, but they all went into hiding at photo time. If you have a bit more chorizo than you need for this recipe, add it to a delicious egg scramble in the morning, maybe with some poblano chilies, onions, and mushrooms. Mmmm.
Spaghetti with Chicken Chorizo, Zucchini, and Pine Nuts
Serves 4
3-4 tbsp. olive oil
2-3 links spicy chicken chorizo, removed from casings (about 2/3-1 lb.)
1 large zucchini, diced into small cubes (about 3 cups total)
2 cloves garlic, minced
3-4 tbsp. pine nuts
1/2 lb. spaghetti
1 tbsp. butter
1 c. Pecorino Romano cheese, grated
salt and freshly ground pepper
Preparation
1. Start preparing spaghetti according to “al dente” directions on the package (check for doneness about a minute before the minimum time listed).
2. While water is coming to a boil, cook chorizo in olive oil in large skillet over medium-high heat until chorizo is no longer pink, breaking up the chorizo as it cooks. Add zucchini and cook until it has softened and the chorizo is golden. Add garlic during last five minutes of cooking time. If chorizo/zucchini mixture seems dry, add a bit more olive oil.
3. Push chorizo/zucchini mixture to one side of the skillet and sprinkle pine nuts onto the cleared space; cook the pine nuts for a couple minutes or until they turn golden. Incorporate them into the chorizo/zucchini mixture. If the pasta is not yet done, turn off the heat under the chorizo mixture and keep warm.
4. Just before draining the spaghetti, remove about 1/2 c. of the cooking water (or dip a glass measuring cup right into the pasta pot); reserve the water.
5. Drain the spaghetti, toss the drained spaghetti with butter, then pour the chorizo/zucchini mixture on top of the spaghetti and mix in well. If the mixture seems a bit dry, add a small amount of pasta cooking water to moisten.
6. Mix in the Pecorino Romano cheese, add salt and freshly ground pepper to taste, and serve immediately.
With three children away from home, and the fourth frequently out and about, my husband and I are adapting to eating dinner by ourselves. It is a necessary exercise; in one more year, we will be empty nesters. We have made some adjustments, but not all recipes for six translate easily into a meal for two, so I am beginning to rethink my approach to dinner. Luckily, this recipe is very adaptable and can easily be scaled down (or back up).
It’s also quick, which makes it perfect for a busy week night. But more importantly, it will satisfy proponents of the two different schools of thought on pasta cream sauces. When this dish is first put on the table, the cream sauce will be fairly thin (as in the photo). In our family, there are staunch supporters of a thinner cream sauce; they say a more liquid consistency allows for maximum “soppage” with a nice piece of crusty bread. Other family members prefer a thicker sauce, which coats the pasta very nicely. Luckily, it’s possible to have it both ways: thinner-sauce aficionados can dig right in; thicker-sauce advocates can nibble on salad or bread and let the sauce cool a bit. Regardless of their sauce philosophies, family members agree on one thing: this is good to the last bite, thick or thin.
Note: Feel free to substitute Parmesan cheese for the Pecorino Romano, and bacon for the pancetta (I used bacon this time, after discovering at the last moment that the pancetta I thought I had in the freezer was a figment of my imagination).
Pasta in Cream Sauce with Pancetta and Pecorino Romano Serves 2-3
1/2 lb. (227 gr.) pasta; I used gemelli
2 oz. (57 gr.) cubed pancetta [in the U.S., Trader Joe’s sells a 4-oz. package*], or 4 slices bacon, chopped
1/2 tbsp. olive oil
1 small clove garlic, sliced
1 c. (237 ml.) half and half, which is half light cream and half milk (or you can use all light cream or heavy cream–the heavier the cream, the thicker the sauce)
small pinch salt
freshly ground pepper
1/2 c. (about 60 gr.) grated Pecorino Romano or Parmesan cheese
Preparation
1. Bring an ample amount of water to boil in a medium pot and cook the pasta just until it is al dente.
2. While the water is coming to a boil, heat the olive oil over medium heat in a medium saucepan and cook the pancetta/bacon until crisp; remove the pancetta/bacon, place on a paper towel to drain, and set aside. Leave about 1/2 tbsp. of oil/drippings in the saucepan; discard the rest. Add the sliced garlic to the pan and cook just until golden (you do not want the garlic to burn). Remove the garlic and discard. Turn heat to low and add the half and half (or cream). Grind black pepper over the surface of the sauce. Add a small pinch of salt (be conservative at this stage because you’ll be adding salty bacon and cheese to the dish; you can adjust the seasonings afterward). Keep the sauce warm without letting it boil.
3. When the pasta is done, drain it well, return it to the pot, and immediately toss with the cheese. Add the reserved pancetta/bacon, mix well, and then pour the cream sauce over. Stir well and adjust the seasonings (I usually add more pepper at this stage). The sauce will appear thin at first, but will thicken as it cools.
4. Serve with salad and crusty bread.
*I stock up on packages of cubed pancetta and freeze them. Then, I add the frozen, cubed pancetta directly to the hot oil. It cooks (and crisps up) beautifully, and is oh-so convenient.
Apologies for the silence–I was on a jam-packed work trip last week. But the meeting was near Rome, so I can’t complain!
Immediately after arriving in Rome on Sunday morning, I headed to a delicious lunch at the home of some dear friends, where I was treated to chicken rollatini and a ricotta mousse topped with melted Nutella. It was the start of a fantastic eating fest. After lunch, we headed to Eataly for coffee and to have a look around. Of all the beautiful things to see there, here is just one that struck me because of its appearance and name: Ox Heart (or Beef Heart) ribbed tomatoes (Pomodori Cuore di Bue). On the way back to the hotel, I counted myself very lucky to be in Rome at just the right time to see all the wisteria in bloom.
[Please note that these blog photos were taken with my iPhone — the day-time/outdoor ones turned out a bit better than night-time/indoor ones….]
Pomodori Cuore di Bue Wisteria
I had very limited in Rome itself and since we had lived there before, I eliminated any sightseeing and focused solely on the gastronomic. And of the wealth of options on that front, I was miraculously able to eat two of my favorite things in Rome (ok, in the world). The easier of the two involved a lightening-quick pilgrimage to Della Palma gelateria near the Pantheon for a scoop of Roché gelato– dark chocolate base with crushed hazelnuts and wafer pieces, like the famous chocolates — topped off with a scoop of Duplo gelato, a rich caramel base interlaced with liberal swirls of Nutella. There are many gelaterias in Rome, including some very famous ones, but this is the one I like best because it is where we always used to go as a family. And because of the Roché and Duplo…. I am sighing now, knowing it will be some time before I taste either again.
The other dish I was hoping to have was Spaghetti al Nero di Seppia (Spaghetti in Squid Ink) — a dish that would be a serious contender on my last-meal list. The problem is that very few Roman restaurants offer it. So I owe a deep debt of gratitude to a kind friend who told a restaurant owner that an overseas visitor had a serious craving for the dish, and to the owner for going out and buying the squid-ink sacs just to prepare the meal for us on the evening of my arrival. The jet-black sauce is made with squid ink, garlic, white wine, olive oil, red chilies, and tiny pieces of squid. It is dish that tastes as if it came straight from the sea, and it’s fantastic. But it turns your lips black; you will end up looking like Cruella De Vil. It is so worth it, however.
Gelato at Della Palma Spaghetti al Nero di Seppia
The very last night, after non-stop meetings in a suburb of Rome where there was not a lot to see, another lovely friend suggested an outing to Bracciano, a charming town with a beautiful lake and an old castle. I loved the many flower pots the residents had everywhere: on stoops, staircases, walls, lattices, etc. And I was struck by the hardiness of the fig tree; the ones I saw were all growing straight out of high walls, having found a tiny foothold and enough nutrients to somehow survive.


 Tomatoes © G. Stansbury")


 on the sides; front-facing wall of opus mixtum (bands of brick and tufa), with lateral 'toothing' and a structural arch; plus rough-hewn travertine column--Portico of Claudius, Portus (c. 50 AD)")
")
 with lateral 'toothing' and putlog holes at the top--Trajan's warehouse, Portus (c. 100 AD)")
")
, Trajan's warehouse, Portus (c. 100 AD)")

