Archive | Recipes RSS feed for this section

Recipe: Easy Lahm bi Ajin (Lebanese Lamb Pizza)

5 Oct

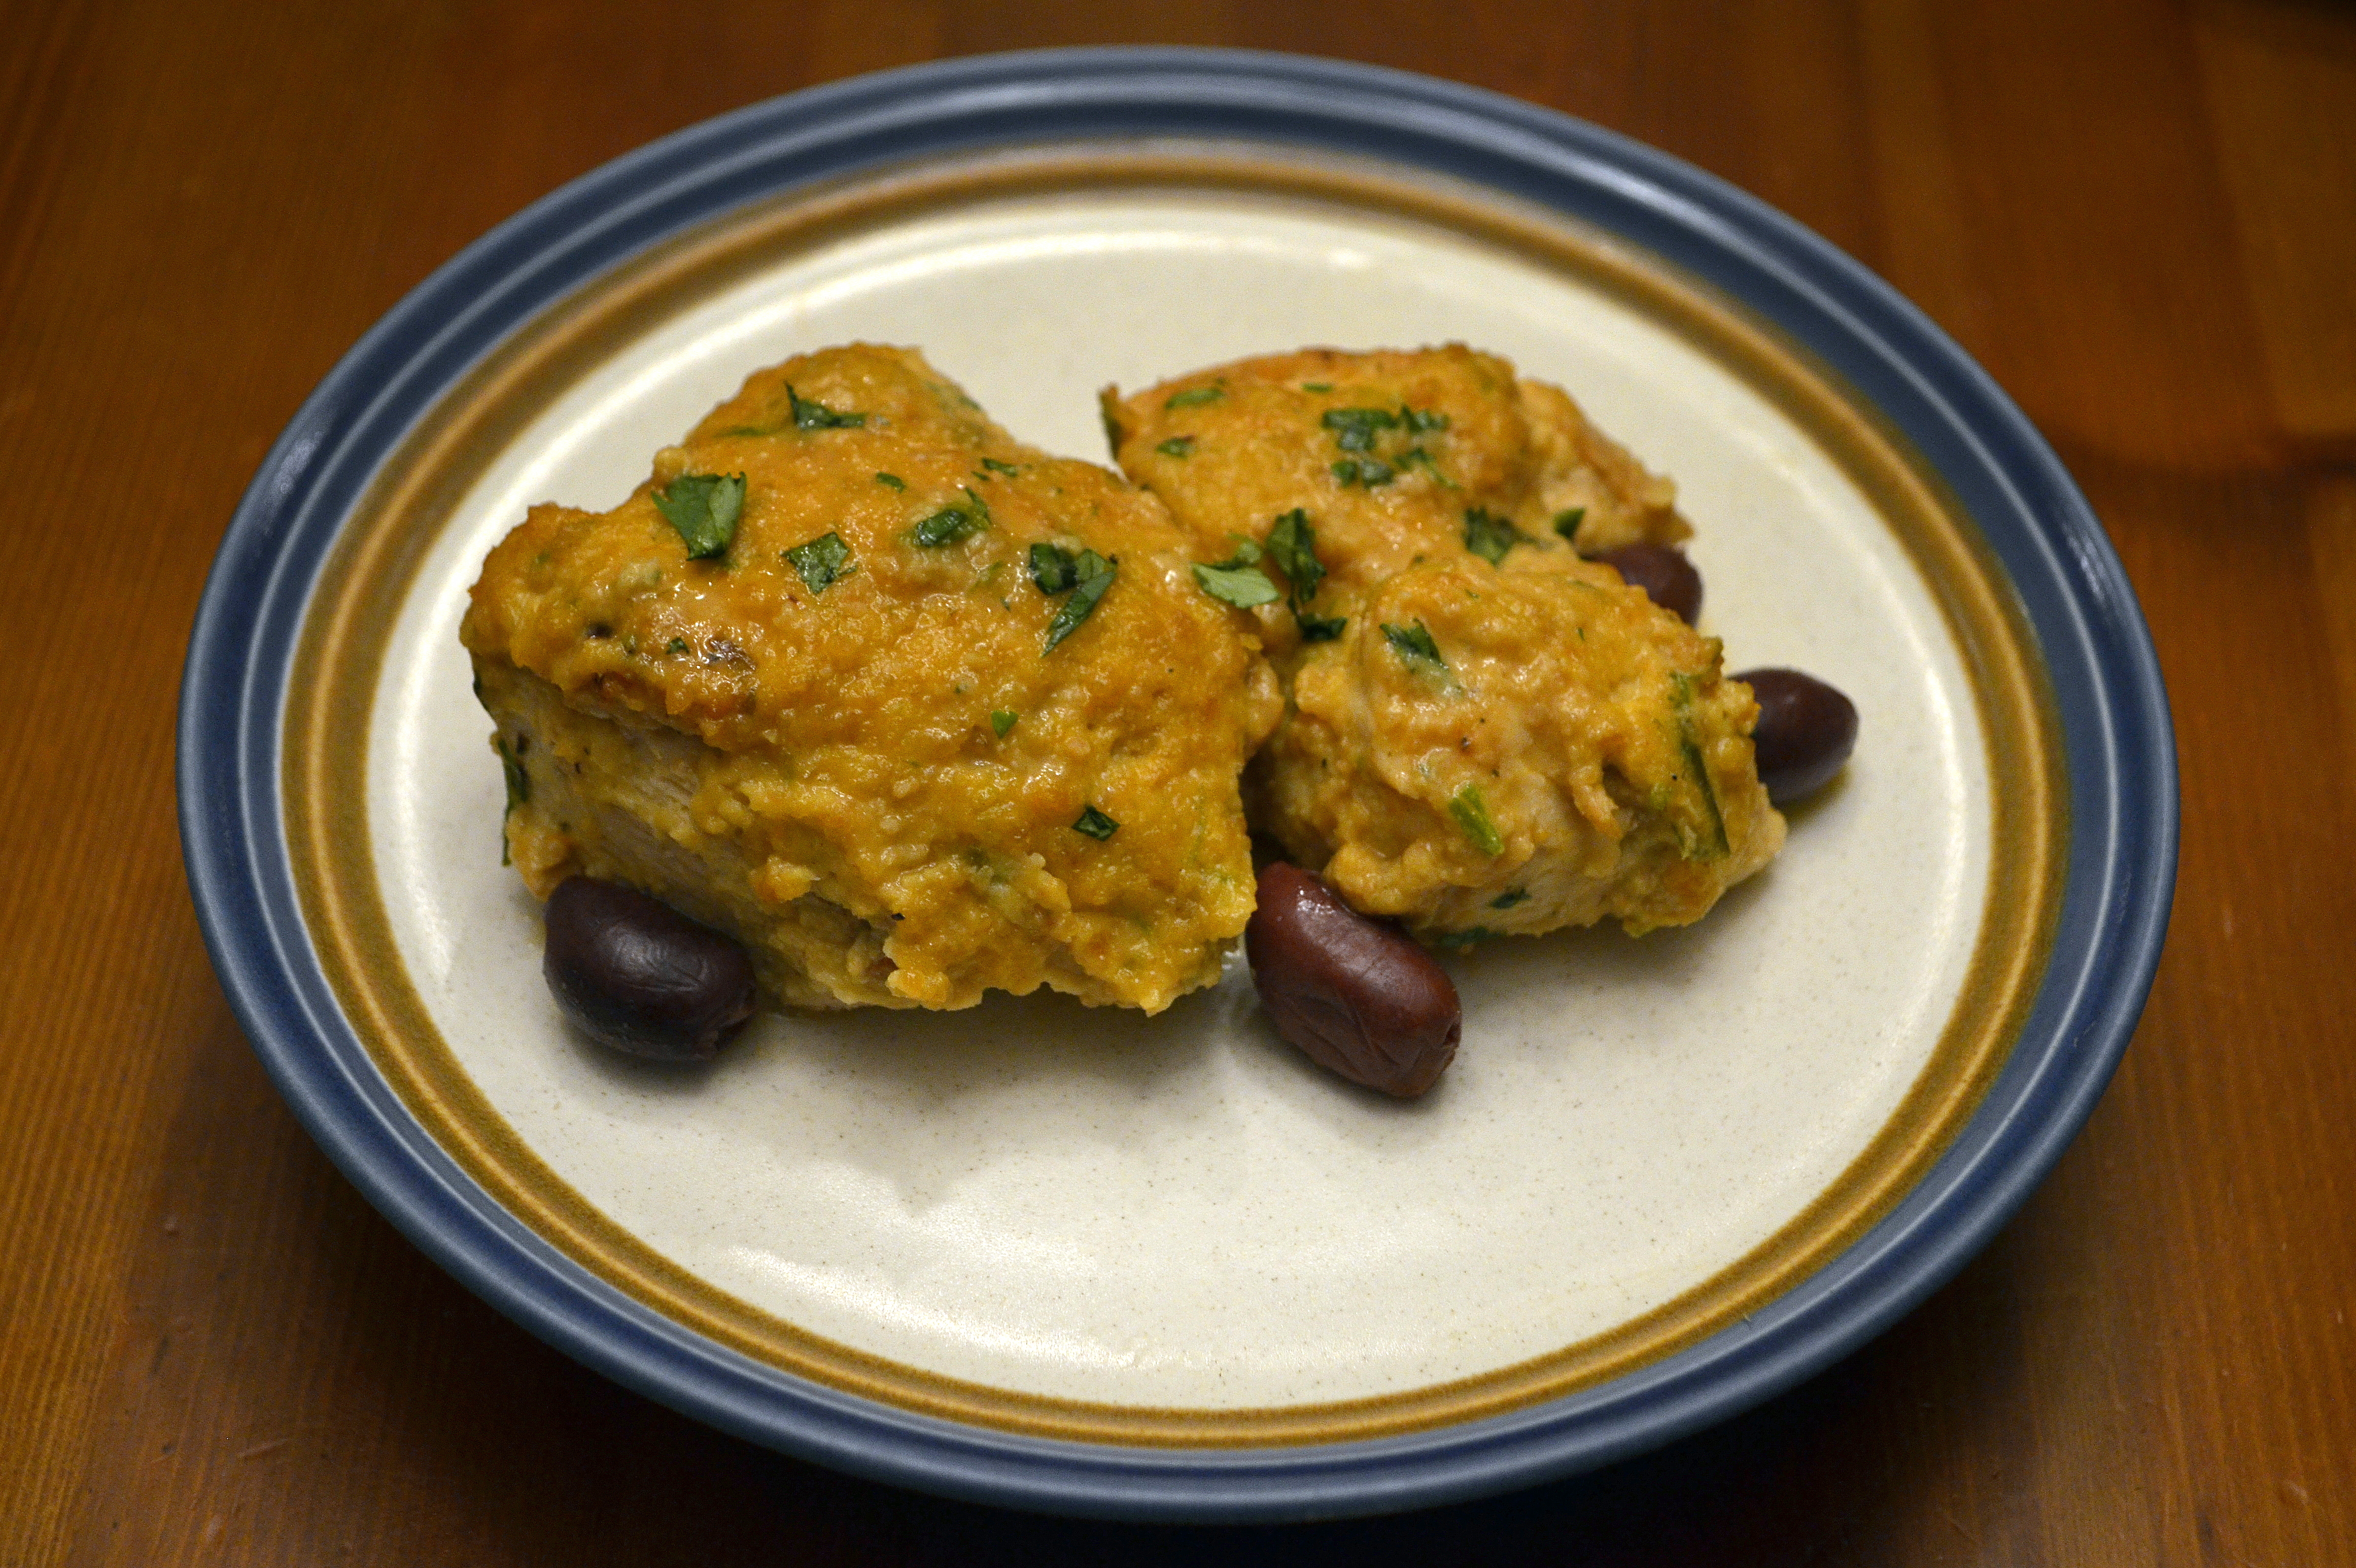
In Arabic, lahm means “meat,” and ajin means dough or pastry. Many cultures pair meat with pastry, and while I like just about every iteration of that theme, this Lebanese version is one of my favorites. This recipe is slightly easier and quicker to make than some traditional versions because it uses a pita-bread base instead of one requiring home-made dough. These Lahm bi Ajin are pretty hearty, and go quite nicely with Tabouli or other salads.

lahm bi Ajin3
Lahm bi Ajin
Serves 4

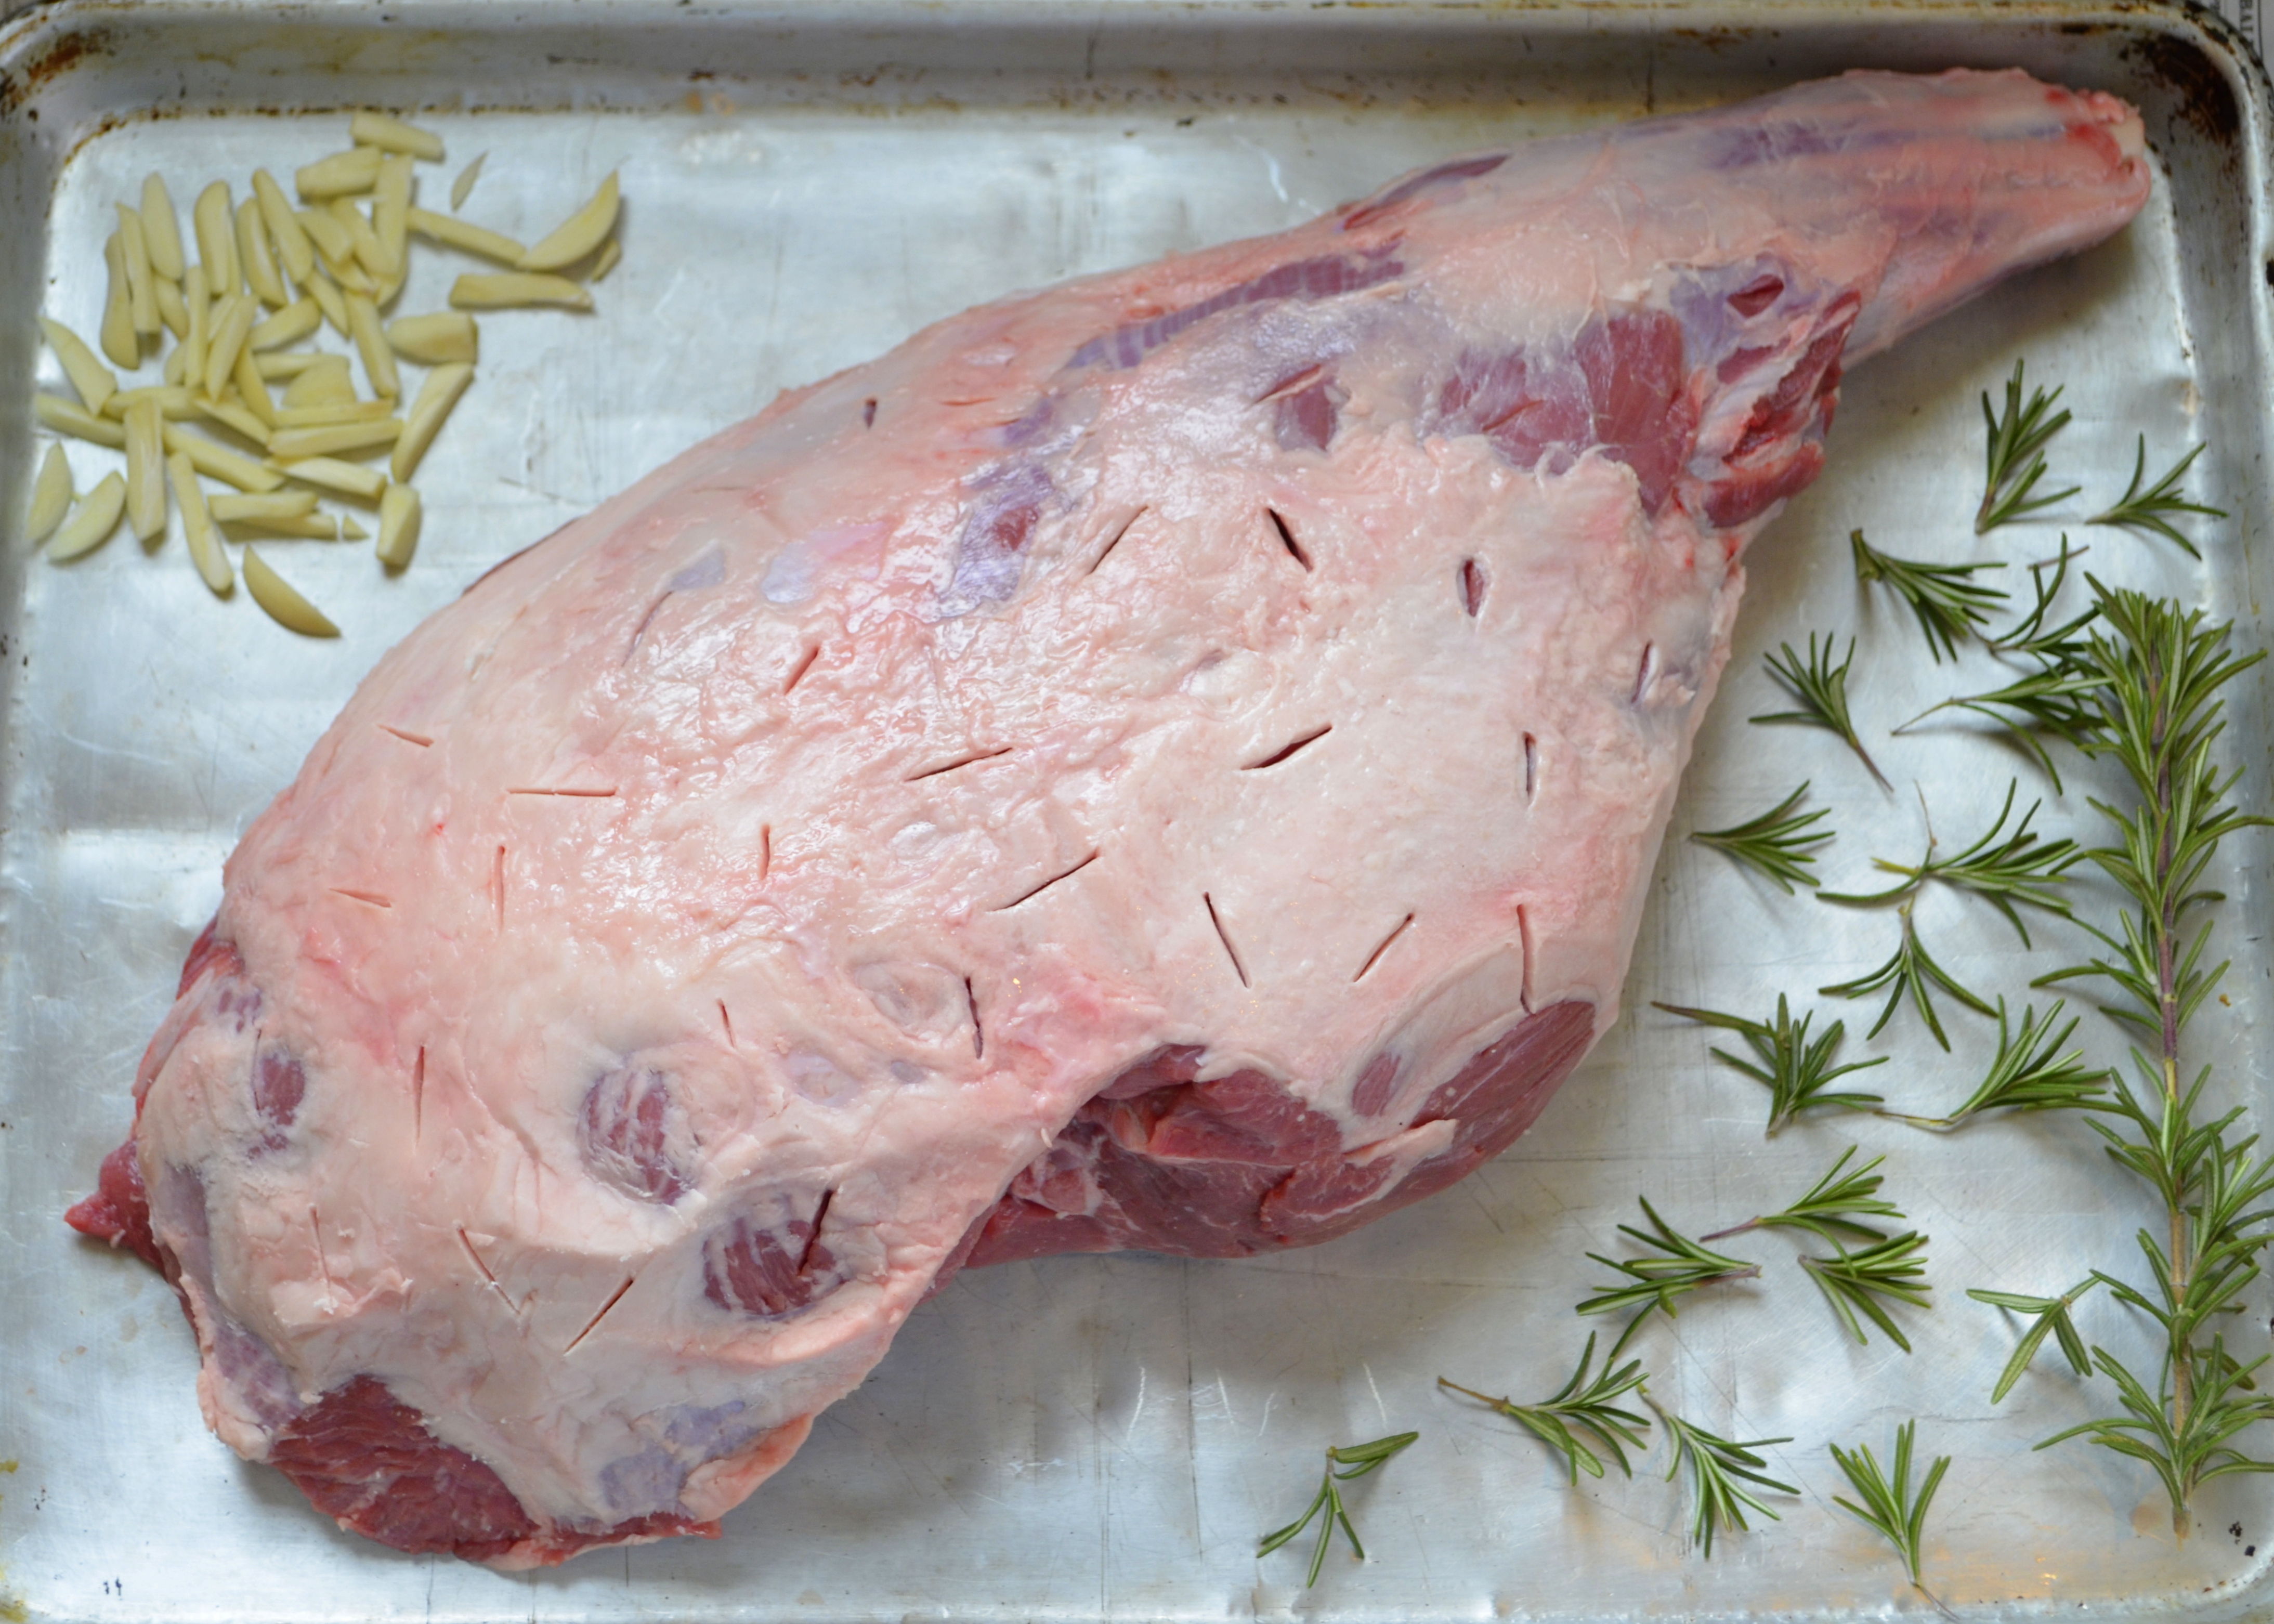
1 lb. (454 gr.) ground lamb
3 tbsp. olive oil
1 large onion, finely chopped
5 cloves garlic, crushed
1/2 tsp. cinnamon
1/4 tsp. allspice
1/8 tsp. chili flakes
1/3 c. (85 gr.) tomato paste
1 tbsp. pomegranate molasses, or juice of 1/2 a small lemon
1/4 c. (61 gr.) yogurt
salt and pepper to taste

1/4 c. (34 gr.) pine nuts, optional
extra 2 tbsp. olive oil
4 medium-sized pitas, unopened
1 tbsp. each of chopped fresh mint and parsley, or 1/2 tsp. dried mint and dried parsley

Preparation
1. Heat a heavy-bottomed skillet over medium-high heat, drizzle with a bit of olive oil, and cook the lamb until it is no longer pink, breaking it up as finely as possible. Remove the lamb from the pan, drain in a colander, and set aside.
2. Wipe the skillet, add the 3 tbsp. of olive oil, and when hot, add the onion and cook until translucent and slightly golden.
3. Add the garlic and spices, and cook for a few more minutes. Return the lamb to the pan along with the tomato paste and the pomegranate molasses/lemon juice; mix well to combine. Cook the lamb mixture for 5 minutes over low heat, mashing periodically with the back of a wooden spoon.
4. Turn off the heat, and add the yogurt to the lamb mixture in two batches, incorporating well after each batch. Season with salt and pepper to taste. Set the lamb mixture aside.
5. Heat the oven to 400 degrees. Take out one large (or two medium) rimmed baking sheets–to accommodate the four pitas.
6. Toast the pine nuts in a small skillet until they start to turn golden; remove from skillet.
7. To assemble: pour the extra 2 tbsp. olive oil into a very small bowl; brush the top of each unopened pita with the olive oil. Place the pitas on the baking sheet(s).
8. Divide the lamb mixture among the four pitas, patting it down and spreading it to the edge of each pita. Sprinkle each pita with the mint, parsley, and pine nuts, pressing the pine nuts into the lamb mixture. Drizzle the pitas with any remaining olive oil from the small bowl.
9. Bake in the oven until the edges of the pitas start to get crisp and the lamb topping begins to brown, about 15 minutes.
10. Eat immediately.

Recipe: Mousse de Mango

10 Sep

I love mangoes in any way, shape, or form–and so do my children, who used to line up for a chance to get the pit after I was done slicing the rest of the fruit. For years, I vowed to make mango mousse–but I always let myself be lured by the siren call of the chocolate version instead. Until recently, when I was making a Latin American dinner and wanted a Latin American dessert to go with it. And now I’ve been asking myself, why didn’t I try this sooner? This recipe, very slightly adapted from The South American Table by Maria Baez Kijac, calls for fresh mangoes, and like many other mousses, includes raw egg whites (so use the freshest eggs possible). It serves 8 regular dessert lovers, or 6 serious mango lovers. Note: the original recipe suggests serving the mousse with a raspberry coulis, but I am a purist who prefers an unadulterated mango flavor.

Mango Mousse

Mousse de Mango

1/4 c. fresh orange juice
1 envelope unflavored gelatin
2 large, ripe but firm mangoes, peeled, seeded, and chopped (2 c.)
3/4 c. sugar
2 tbsp. orange liqueur or rum
1 c. whipping cream
2 large egg whites
1/4 tsp. cream of tartar

Preparation
1. Place the orange juice in a small heat-proof bowl, sprinkle the gelatin over top, and let soften for 5 minutes. Set the bowl in a small saucepan with 1 inch of simmering water and heat until the gelatin is completely dissolved. Remove the bowl containing the gelatin mixture from the saucepan.
2. Place the mangoes in a blender or food processor and process until smooth. Add the sugar, liqueur/rum, and dissolved gelatin, and process again until smooth. Place the mango puree into a large bowl.
3. Whip the cream in a medium-size mixing bowl until soft peaks form. Beat the egg whites with the cream of tartar in another medium-sized bowl until soft peaks form.
4. Very gently fold half the whipped cream into the mango puree, followed by half the egg whites. Repeat, and mix gently until all the cream and egg whites have been incorporated.
5. Distribute the mousse among 6-8 dessert cups, cover, and refrigerate until thickened–about 30 minutes.
6. Enjoy!

Recipe: Peruvian-Style Peanut Chicken (Pollo Arequipeño)

31 Aug

There are two signature Peruvian dishes consisting of boiled potatoes topped with a spicy, creamy, cheese sauce:  Papas a la Huancaina and Ocopa Arequipeña. They both feature yellow chilies, cheese, and milk–and frequently, onions and garlic. An Ocopa sauce often contains nuts as a thickener, while a Huancaina sauce usually includes crackers (and an herb that is difficult to find: huacatay, sometimes referred to as black mint). However, I’ve seen Ocopa made with crackers, too…. Regardless, both sauces and their many variations are delicious!

The following recipe departs from the norm: it features an Ocopa-style sauce over chicken rather than potatoes, and it is broiled in the oven until the sauce begins to turn golden brown.

Peruvian Peanut Chicken

Peruvian-Style Peanut Chicken (Pollo Arequipeño)
Serves 8

6 boneless, skinless chicken breast halves
juice of 2 lemons or limes
2 tbsp. olive oil
salt and pepper

Sauce:
3 tbsp. olive oil
1 small red onion, chopped
2 scallions (green onions), trimmed and sliced
5 cloves garlic, crushed
1 tbsp. aji amarillo (yellow chili) paste –add more if you like your sauce hot
1/2 c. roasted, salted peanuts
1/2 c. grated Münster cheese (or feta or queso fresco)
3/4-1 c. evaporated milk
1/4 tsp. salt, or to taste

chopped cilantro
Kalamata (or other black) olives

Preparation

1. Trim the chicken breasts and cut each into two pieces.
2. Combine the lime juice and olive oil in a glass container and add the chicken. Sprinkle the chicken with salt and pepper to taste, mix well, cover, and refrigerate for a couple of hours.
3. Meanwhile, make the sauce. Heat the olive oil in a large skillet over medium-high heat; add the red onion and scallion and cook until soft. Add the garlic and aji amarillo paste (and huacatay puree if available/desired) and cook for another couple of minutes. Turn off the heat. Put the onion mixture into a blender along with remaining sauce ingredients; blend until smooth. If the sauce appears very thick, add a bit more milk. Place the sauce in a  covered container and refrigerate until needed. Set the skillet to the side on the stove; do not clean or rinse.
4. After the chicken has marinated, heat the skillet over high heat and cook the chicken (in two batches if needed) until the pieces are golden brown on both sides (no need to add extra oil to the skillet first, since the marinade contains oil). Place the chicken pieces in a single layer in a baking dish, top each piece with an ample amount of the peanut sauce, cover with aluminum foil and bake at 350 degrees for about 20-30 minutes. Remove the aluminum foil, sprinkle Kalamata olives around the chicken, and broil until sauce begins to turn golden brown in spots.
5. Remove the chicken from the oven, sprinkle with cilantro, and serve.

Recipe: Roasted Tomatoes, Onions, and Garlic with Basil

28 Jun

This year, I planted three tomato plants, which are beginning to completely take over the vegetable garden. If that weren’t enough, a fourth rogue plant sprung from the seeds of  last year’s tomatoes is giving them a run for their money. Which means I’m soon going to be faced with a bumper crop of tomatoes and the challenge of figuring out what to do with the ones I keep. This recipe is one of my all-time favorites for tomatoes, and I often serve it at brunches as an accompaniment to cold roasted meats. It is a very flexible recipe: it can be made ahead, served warm or at room temperature–and you can play around with the ingredients depending on what you have on hand. However you tweak it, it’s hard to go wrong with tomatoes, red onions, garlic, basil, and pine nuts.


Roasted Tomatoes, Onions, and Garlic with Basil
12 servings

3 lb. roma tomatoes (other smaller types work well, too)
2 large red onions, cut in half, each half cut into eight wedges
30 cloves garlic /2 bulbs, peeled (slice large cloves in half)
2/3 c. olive oil
2 tsp. sambal oelek (or sweet chilli sauce)
1 tbsp. sugar
2 tbsp. bottled pesto (or fresh, if you have it)
1 tsp. salt
2 tbsp. balsamic vinegar
1/2 c. shredded fresh basil
2 tbsp. chopped fresh oregano
1/2 c. pine nuts, toasted

Preparation

1. Heat oven to 400º.
2. Cut the tomatoes in half lengthwise. Place tomatoes, cut side up, in large baking dish, then nestle the onions and garlic around the tomatoes.
3. In a small bowl, combine the olive oil, sambal oelek, sugar, pesto, and salt. Pour over the vegetables.
4. Bake uncovered for about 30 minutes or until tomatoes, onions, and garlic are soft.
5. Meanwhile, dry toast the pine nuts in a small skillet over medium-high heat (watching carefully), until they start to turn golden. Remove them from the skillet and reserve.
6. Once the tomatoes come out of the oven, add the vinegar, herbs, and pine nuts, and mix gently. Serve warm or cold.

Banana Flowers and Other Edible Parts

22 May

Being a bit less mobile than usual, I thought I’d use the opportunity to choose a photo I’ve previously taken and see if I can learn more about the subject. What you see below is commonly called a banana flower or banana blossom (photo taken at the United States Botanic Garden). I’ve always been struck by this part of the plant, a deep-red appendage that dangles below the bunches of bananas. Though we like to think of the banana plant as a tree, it is technically a perennial herb, albeit a really big one; it dies down to the ground after the plant flowers and produces fruit. The inner part of the stem of the plant (which is actually a false stem consisting of leaf sheaths) is edible, as are parts of the flowers–they are considered vegetables and are popular in Asian and tropical cuisines, where they are used in salads, curries, stir fries, and other dishes.


The banana “flower” seen in the photo above is actually the lowest part of an inflorescence consisting of layers of bracts (the petal- or leaf-like parts) that cover rows of  flowers. The female flowers are higher up and can develop into fruit (bananas). Once that happens, the inflorescence elongates and produces a terminal male bud. Here, the redder (and tougher) outermost bracts of that bud have opened upward, revealing yellow-tipped male flowers underneath and paler closed bracts below.

Different parts of the banana flower (or bud) can be eaten: the innermost bracts, the florets (once the stamens and tough covers have been removed), and the inner core, or heart. The tougher outer bracts are often used as serving plates for dishes made with the other parts of the banana flower. I don’t have easy access to banana flowers, but if you do and want to experiment with them, here are some resources:

To read about the ornamental Golden Lotus Banana/Chinese Dwarf Banana, see this post. To read about the difference between Musa (bananas), Strelitzia, and Heliconia, see this post.

And here are some additional banana-related photos:

1) A banana leaf unfurling at the Eden Project in England. Each leaf emerges from the center of the banana plant in the form of a rolled cylinder. Once the last leaf has emerged, the plant produces the inflorescence, which starts off pointing skyward, but then falls over and dangles as it gets heavier and the female flowers develop into bananas.
2 ) Banana bunches on the plant (with the terminal bud having fallen off). Some bunches can contain 200-300 bananas each; the largest one recorded by the Guinness Book of World Records contained 473 bananas and weighed 287 pounds.
3) Banana transport in Rwanda.


Recipe: Pavlova

27 Apr

We lived in Australia for four years and loved every minute of it, leaving behind dear friends and wonderful memories. One of those memories was of Pavlova, a beautifully light and sweet dessert named after the Russian prima ballerina Anna Pavlova, who toured Australia and New Zealand in the 1920s. There has been a long-standing debate based on primary and secondary sources and lots of national pride, as to whether the dessert was first created  in New Zealand or Australia. Though the scales may have now tipped toward New Zealand (with the Oxford English Dictionary crediting the first written record of the recipe to New Zealand), it is a question that may never be satisfactorily answered; in an elegant diplomatic maneuver, the OED also lists the origin of pavlova as “Austral. and N.Z.”

For our family, the answer is simple: since we first encountered Pavlova in Australia, it will for us forever remain as one of our favorite Australian desserts.

The version in the photo below is a double recipe, prepared in a rimmed 18 x 12-inch jelly roll pan–which was a mistake. There was no easy way to get the meringue out and onto a serving platter without shattering it into pieces–so we served the Pavlova straight from the pan, lifting each piece off the baking/parchment paper with a thin spatula. It was a bit messier than usual, but due to the amazing decorating job by three enthusiastic teenagers, and to the fantastic blend of flavors that has made this such a beloved recipe, no one minded. In the future, though, I’ll remember to use an unrimmed baking sheet….

pavlova

Pavlova
8 servings

6 large egg whites
pinch salt
1 1/2 c. + 1/8 c. sugar
2 tsp. cornstarch
1 tsp. white vinegar

1 1/2 c. cream
2 tsp. sugar
1 tsp. vanilla

1 large punnet strawberries, hulled and sliced
1 small punnet blackberries
1 small punnet raspberries
2 kiwis, peeled and sliced

Preparation

1. Preheat oven to 350 degrees.
2. Draw a 9″ circle on baking/parchment paper and place it on a baking sheet. Spray the paper with baking spray.
3. Combine egg whites and the pinch of salt in a very clean and completely dry large bowl, and beat until stiff peaks form (you can also use a stand mixer). Gradually add sugar, a tablespoon or two at a time, beating constantly, until the mixture is very glossy and the bowl can be held upside down without the meringue falling out. Gently whisk in the cornstarch and vinegar.
4. Using a spatula, spread the mixture onto the paper circle on the baking sheet; smooth the top with the spatula.
5. Place the baking sheet in the oven and bake the meringue for 5 minutes, then turn the heat down to 270 degrees and bake another 75 minutes, or until the outside of the meringue is crisp, but the inside is soft and chewy. Turn the oven off and leave the meringue in the oven, with the door ajar, for 15 minutes.
6. Slide the meringue, still on the baking paper, onto a rack and allow to cool completely. It will crack a bit when cooling; this is normal. Using two spatulas or a pizza peel, carefully lift the meringue off the baking paper and place on a serving platter.
7. Whip the cream with the sugar and vanilla until stiff peaks form. Try to use as little sugar in the whipped cream as your palate will allow, to offset the very sweet meringue.
8. Spread the whipped cream on the meringue and add the fruit in a decorative pattern. (The great thing about pavlovas is you can decorate them any way you like, with whatever fruit you prefer.)

Recipe adapted from Australian Table magazine.

Recipe: Nutella Hazelnut Palmiers

19 Apr

By family decree, certain elements of our Easter Brunch can never be altered: the Breakfast Pizzas; the Pesto-Roasted Tomatoes, Red Onion, and Garlic with Pine Nuts; and the Fruit Salad with Honey Lime Dressing. The ham comes and goes and the potatoes occasionally vary (Hashbrown Casserole has been a favorite for many years, but to the dismay of one of our sons, is being edged out this year by Country-Fried Potatoes with Bacon and Green Onions). Other dishes enter and exit as the urge strikes: this year, one of those “other” items will be Stuffed Mushrooms with Merguez Sausage and Spinach, which I realized I hadn’t made in a while.

The one area of Easter Brunch where more experimentation is allowed is the sweet section, which consists of 2-3 items chosen at whim. Today, I made these Nutella Hazelnut Palmiers while everyone was out hiking; I’ll need to hide them pretty soon, lest the returning teenagers and 20-somethings demolish them before tomorrow’s brunch. And before I “taste test” any more of them myself….

Palmiers

Nutella Hazelnut Palmiers
Makes about 30

1 (17.65 oz. ) pkg. puff pastry dough sheets, thawed
2 tbsp. raw sugar, divided in half
1 c. Nutella (chocolate hazelnut spread), divided in half*
1/2 c. chopped hazelnuts, divided in half

Preparation

1. Lightly flour a clean, 12 x 12-inch spot on your counter. Sprinkle the spot with 1 tbsp. raw sugar.
2. The puff pastry dough package should contain two sheets. Unfold one of the sheets and place it on top of the  flour/sugar. Gently roll out the dough to the left and to the right until it is about 15-inches long (don’t worry about the width); you mostly want to embed the sugar into the underside of the dough.
3. Spread 1/2 c. Nutella onto the puff pastry sheet; sprinkle 1/4 c. chopped hazelnuts over the top.
4. Starting at the top long end, roll the dough toward you until you get to the middle of the pastry sheet. Now roll from the bottom end up to the middle. Bring the two rolls together, and place the log of dough seam-side down on a baking sheet lined with parchment paper.
5. Repeat with the second puff pastry sheet. Sprinkle the counter with more flour and the remaining tbsp. of sugar, top with the second pastry sheet, and gently roll the dough out. Spread with the remaining Nutella and sprinkle the remaining hazelnuts on top; roll up as indicated in Step 4. Place the second log of dough on the baking sheet, too, and then put the baking sheet in the freezer for about 10 minutes to firm up the dough.
6. Preheat oven to 350 degrees.
7. Working with one  log of dough at a time, place on a cutting board and slice into 3/4-inch thick slices (or as close as you can get) with a serrated knife. Lay the palmiers flat side down on the parchment paper-lined baking sheet, with ample room between palmiers since they will expand.  You will need multiple baking sheets, or will need to bake in batches.
8. Bake for 30 minutes or so, until the palmiers are golden. (Keep an eye on them; baking time will depend on the thickness of the palmiers.)
9. Let them cool on the baking sheet for a couple of minutes, then remove to a rack to cool completely.
10. Enjoy!

* Can add up to 1/2 c. more Nutella ( 1/4 c. on each sheet) for sweeter but slightly messier palmiers.

Recipe: Roast Leg of Lamb with Red Wine and Herbs

17 Apr

On the Thursday before Easter, we always have a leg of lamb as part of our evening meal, a tradition that started before my husband and I were married–when we were young and foolish. We bought our first leg of lamb on impulse at a butcher shop in Greenwich Village, New York, on the Wednesday before Easter (we happened to be visiting NYC). We sprinkled some herbs over it, doused it with a bottle of wine, wrapped it up, refrigerated it overnight, and then drove it to Washington, DC the next day in time to roast it for dinner. It was a slightly boozy, but very delicious lamb we ate that evening; the excess alcohol probably helped preserve it, unrefrigerated, during the 4-hour trip.

Though we have very fond memories of that lamb, I have since refined the recipe, ensuring proper food-safety techniques and (unfortunately) eliminating the need for any road trips.

Lamb6

Roast Leg of Lamb with Red Wine and Herbs
Serves 6-8
Note: This lamb needs to marinate overnight (or for at least 8 hours) prior to roasting.

1 bone-in leg of lamb (6-8 lb.)
salt and pepper
4-5 cloves garlic, cut into slivers
fresh rosemary, separated into small sprigs

Marinade:
1/3 c. olive oil
1/4 c. red wine of your preference
1 tsp. Dijon mustard
1/2 tsp. each dried basil, oregano, parsley, mint, etc.
1/2 tsp. sugar

Preparation

1. Rinse lamb and pat dry. Then, using a sharp knife, cut off  as much of the top, papery thin layer (the “fell”) as possible; it is not necessary to remove all of it. (Some cooks prefer to leave it on to help keep the lamb moist. Others remove it because they think it has a strong flavor. I remove it for aesthetic reasons; family members don’t like seeing the fell on the lamb.)
2. Trim off  excess fat, but make sure to leave a nice layer to ensure moistness and to help carry the flavor of the rosemary, garlic, and marinade.
3. Using the same sharp knife, make deep slits into the meaty portions of the leg.

L1
4. Insert one sliver of garlic and a small sprig of rosemary into each slit in the lamb. Sprinkle lamb with salt and freshly ground pepper.

L2
5. In a bowl, combine marinade ingredients.
6. Place lamb in 2-3 layers of clean, plastic grocery bags (or other large sealable bags) on a rimmed baking sheet large enough to hold the lamb. Holding the bags open, pour the marinade over the lamb, taking care to pour some of the marinade into each of the slits filled with garlic and rosemary.

Lamb
7.  Tie the plastic bags together tightly so that the marinade cannot leak out, then place the lamb (still on the baking sheet) in the refrigerator overnight (or for at least 8 hours). If you are so inclined, feel free to massage the marinade into the lamb every so often.

Lamb2
8. In the morning (or after about 4 hours), turn the lamb over so that the other side of the lamb can soak up some of the marinade.
9. Preheat oven to 450 °F. Remove the lamb from the bags (reserving the marinade), pat dry, sprinkle with a bit more salt and pepper, then place the  lamb on a rack set inside a rimmed baking sheet or pan. Insert a meat thermometer into the thickest part of the lamb, but not near the bone. Cook lamb at 450°F for 20 minutes, then reduce heat to 325 °F. Roast lamb until meat thermometer reaches between 145 °F (medium rare) and 160 °F (medium), basting periodically with leftover marinade. For a 6 lb. leg of lamb, total cooking time should be about 2 hours, depending on preferred degree of doneness.
10. Remove lamb from oven, then let rest for at least 15 minutes before carving.

Lamb7


Recipe: Corned Beef with Honey-Mustard Glaze

16 Mar

St. Patrick’s Day at our house has always meant three things: 1) a visit from a  leprechaun who somehow always manages to turn all our milk green; 2) an evening meal consisting of corned beef with honey-mustard glaze, crispy roast potatoes, and cabbage sauteed in olive oil and butter ; and 3) a green dessert — usually a torte made with a zesty lime filling, courtesy of my daughter whose specialty that has become.

However, the corned beef is without doubt the pièce de résistance, despite the fact it requires only three ingredients. It is cooked twice: first simmered until fork tender, and then glazed and finished off in the oven. It is such a beloved dish that we only make it once a year, to retain its special status. But we always make sure to have plenty of leftovers to enjoy for a day or two afterward. Most recently, we made three corned beef briskets — enough for two full meals for four hungry people, with some snacking in between.

Corned Beef with Honey-Mustard Glaze
Servings: 4

1 pkg. flat-cut corned beef brisket  (3-4 lb.), with spice packet
whole grain Dijon mustard (roughly 2.5-3 oz.)
honey (roughly 1-2 tbsp., or to taste)

Preparation

1. Remove the brisket from the package; reserve the spice packet that is usually included. Note: if there is no spice packet, use 1 tbsp. pickling spice, or make your own with 1 tsp. yellow mustard seeds, 1 tsp. black peppercorns, 8 whole cloves, 8 whole juniper berries, 8 whole allspice berries, and 2 bay leaves; place the spice(s) in a small bowl and set aside.
2. Rinse the corned beef, then place in a large pot and cover completely with water. Bring to a boil over high heat, then reduce heat to a medium simmer. After the first boil, use a large cooking spoon to remove the foam that rises to the surface (I ladle the foam into a large bowl and keep the bowl by the stove until no longer needed). Keep removing the foam every 15 minutes or so until very little is being generated.
3. Add the contents of the spice packet (or your own reserved spices) to the corned beef in the pot, reduce heat to a low simmer (you want to see some gentle movement in the water, but do not want it at a full boil), partially cover the pot, and let the beef simmer for about 3 hours, or until fork tender. Top up with additional water as needed.
4. Carefully lift the brisket out of the pot and place on a rimmed cookie sheet. When cool enough to handle, use the side of a fork (the outer edge of one of the tines) to gently scrape off any fat that is on the brisket. Make sure to remove all visible fat.
5. Spray a baking dish (or another cookie sheet) with cooking spray, and place the brisket on the dish/sheet. Heat oven to 400 degrees.
6. Put the mustard in a small bowl and mix in the honey; adjust quantities of each to suit your taste. (I usually make the glaze without measuring either ingredient; I taste test until there is just enough sweetness to the mustard.)
7. Spoon the glaze over the corned beef, then bake until the corned beef is warm and the glaze is beginning to turn golden.
8. When serving, slice across the grain.

Recipe: Bolivian Peanut Soup with Chicken (Sopa de Mani)

3 Mar

Bolivian Peanut Soup is a one-bowl wonder, the ultimate comfort food–especially with fried potatoes and queso fresco (or the un-Latin American but perfectly substitutable feta cheese) sprinkled on top. Traditionally, the soup is made with beef bones, but I prefer to make it with small pieces of boneless chicken breast instead; chicken and peanuts have a natural affinity for each other, and chicken makes the soup a bit lighter. This can easily be made vegetarian or vegan, too, by omitting the chicken and making the soup with vegetable broth. The 1 tbsp. chili paste listed here adds a mild kick to the soup–if you like heat, add more.

Bolivian Peanut Soup with Chicken (Sopa de Mani)

1 cup (150 gr.) roasted unsalted peanuts
3 tbsp. peanut or canola oil, divided in half
2 large boneless chicken breast halves (about 1.5 lb./680 gr. total), cut into small bite-sized pieces (about 1/4 inch)
1 lg. white onion, diced
1 large carrot, coarsely grated
2 tsp. cumin
1 tsp. oregano
1/2 tsp. turmeric (or palillo)
1 tbsp. aji amarillo paste (yellow chili paste), available at international/Latin food markets
2 lg. potatoes, peeled and diced
6 cup (1.4 liters) chicken broth
salt and pepper
chicken bouillon cube or powder (if needed)

Garnish
2 large potatoes, julienned, and fried in oil until golden
crumbled queso blanco (or feta)
chopped parsley or cilantro

Preparation
1. Grind the peanuts almost to a powder in a food processor (or pound them in a mortar and pestle in several batches); set aside.

Crushed peanuts

2. Heat 1.5 tbsp oil in large Dutch oven over medium-high heat, add the chicken, and cook until no longer pink; remove the chicken from the pot along with any juices that may have accumulated, and keep warm.
3. Add the remaining oil to the pot, then cook the onion and carrots until the onion is soft, stirring occasionally.  Mix in the spices and aji amarillo (yellow chili) paste and cook 1-2 minutes.

One of the many brands of aji amarillo paste

4. Add the potatoes and peanuts to the pot, and stir well to coat.

Onions, carrots, potatoes, peanuts, and spices

5. Pour the broth over the vegetables, cover the pot, reduce the heat to low, and simmer about 20-30 minutes until the potatoes are tender. Blend the soup with an immersion blender (or in a standard blender, in batches, returning soup to pot after it is blended). Add chicken pieces and accumulated juices to the soup  and simmer another 15 minutes, adding a bit more broth if the soup appears thick. Season to taste with salt, pepper, and/or a chicken bouillon cube or bouillon powder if needed.


Soup, pre-garnish

6. Before serving the soup, fry potatoes until crisp; salt lightly.
7. Ladle soup into bowls, top with fried potatoes, then sprinkle with cheese and parsley (or cilantro). Serve immediately.