Corn tassel consisting of individual spikelets, with anthers hanging from filaments
Last year, I carved out a patch in the vegetable garden, planted some corn kernels, and was very excited when the sprouts emerged. But a few days later, all the sprouts were severed, laying forlornly on their sides where they had fallen. Upon closer inspection, the sprouts had been pulled up and the corn kernels had been chomped off at the base — clearly the work of chipmunk commandos who had infiltrated the garden at the crack of dawn. Chipmunks 1, me 0.
This year, I planted seedlings instead of kernels, crossed my fingers, and hoped for the best. As of yet, there haven’t been any corn massacres, so I’ve been able to watch corn plants grow for the first time — and admire their constituent parts. There is a lot to notice, from the stripy leaves…
Macro view of corn leaf
… to the beguilingly named tassels and silks. The highly recognizable tassel at the top of every corn plant is the male part of the plant, and consists of about 1,000 spikelets, each containing 3 pollen-producing anthers and their filaments (collectively, the stamens). With 6,000 pollen-producing units on each corn plant, that’s a lot of pollen to be wind dispersed (read more about pollen shed in this great article on “sex in the corn field“).
(l-r): Emerging tassel, anthers peeking out (exserting) from individual spikelets, tassel with anthers hanging by their filaments
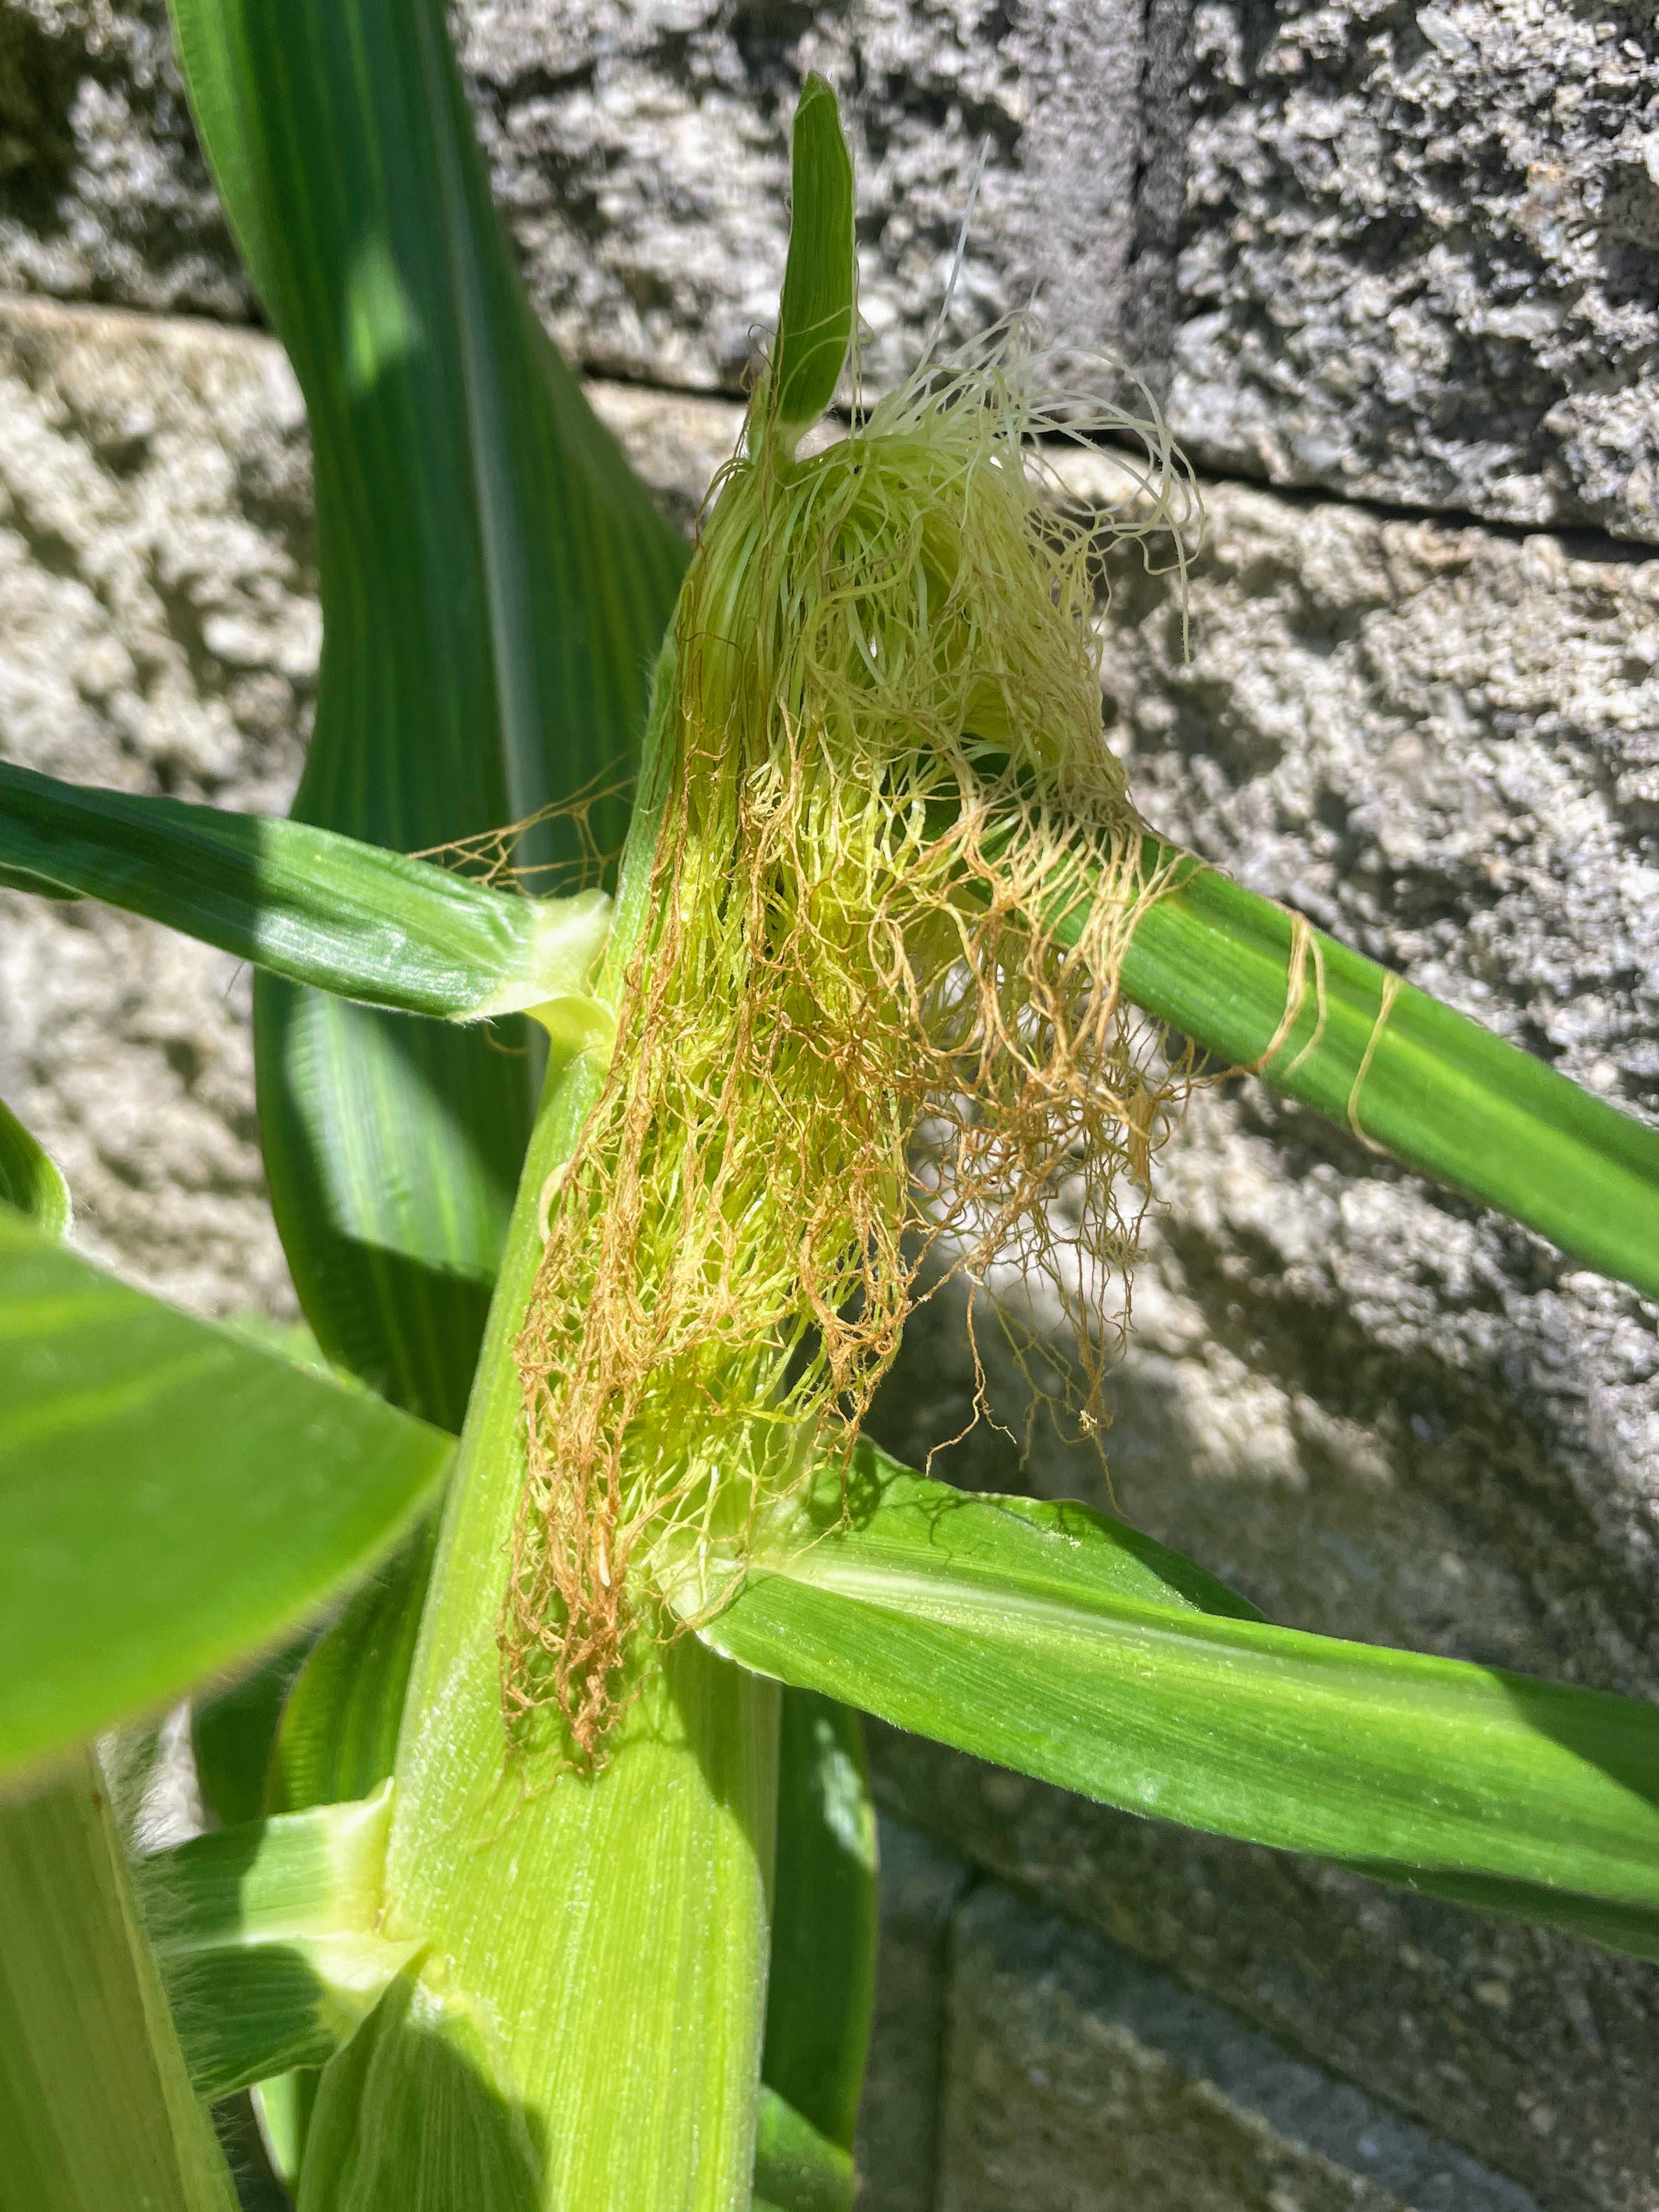
The silks are the female part of the corn plant. They form at the base of the ear but are most visible at the tip, emerging from the husk. Their job is to catch the pollen and guide it down to the unfertilized corn kernels (ovules) on the ear. Here’s the fascinating part: Each silk is connected to a kernel (or what would be a kernel if successfully pollinated). As not every ovule gets pollinated, most ears produce about 400 to 600 kernels.
You can tell when pollination has occurred because the silks dry up, turn brown, and often fall off. You can also tell when pollination hasn’t been very successful if your ear of corn has missing or misshapen kernels. That’s why it’s important for home gardeners to plant corn in a block rather than a single row, so the pollen has more chance of falling on nearby silks rather than being completely blown away from the row.
(l-r): Emerging husk, silks popping out of top of husk, silks turning brown after pollination
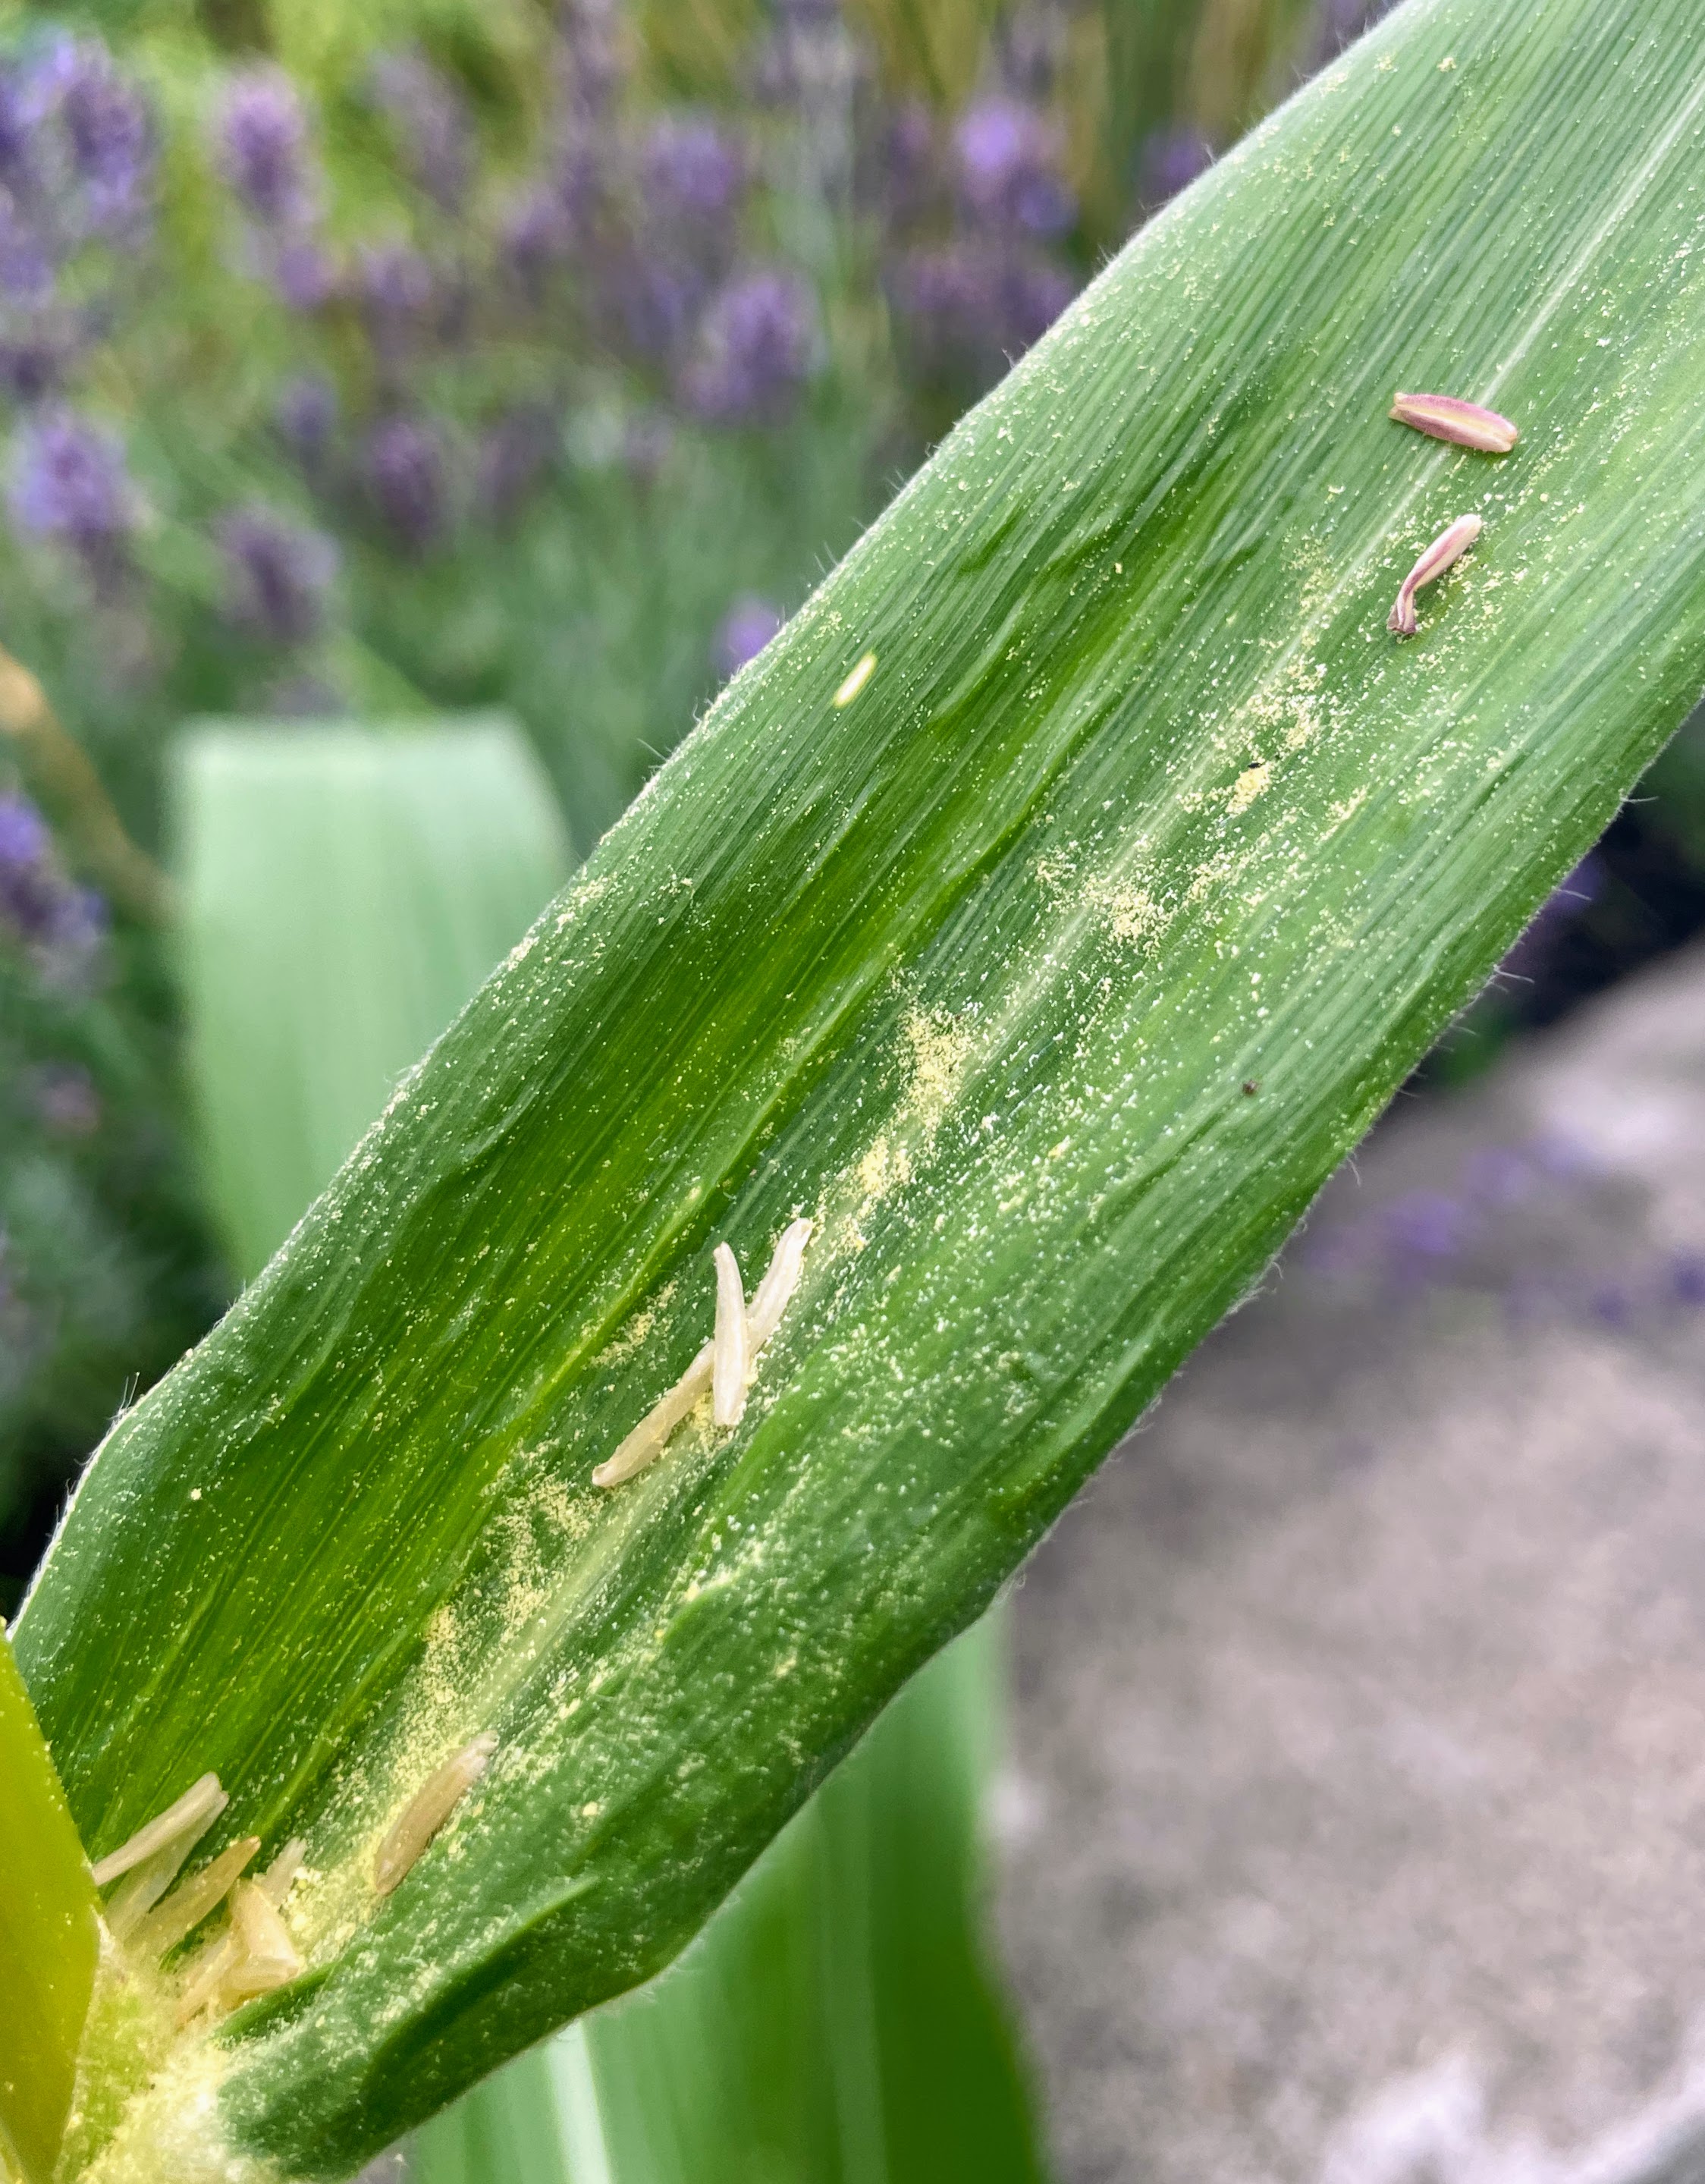
I don’t have any photos of pollen on the silks, but this is what the tiny yellow pollen grains look like on a corn leaf, along with some spent anthers (they drop off the tassel after the pollen is shed).
Some of the 2-5 million pollen grains produced by each corn tassel (and some anthers)
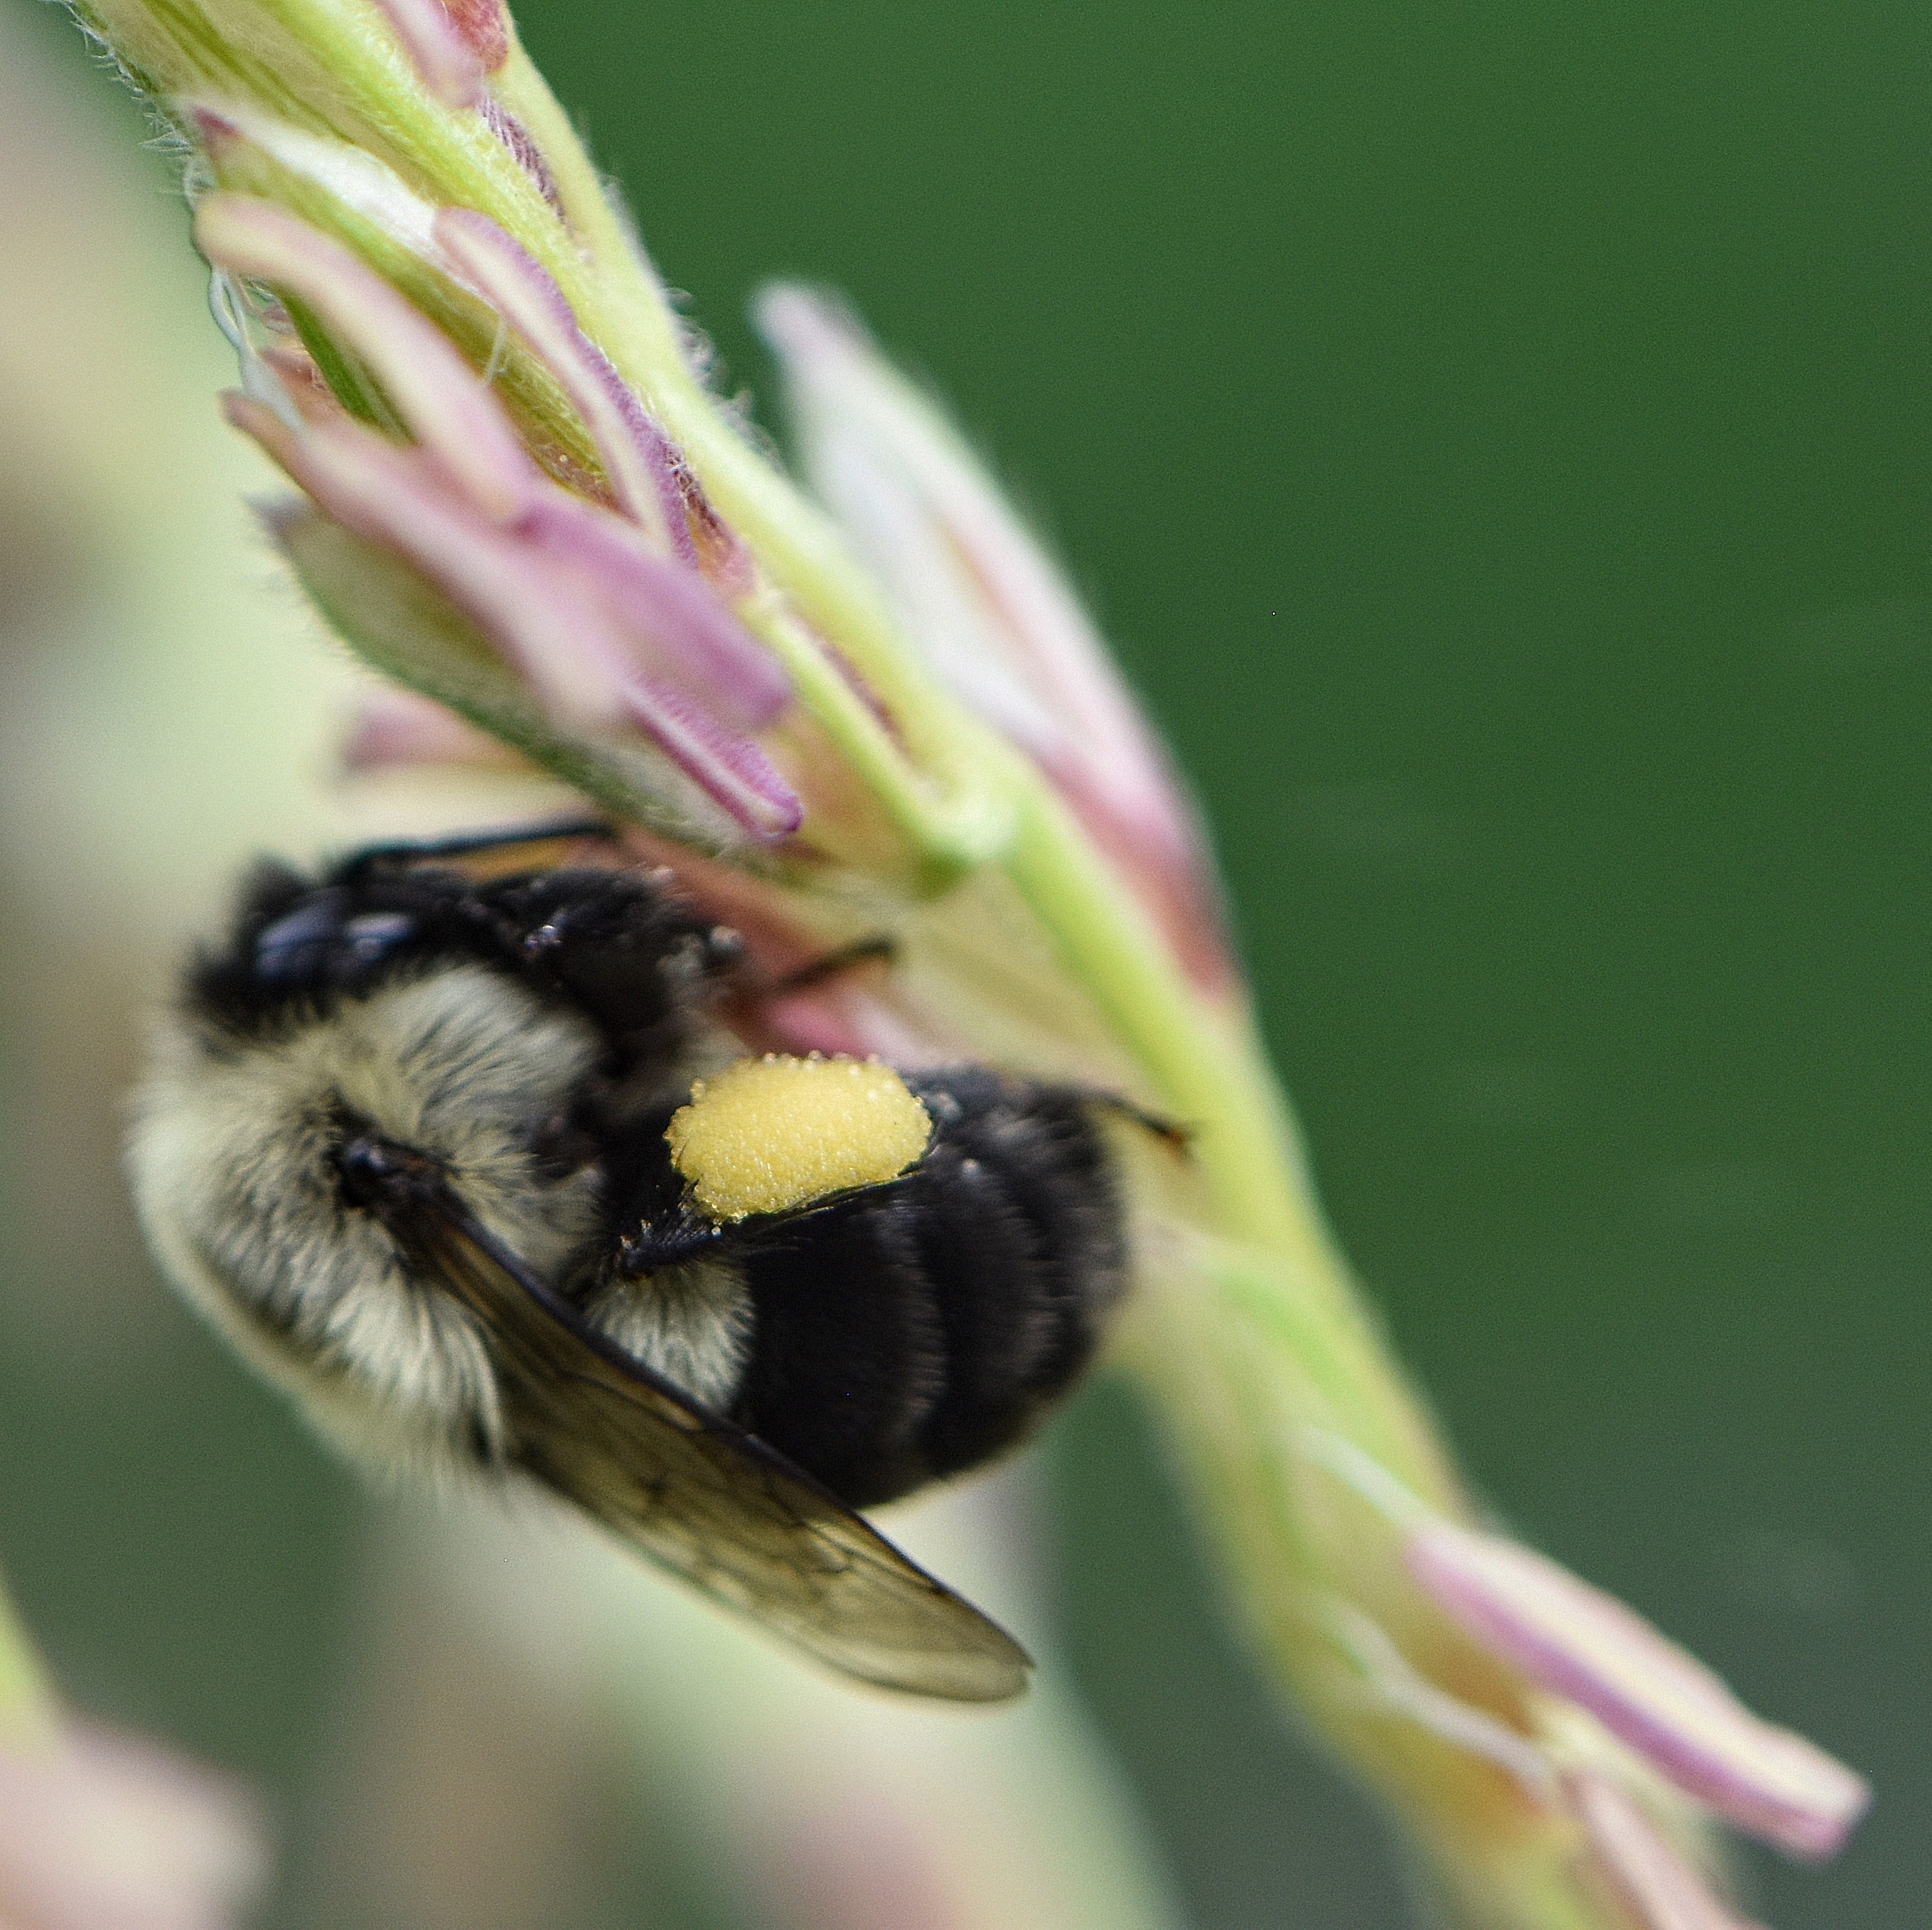
Though corn is pollinated by the wind (anemophily), pollination can also occur with the help of insects (entomophily). Luckily for me, as I was taking photos of the tassels, a bumble bee appeared. Or, more specifically, a female bumble bee appeared–as the females are the only ones to have pollen baskets (corbiculae) on their hind legs.
I had bad luck growing lupines from seed last year; the resulting plants started out well but didn’t make it past spring. I’d like to blame the local rabbits, except for the fact that lupines are poisonous, so maybe a very brave rabbit could have eaten one of my small lupines, but certainly not all of them. So it was probably the fault of a human who shall not be named, not a leporid.
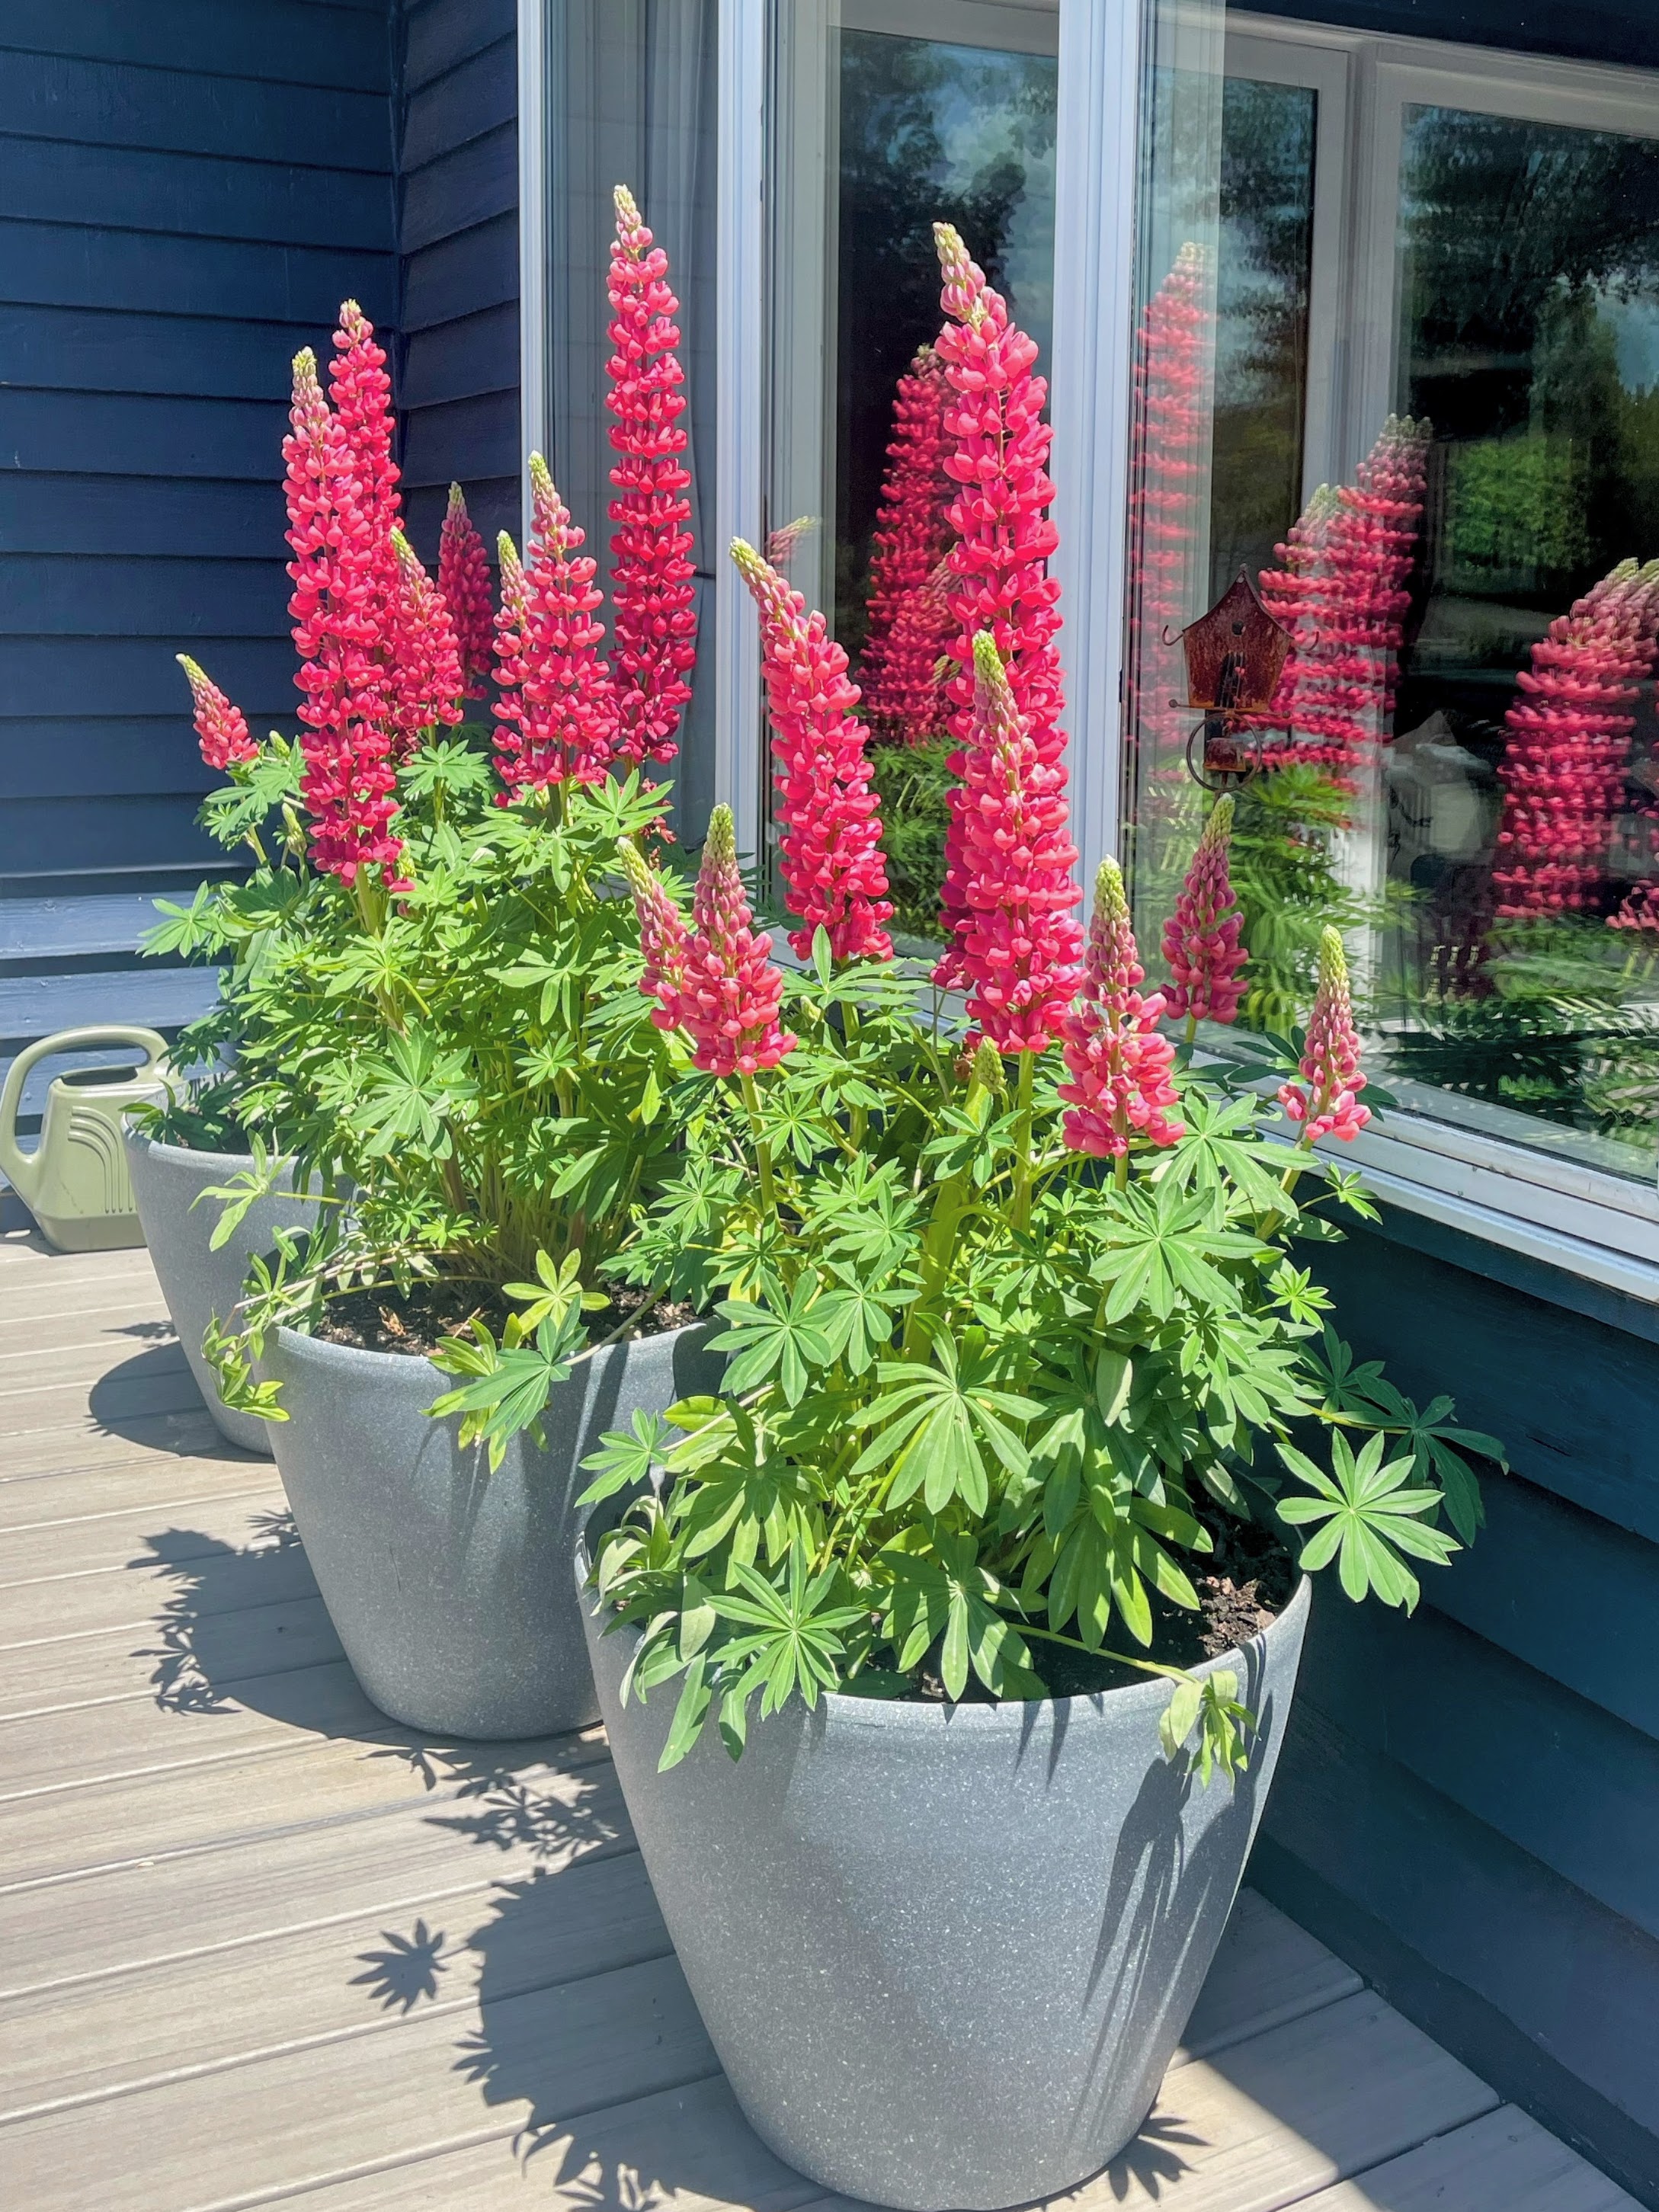
Still traumatized from last year’s lackluster lupine experience, I decided I would not start any from seed this year. In fact, I would not have any lupines at all. But then, while at a garden center for something else entirely, I walked past three magnificent specimens in full bloom (with many more blooms to come) and couldn’t resist. They were far more spectacular than my seed-started lupines had ever been, and I had three large, empty deck pots back home. So I decided to try them as container plants. If that doesn’t work, I’ll need a Plan C.
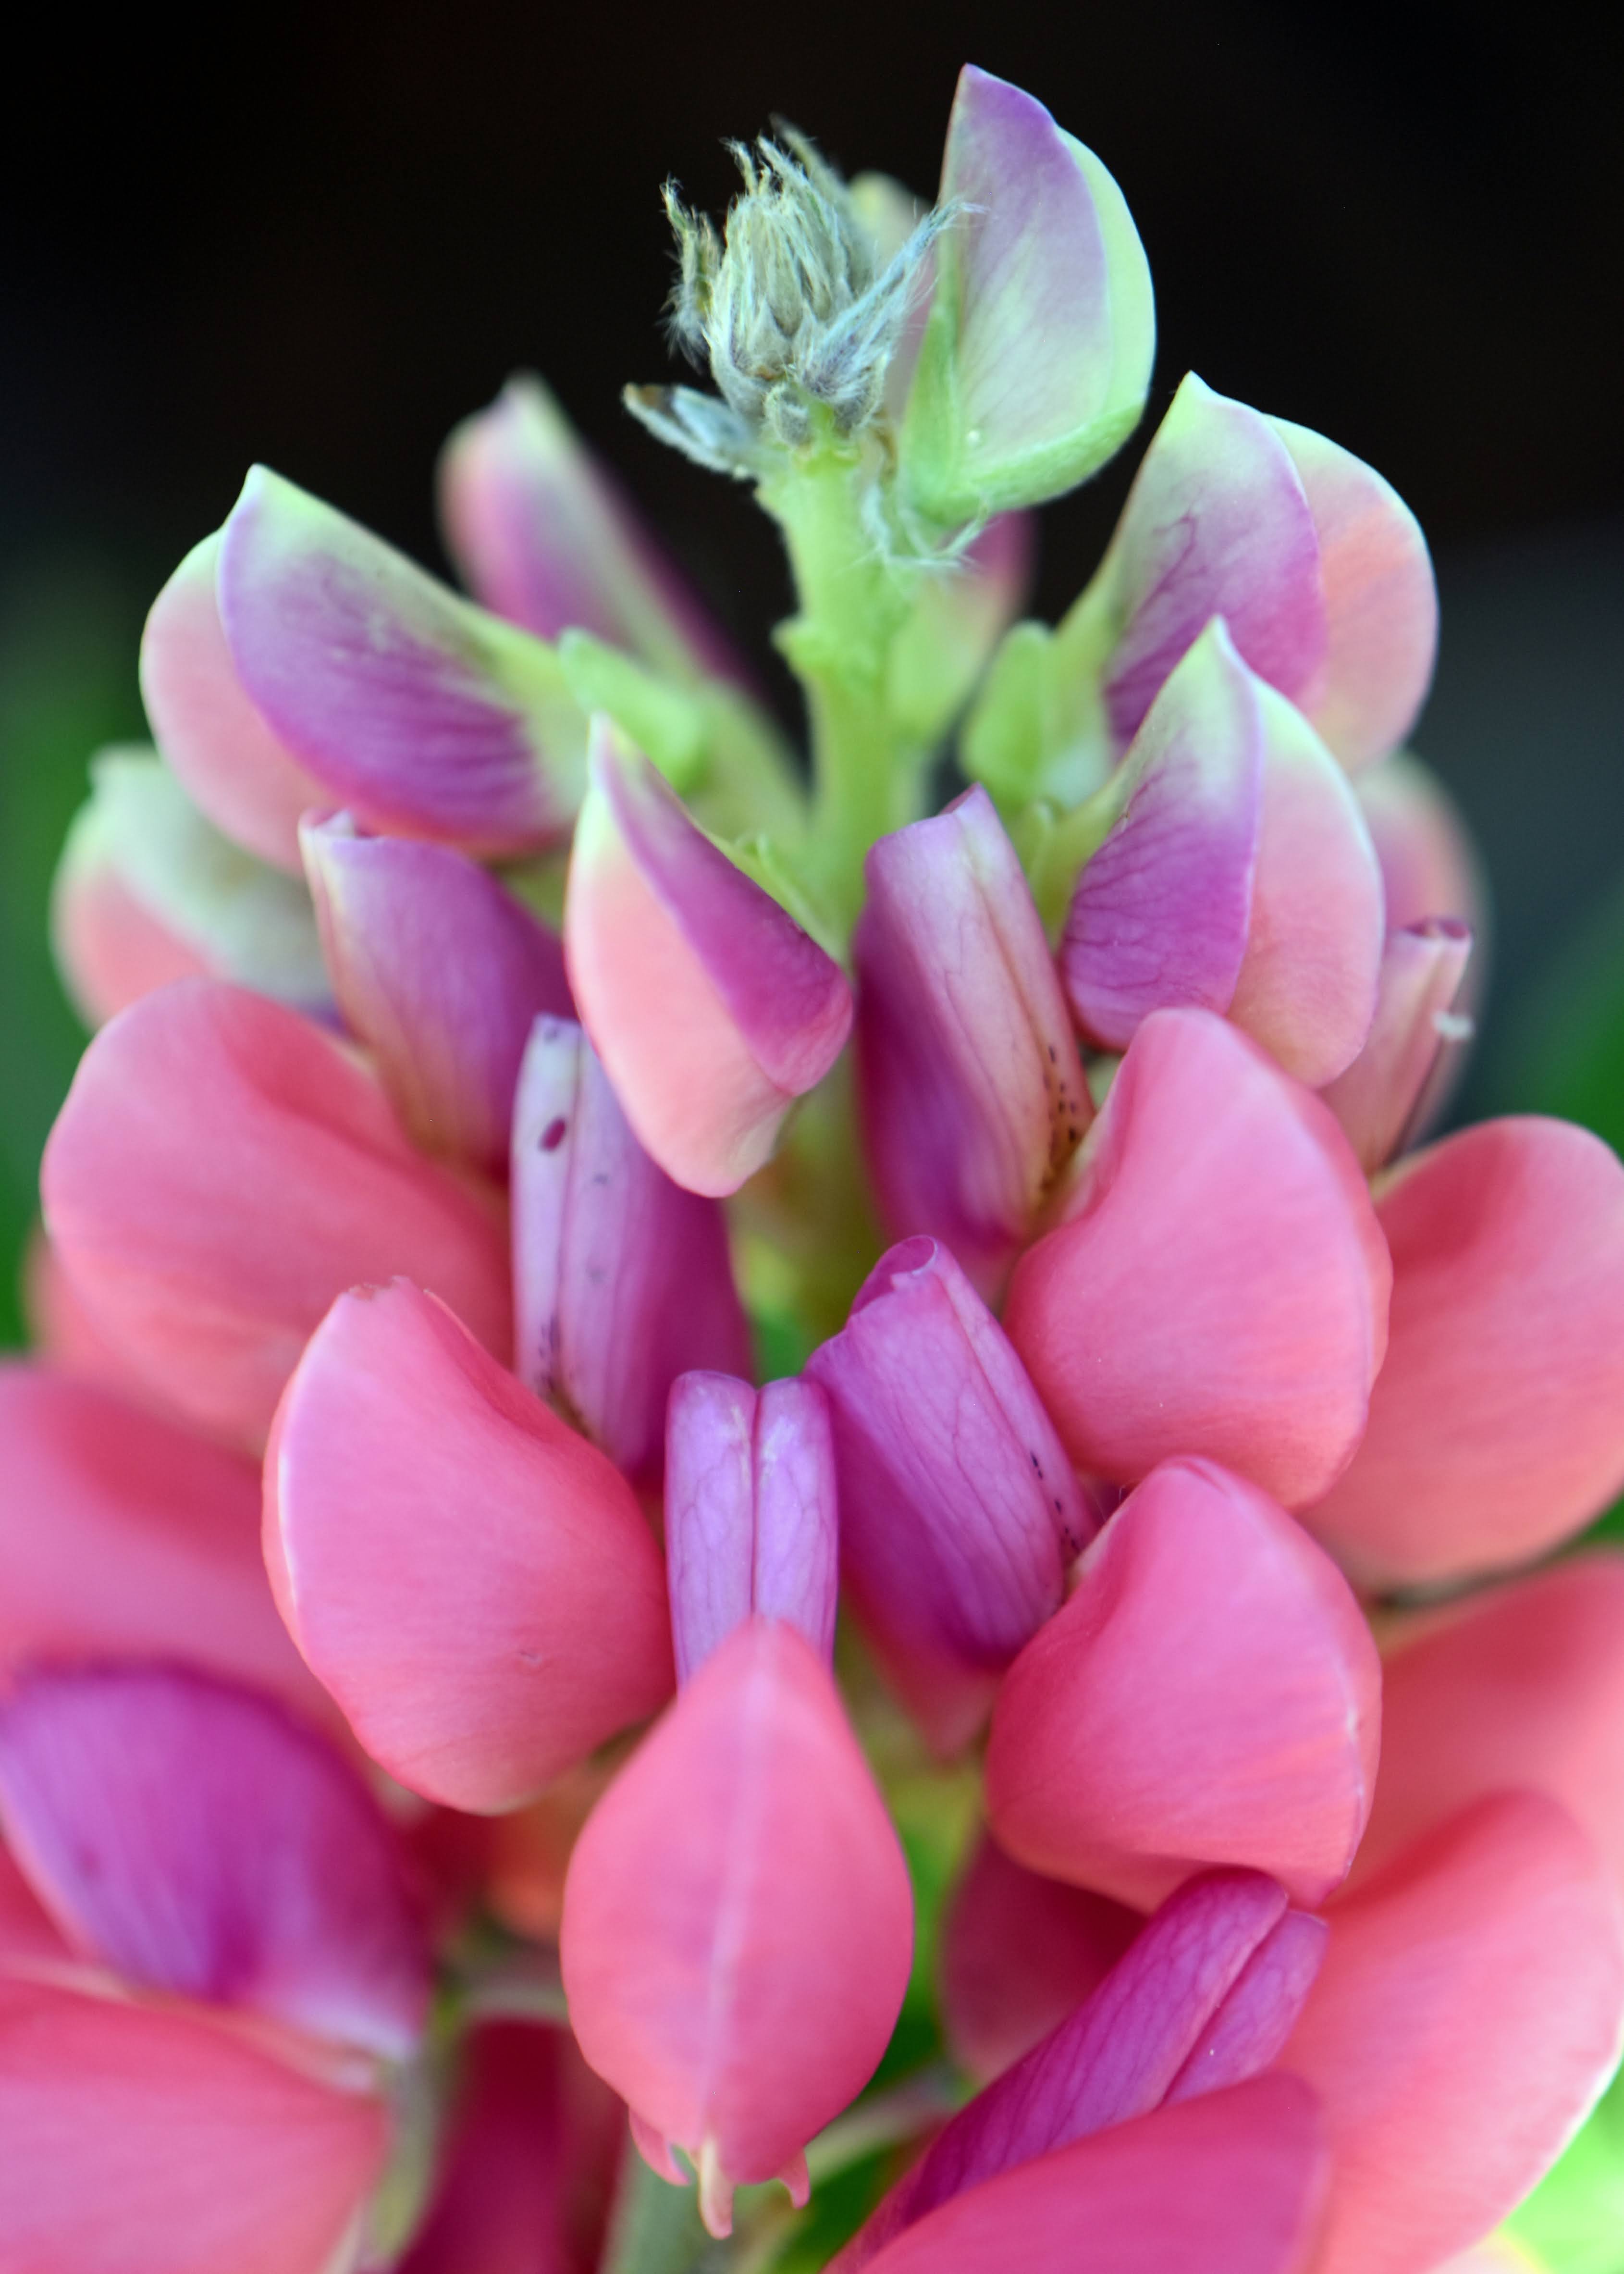
Lupines are part of the Pea family (Fabaceae) along with baptisia,* broom, clover, milkvetch, trefoil, and others. The flowers grow on long spikes called racemes, with the flowers blooming from the bottom of the spike on up. The flowers themselves are distinctive, consisting of five petals. One forms an upright banner, two are lateral wings, and two are fused together to form a curved keel (so called because it resembles a boat’s keel).
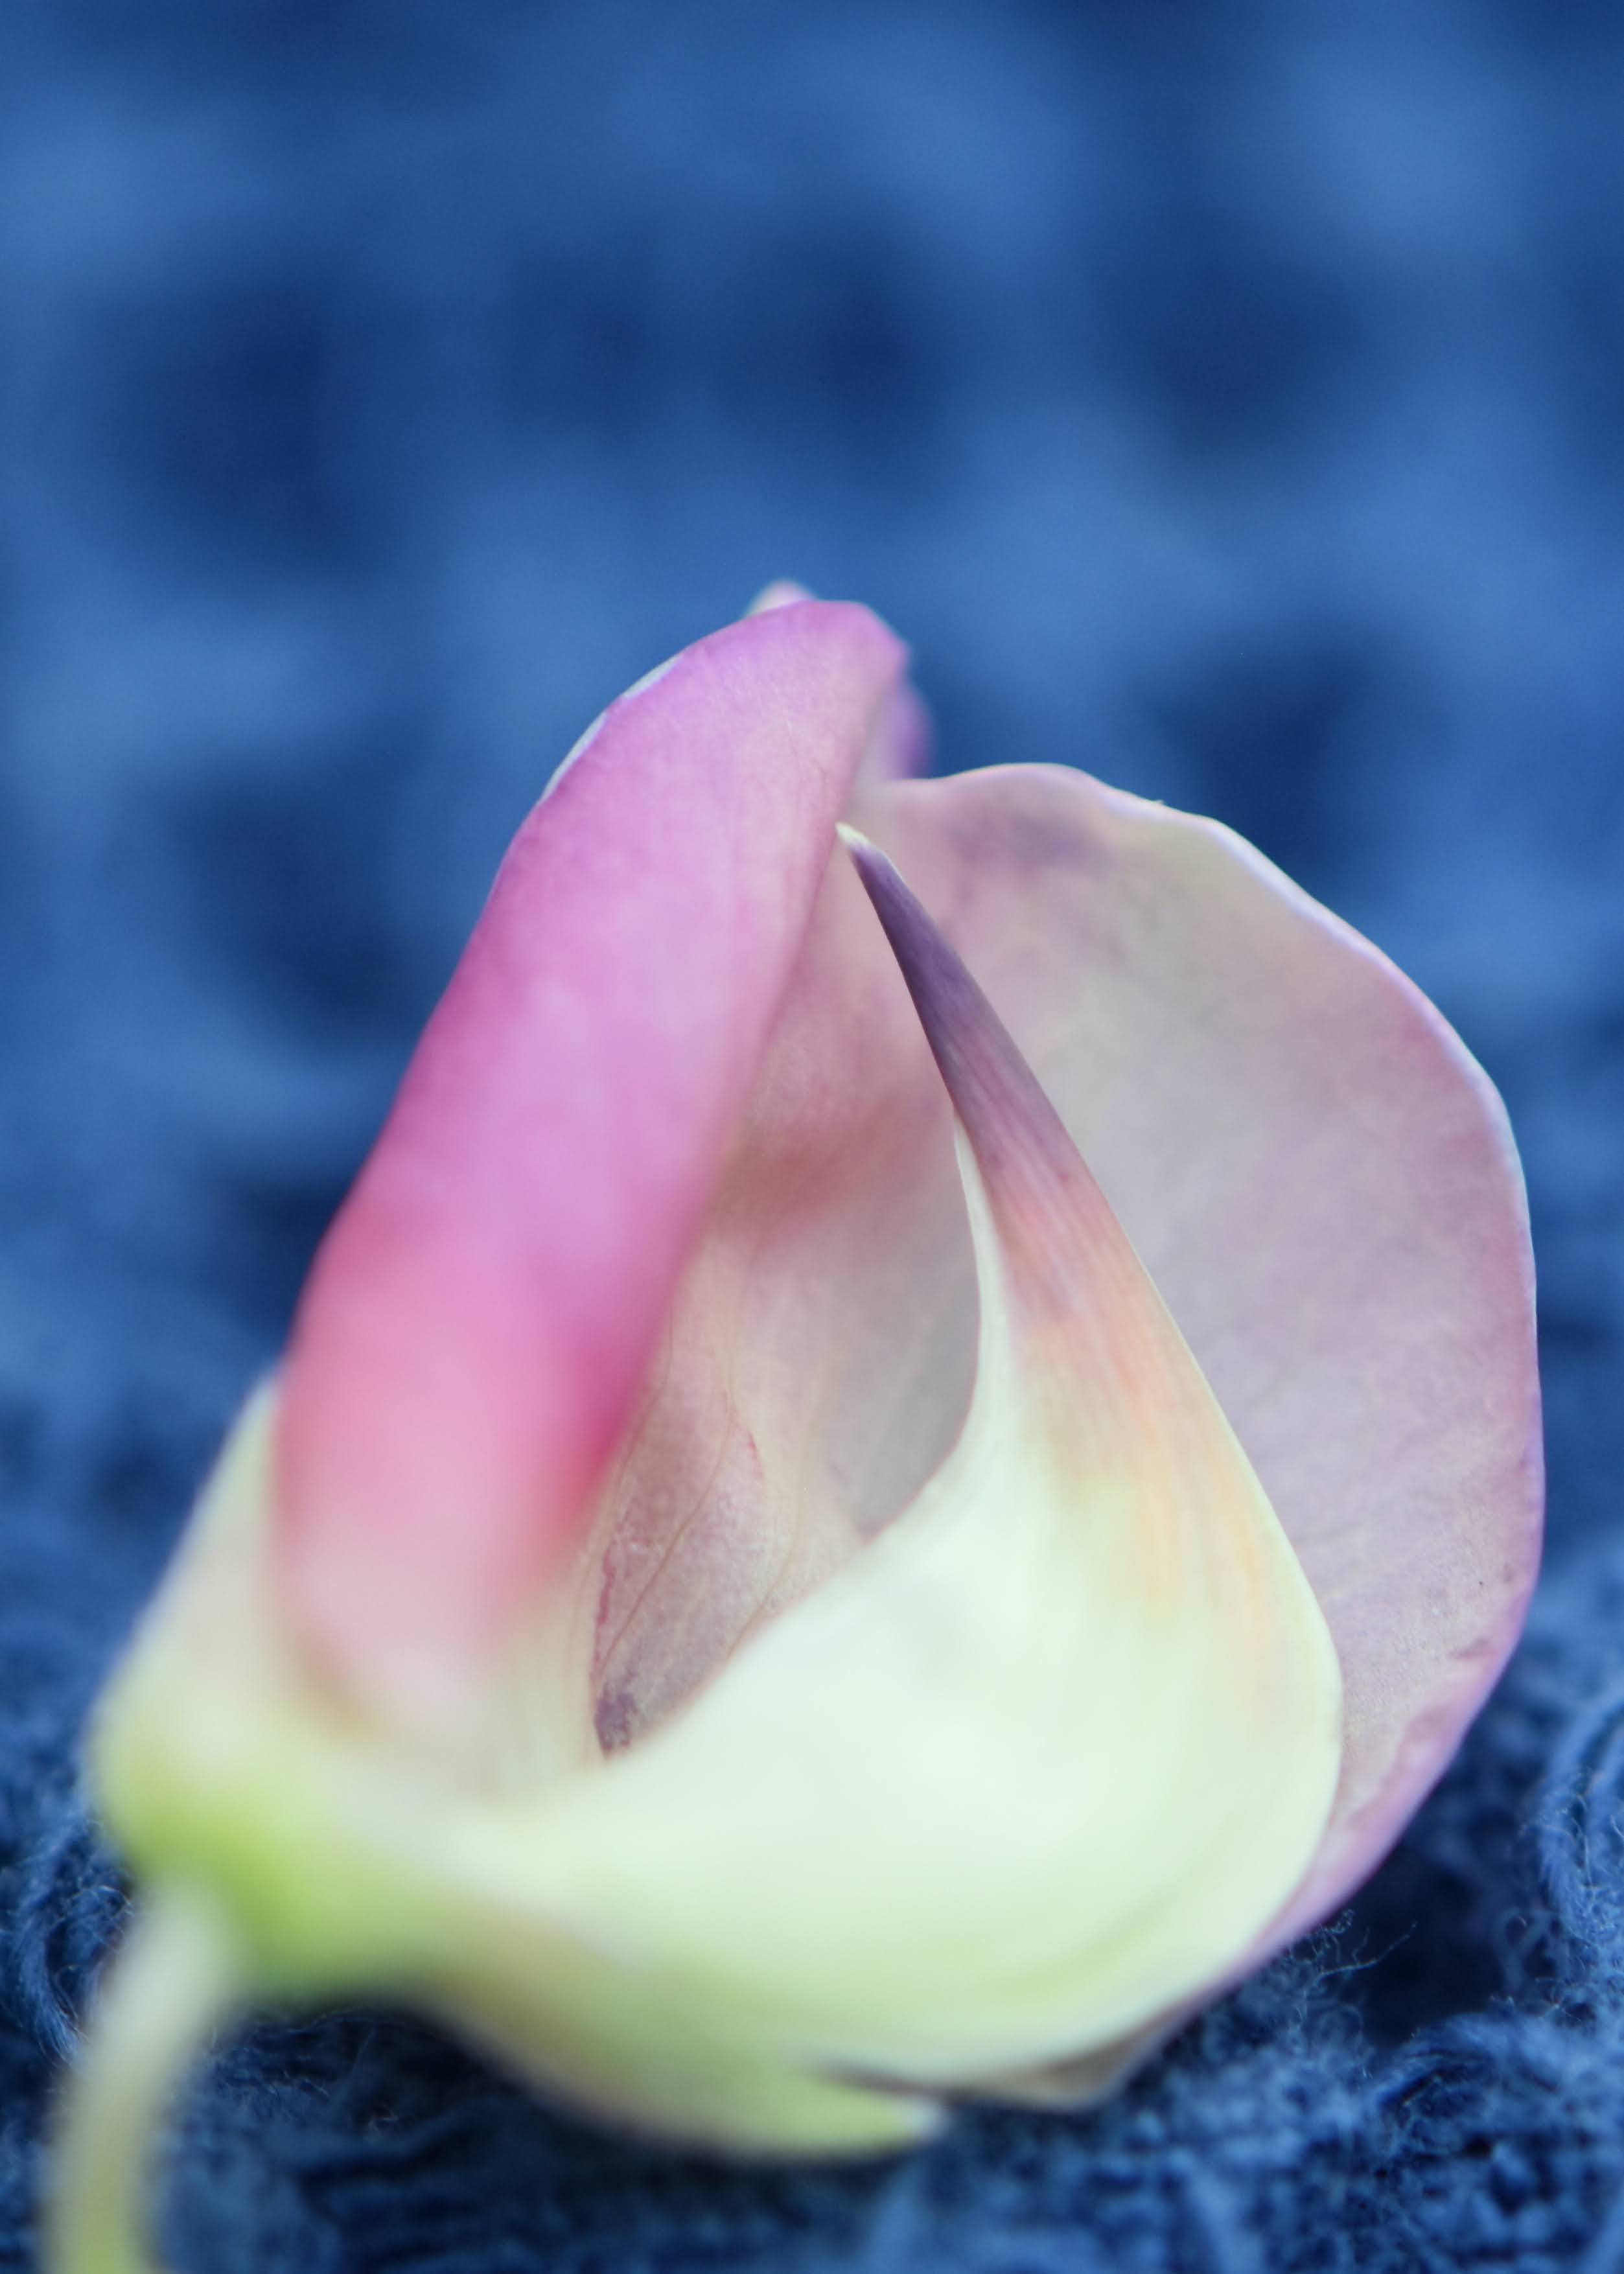
(l-r): Pink wings and purply-white banners; Exposed keel; Open wings, dark keel with reproductive parts emerging
With their lighter-colored center markings, the banners act as sign posts to attract pollinators, ie, bees. (Though most lupines can self pollinate, bees can also help). The two wings form the distinct pea-flower shape and surround the keel, making it hard to see; in the middle photo above, I peeled away one of the wings. The keel protects the flower’s reproductive parts, which are tucked inside it. When a bee lands on the wings, they open up like a clam and expose the keel, which also opens slightly. The bee pollinates the flower by knocking the stigma and anthers together, and in the process collects pollen to feed to its young. The banner then does a really cool thing: it changes color after pollination, to let the bees know there is no more pollen to be had at that particular flower.
So, while the beautiful exteriors of these flowers deserve all the admiration they receive, what they have going on within is pretty fascinating, too!
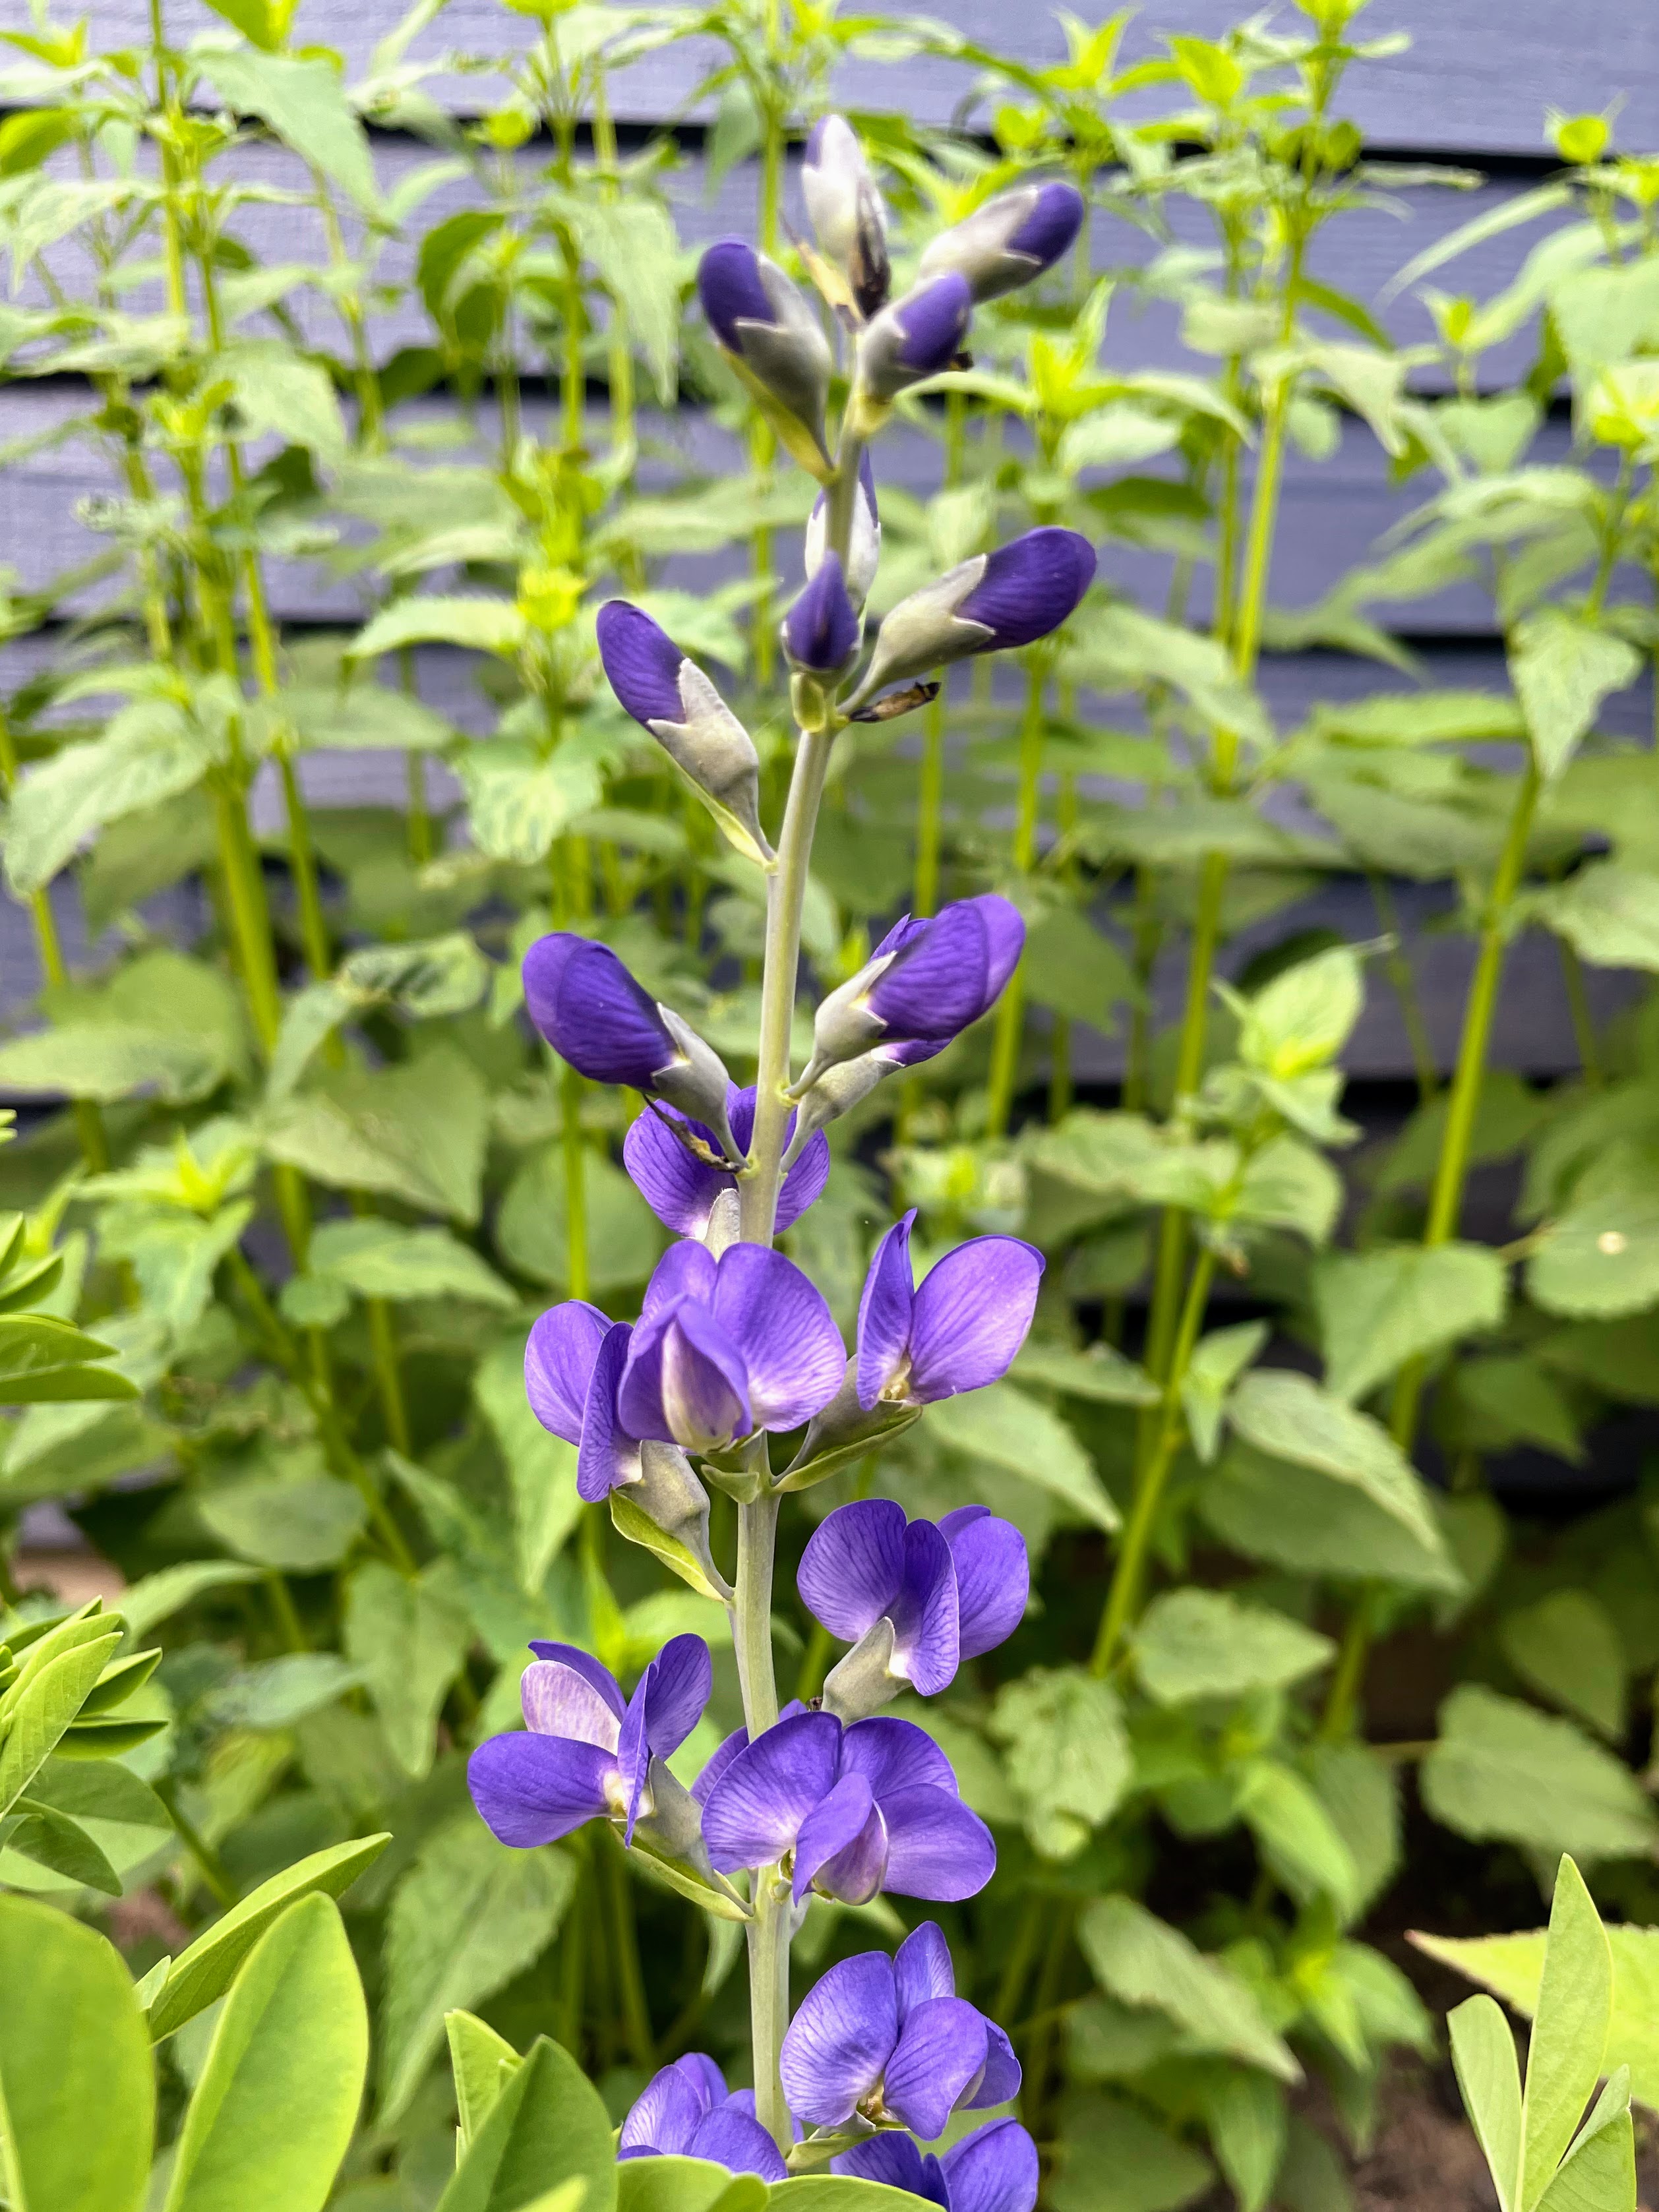
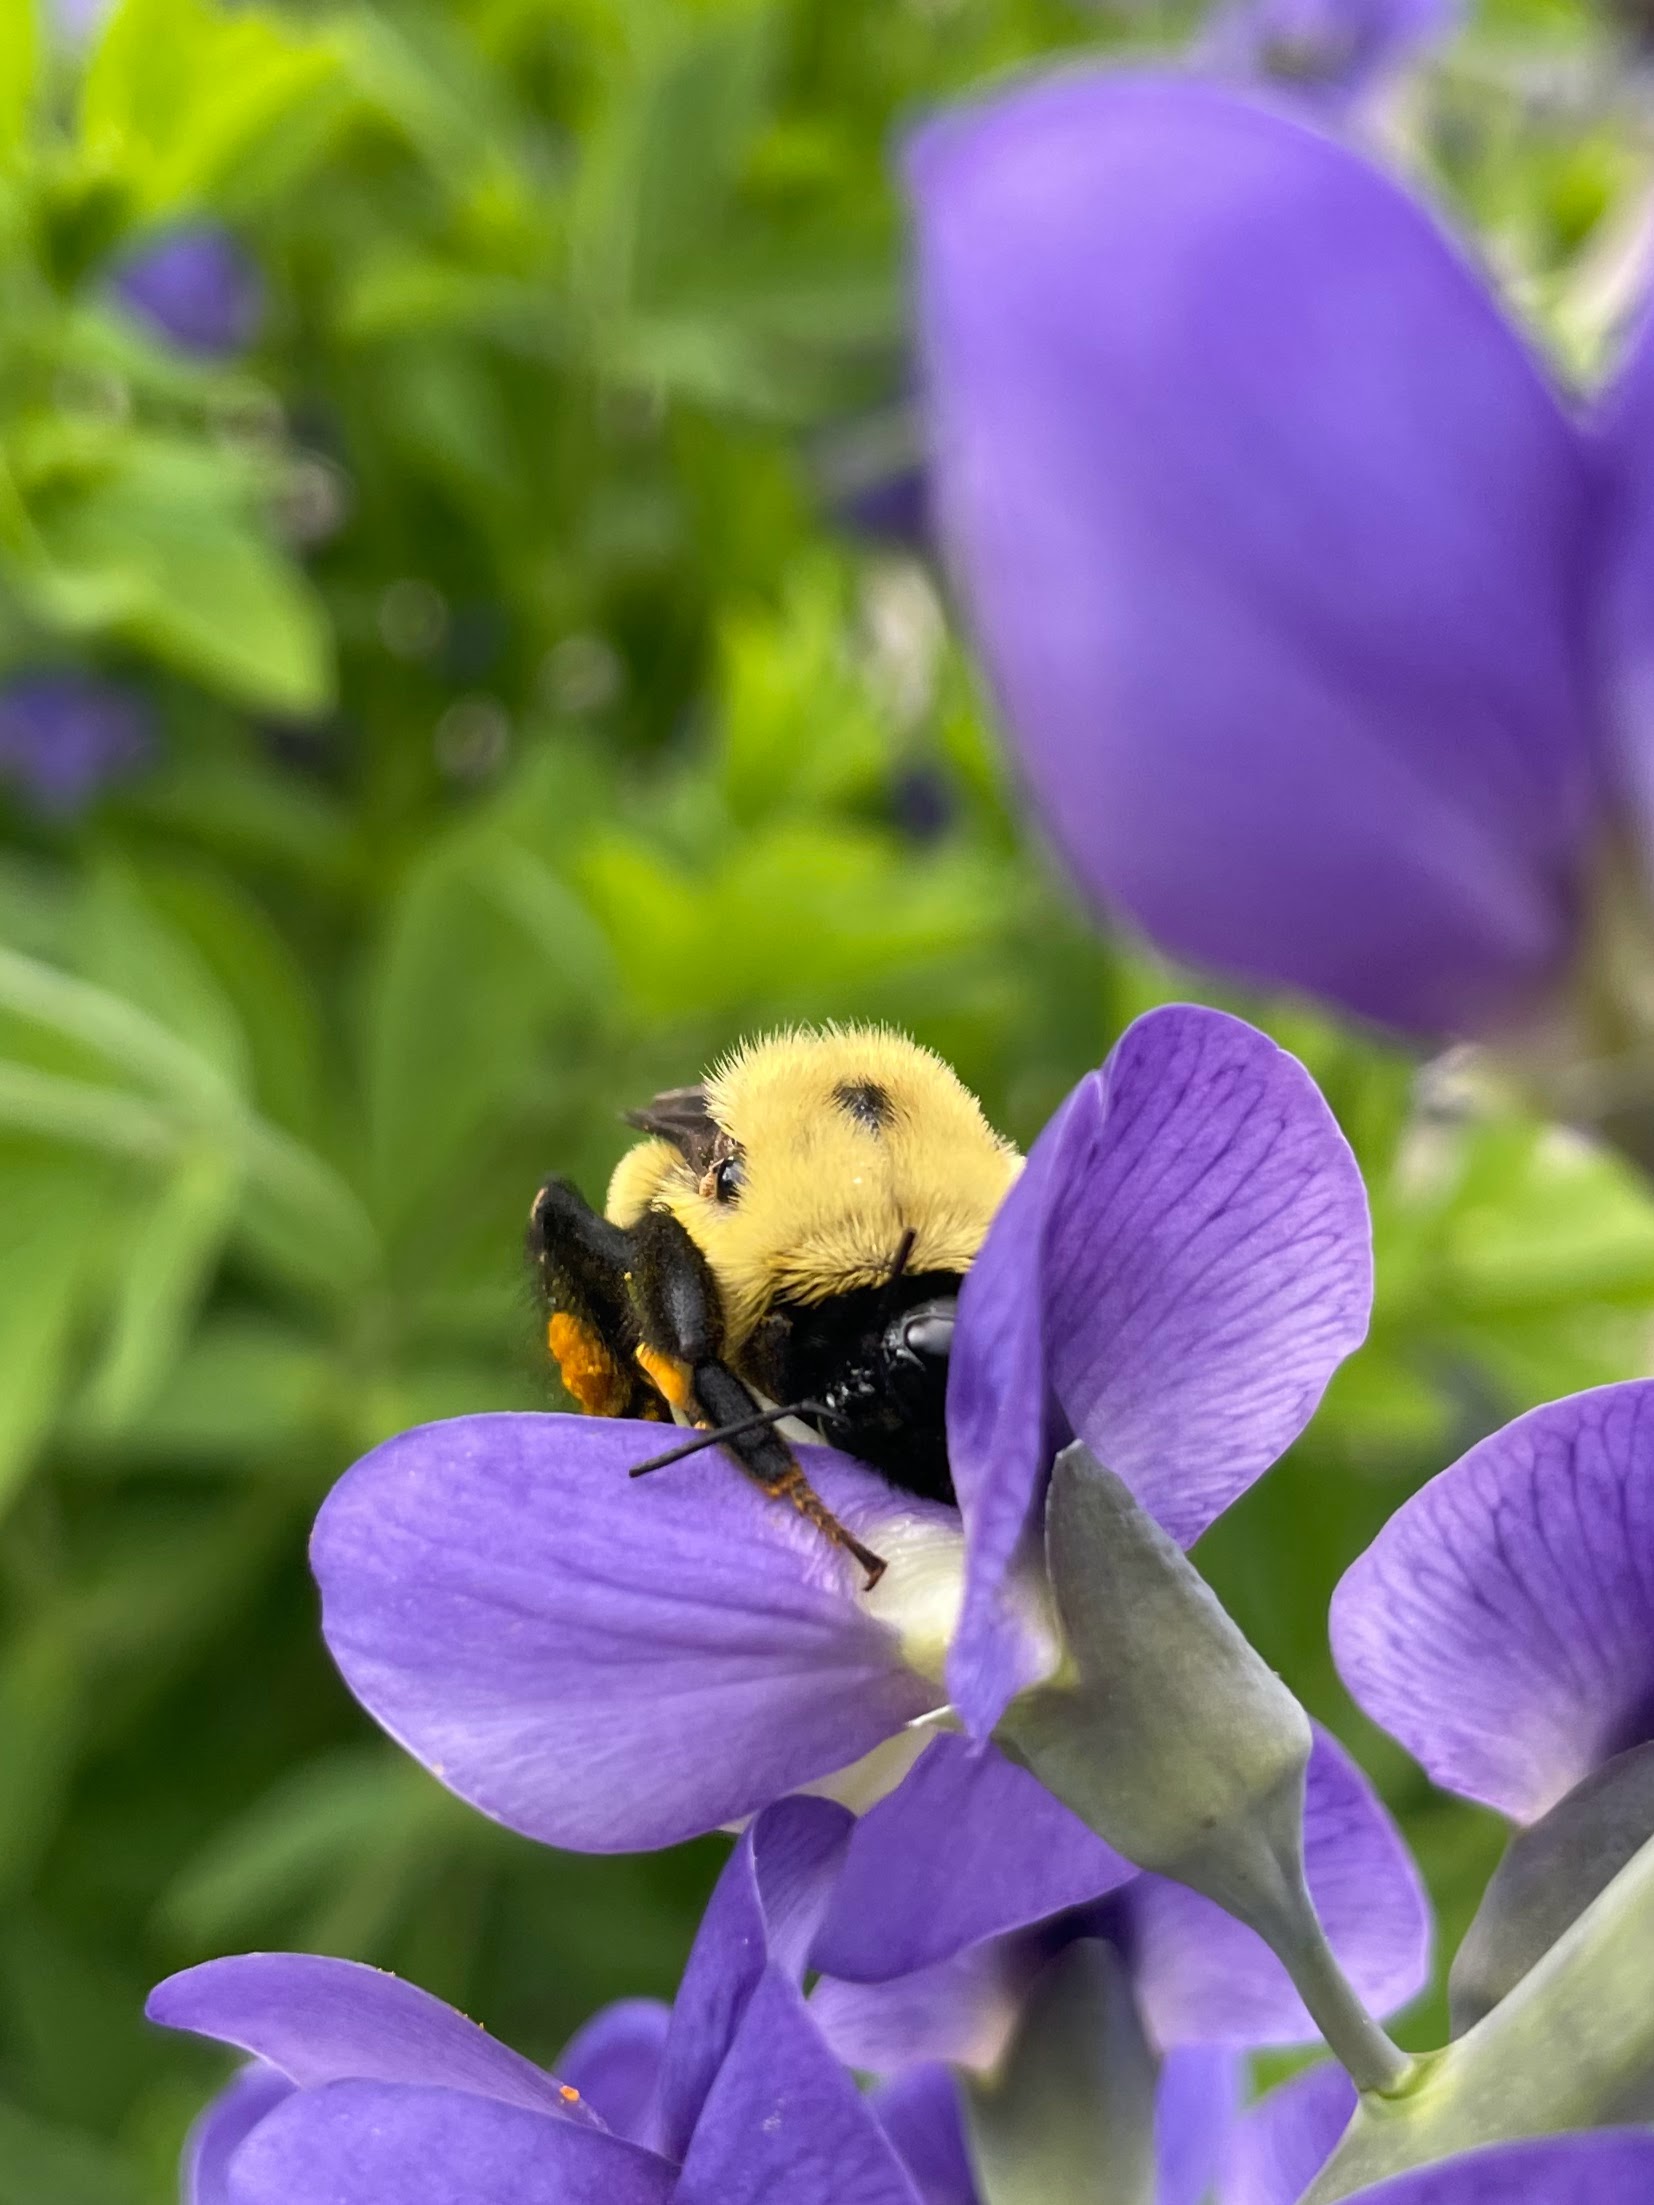
*For flower-comparison sake, here are two photos of Baptisia australis, which also belongs to the Pea family and has banners, wings, and keels. In the last photo, a bee has found its way to the pollen thanks to the banner markings.
(l-r): Baptisia flowers, with banners, wings, and keels underneath; Bee looking for pollen
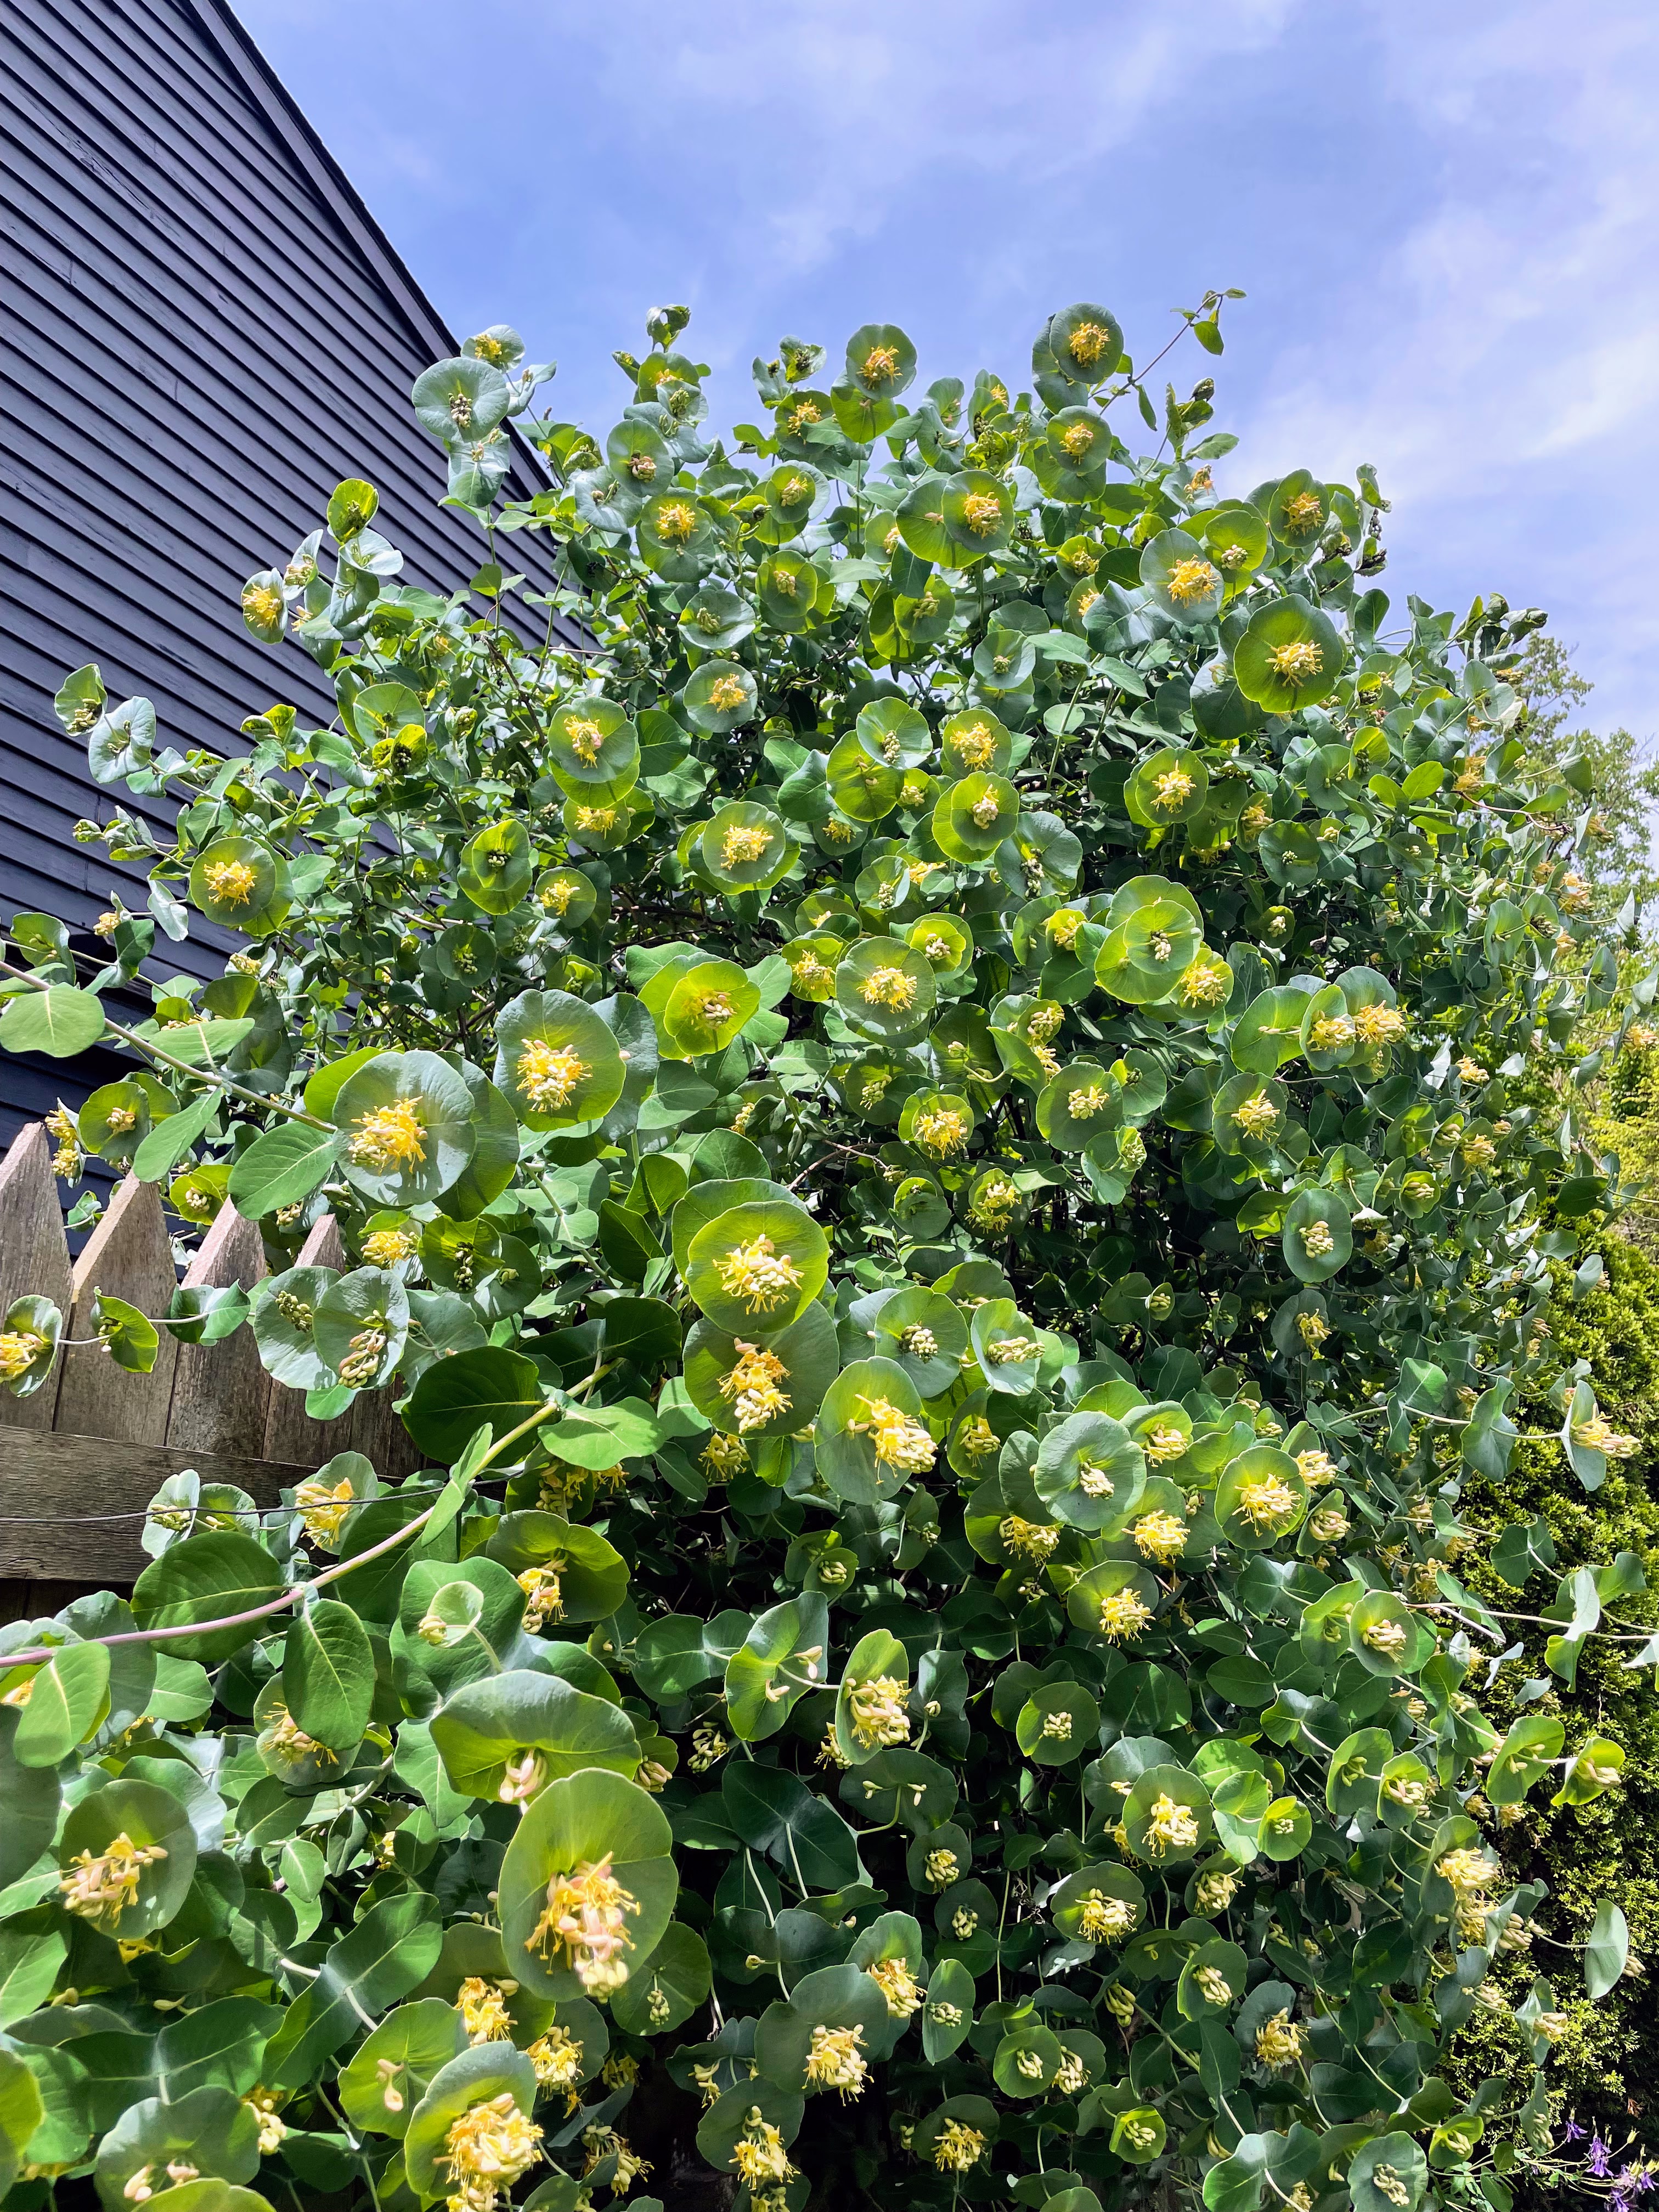
I am lucky in that I have a neighbor who loves plants and gardening as much (if not more) than I do. She has a number of unusual plants in her garden, but one of my favorites is a vine I have never seen anywhere else. Nor had I ever heard of it before, either: a “Kintzley’s Ghost” honeysuckle (Lonicera reticulata). And doubly lucky for me, it grows against the fence between our two houses, so I get to see it in all its glory.
This photo was taken at the end of May. Its tubular yellow flowers are quite pretty and though they are slightly fragrant, they don’t have that full honeysuckle aroma. What sets “Kintzley’s Ghost” apart, though, are the circular bracts surrounding those flowers. Bracts are modified leaves; in this case, the circular bracts are different from the plant’s other, more usual-looking leaves. Since bracts often help play a reproductive role, perhaps these round bracts serve as a sort of bullseye, drawing pollinators’ attention to the center of the circles, where the flowers are, and later, drawing birds’ attention to where the berries have developed. Butterflies and hummingbirds are among the “Kintzley’s Ghost” many admirers, as are humans.
Not only are the bracts eye catching because of their shape, but also because they taken on a silvery-white cast that reminds some people of a Silver Dollar eucalyptus. Because of this coloration, the vine has been described as being “a galaxy of full moons” when it is in its silvery phase later in the season. Unfortunately I don’t have a photo of the full galaxy, just a couple moons (first photo below, taken in October). Eventually, the silvery-white green color gives way to yellow as winter approaches (second photo below).
There is a bit of mystery to the history of this heirloom native honeysuckle, which adds to its allure. It was propagated in the 1880s by William Kintzley, who worked in the greenhouses at Iowa State University, but it was never released commercially. Instead, Mr. Kintzley gave cuttings of the vine to family members. Over time, the plant dropped out of other people’s sight and minds. It was rediscovered in 2001, when someone from a local nursery in Fort Collins, Colorado saw the masses of yellow flowers and round bracts down a side street. As the story goes, he walked up to the house to ask about this very unusual honeysuckle vine and found himself speaking with the elderly grandson of William Kintzley.
The vine is now offered for sale, but can be hard to find. My neighbor was visiting a nursery in Wisconsin about five years ago, when she, too, was mesmerized by her first sight of a mature “Kintzley’s Ghost” vine growing up a barn at the nursery; they can get up to 12 feet high. She bought a small 8-inch clipping and brought it home; it clearly likes the mini ecosystem between our two houses, because it is now more than 8 feet tall.
In general, this honeysuckle variety is pretty happy-go-lucky. It will grow in almost any soil as long as it is relatively moist. And it is very cold tolerant; “Kintzley’s Ghost” is hardy to Zone 4 in the United States, which means it can tolerate temperatures as low as -30°F (-34.4°C). Since it is a vine, it needs some structural support such as a trellis, fence, or wall.
Should you be lucky enough to find one and to be able to grow it in your region, you will be forever grateful–as I am to my neighbor who shares it with me.
I came across this poem recently, by Ian Emberson:
A weed is a flower in the wrong place, a flower is a weed in the right place, if you were a weed in the right place you would be a flower; but seeing as you’re a weed in the wrong place you’re only a weed – it’s high time someone pulled you out.
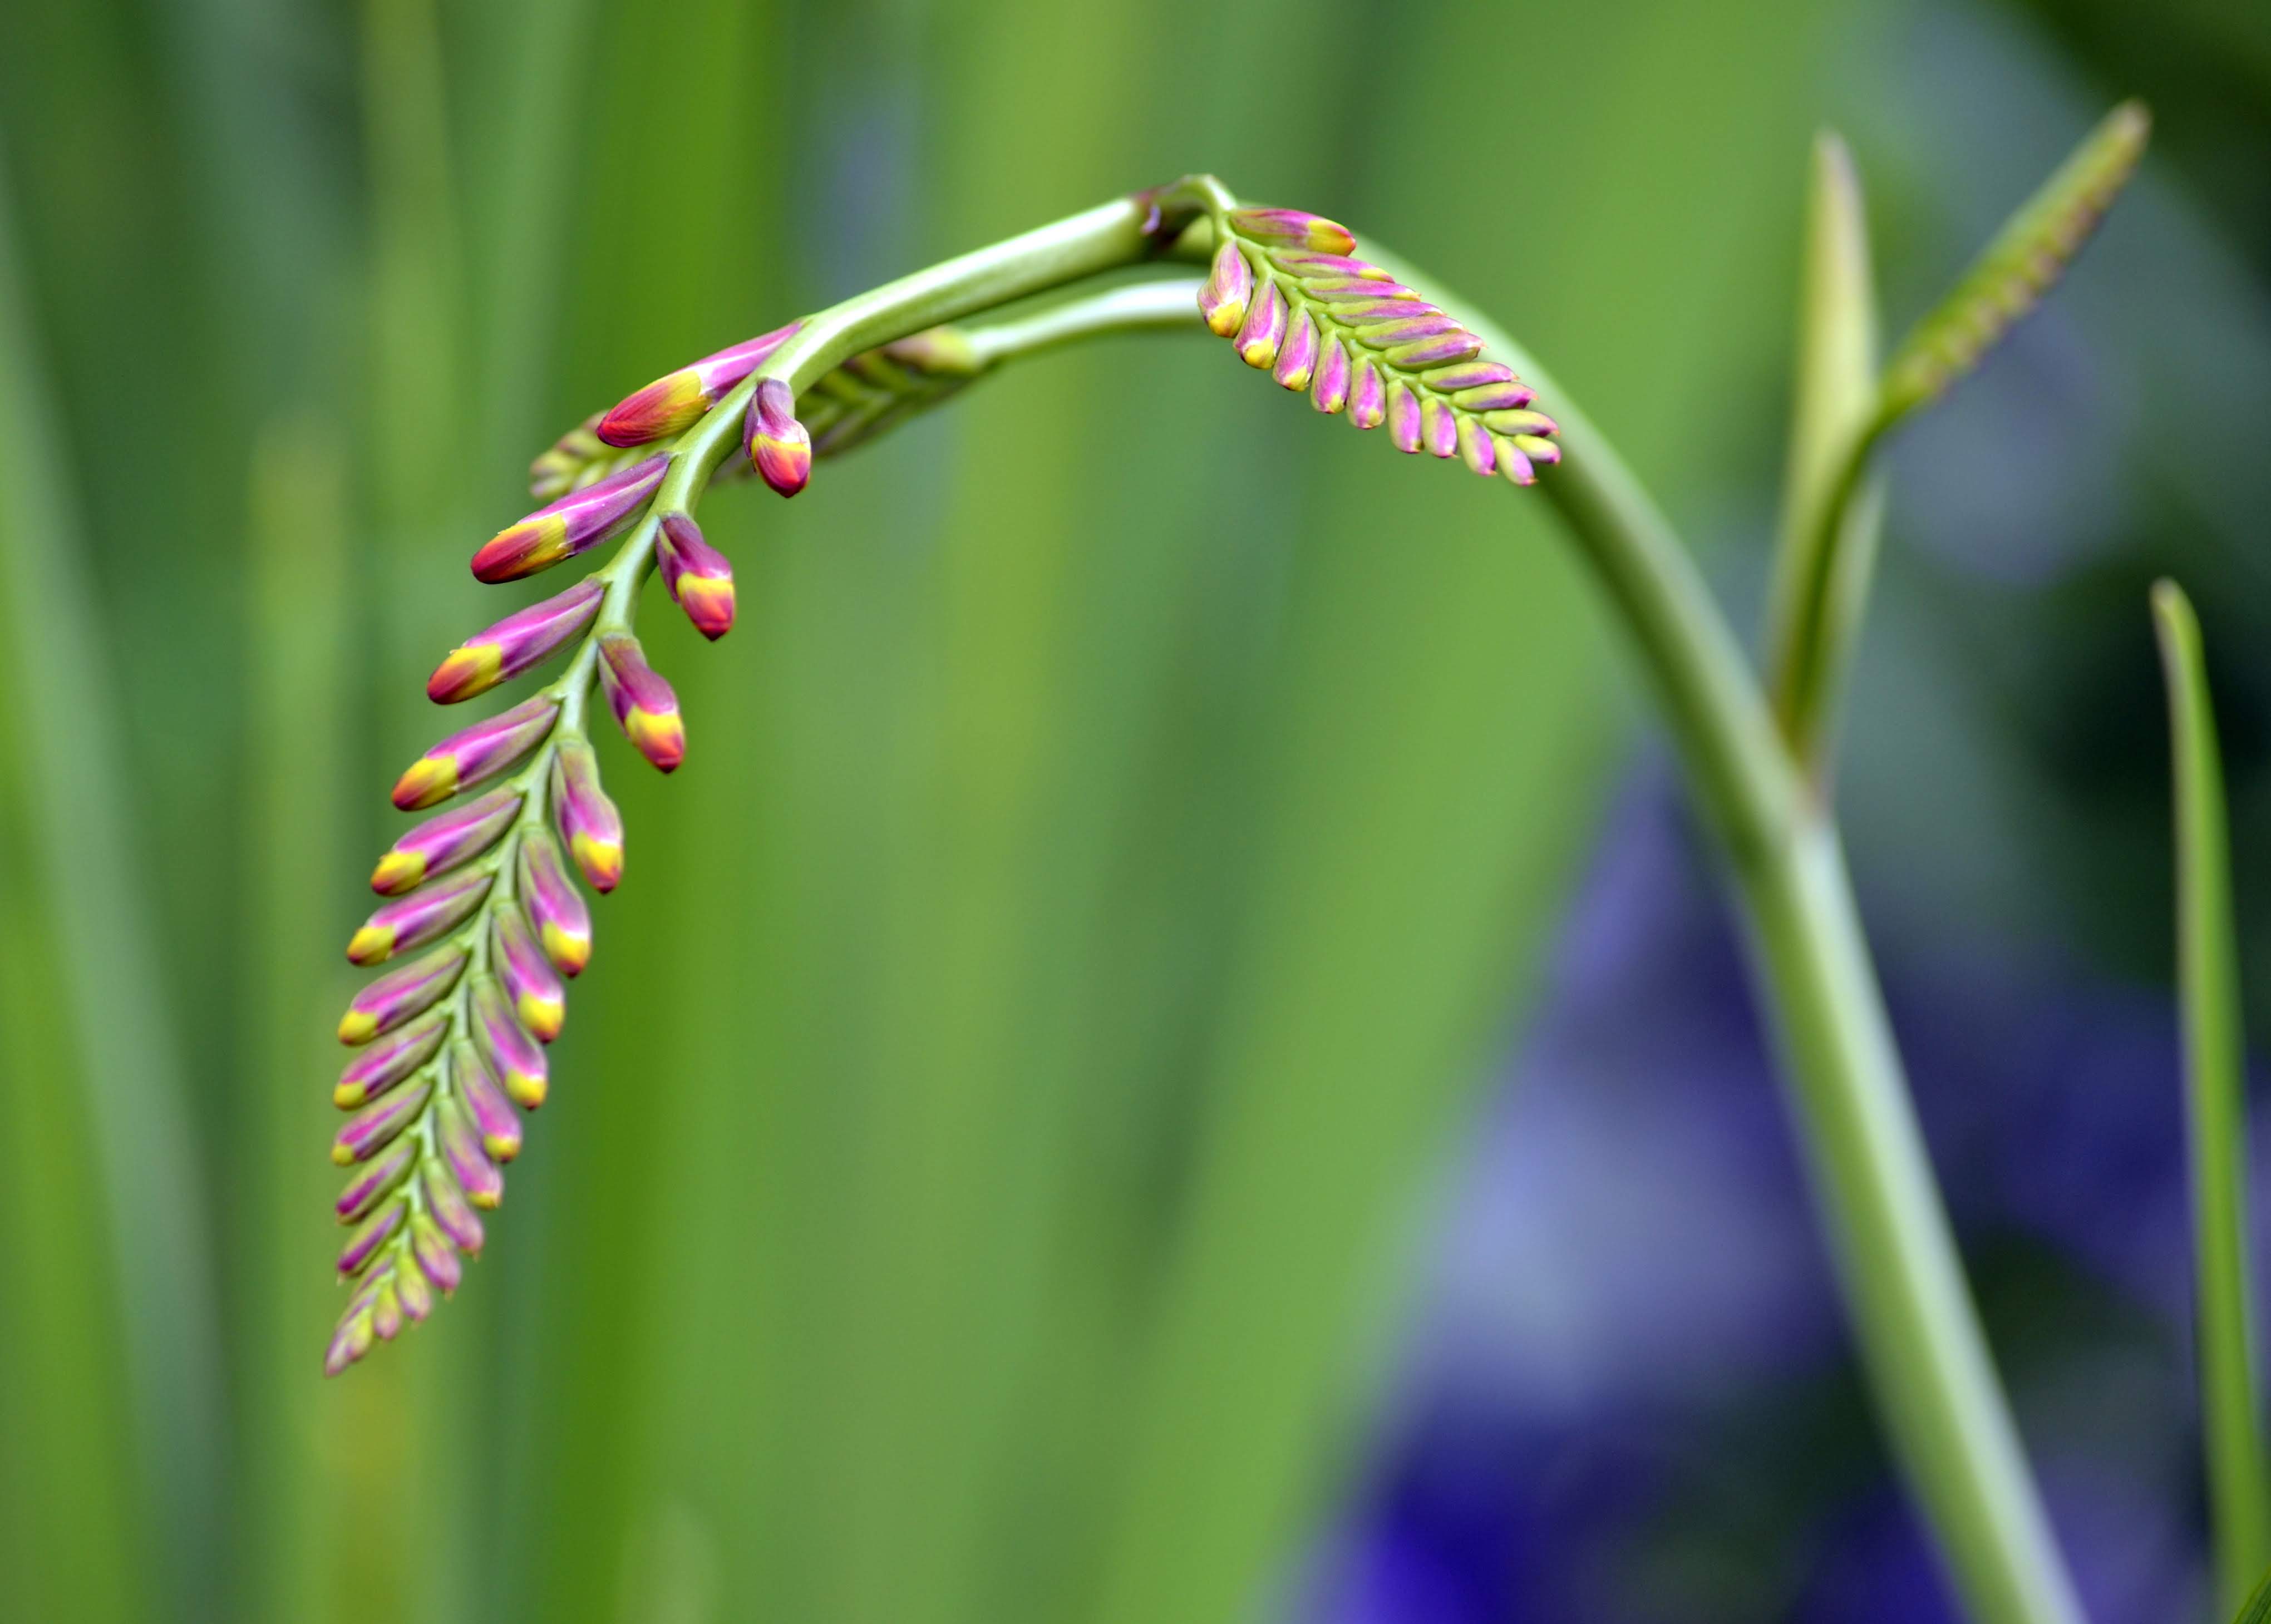
I suspect some difficult interpersonal dynamics led to the last few lines, so I won’t dwell on those. But I quite like the first two lines. They summarize my feelings about a beautiful flower in my garden, which I love when it’s in the right place and frown over when it pops up (again and again) in the wrong place(s): Crocosmia.
Crocosmia in the wrong place
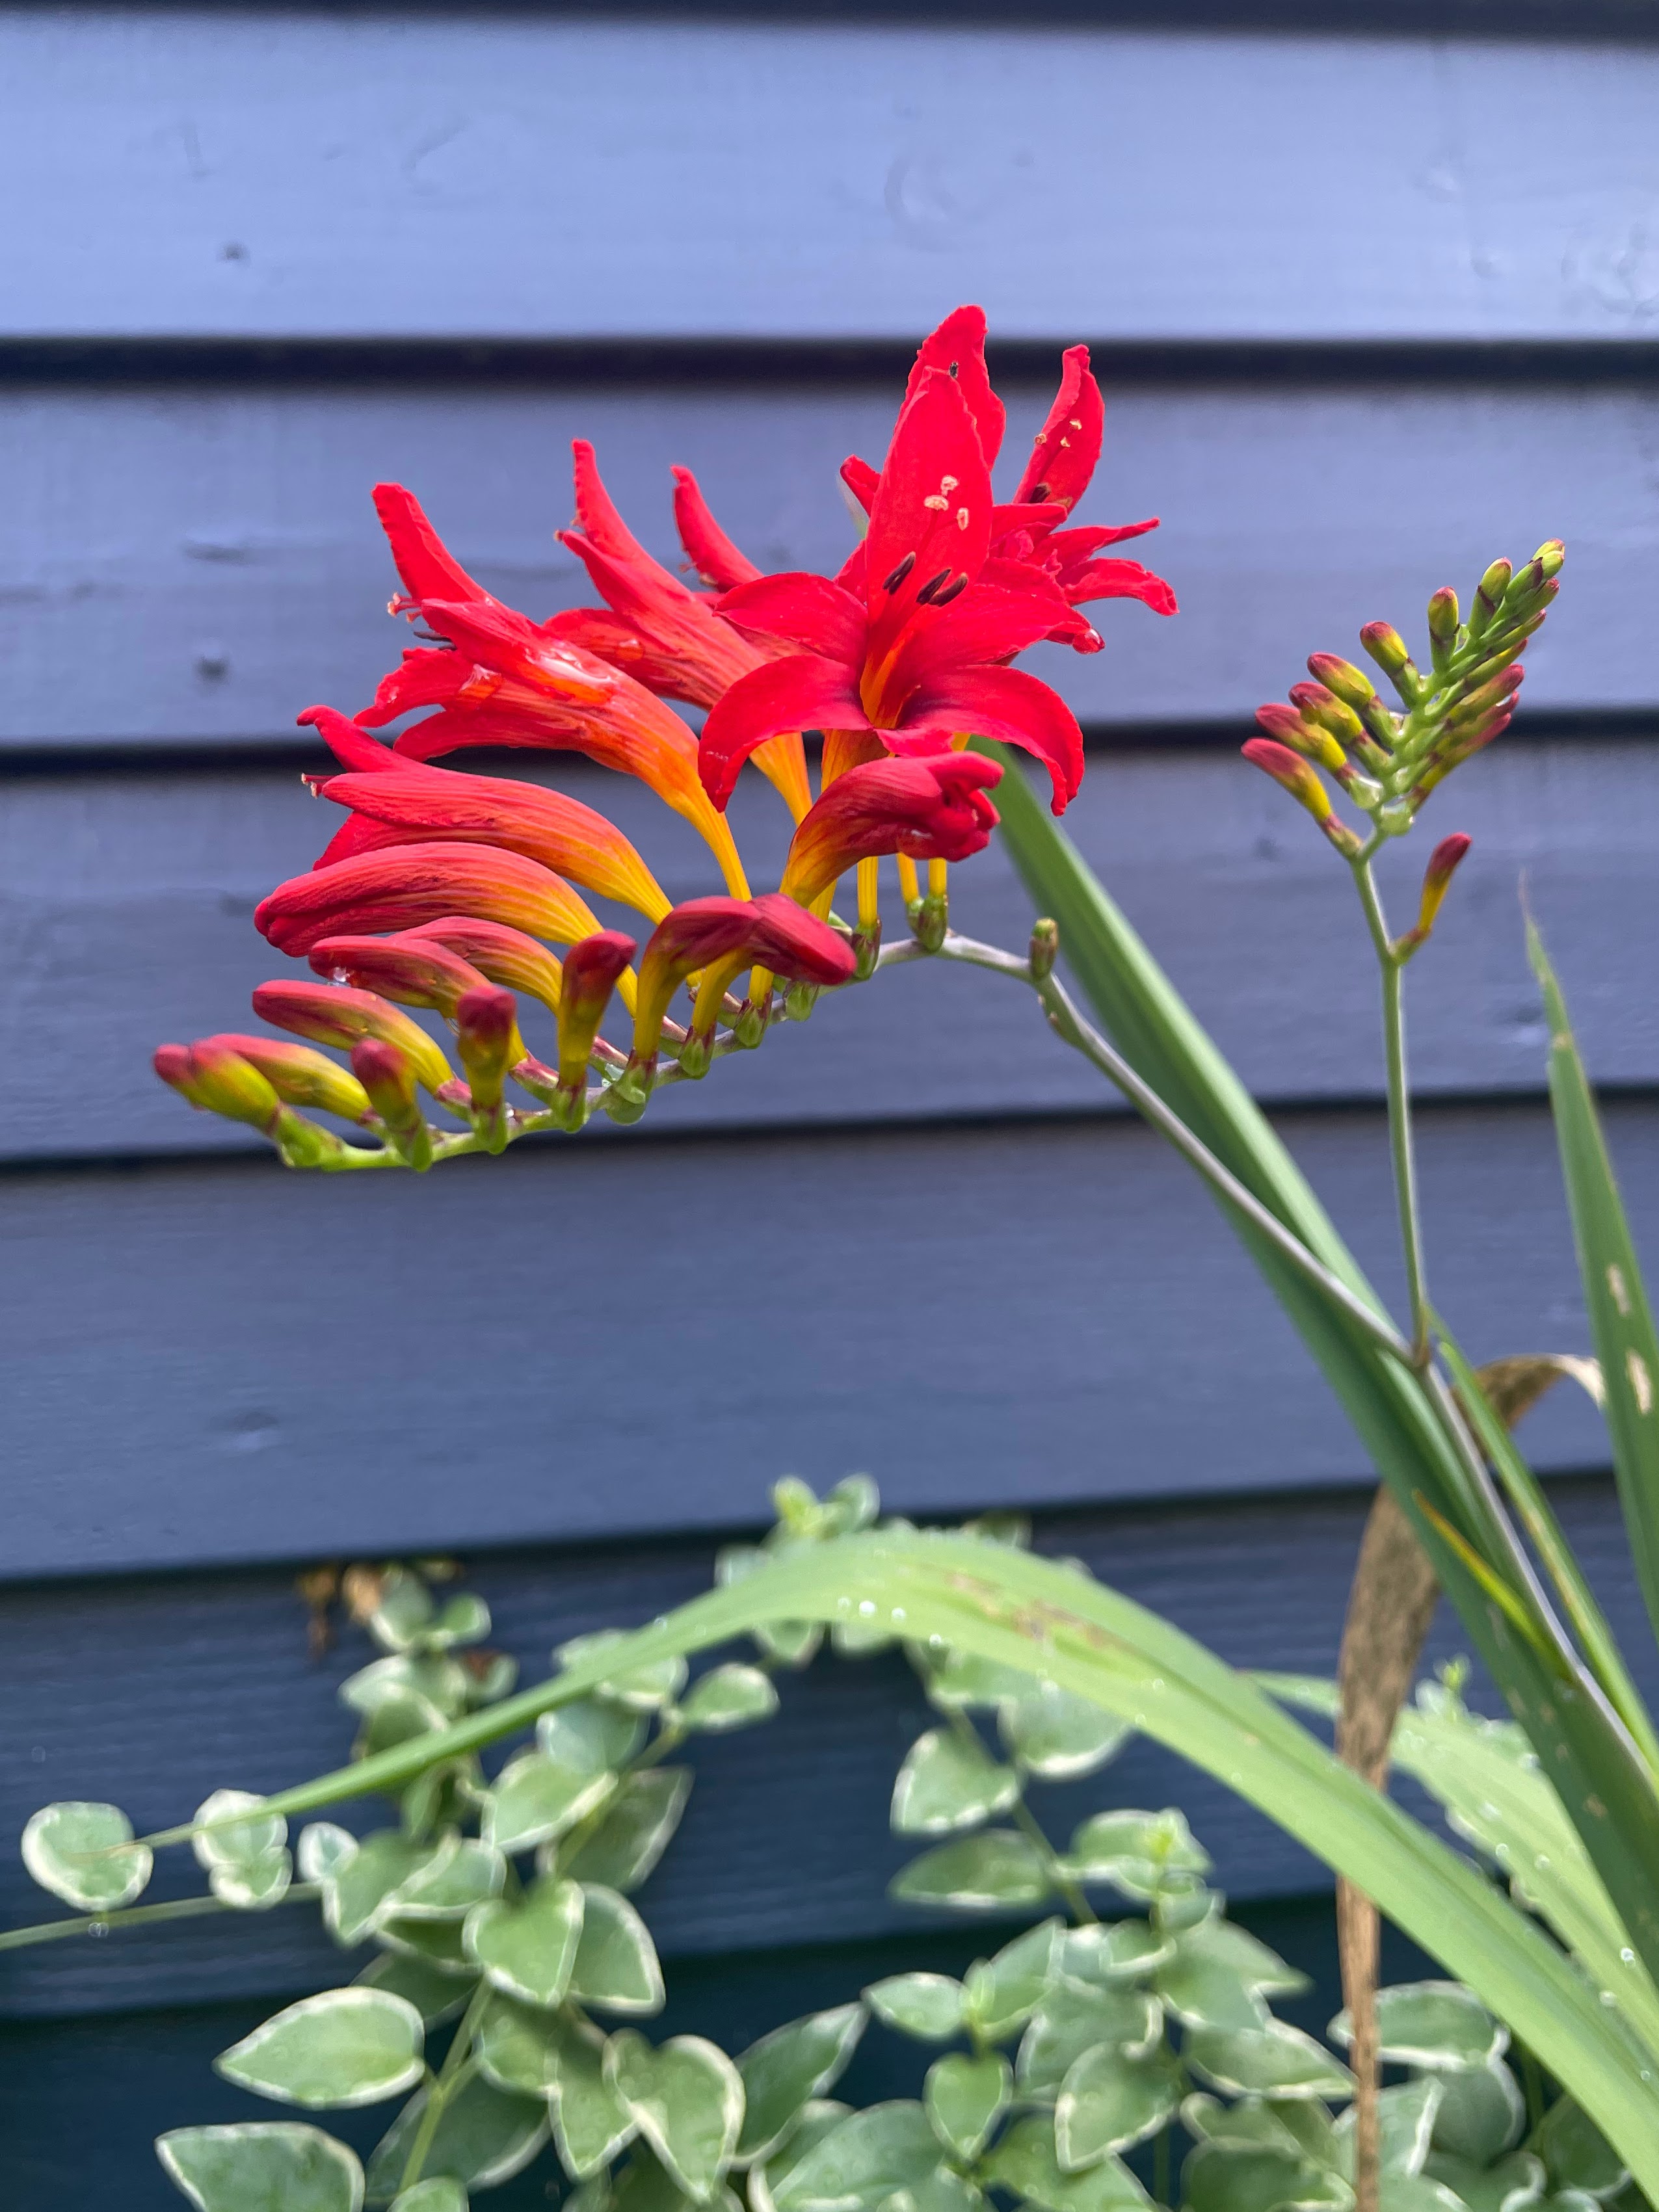
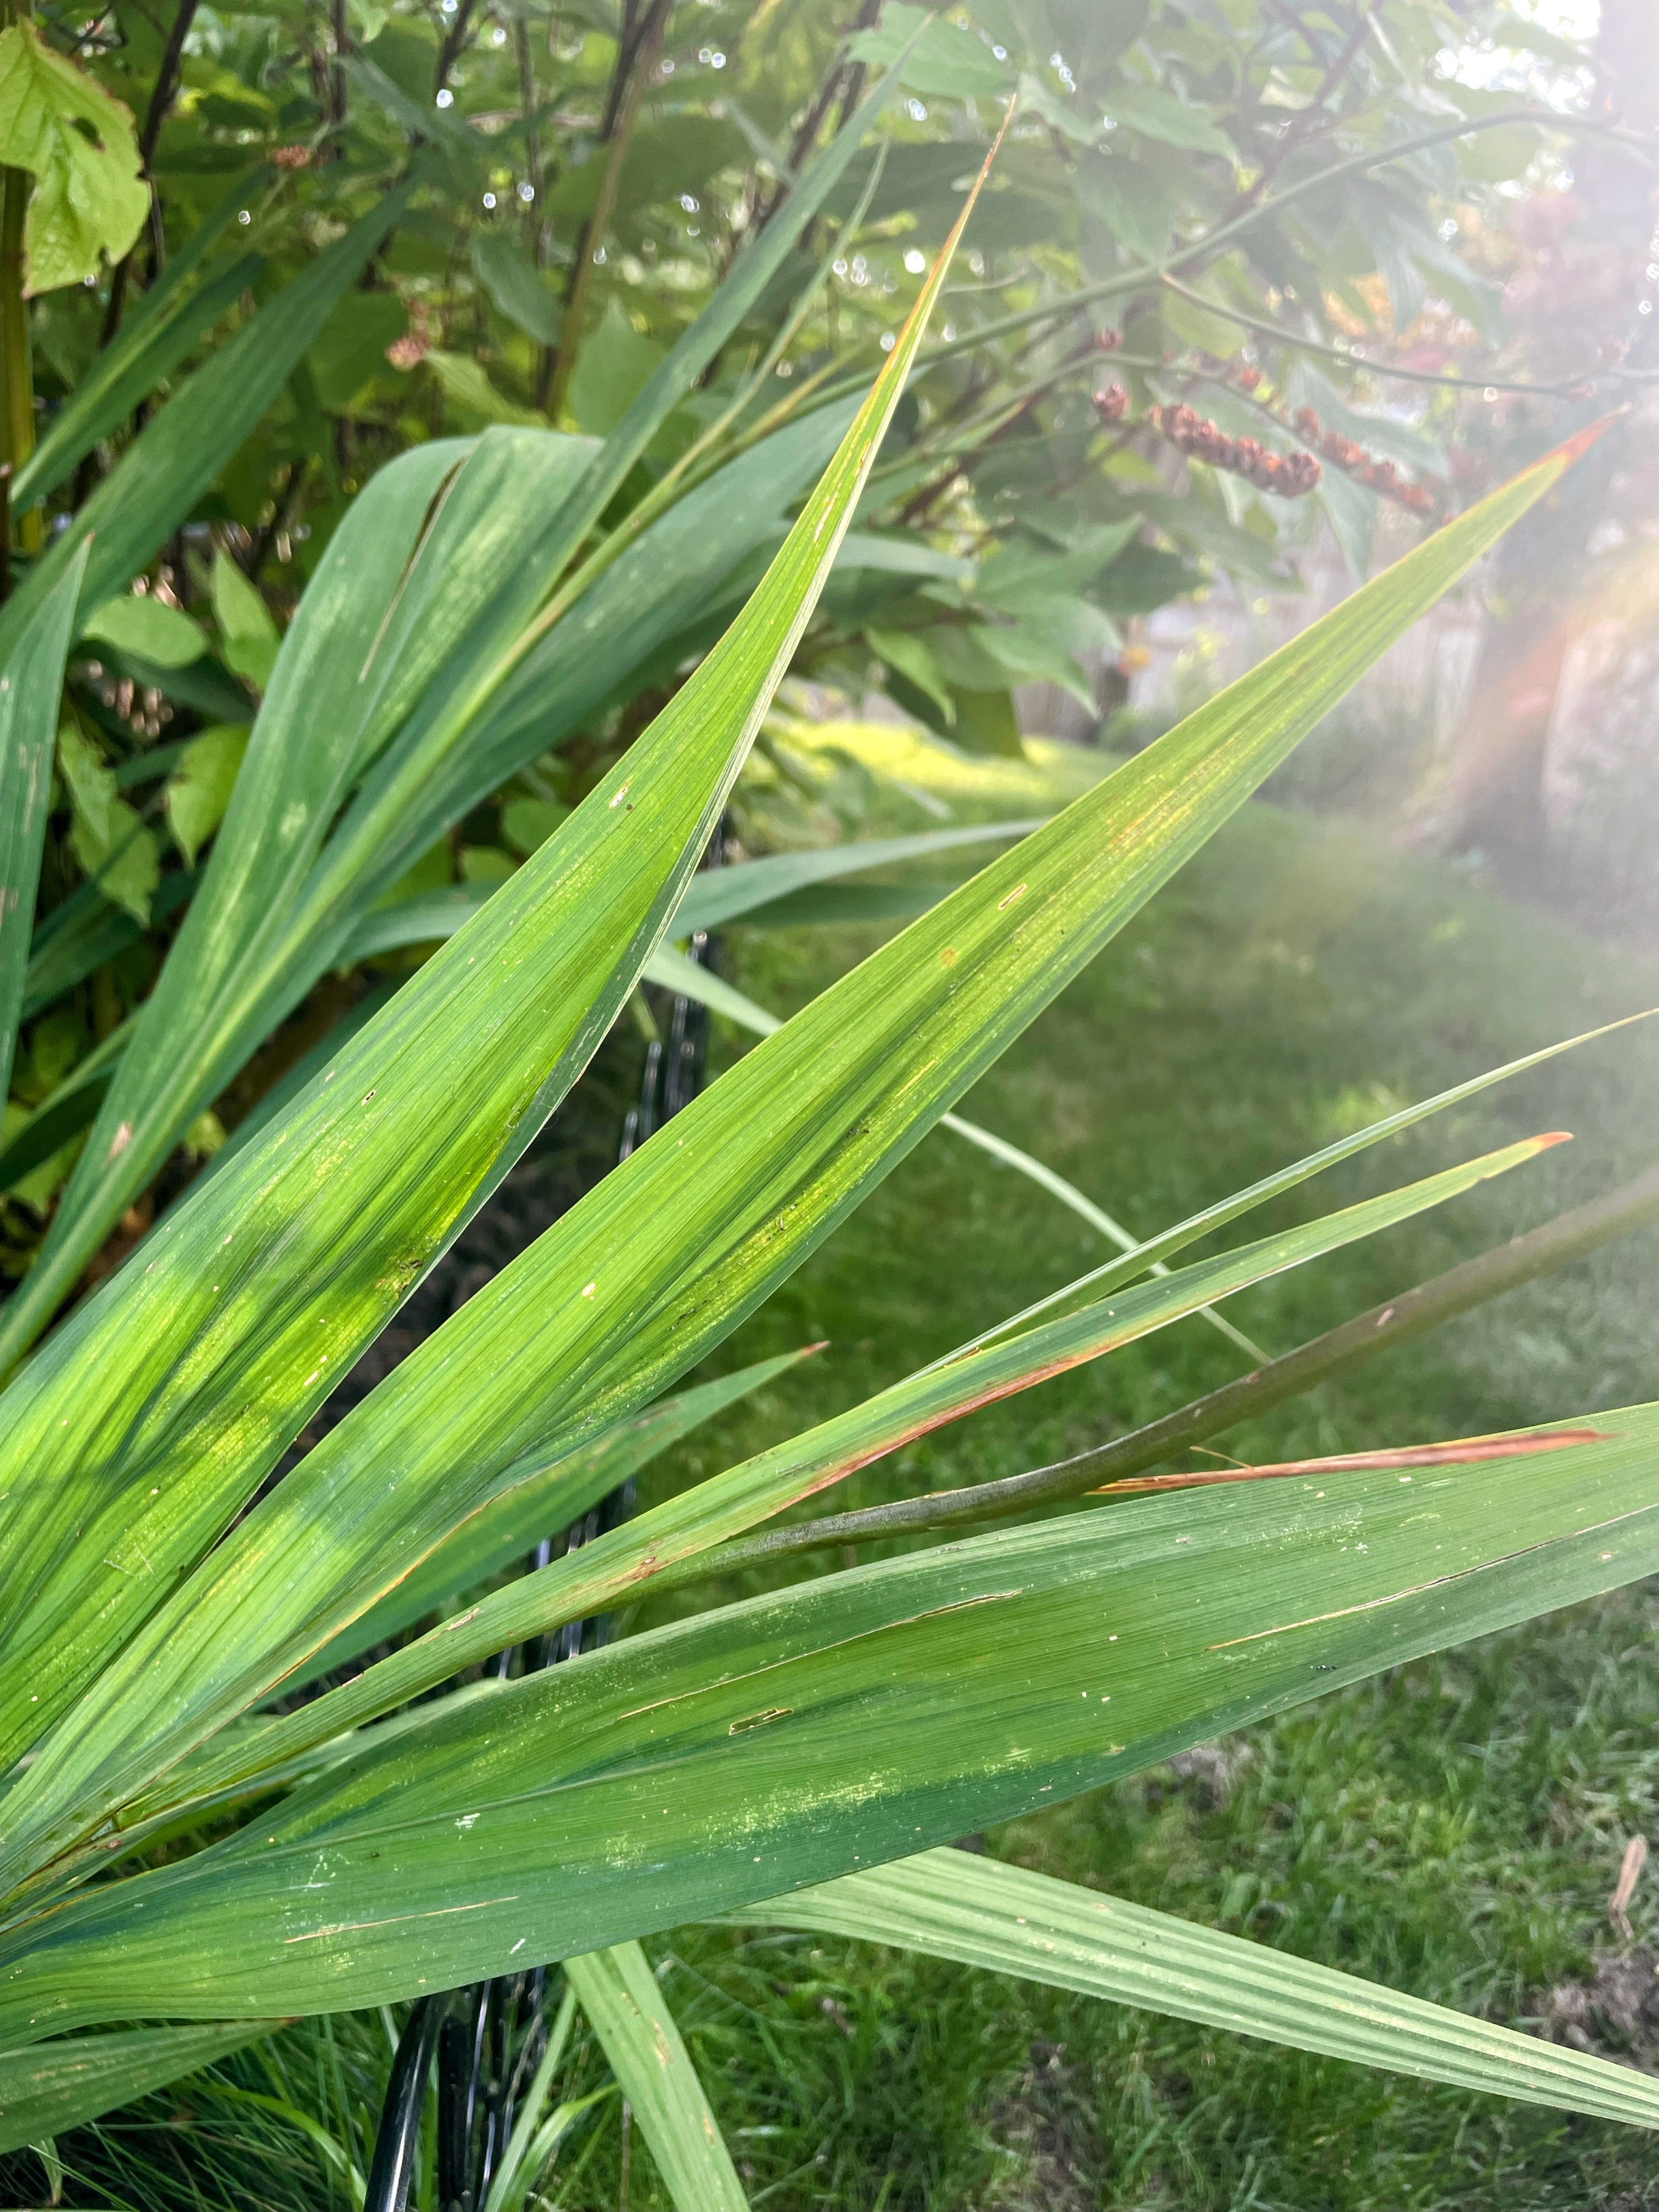
Crocosmia is a member of the Iris (Iridaceae) family, along with its gladiolus and crocus cousins. Plants in this family are perennial, and grow from bulbs, corms, or rhizomes. They have tall, upright foliage; Crocosmia leaves have been called “sword-like” and are easily spotted and admired in the garden.
The tubular, scarlet-red flowers are spectacular as well, and are wildly attractive to hummingbirds, who have been known to defend their Crocosmia patch against any and all interlopers. For hummingbirds, a Crocosmia is the proverbial Lady in Red.
So, what’s not to love? Crocosmia has great flowers, great leaves, and brings hummingbirds to the garden. How could it be a problem? Well, in the U.S. and other parts of the world, this Southern African native is considered an invasive species because of how well it grows, to the detriment of other plants. It really can grow almost anywhere; the ‘Lucifer’ cultivar (which has made itself a regular feature of my garden) is hardy to Zone 4. In the words of the California Invasive Plant Council:
“It prefers disturbed areas, including roadsides, coastal scrub, prairie and forests. Crocosmia is a superior competitor for water, light and nutrients, and it excludes native plants by growing in dense patches.”
I’ve seen mass plantings of Crocosmia, which can be stunning:
Intentional Crocosmia planting, Japanese Tea Garden, San Francisco
But where not controlled, Crocosmia could run riot. It is a determined grower whose corms multiply and multiply. You may think you’ve gotten them all, but you haven’t. In my own garden, no matter how often I have tried to transfer rogue Crocosmia from where I do not want it to grow, to where I do, it keeps cropping up in the old spots — and in new ones.
Crocosmia in yet another unplanned spot
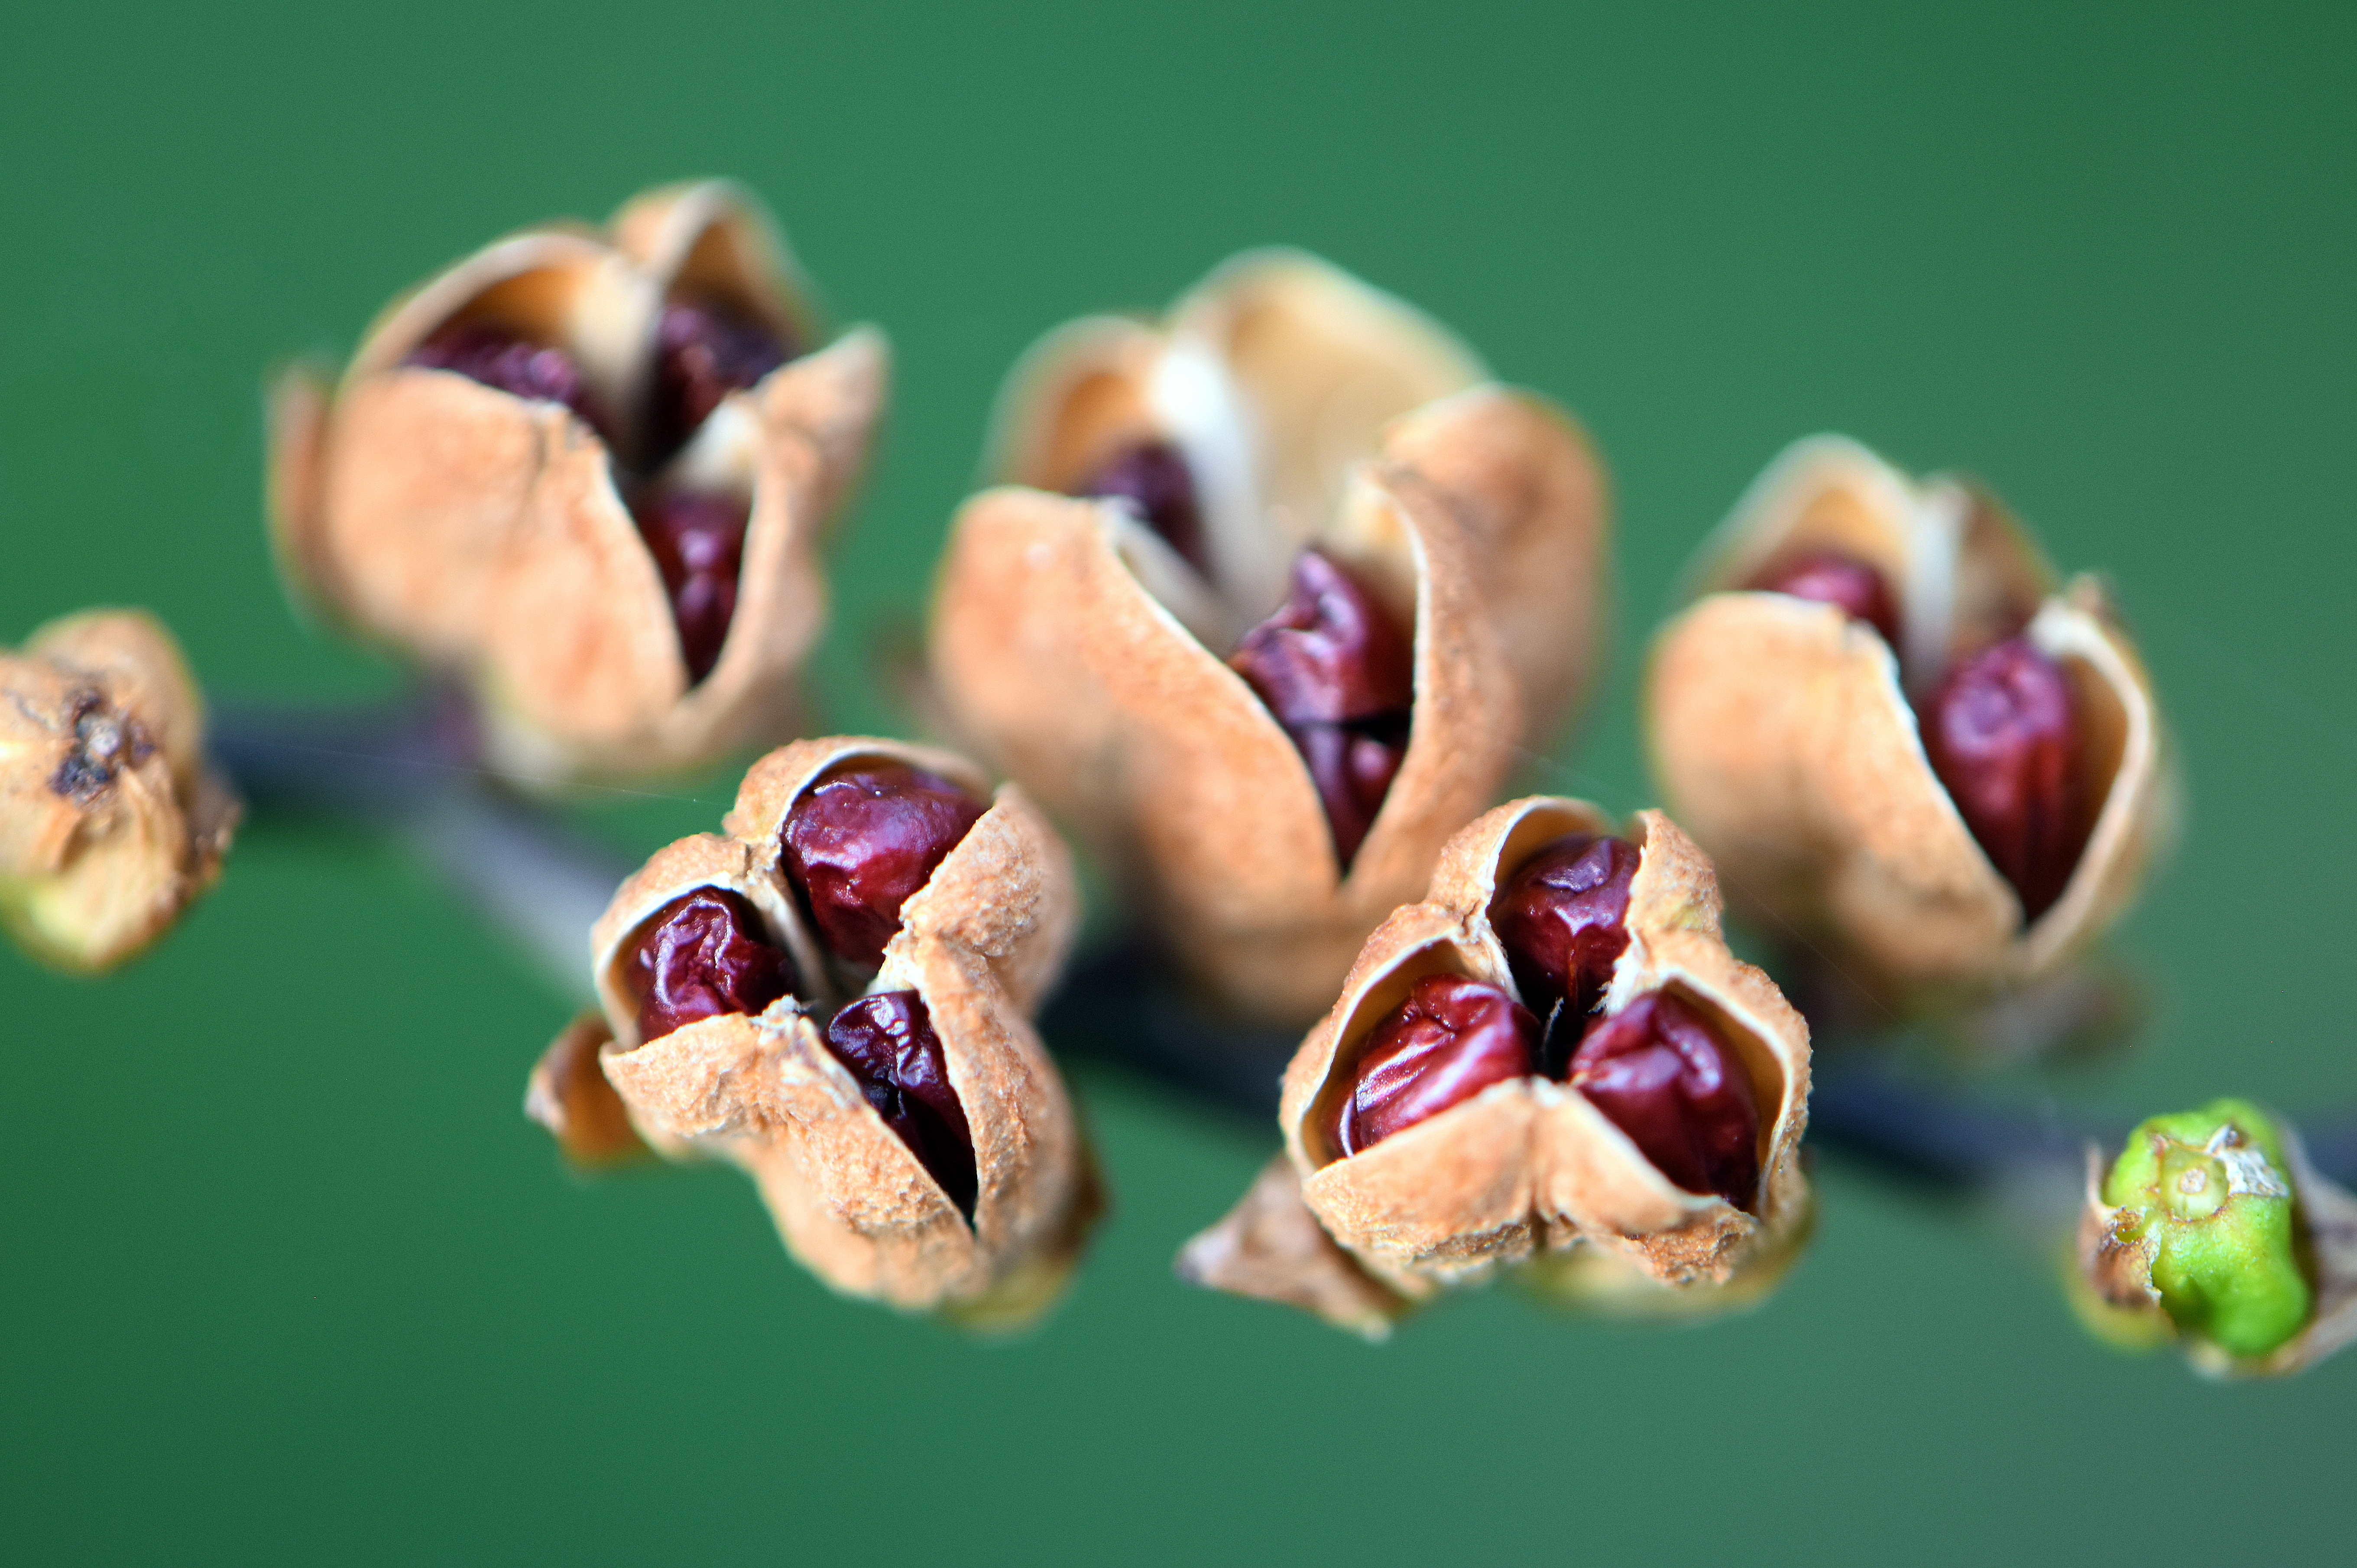
The reason I am finding it in new spots in my garden, is that — in addition to propagation by corms — Crocosmia can also grow from seed. I did not realize how sneaky and able Crocosmia was until now, so I naively let the seed pods develop and scatter, mostly because I did not perceive them as a threat. In my skirmishes with this flower (or weed?), it has outwitted me each time. I’ve been focused on battling corm-spreading Crocosmia, without realizing my garden was also being strafed by airborne seeds. Now I know I should have been cutting Crocosmia off at the pass, literally; I should have been cutting the flower stems at their base as soon as the flowers were spent. Instead, I have allowed the (admittedly beautiful) seed pods to develop, along with the mini paratroopers housed therein, just waiting to spread further red cheer throughout my garden. Clearly, I am no military strategist.
But… lesson learned for next year. I vow to be ruthless. Really.
When we moved back to the U.S. three years ago, we bought a house with a big grassy backyard, sloping down to a wooden fence along the property line. It was a great backyard, but other than a small flower bed off the (old) deck, there wasn’t much active “gardening” space. There was a walkway border garden out front and a few roses scattered around there, too, but that was it. After living in apartments in Rome for five years, we wanted to enjoy the outside — and I really wanted to garden again. Luckily, the spaces around our new house had great potential to become places of joy not just for us, but also for the local bees, butterflies, and birds. I won’t dwell on the chipmunks, squirrels–and for a short while, rabbits–who have also found great joy here, too. Who knew squirrels could climb up giant sunflowers and take the heads right off? I didn’t. Lesson learned, though; no giant sunflowers next year.
But I digress. The hope we had for our outdoor spaces–which we thought about for a year before getting started–included flower beds, an herb garden, a vegetable garden, and a couple patios to provide more gathering space. As they say, beware what you wish for, because what followed took three years and a LOT of work. But it kept us busy during COVID and beyond, when we were glad to have something productive to do during the weekends.
Original sale photo of the backyard, taken Summer 2019, six months before we bought the house.
Today we have 12 separate garden beds, including a pollinator garden that looks like a wild English border garden, an herb garden, a vegetable garden, a rose garden, and new areas for all the plants we moved around, plus many new ones. This required completely redoing the backyard, rethinking a lot of the front yard, and lots of digging, weeding, transplanting/planting, weeding, seed starting, weeding, and finger crossing that everything we shifted around (often more than once) would survive.
We started Phase 1 by taking out most of the grass in the back and terracing the sloping plot, with help–as we could not move tons of soil on our own, nor could we install all the hardscaping alone. We toyed with the idea of laying down the patios ourselves (as we’ve done in the past), but knew we did not have the skills to build retaining walls, nor the necessary time, seeing as we both have actual other jobs requiring our daily attention. And this was not a weekend task.
Backyard, Summer 2021
Once all soil was out and the hardscaping was in, our work began: filling it all in. But it was early September (autumn) by then, so mostly we transplanted things from around the front, back, and side yards, and made a list of the new plants that would go in next spring. The top bed in the first photo below would be the future Pollinator Garden (I had saved plants from the old flower bed before we redid the yard, so got a head start by putting those back into the new bed). The second level would become the Herb Garden (ready to be planted with some perennial herbs I had grown in fabric bags during the summer), and the bottom level (barely visible) would be the Vegetable Garden. These were the first three of the 12 garden beds we would put in (or redo) around the house!
Backyard, Fall 2021
Note the missing deck section in the first photo above; we replaced the old deck entirely in Phase 2–with help from our children, family, and friends; but mostly done solo by my husband all through Fall 2021.
Finished deck and hardscaping, early Spring 2022
Backyard terrace beds: Top = Pollinator Garden, Middle = Herb Garden, Bottom = Vegetable Garden
In the two top beds above were the “skeleton plants” we had in Spring 2021. I added other plants to fill out the Pollinator and Herb Gardens, and grew some veggies from seed for the vegetable garden, though I also bought some more mature plants to jump start the process a bit. Here’s how the terraced garden beds evolved:
Pollinator Garden, Summer 2022 (left, middle); Herb Garden, Summer 2023 (right)Vegetable garden as seen from the bottom of the yard, Spring & Summer 2023
And here are some photos of the front yard garden beds, which were part of Phase 3:
New front Walkway Garden, Summer 2022 & 2023New, existing, and transplanted roses in the front Rose Garden
Below is what the front Walkway Garden looked like before (first photo taken while house was being painted). The bed was filled with yellow daylilies and magenta Campion Rose flowers, and I wanted to redo it from Day One. First, I am not fond of magenta and yellow as a color combination. As part of a riot of bold colors, yes, but not by themselves. Secondly, Campion Rose spreads everywhere. I needed to isolate it to a very small section of the yard. Thirdly, and most importantly, the Walkway Garden is in view of the Rose Garden, and I wanted to plant it with flowers that complemented the colors of the roses.
Here are some of the transplanted flowers that are happy in their new spots: 1) Spiky Giant Hyssop now along the southernmost part of the new deck, popping above the railings and attracting bees far and wide (though they are very friendly bees; I stick my head among the flowers to tie them up periodically, and the bees pay me no mind at all). 2) Panicle Hydrangea turning a dusty pink from its initial white, now in its third and final resting place, and 3) the yellow daylilies from the front yard, now in the back along with some Spiderwort ( a much more pleasing combination in my very biased opinion!).
Some of the many newcomers to the garden: Hollyhock, Allium Schubertii, Astilbe, Baptisia Australis, Black-Eyed Susans (Rudbeckia hirta), Aquilegia
And finally, a few things from the garden other than flowers:
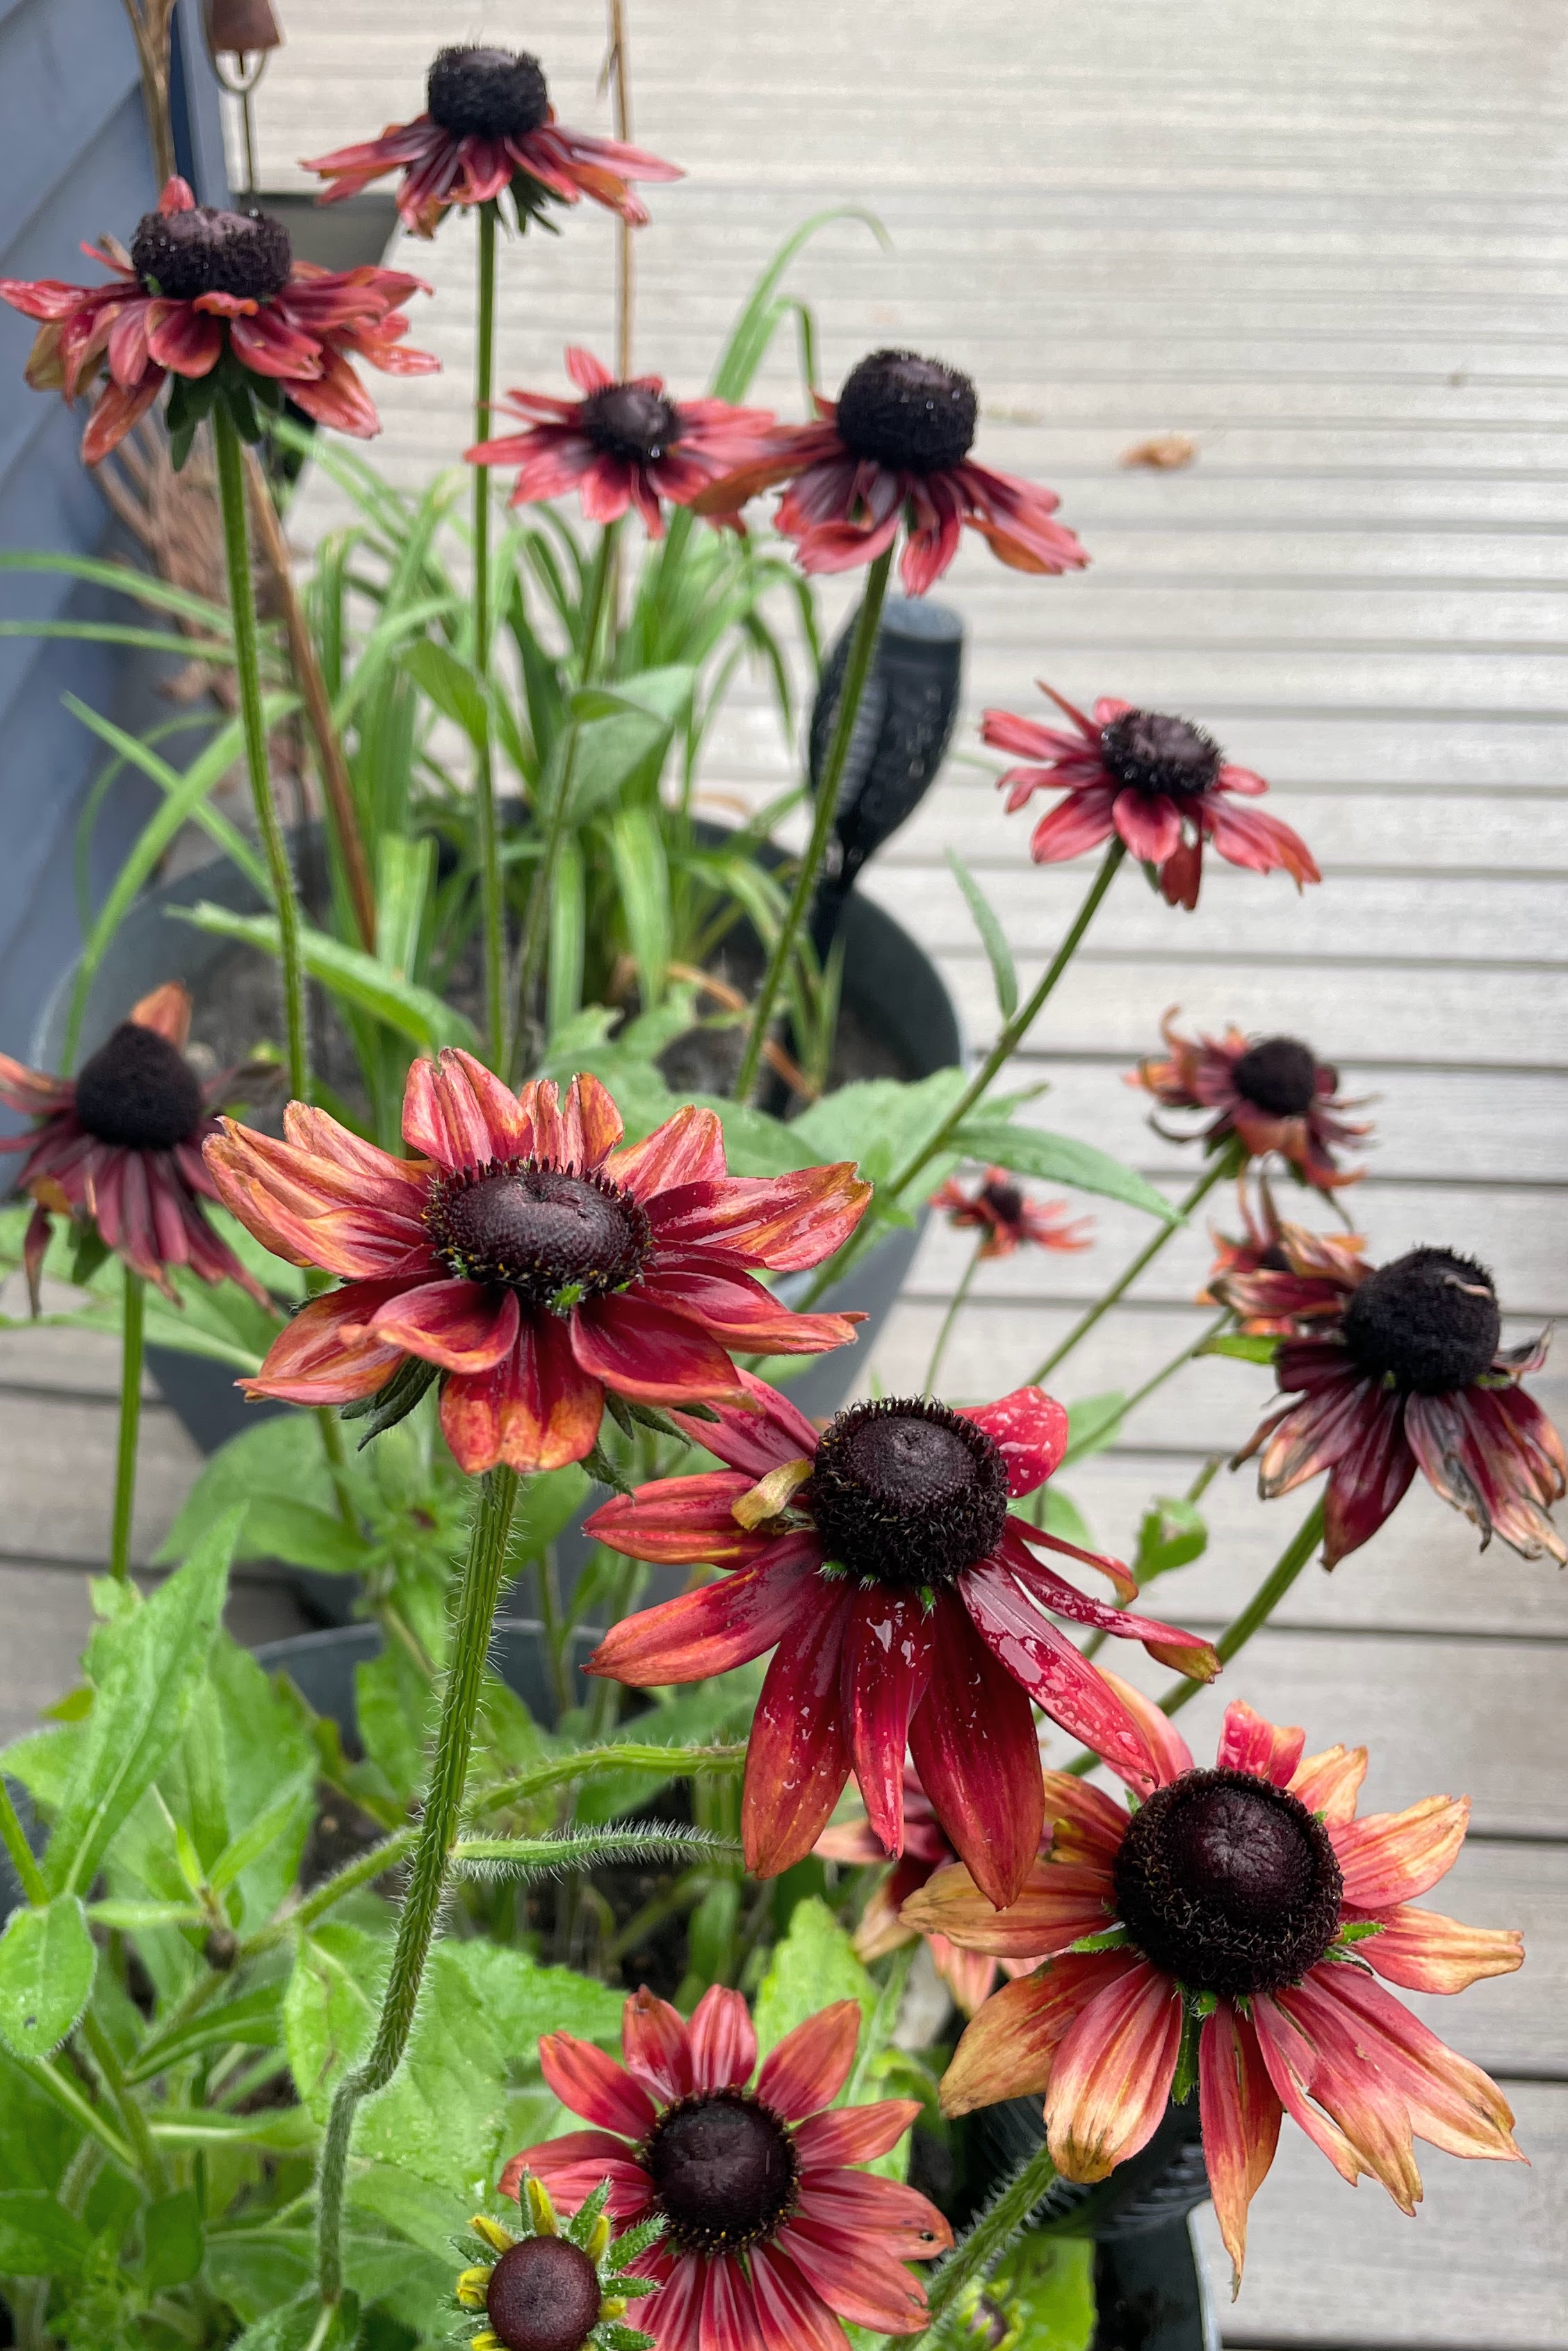
You may look at the beautiful potted flowers above and know right away what they are. When I look at them now, I also know. And forever more, I will know. But for the past couple of weeks, every time I walked by this part of the deck, I reveled in how beautiful these ‘echinacea’ were, and what an unusual color, too. I would then glance over to a different part of the garden and marvel at how many other beautiful varieties of echinacea existed:
But I was wrong about the potted flowers in the first photo, despite abundant evidence. My disregard for the facts started when I forgot what was written on the original plant tags and did not feel I needed to re-check; it spiraled from there and led me to overlook the obvious.
Mostly, it was hubris; I thought I knew, so I failed to observe properly, or fact check. What clues did I miss? Many. As this blogger stated, a gardener confusing a rudbeckia with an echinacea is like a farmer confusing a sheep with a goat. Ouch. In my defense, sheep and goats are very closely related genetically– as are rudbeckia and echinacea. And until a couple of weeks ago, I did not have this ‘Cherry Brandy’ rudbeckia in my garden. But I get the point, and now I can see the obvious differences between the “sheep” and “goats” in my garden.
Here’s how to tell them apart:
1. First, it’s not by how hairy one plant is, vs the other. I read that one way to tell them apart is that echinacea have hairier leaves. But both plants have hairy leaves; echinacea leaves feel rough like a cat’s tongue, while Rudbeckia hirta leaves are softer and more velvety (see photo below):
Since both plants have hairy leaves, it’s not the best test. There is a better one (in fact, the best and easiest one):
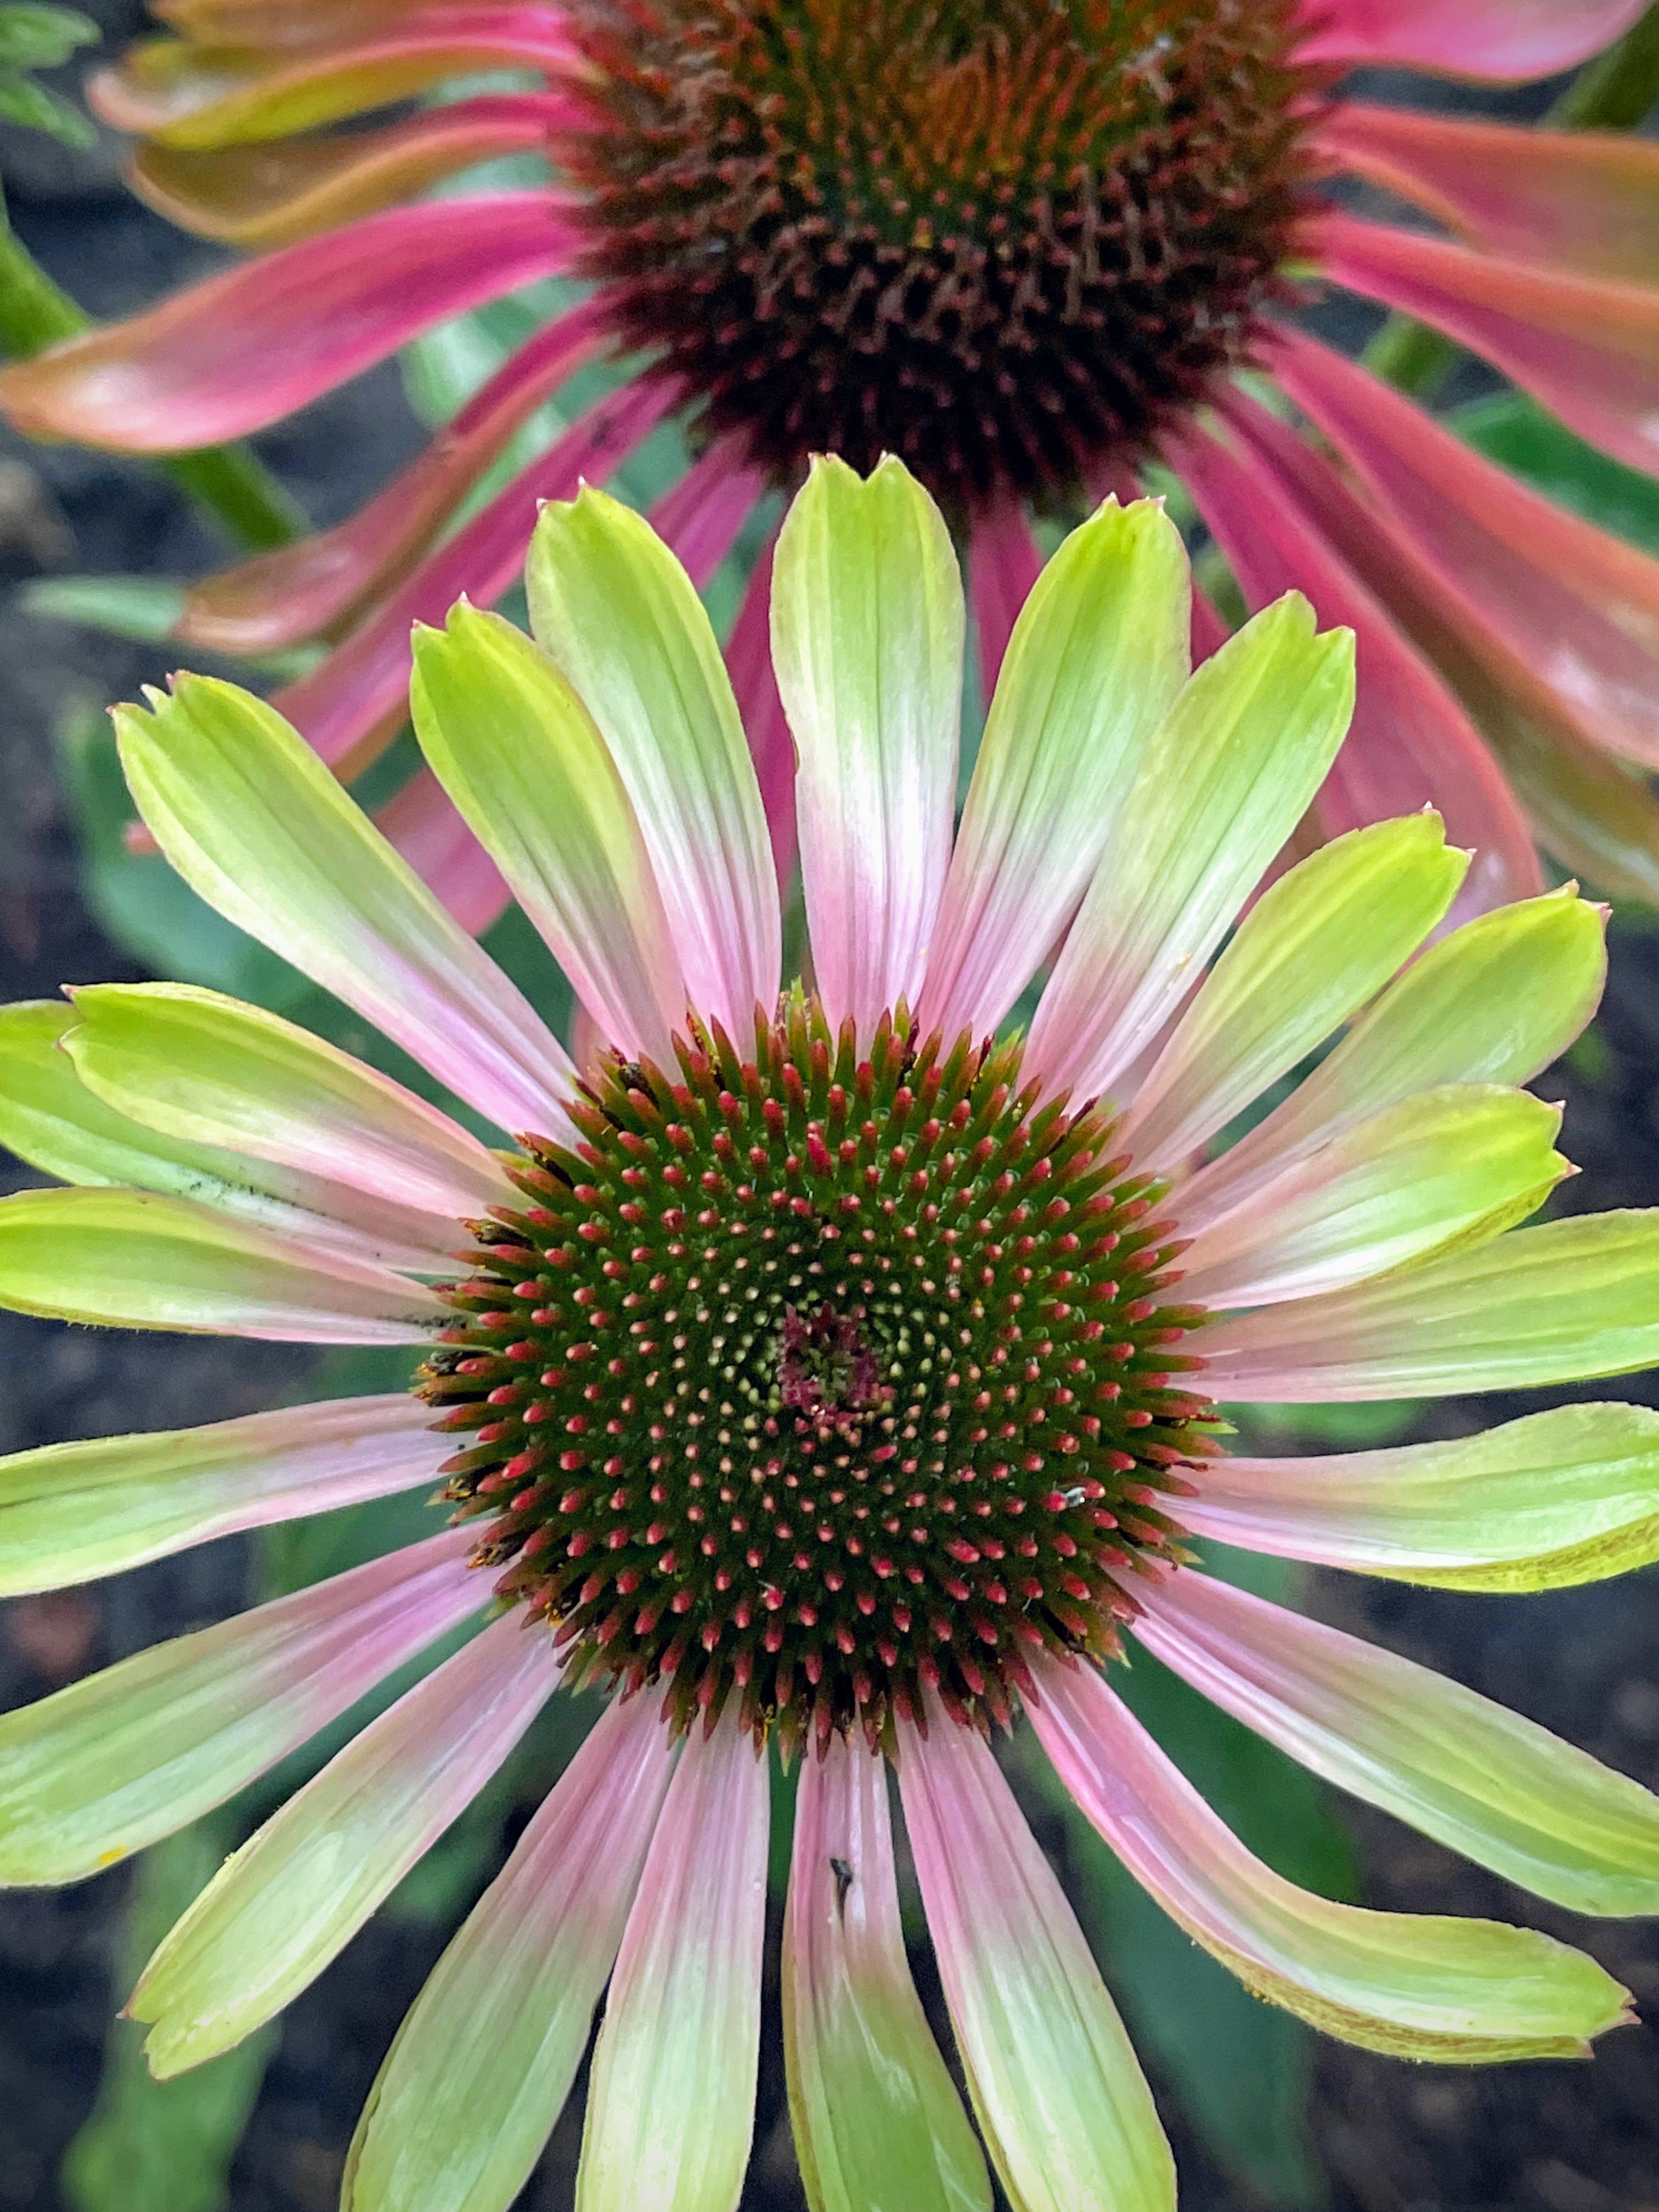
2. Examine the cones.Rudbeckia hirta cones (l) are relatively soft and usually look like blackbutton tufts (hence the name Black-Eyed Susans), while echinacea cones (r) are harder and pricklier and more conical — and are not black, but orange or green or brown.
3. Look at the “petals” (though technically, they are ray florets, not petals): This can often help, but not always. According to this way of telling the difference between the two plants, echinacea petals tend to droop and point downward while rudbeckia petals tend to stick straight out. But in the photo below, some of the echinacea petals are drooping and some are sticking straight out. It depends on the variety and the plant’s stage of development. So use the “petal” test as a first form of evidence gathering if you like, but be sure to confirm with the cone test; it will give you the right answer.
In seeking the right answer today, I learned something new. Not just about the difference between Rudbeckia hirta and echinacea, but about assumptions and facts. And about taking the time to stop and smell the roses — and see the petals and leaves, and touch the cones.
Depending on who you ask, the color orange brings to mind many things: amusement, danger, encouragement, energy, enjoyment, enthusiasm, extroversion, fascination, fire, happiness, heat, sunshine, and warmth.
It is one of my favorite colors, because it is so cheery (and because it goes so well with blue, its complementary color). I particularly like that it is associated with joy and creativity, and I love this description: “Orange oozes with delight.”
Interestingly, people did not have a good way to describe the color at first, sometimes calling it (in English) “yellow-red” or “saffron.” It wasn’t until oranges made their way around the world from their native Southeast Himalayan foothills that the color began to be associated with the ripe fruit. The first recorded use of orange as a color name in English was in 1512.
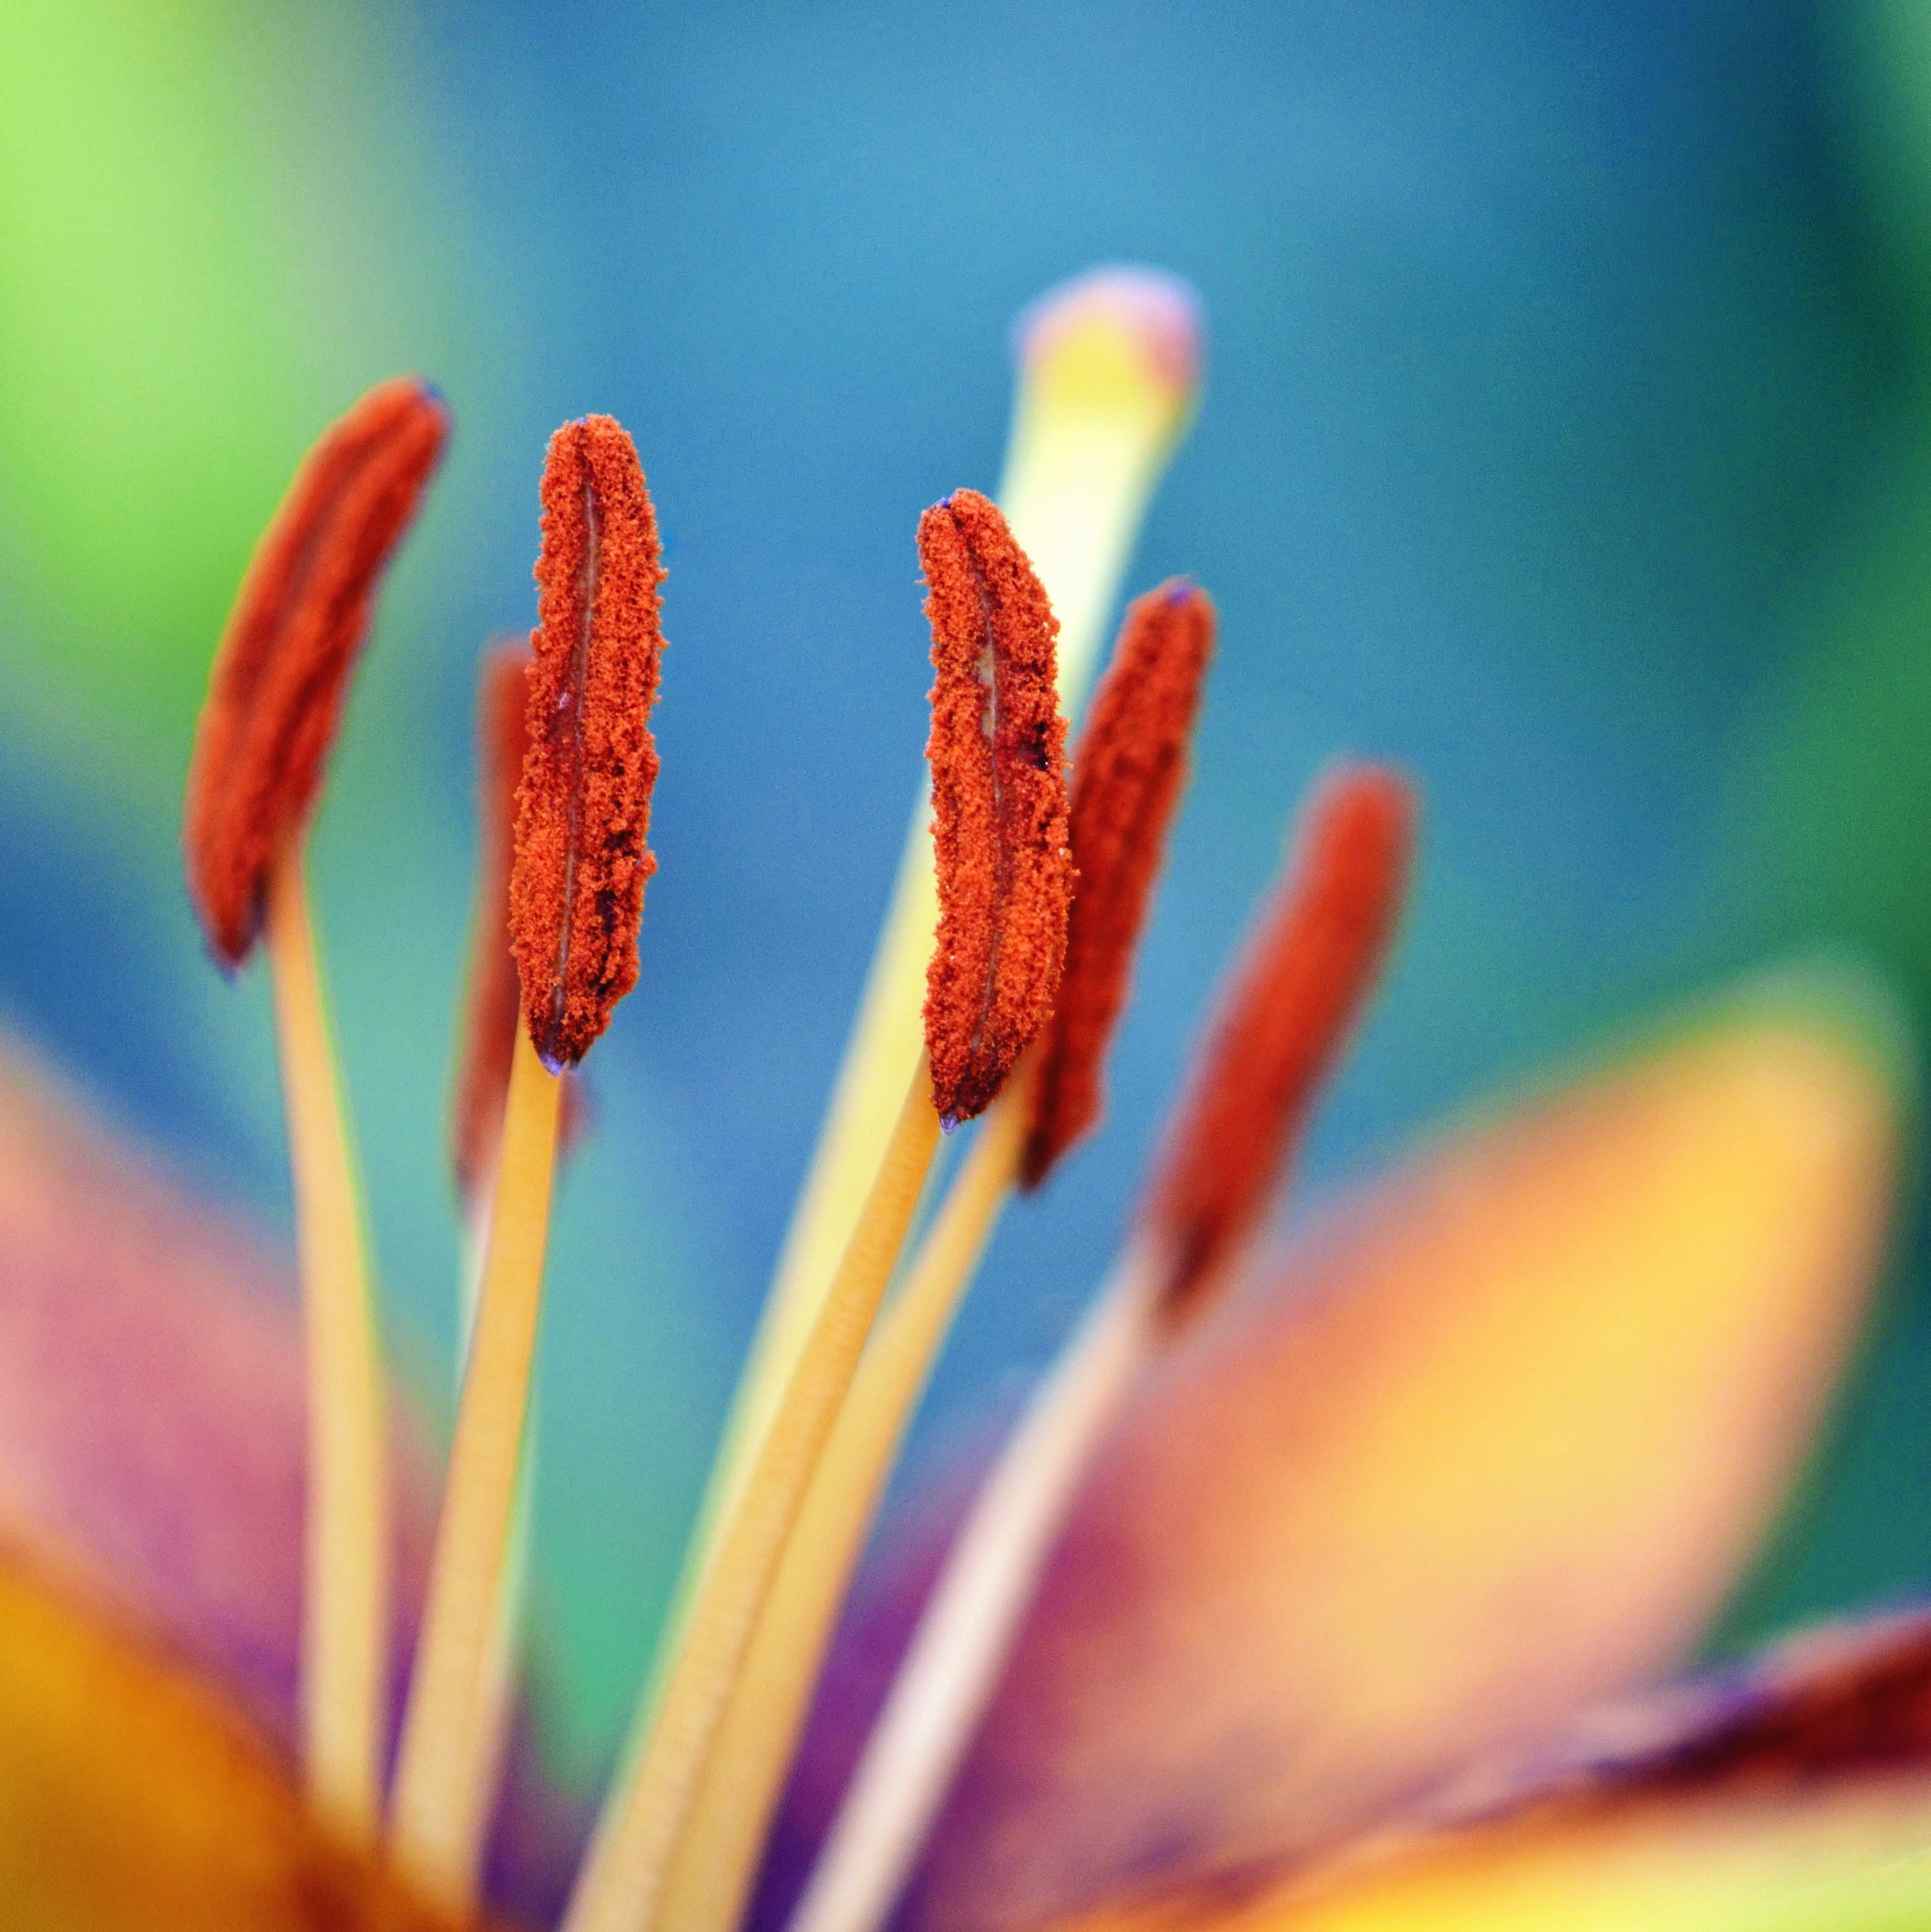
This week’s color, orange, appears on the six stamens of an Asiatic Lily ‘Tiny Sensation.’ The stamens are the male reproductive organs of flowers, consisting of anthers coated in pollen resting atop slim filaments. The female part of the flower, the pistil, can be seen rising blurrily in the back. Though not visible in the photo, the top part (the stigma) has three lobes and is sticky, to better catch the pollen.
Here is a better view of the pistil and its three-lobed stigma, surrounded by the six stamens. This photo is from a different lily, but luckily the pollen here is also orange, fitting in with this week’s theme.
Pollination occurs when bees, butterflies, and other pollinators carry the pollen from the lily’s anthers to the female parts of other lilies. Successful sexual reproduction leads to seeds that ripen in pods and are dispersed when the pods start to open in the fall. Unfortunately, I do not have any good photos of lily seed pods (though will now be on the lookout this fall), but did stumble upon iris seeds one autumn, as described here.
And of course, as lilies come from bulbs, another great way to get more lilies is via bulb division.
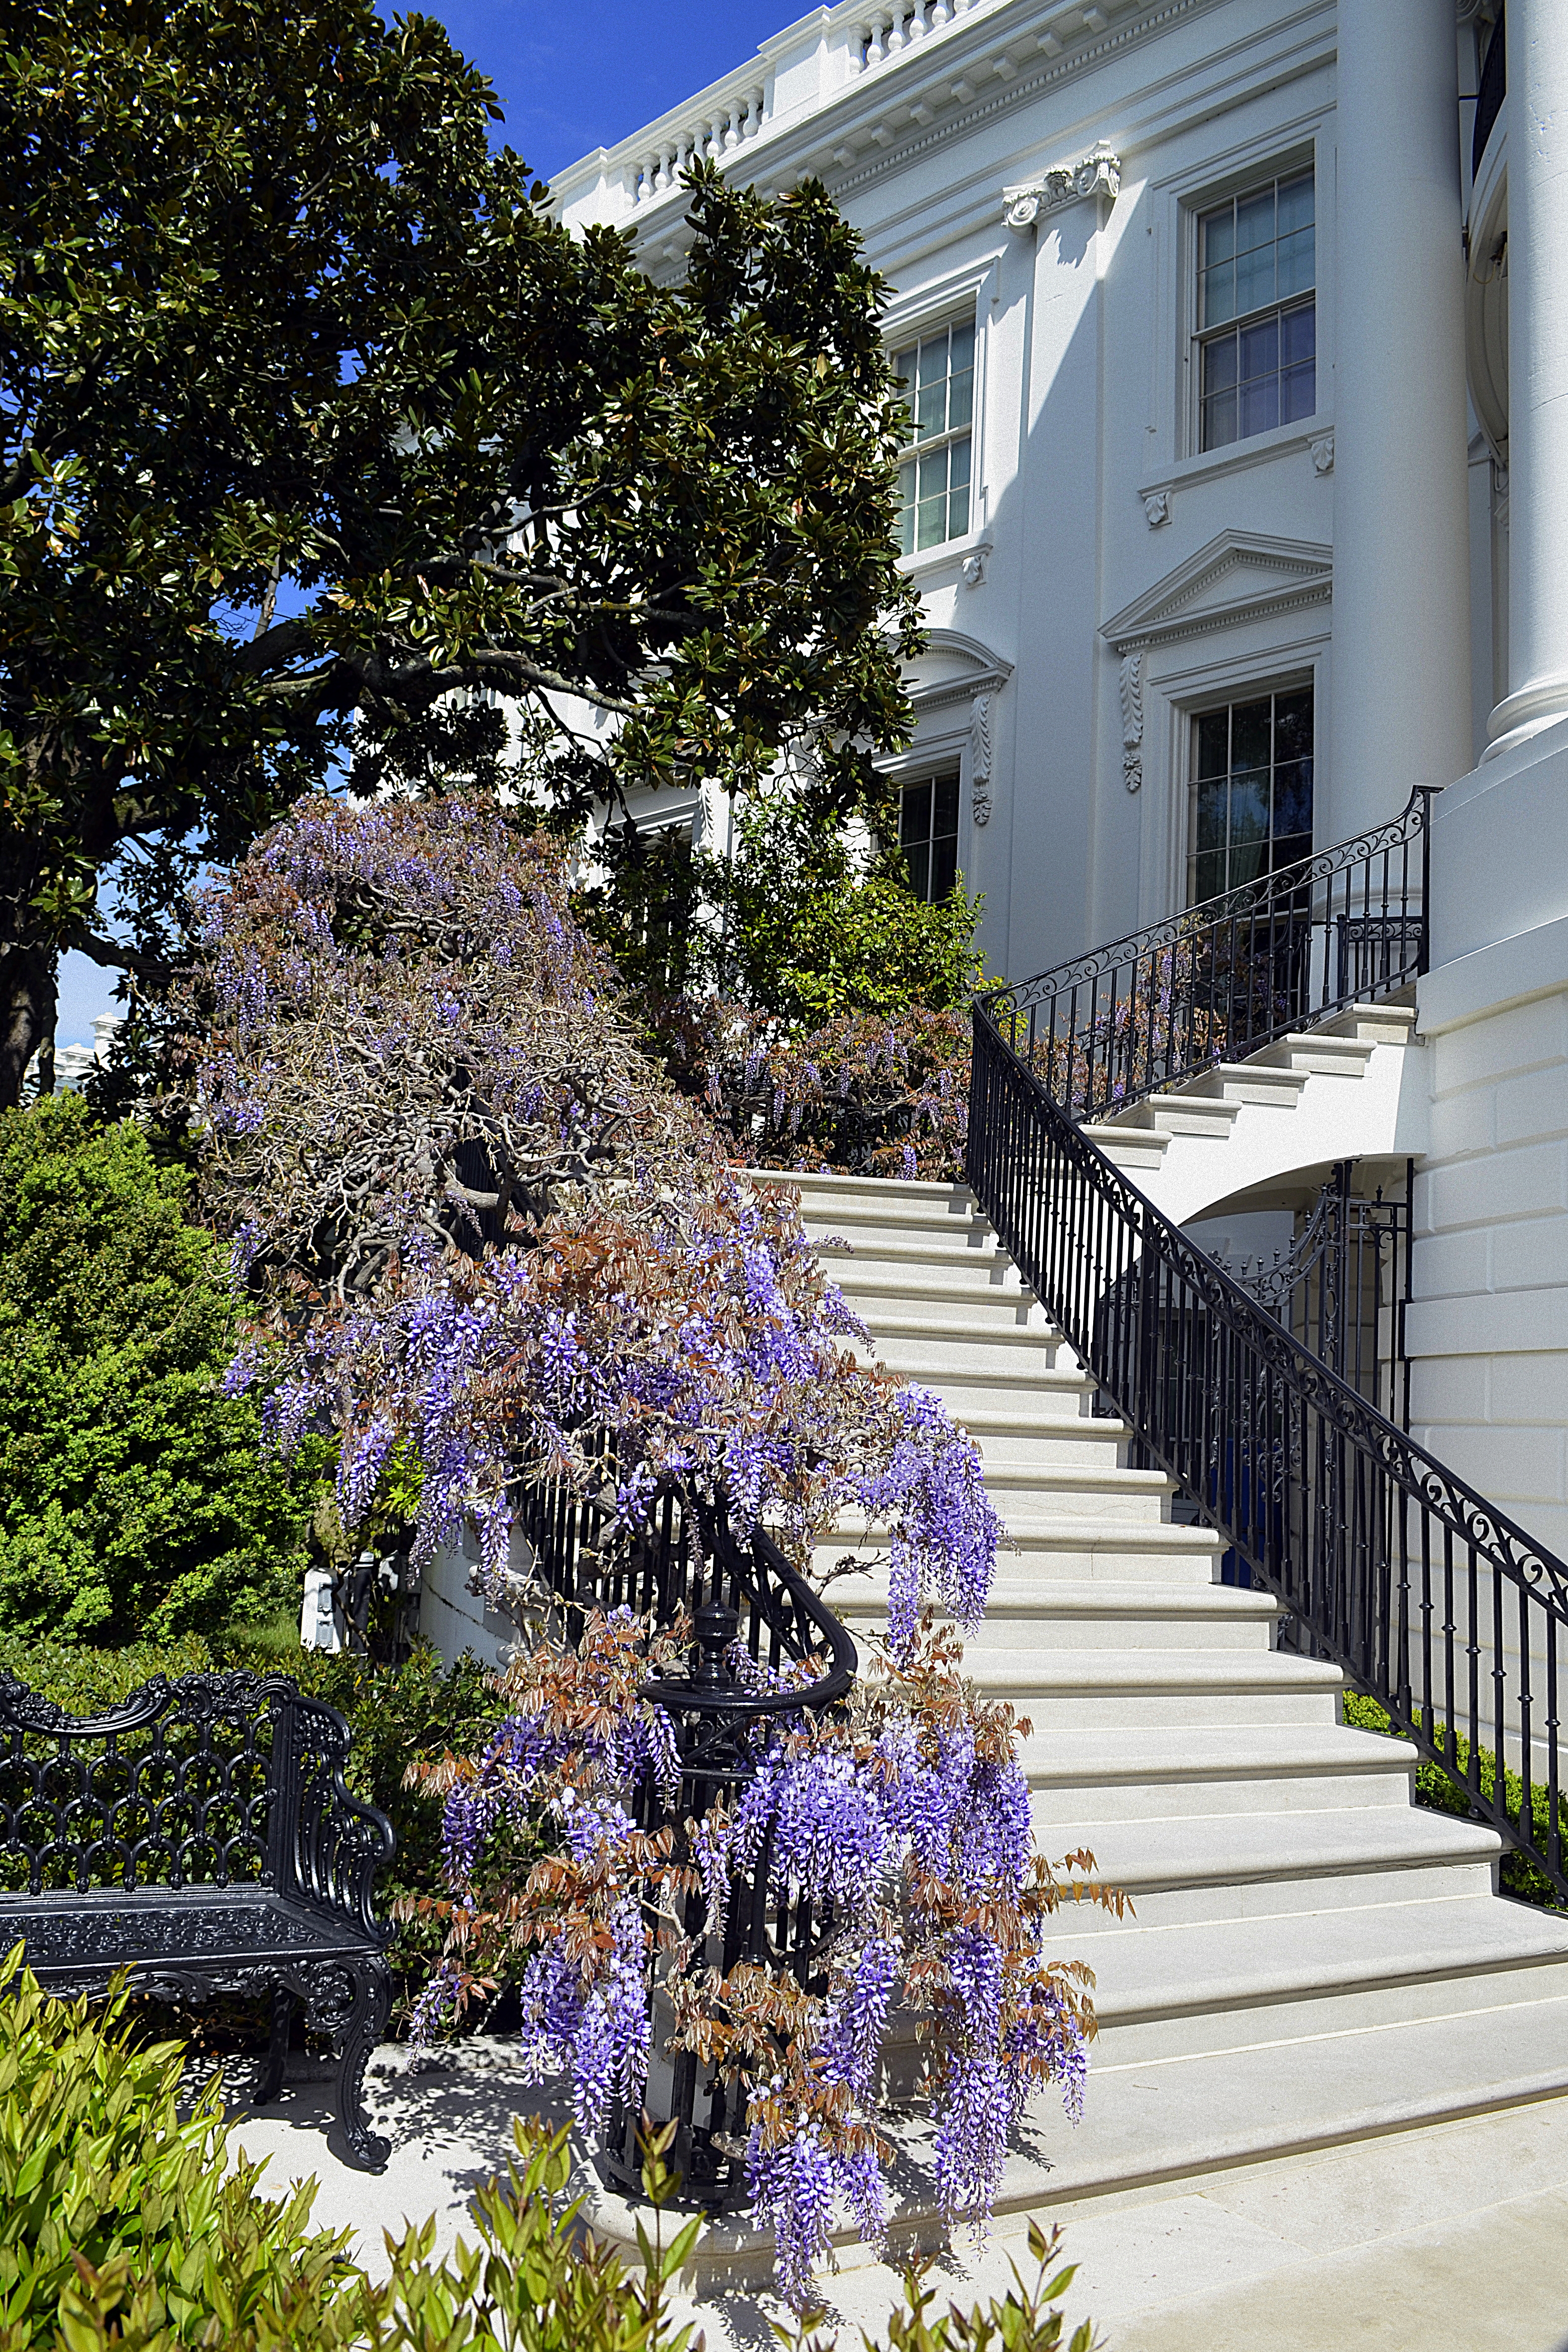
Last weekend, I was lucky enough to go on the White House’s Spring Garden Tour with a good friend. There were tulips everywhere, but these striking red ones caught my eye, probably because they were past the first flush of youth yet managed to look so elegant in their decay. I won’t dwell on the philosophical ramifications of that–but I will dub them ‘Norma Desmond’ tulips since I don’t know what type they actually are.
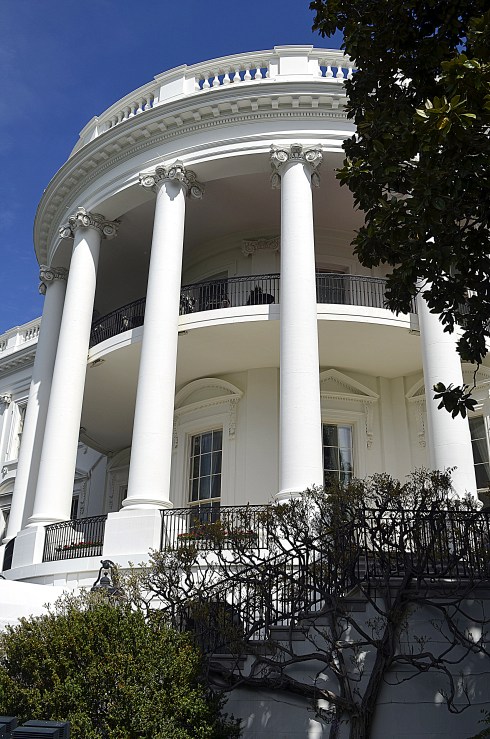
Aside from tulips , there are commemorative trees throughout the gardens, planted by various presidents and first ladies. The oldest are two huge Southern Magnolias that have been flanking the South Portico of the White House since 1830, when Andrew Jackson planted them (see glimpses of both trees, plus some wisteria, below):
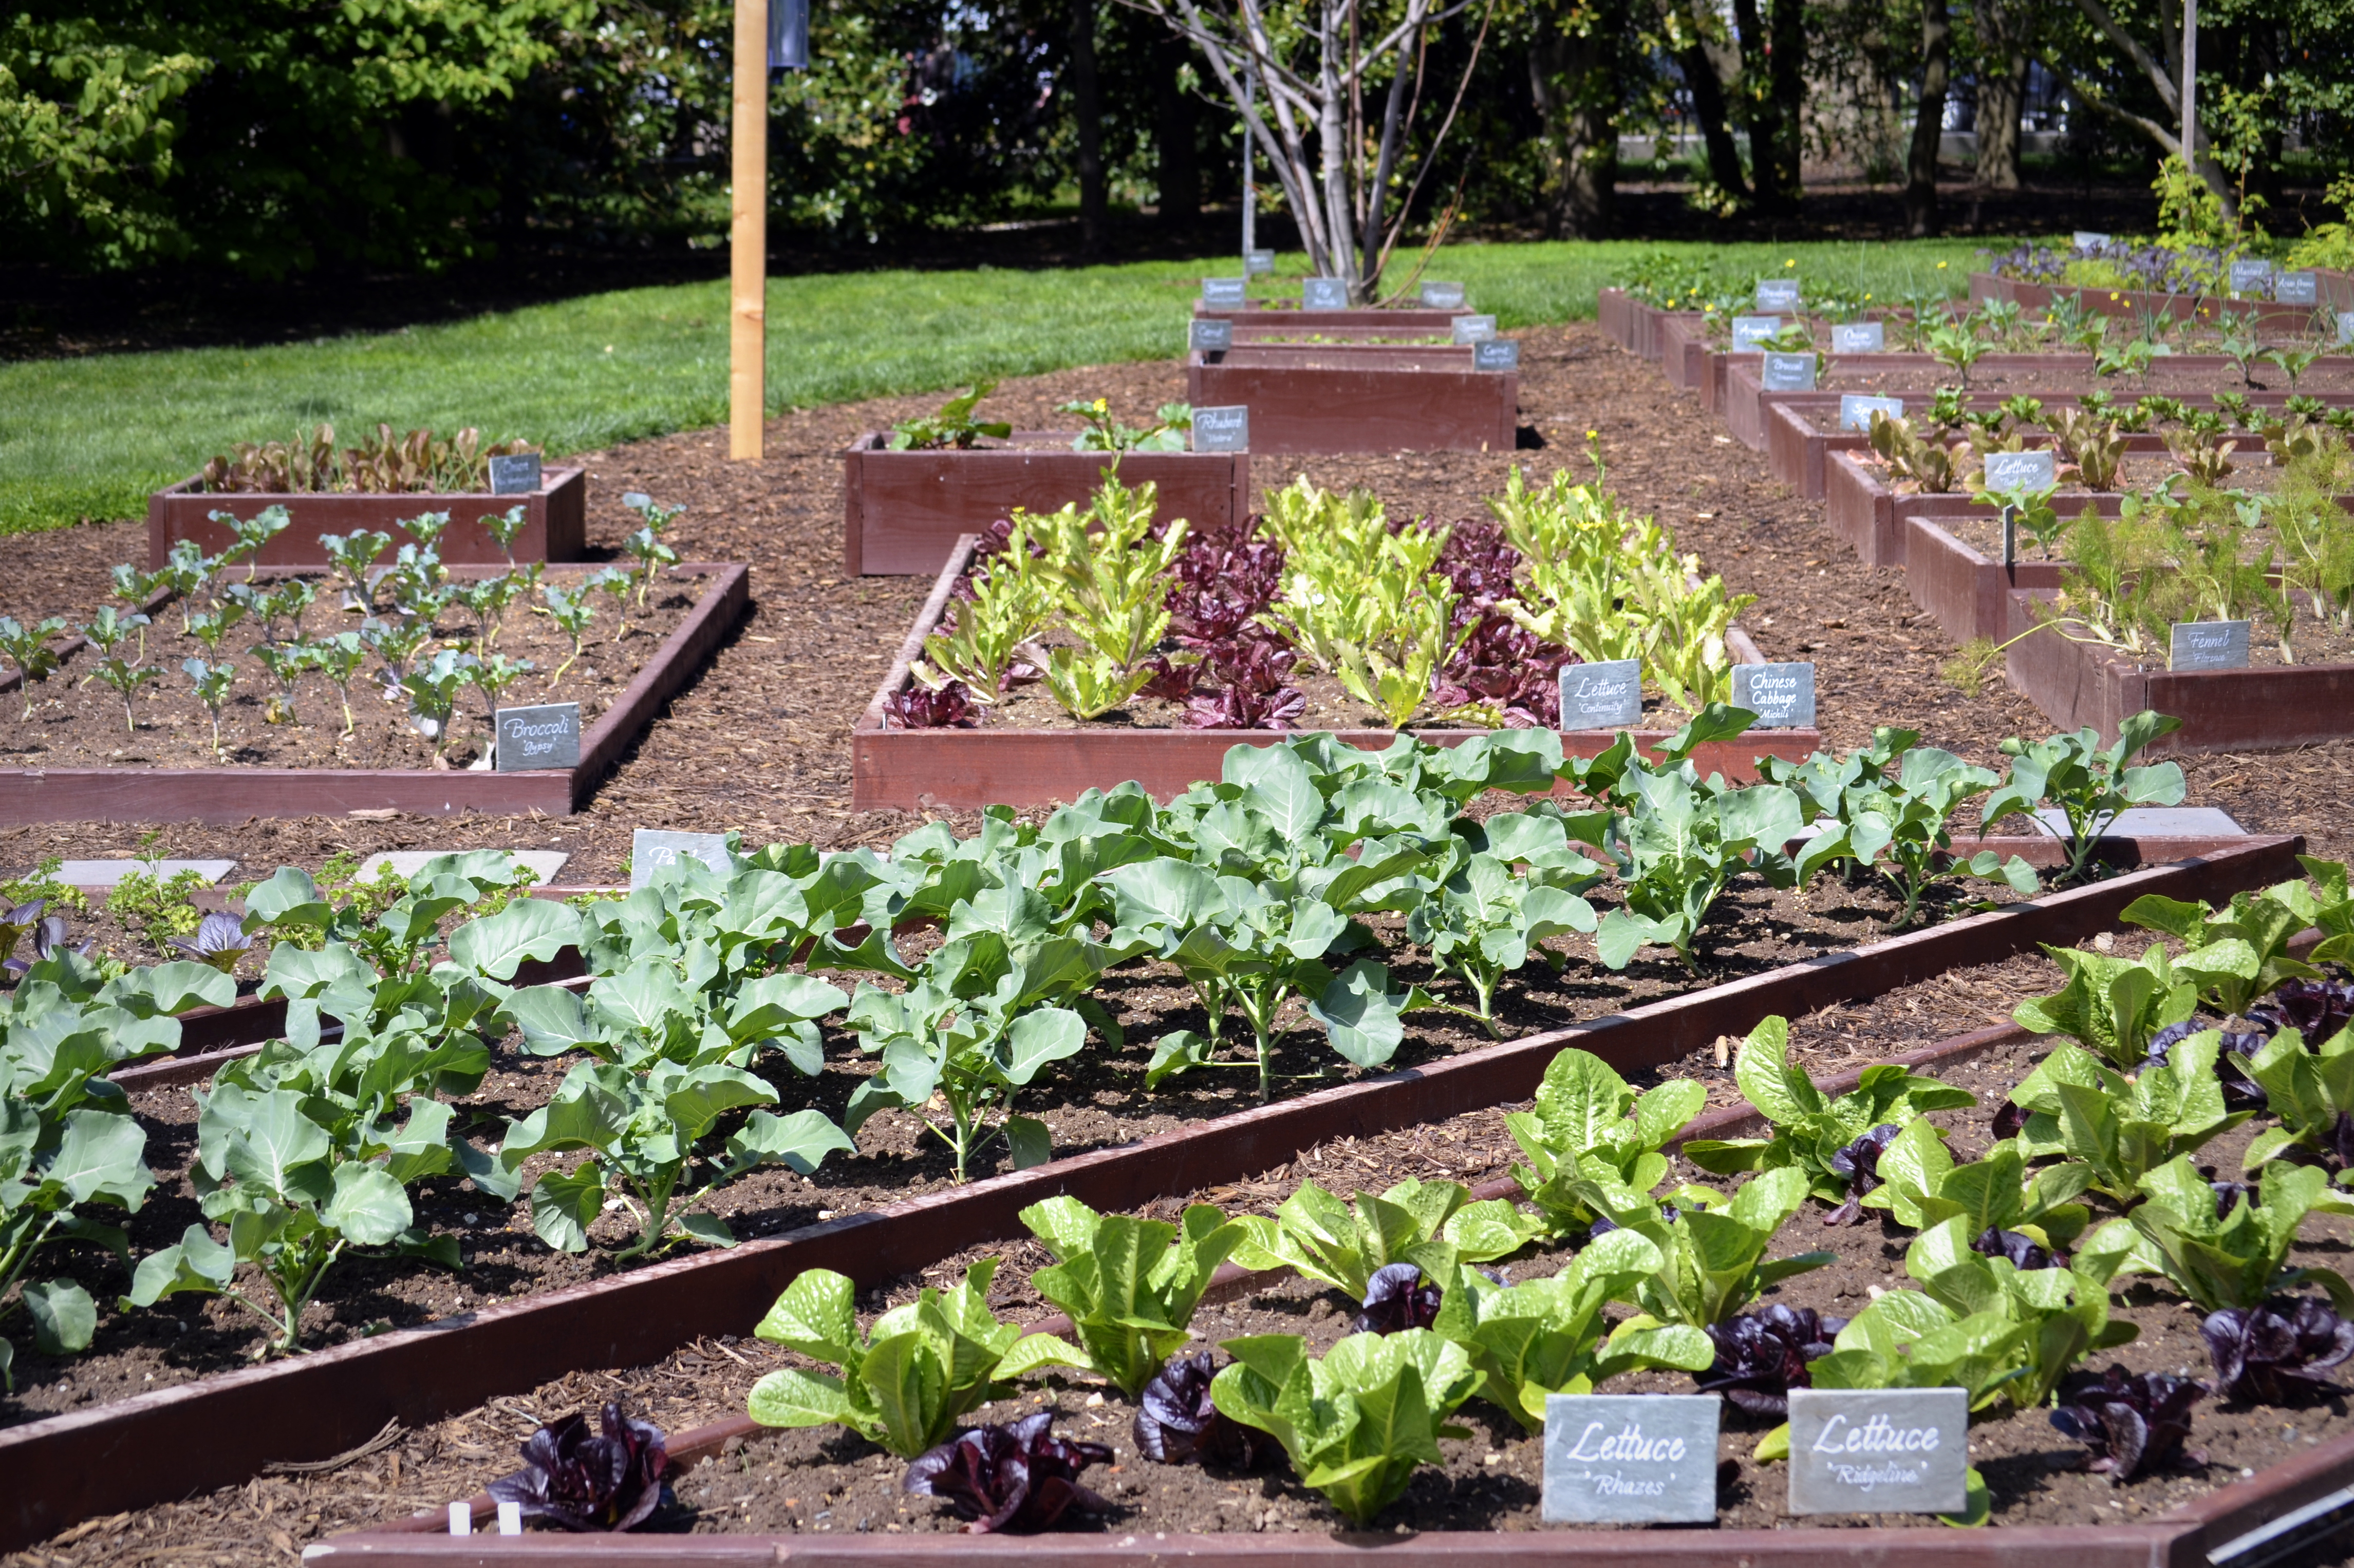
The Rose Garden adjacent to the West Wing was in view, but was off limits–we were able to get a bit closer to Michelle Obama’s Kitchen Garden:
And of course, there is the spectacular view from the White House of the Washington Monument and the Jefferson Memorial.
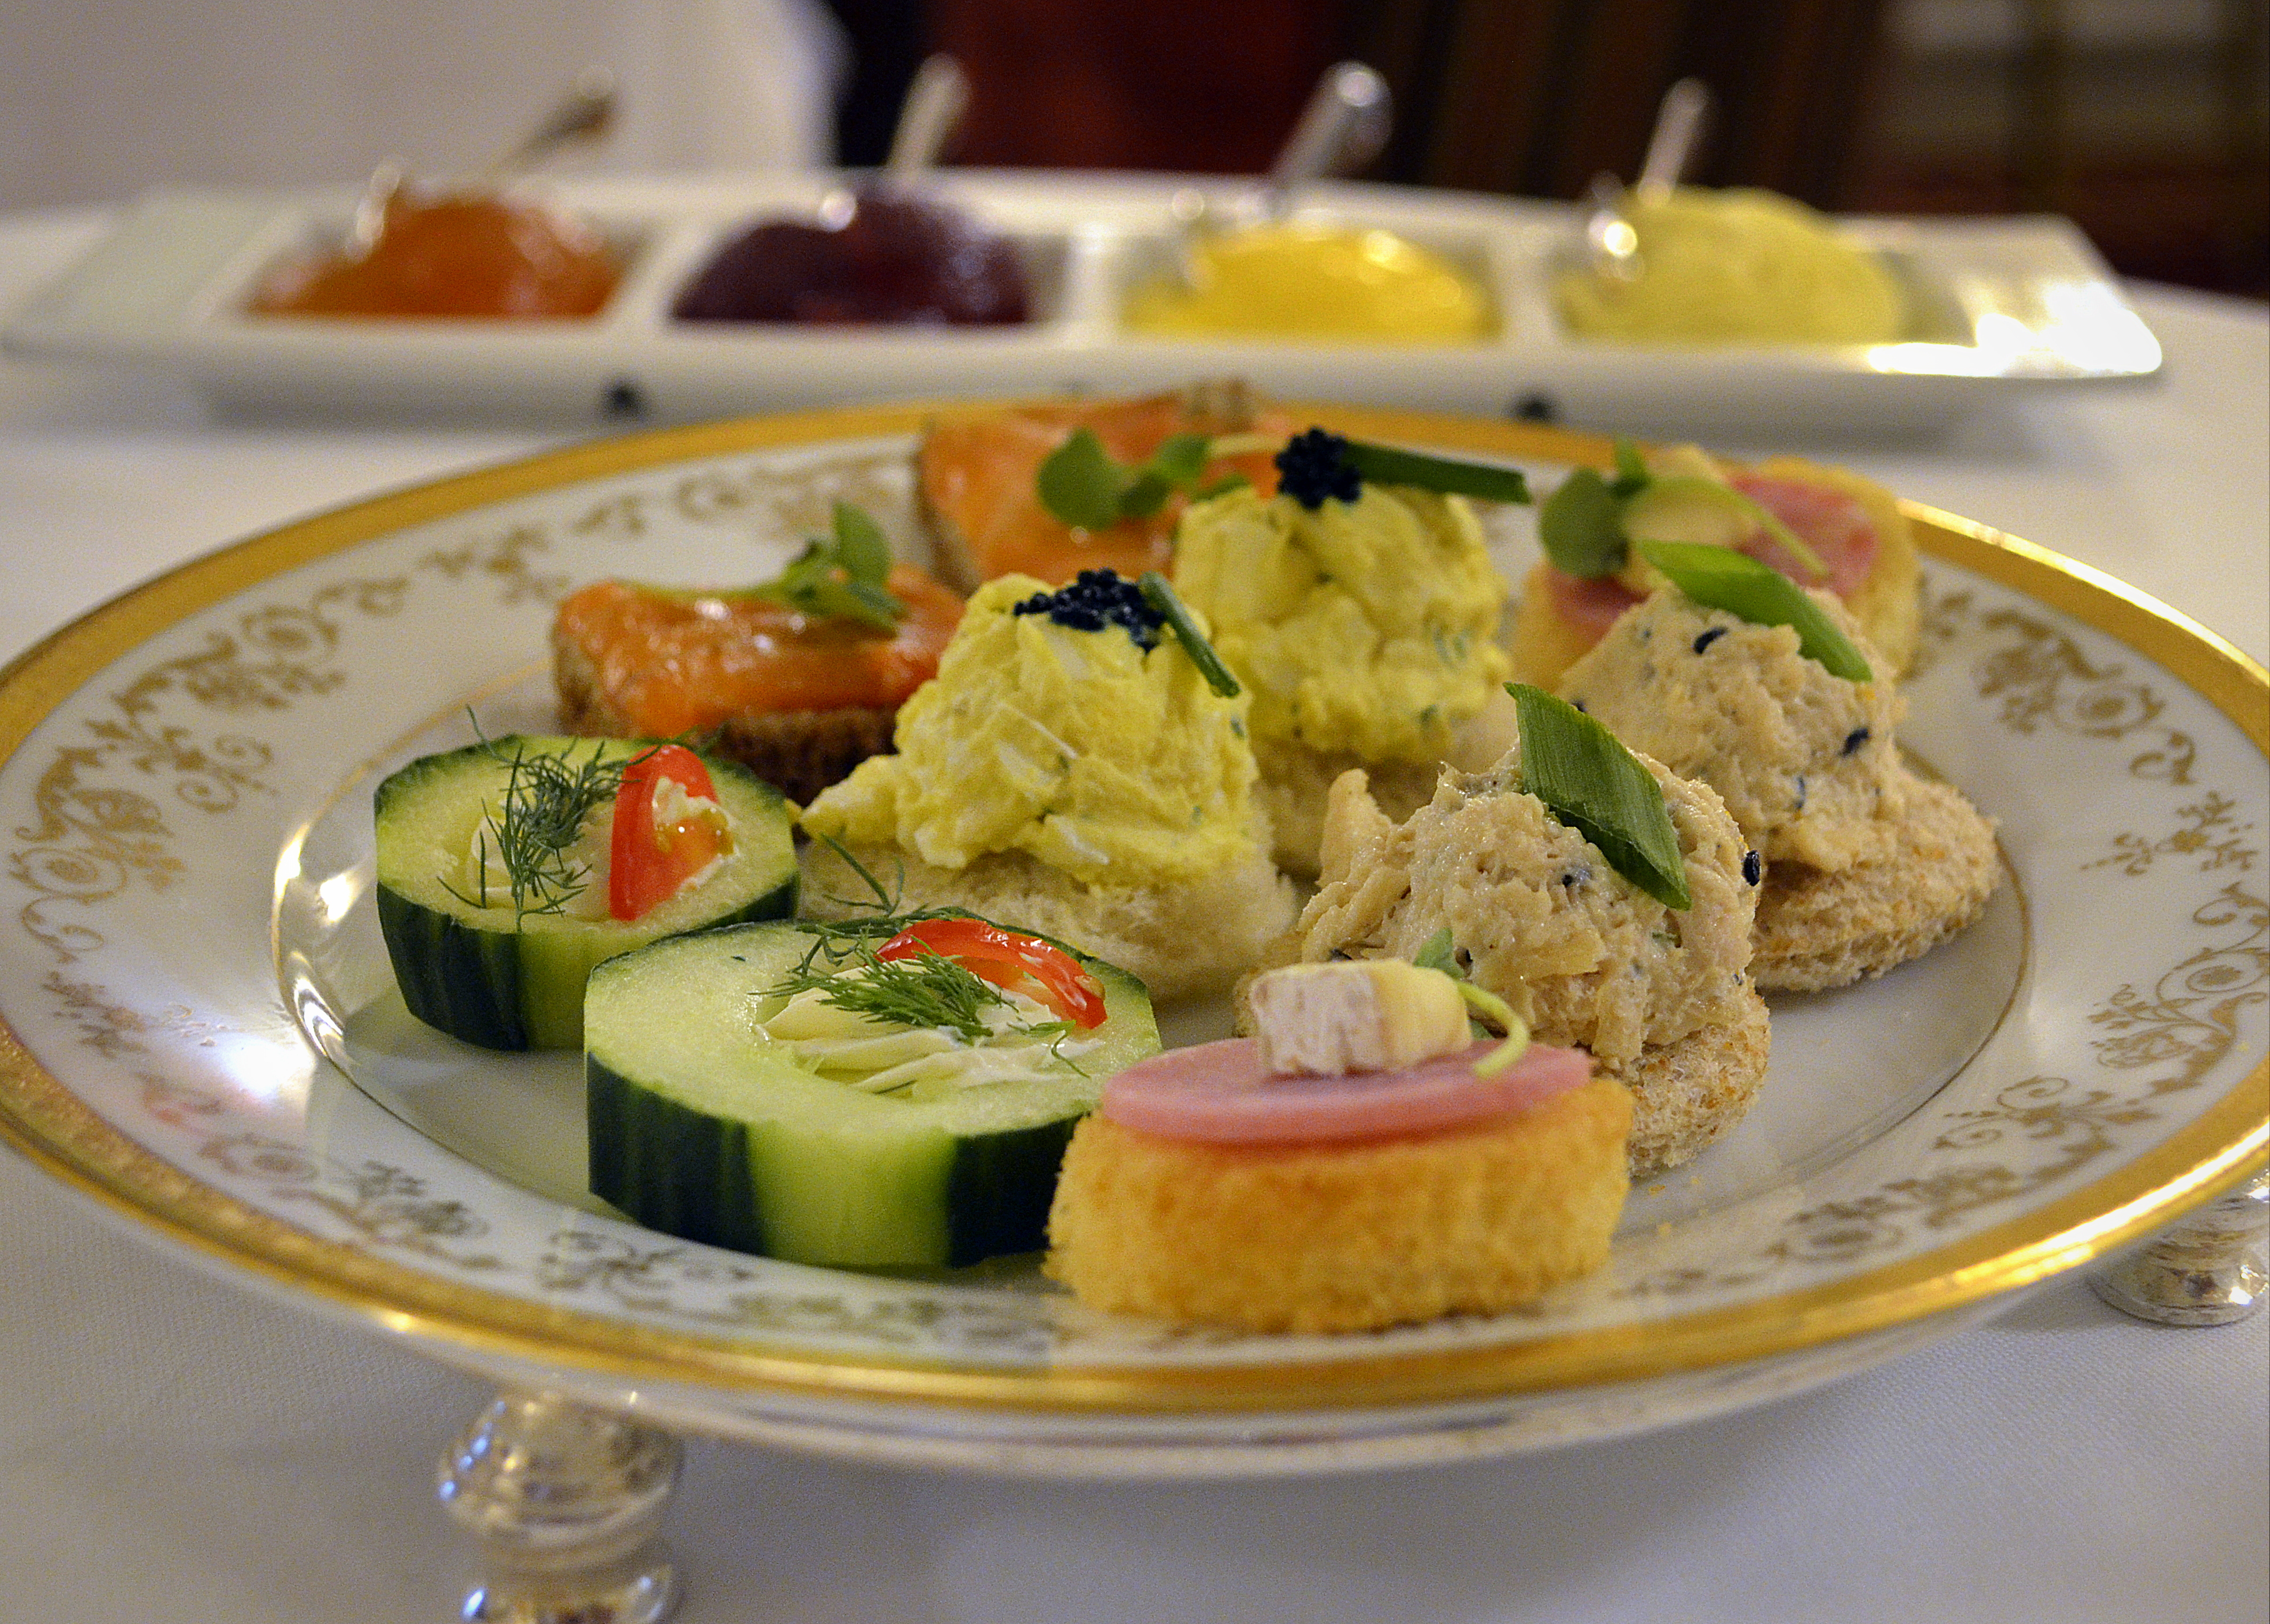
Could the day get any better? Why yes, it could. Because the Willard Hotel, renown for its afternoon tea, is right around the corner, and they seated us despite our not having any reservations. The Willard’s ‘Peacock Alley’ afternoon tea venue is below:
And here is the sandwich part of our tea–a very small part of the overall meal, which also included two kinds of scones, four types of pastries, and chocolate mousse. And a pot of tea.
Flowers, tea, and friendship. A great day all around.
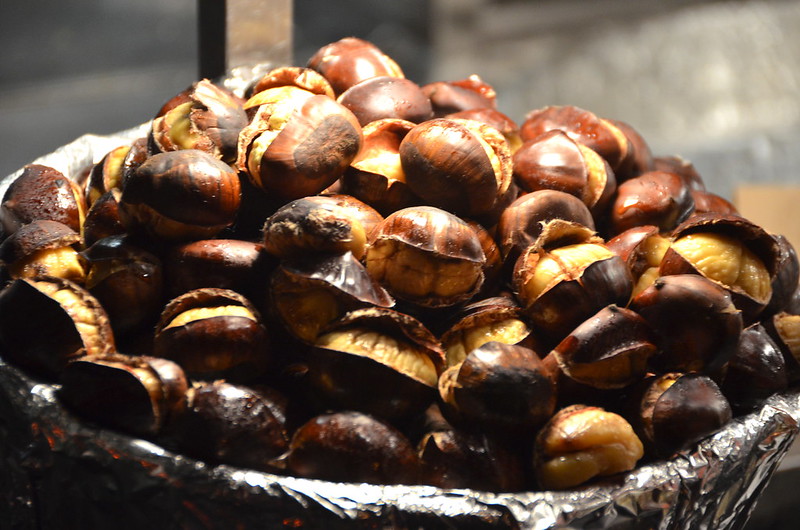
My father was a New Jersey boy who went to elementary school in Manhattan in the 1940s. He loved the smell of chestnuts roasting over open fires on city street corners, a snack available almost year round when he was young. By the time I was a teenager, roasted chestnuts were primarily a holiday season treat, due to changing tastes and a perception that chestnuts were a poor man’s food. (Amazingly, lobster was once viewed the same way; today, the lines that form in front of the lobster roll truck by my office at lunchtime are a sight to behold). Here is a photo of chestnuts roasting in NYC, courtesy of a fellow Flickr user:
Photo credit: Adam Fagen, Flickr
Chestnuts–which are chewier and starchier than, say, walnuts–have been a staple food in southern Europe and parts of Asia for millennia. They can be boiled, candied, eaten raw, mashed, roasted, sautéed, steamed, or ground into flour–and have long been a favored ingredient in stuffing, vegetables dishes, casseroles, porridge, and desserts. They have less calories than other nuts and are the only nut to contain significant amounts of Vitamin C. So, as often happens when nutritious traditional foods are “rediscovered,” chestnuts and the naturally gluten-free chestnut flour are making a comeback, especially in upscale U.S. restaurants and specialty stores. Demand for chestnuts in the United States outstrips supply.
There are four main species of chestnuts: European, Chinese, Japanese, and American. The American chestnut (Castanea dentata)–known as the sequoia of the east because of its height–was almost completely wiped out by blight in the first half of the twentieth century, right around the time my father was enjoying the roasted (and probably Italian) versions near his school in New York City. Four billion trees died. Before tragedy struck, American chestnut trees were highly valued not just for their nuts, which fed both people and animals, but also for their wood. Nowadays, most of the chestnuts we eat in the United States are imported, but efforts are underway by organizations such as the American Chestnut Foundation and others to breed blight-resistant American chestnuts and reintroduce them into the forests of the American east.
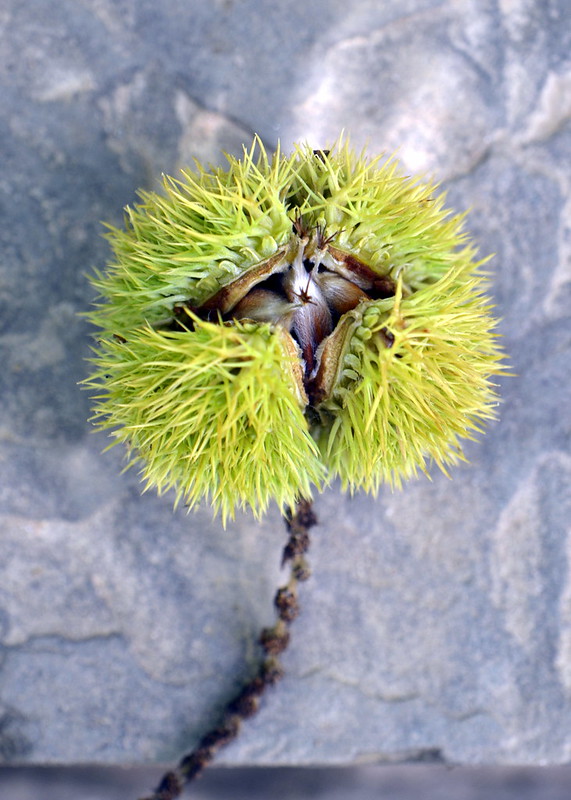
In the meantime, the most commonly seen chestnut trees in the United States are Chinese Chestnut trees (Castanaea mollisisma), which are resistant to blight. On a recent visit to the Audubon Naturalist Society’s Woodend Nature Sanctuary, Castanea mollisima burs carpeted the ground. Here are two burs (and boy, are they prickly and sharp), one of which is beginning to open.
Chestnuts are harvested once the burs have fallen from the tree. Typically, there are up to three nuts inside each bur; here is a photo with one nut inside a more mature (and browner) bur. The nuts are covered by two “skins”: a dark brown, hard seed coat (or husk) and a papery under layer.


 on the sides; front-facing wall of opus mixtum (bands of brick and tufa), with lateral 'toothing' and a structural arch; plus rough-hewn travertine column--Portico of Claudius, Portus (c. 50 AD)")
")
 with lateral 'toothing' and putlog holes at the top--Trajan's warehouse, Portus (c. 100 AD)")
")
, Trajan's warehouse, Portus (c. 100 AD)")

