Corn tassel consisting of individual spikelets, with anthers hanging from filaments
Last year, I carved out a patch in the vegetable garden, planted some corn kernels, and was very excited when the sprouts emerged. But a few days later, all the sprouts were severed, laying forlornly on their sides where they had fallen. Upon closer inspection, the sprouts had been pulled up and the corn kernels had been chomped off at the base — clearly the work of chipmunk commandos who had infiltrated the garden at the crack of dawn. Chipmunks 1, me 0.
This year, I planted seedlings instead of kernels, crossed my fingers, and hoped for the best. As of yet, there haven’t been any corn massacres, so I’ve been able to watch corn plants grow for the first time — and admire their constituent parts. There is a lot to notice, from the stripy leaves…
Macro view of corn leaf
… to the beguilingly named tassels and silks. The highly recognizable tassel at the top of every corn plant is the male part of the plant, and consists of about 1,000 spikelets, each containing 3 pollen-producing anthers and their filaments (collectively, the stamens). With 6,000 pollen-producing units on each corn plant, that’s a lot of pollen to be wind dispersed (read more about pollen shed in this great article on “sex in the corn field“).
(l-r): Emerging tassel, anthers peeking out (exserting) from individual spikelets, tassel with anthers hanging by their filaments
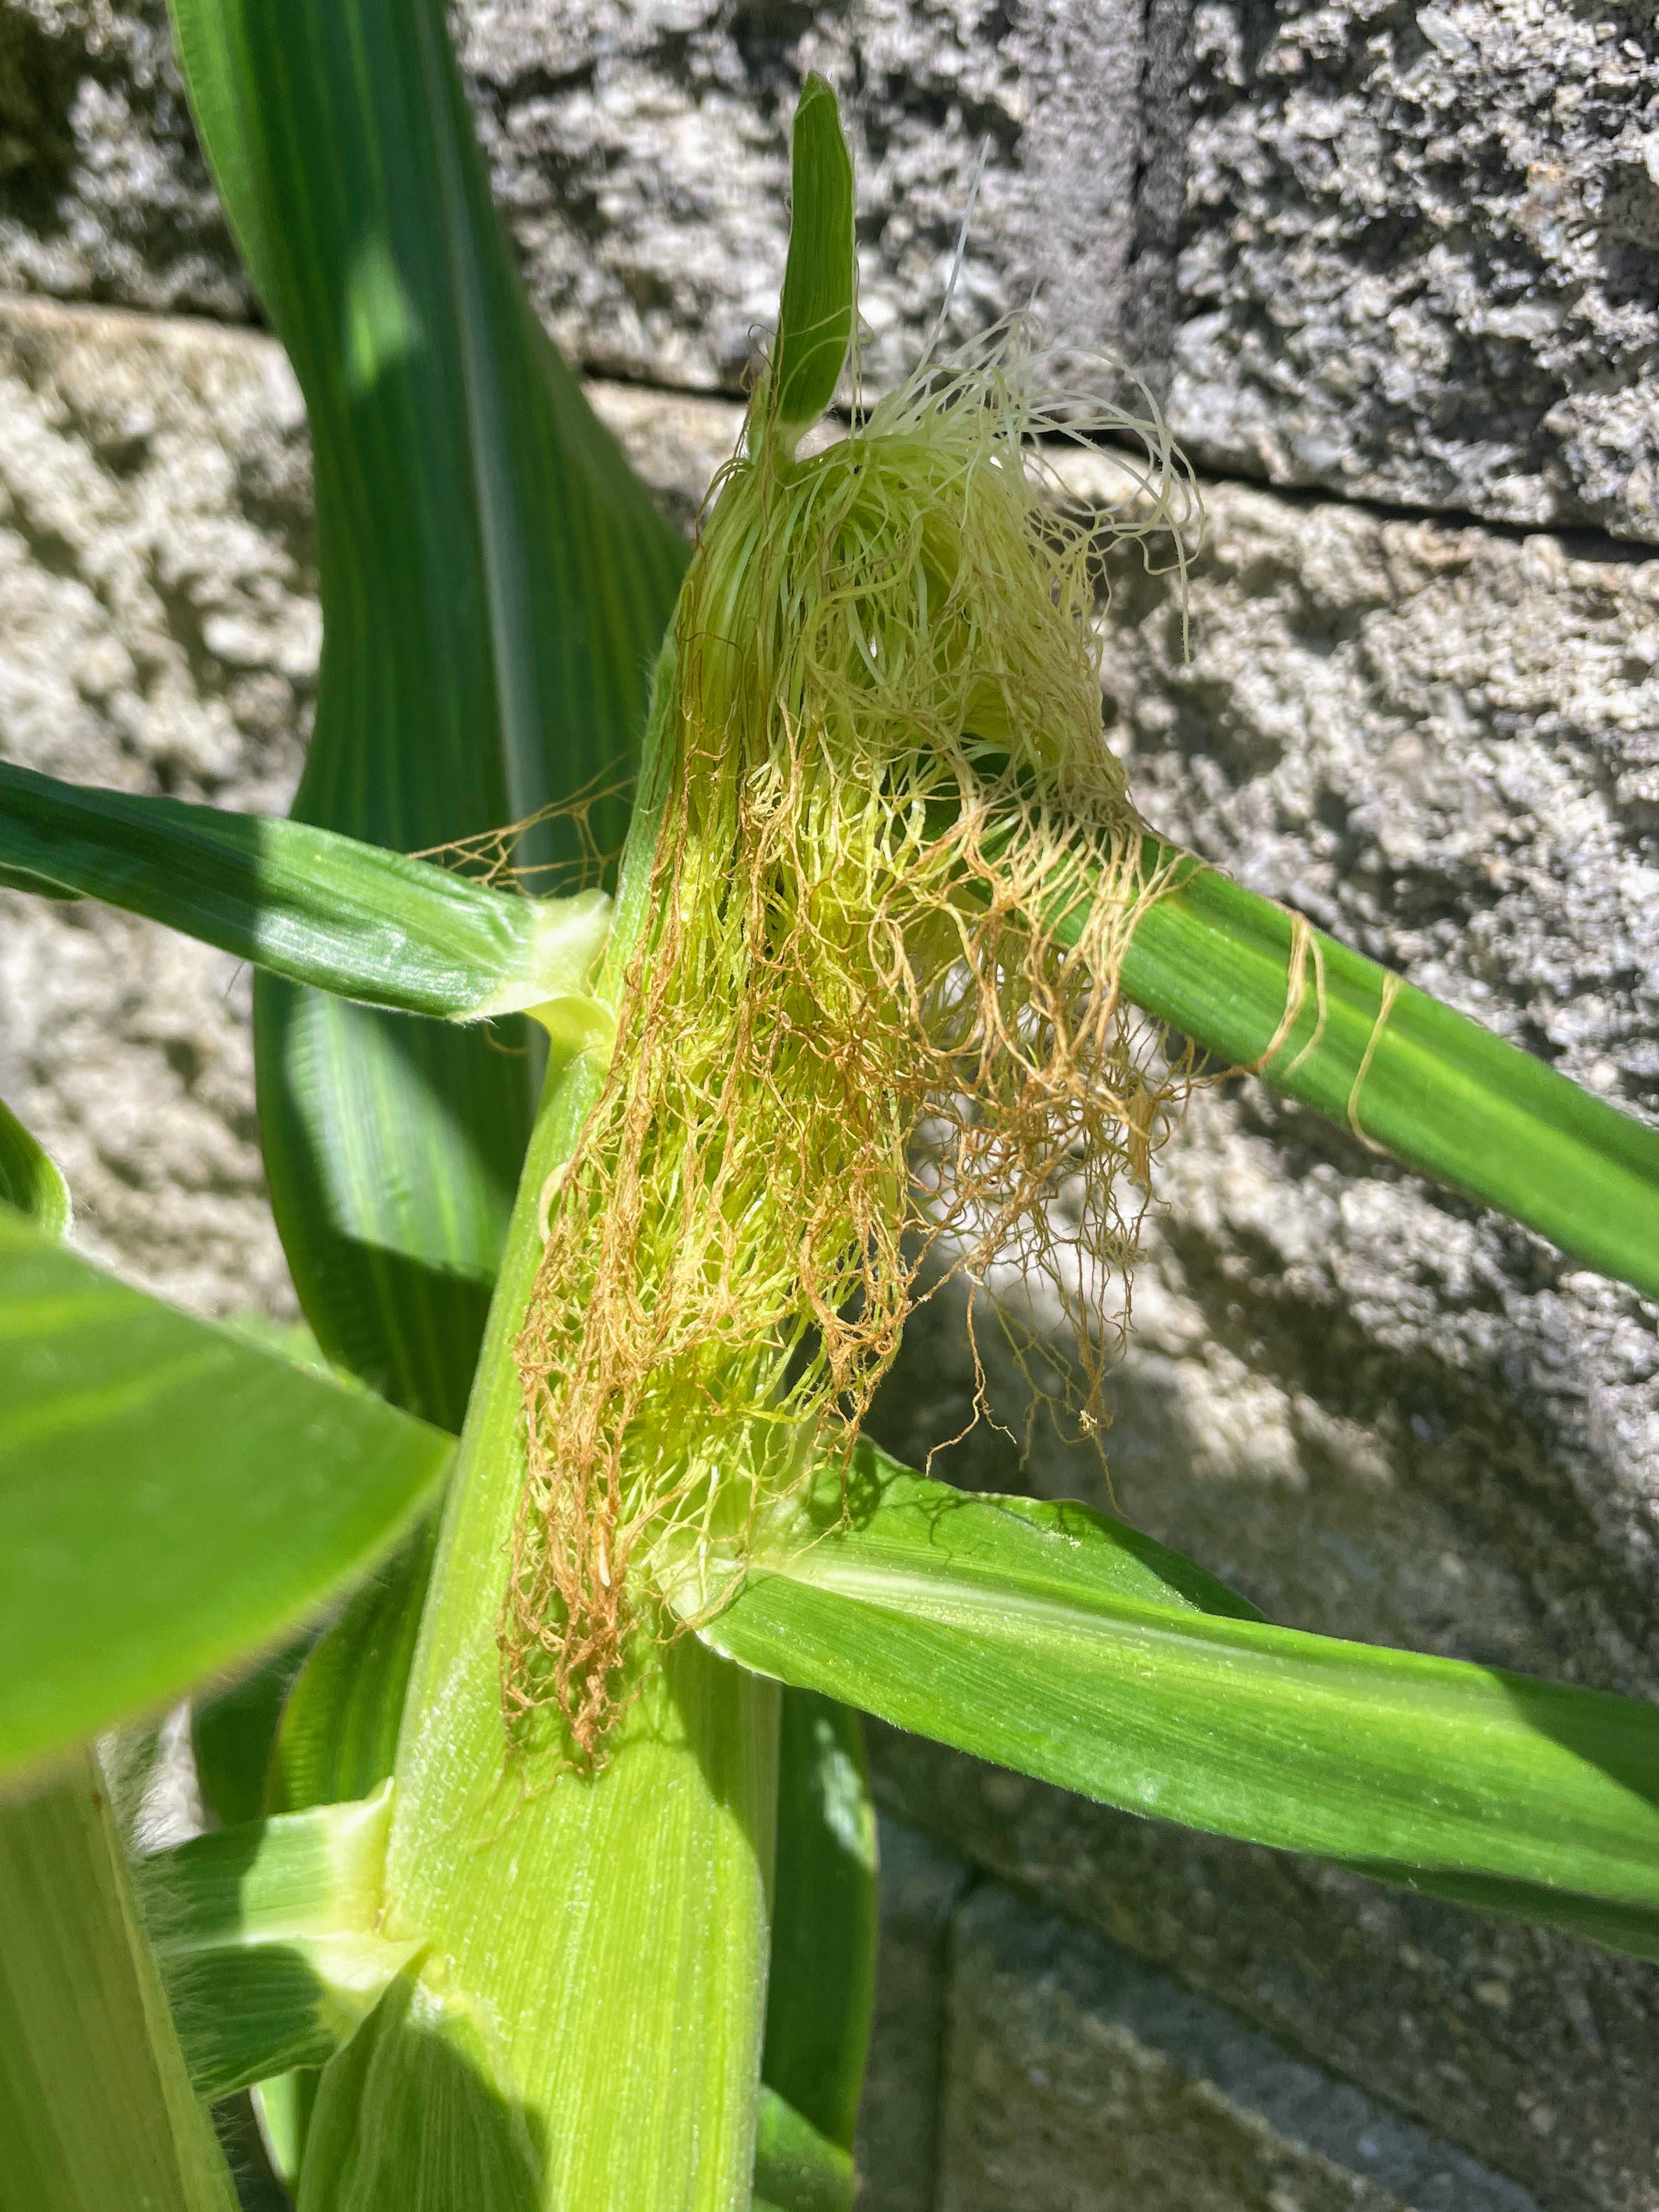
The silks are the female part of the corn plant. They form at the base of the ear but are most visible at the tip, emerging from the husk. Their job is to catch the pollen and guide it down to the unfertilized corn kernels (ovules) on the ear. Here’s the fascinating part: Each silk is connected to a kernel (or what would be a kernel if successfully pollinated). As not every ovule gets pollinated, most ears produce about 400 to 600 kernels.
You can tell when pollination has occurred because the silks dry up, turn brown, and often fall off. You can also tell when pollination hasn’t been very successful if your ear of corn has missing or misshapen kernels. That’s why it’s important for home gardeners to plant corn in a block rather than a single row, so the pollen has more chance of falling on nearby silks rather than being completely blown away from the row.
(l-r): Emerging husk, silks popping out of top of husk, silks turning brown after pollination
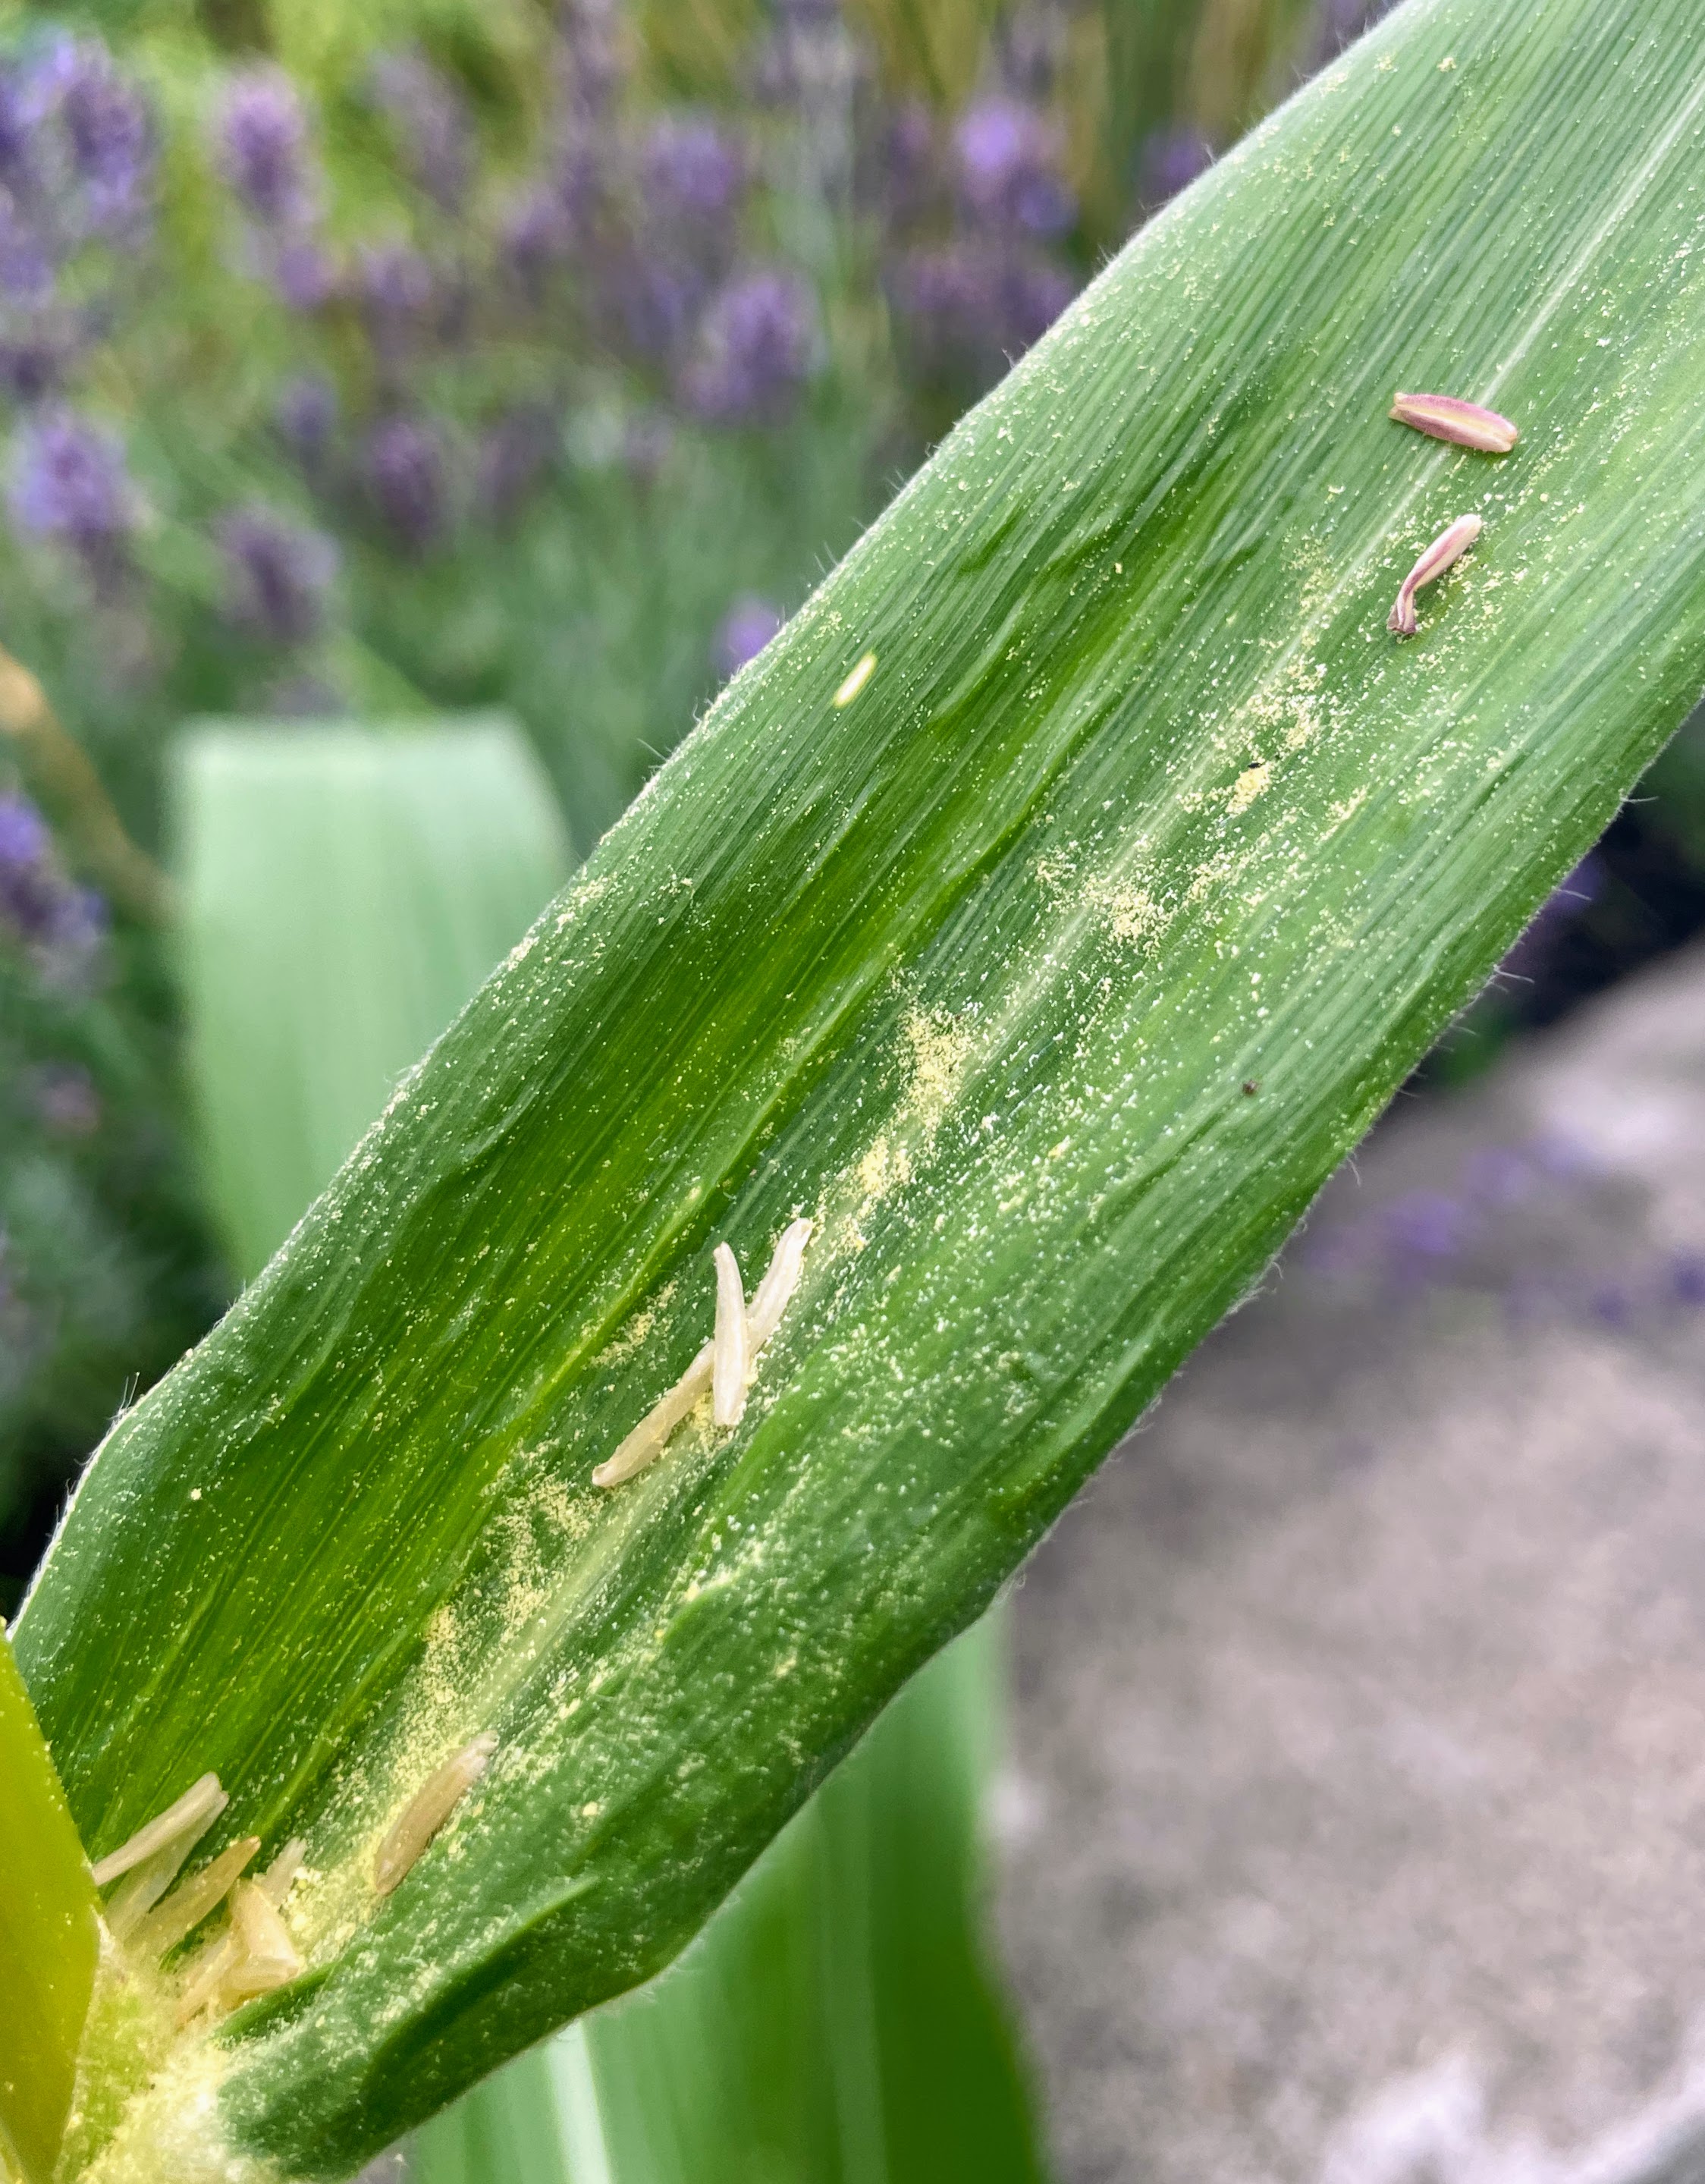
I don’t have any photos of pollen on the silks, but this is what the tiny yellow pollen grains look like on a corn leaf, along with some spent anthers (they drop off the tassel after the pollen is shed).
Some of the 2-5 million pollen grains produced by each corn tassel (and some anthers)
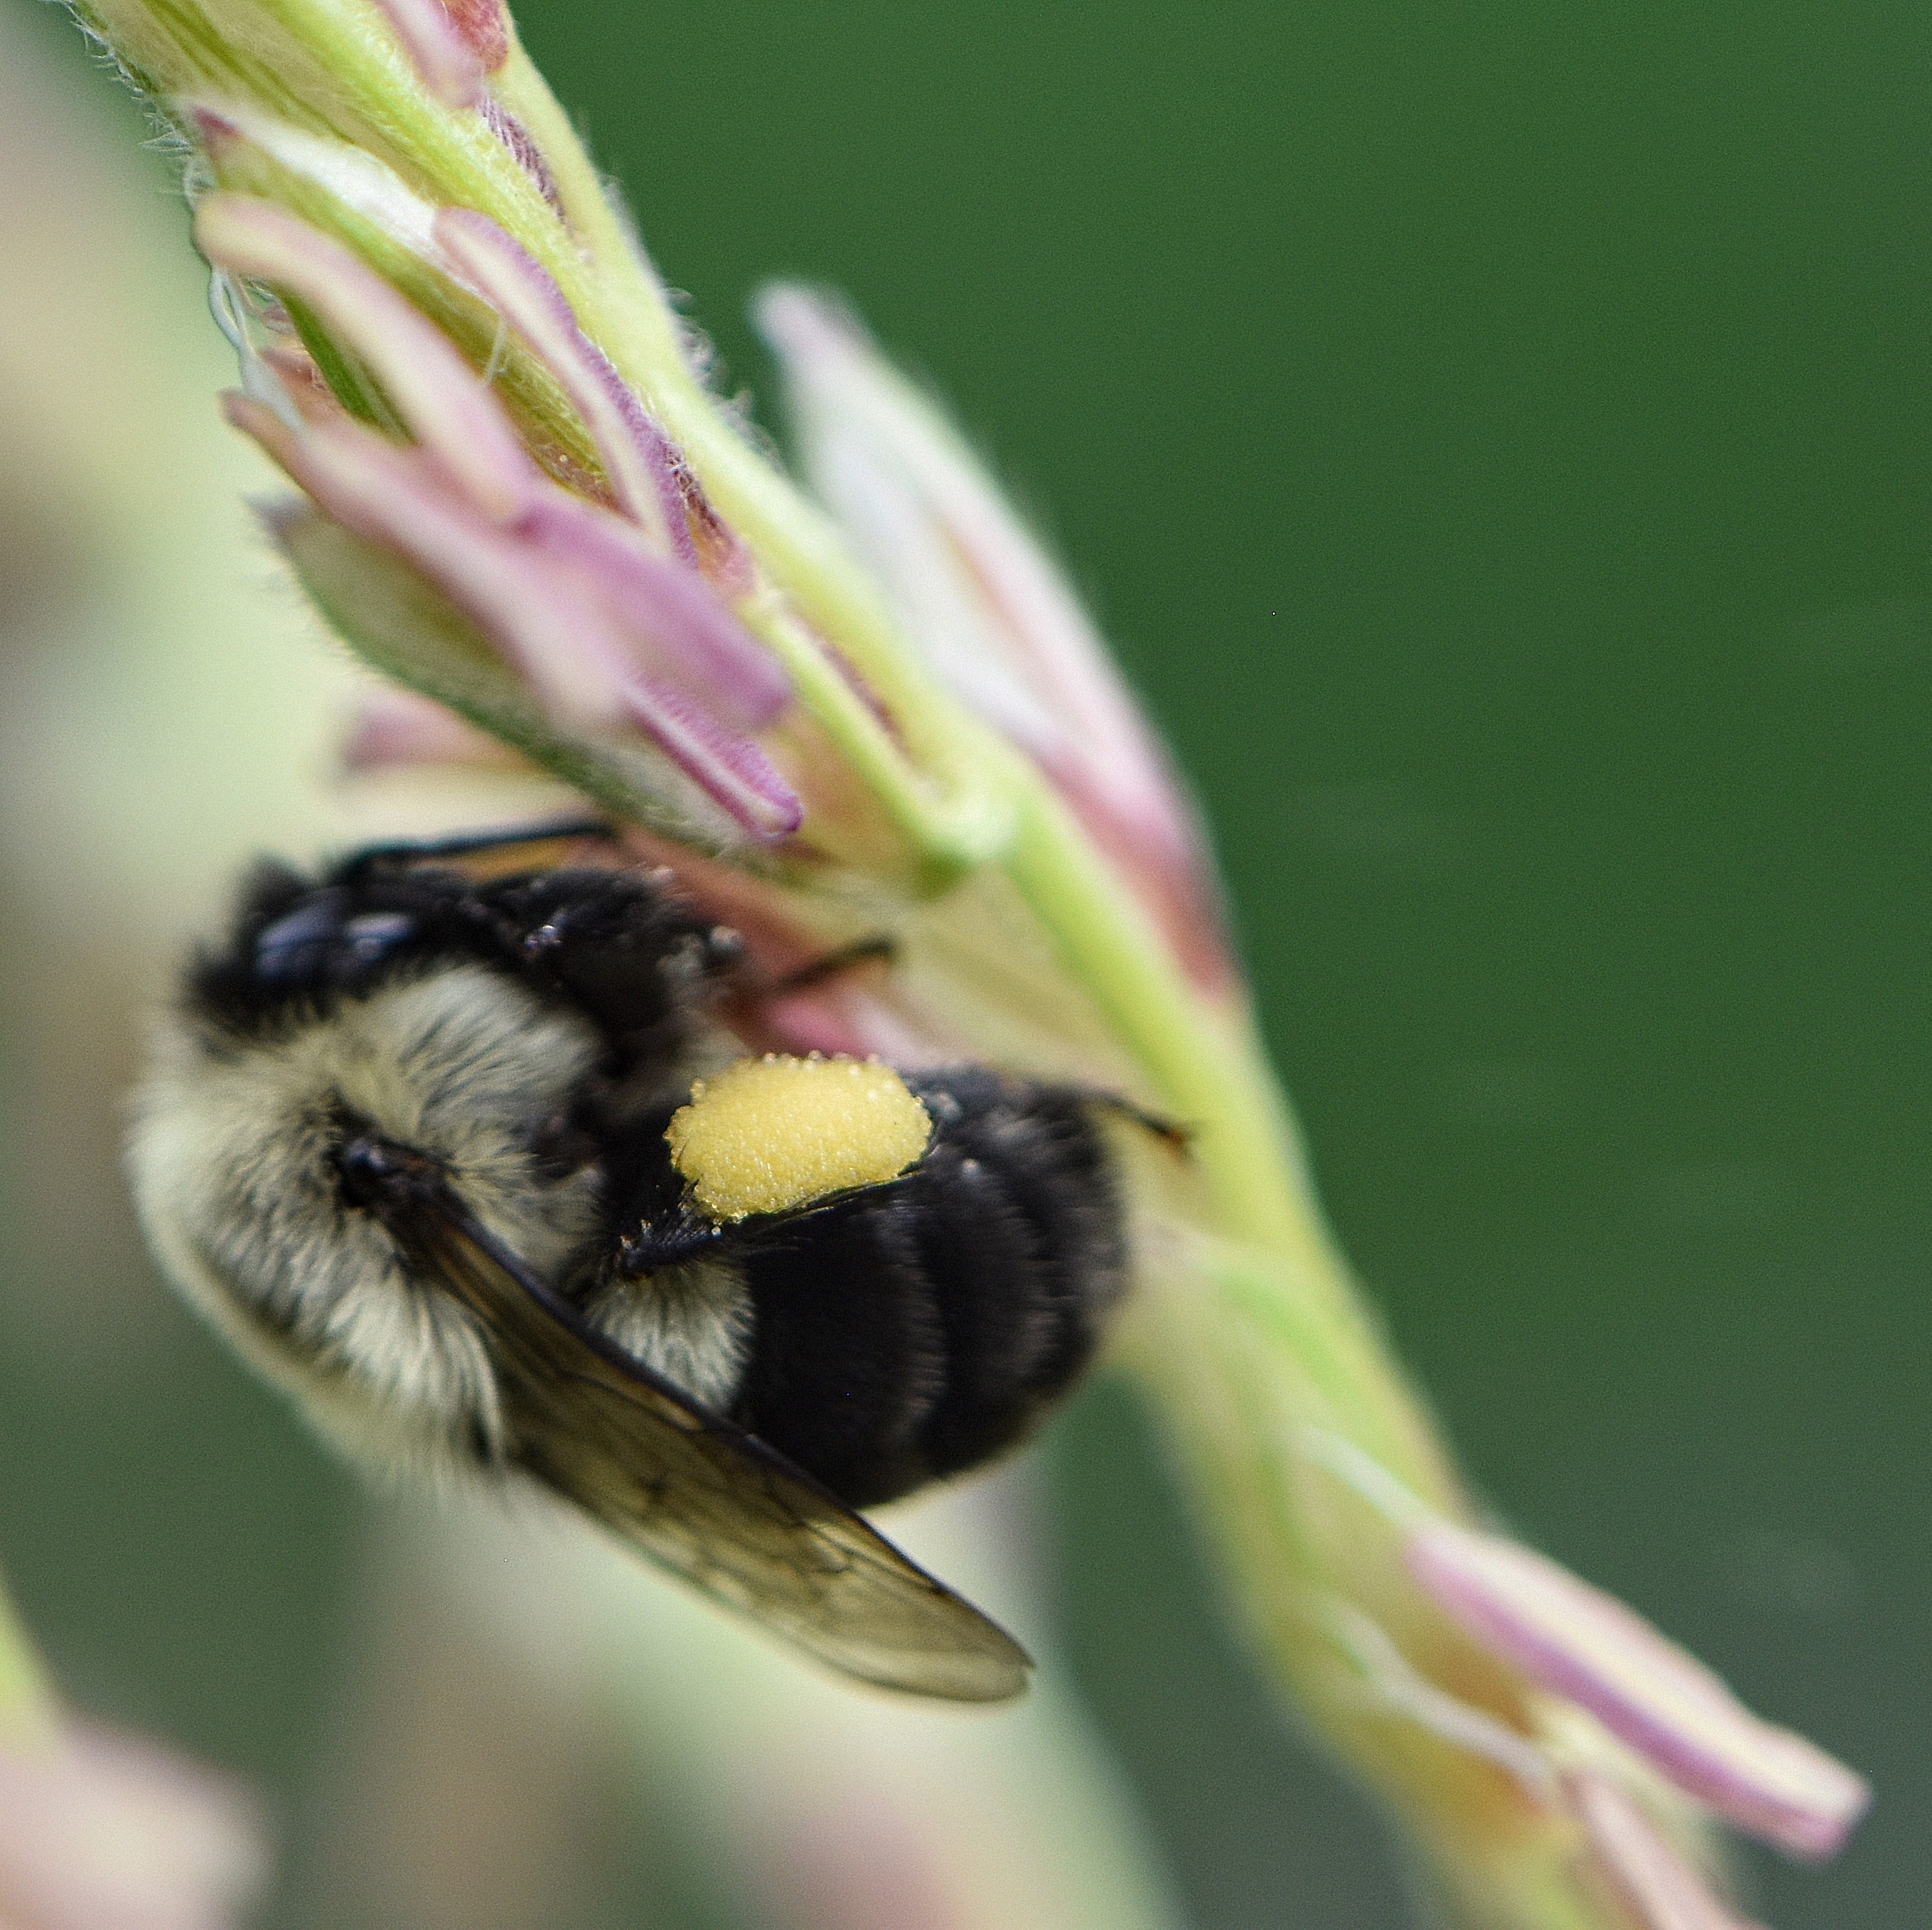
Though corn is pollinated by the wind (anemophily), pollination can also occur with the help of insects (entomophily). Luckily for me, as I was taking photos of the tassels, a bumble bee appeared. Or, more specifically, a female bumble bee appeared–as the females are the only ones to have pollen baskets (corbiculae) on their hind legs.
I remember a teacher in elementary school bringing our class a batch of “Everything But the Kitchen Sink” cookies, which I’d never had before. I didn’t quite understand the name, so the teacher explained that it meant she had put all sorts of things into the cookies, almost everything in her kitchen but the kitchen sink. That day, I tasted a new cookie and learned a new phrase.
For me, Minestrone is an “Everything but the Kitchen Sink” soup. When the leaves start turning colors in the fall — ie, when soup weather is upon us — and I have vegetables to use up, I immediately think “Minestrone.” In Italian, minestra means “soup;” minestrone means “big soup.” And it really is a big soup, full of so many good things.
Of those good things, there is one without which this cannot be Minestrone, in my view: the cheese rinds. We usually have a wedge of Pecorino Romano cheese in the fridge, and as we get to the last of each wedge, I save the rinds. Without some rind, the soup will not taste like Minestrone; the slow-simmered cheese is a huge part of what makes the broth so delicious.
Pecorino Romano rind (black), Parmesan rind (golden yellow). And a Pecorino rind with the black part already trimmed off.
Aside from the rinds and the soffritto ingredients (onion, carrot, celery; see below), I like to add canned tomatoes, zucchini, white beans, and cabbage or spinach or both (or any other leafy green). Plus pancetta when I have it, potatoes if I need to use some up, and small pasta if there is room.
Today this is what I had at hand:
Fridge:
two onion halves (one red, one white)
four stalks of celery
some leftover grated carrots (about 1.5 c.)
zucchini (I had 2, but ended up using only 1 big one)
some shredded cabbage, ie ‘cole slaw’ mix (about 4.5 oz/127 gr)
baby spinach (about 3-4 handfuls)
Some Pecorino Romano and Parmesan ‘heels’ (see photo)
Freezer:
Cubed pancetta (4 o oz/113 gr)
Pantry:
Yukon Gold potatoes (I had 3, but ended up using only 2)
Whole peeled tomatoes
Cannellini beans (2 cans, 15.5 oz/440 gr each, undrained)
Garlic (3 large cloves)
Bay leaves
Vegetable bouillon cubes
Salt and pepper
Perfect–I had everything I needed for Minestrone! I also had mini pasta sea shells, which I’ve used in Minestrone before, but I did not use them this time; by the time I got to the point where I would have added them, there was no more room in the pot! Plus, dry pasta keeps and I had to use up the potatoes. (If you have pasta but no potatoes or just prefer the pasta, add a handful of that instead.)
For me, Minestrone is a soup I make in ‘layers,’ meaning I start with the first ingredients and while they are cooking, I prep the others, adding them to the pot as I go. Today, I started by cooking the pancetta in olive oil in a large Dutch Oven until it got crispy. (If you are vegetarian, omit the pancetta).
While the pancetta was cooking, I diced the onions and celery, then added them–and the already-grated carrots and a couple bay leaves–to the pot along with a splash more olive oil. This mixture of onions, celery, and carrots is what the Italians call soffritto and the French call mirepoix, and it is the foundation of many great soups. When the veggies got soft, I crushed the garlic cloves straight into the pot, added some freshly ground black pepper, and cooked everything for a couple more minutes. This is what I consider to be Layer 1, made up of a few subparts. [I forgot to take a photo of this, however.]
To start building Layer 2, I added some hand-crushed tomatoes and their juices to the soup pot. If I’d had a can of diced tomatoes, I would have used that instead–but necessity is the mother of hand crushing. With a very clean hand, I gently took a whole peeled tomato from the can, and crushed it into the soup pot, repeating until I had crushed all the tomatoes. [Note: If you will also crush the tomatoes by hand, lower your hand as far as possible into the pot, and crush each tomato very slowly. Otherwise, the likelihood of having crushed tomato all over your back stove wall, and yourself, is extremely high–as I’ve learned from experience.]
Successfully hand-crushed tomatoes; all in the pot, none on me
Then I added the cheese rinds (trimmed of the outer, colored parts) and 4 cups of water and let everything simmer while I diced the potatoes. When the potatoes were ready, I added them, the canned cannellini beans with all their liquid, and a vegetable bouillon cube to the pot, along with more freshly ground pepper. This is Layer 2. I let this simmer, partially covered, for about 10 minutes while I prepped the zucchini for Layer 3.
Nestling cheese rinds into the soup
In Layer 3, I added the diced zucchini and the already-shredded cabbage, and continued to simmer the soup until the zucchini and potatoes were both soft. I also checked the seasonings and decided to add another bouillon cube and a little salt. At that point, my Minestrone was essentially done and ready to serve, so I did the very last thing: I put the handfuls of spinach on top and stirred until the spinach was wilted in.
Then I set the soup pot out for everyone to serve themselves (with everyone getting at least one piece of the now-soft cheese rinds–an absolute treat), along with some freshly grated Pecorino Romano to sprinkle on top. Mmmm. So good on a fall day.
When we moved back to the U.S. three years ago, we bought a house with a big grassy backyard, sloping down to a wooden fence along the property line. It was a great backyard, but other than a small flower bed off the (old) deck, there wasn’t much active “gardening” space. There was a walkway border garden out front and a few roses scattered around there, too, but that was it. After living in apartments in Rome for five years, we wanted to enjoy the outside — and I really wanted to garden again. Luckily, the spaces around our new house had great potential to become places of joy not just for us, but also for the local bees, butterflies, and birds. I won’t dwell on the chipmunks, squirrels–and for a short while, rabbits–who have also found great joy here, too. Who knew squirrels could climb up giant sunflowers and take the heads right off? I didn’t. Lesson learned, though; no giant sunflowers next year.
But I digress. The hope we had for our outdoor spaces–which we thought about for a year before getting started–included flower beds, an herb garden, a vegetable garden, and a couple patios to provide more gathering space. As they say, beware what you wish for, because what followed took three years and a LOT of work. But it kept us busy during COVID and beyond, when we were glad to have something productive to do during the weekends.
Original sale photo of the backyard, taken Summer 2019, six months before we bought the house.
Today we have 12 separate garden beds, including a pollinator garden that looks like a wild English border garden, an herb garden, a vegetable garden, a rose garden, and new areas for all the plants we moved around, plus many new ones. This required completely redoing the backyard, rethinking a lot of the front yard, and lots of digging, weeding, transplanting/planting, weeding, seed starting, weeding, and finger crossing that everything we shifted around (often more than once) would survive.
We started Phase 1 by taking out most of the grass in the back and terracing the sloping plot, with help–as we could not move tons of soil on our own, nor could we install all the hardscaping alone. We toyed with the idea of laying down the patios ourselves (as we’ve done in the past), but knew we did not have the skills to build retaining walls, nor the necessary time, seeing as we both have actual other jobs requiring our daily attention. And this was not a weekend task.
Backyard, Summer 2021
Once all soil was out and the hardscaping was in, our work began: filling it all in. But it was early September (autumn) by then, so mostly we transplanted things from around the front, back, and side yards, and made a list of the new plants that would go in next spring. The top bed in the first photo below would be the future Pollinator Garden (I had saved plants from the old flower bed before we redid the yard, so got a head start by putting those back into the new bed). The second level would become the Herb Garden (ready to be planted with some perennial herbs I had grown in fabric bags during the summer), and the bottom level (barely visible) would be the Vegetable Garden. These were the first three of the 12 garden beds we would put in (or redo) around the house!
Backyard, Fall 2021
Note the missing deck section in the first photo above; we replaced the old deck entirely in Phase 2–with help from our children, family, and friends; but mostly done solo by my husband all through Fall 2021.
Finished deck and hardscaping, early Spring 2022
Backyard terrace beds: Top = Pollinator Garden, Middle = Herb Garden, Bottom = Vegetable Garden
In the two top beds above were the “skeleton plants” we had in Spring 2021. I added other plants to fill out the Pollinator and Herb Gardens, and grew some veggies from seed for the vegetable garden, though I also bought some more mature plants to jump start the process a bit. Here’s how the terraced garden beds evolved:
Pollinator Garden, Summer 2022 (left, middle); Herb Garden, Summer 2023 (right)Vegetable garden as seen from the bottom of the yard, Spring & Summer 2023
And here are some photos of the front yard garden beds, which were part of Phase 3:
New front Walkway Garden, Summer 2022 & 2023New, existing, and transplanted roses in the front Rose Garden
Below is what the front Walkway Garden looked like before (first photo taken while house was being painted). The bed was filled with yellow daylilies and magenta Campion Rose flowers, and I wanted to redo it from Day One. First, I am not fond of magenta and yellow as a color combination. As part of a riot of bold colors, yes, but not by themselves. Secondly, Campion Rose spreads everywhere. I needed to isolate it to a very small section of the yard. Thirdly, and most importantly, the Walkway Garden is in view of the Rose Garden, and I wanted to plant it with flowers that complemented the colors of the roses.
Here are some of the transplanted flowers that are happy in their new spots: 1) Spiky Giant Hyssop now along the southernmost part of the new deck, popping above the railings and attracting bees far and wide (though they are very friendly bees; I stick my head among the flowers to tie them up periodically, and the bees pay me no mind at all). 2) Panicle Hydrangea turning a dusty pink from its initial white, now in its third and final resting place, and 3) the yellow daylilies from the front yard, now in the back along with some Spiderwort ( a much more pleasing combination in my very biased opinion!).
Some of the many newcomers to the garden: Hollyhock, Allium Schubertii, Astilbe, Baptisia Australis, Black-Eyed Susans (Rudbeckia hirta), Aquilegia
And finally, a few things from the garden other than flowers:
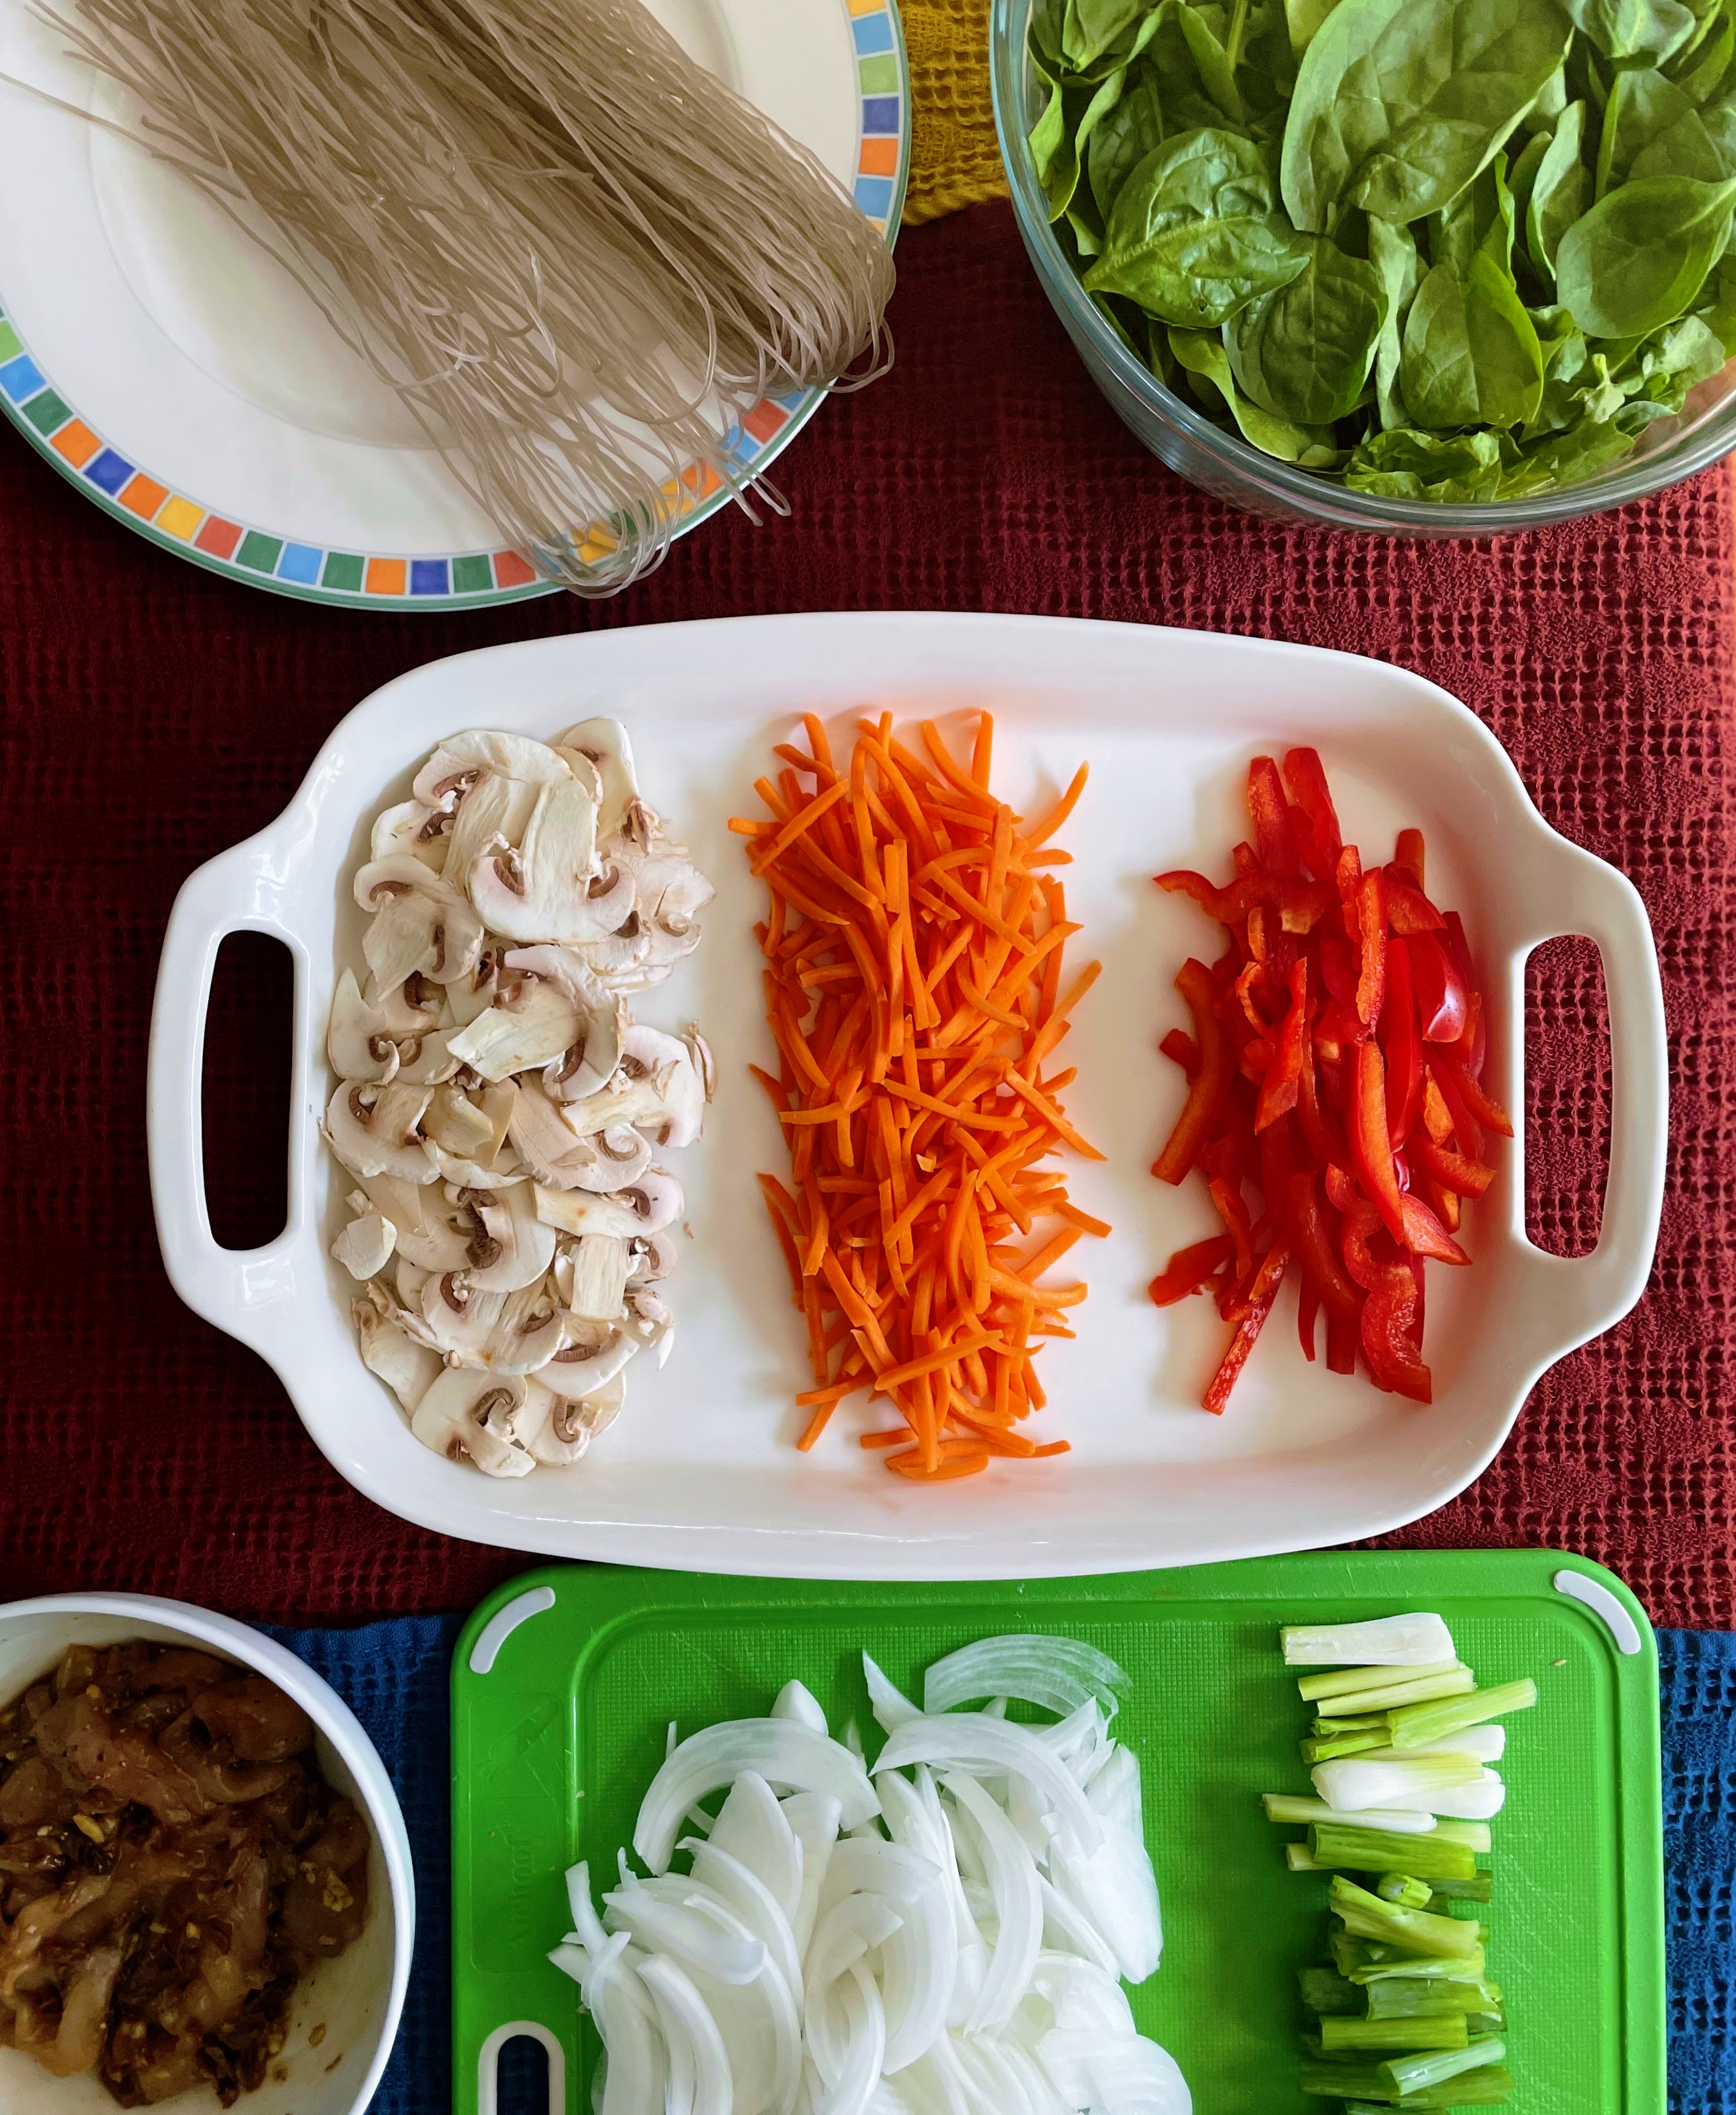
Let me start by saying that chicken is not traditional in this recipe, but it’s what I had on hand when I got the urge to make this; japchae takes a bit of effort and I didn’t have time to add a grocery trip into the mix, too. Amazingly, though, I had almost all the other ingredients, and had been dreaming of this dish for a while. I’ve loved it since my college days, when there was a hole-in-the-wall Korean restaurant around the corner from where I lived (what bliss). But what made me have to make this dish, right now, was watching a K-Drama one weekend that had tantalizing views of the protagonists eating japchae…. After salivating through a few episodes, I knew what we had to have for dinner.
If you haven’t ever had japchae (jap means to mix, and chae means vegetables), you are in for a treat. The glassy, sweet potato starch noodles (dangmyeon) are slippery, chewy, savory and a bit sweet, and are tossed with so many good things.
If that weren’t enough, this dish gives you options: you can make the japchae a day or two ahead of time (quickly stir-frying before serving), and you can serve it warm or at room temperature.
I used a recipe from the incomparable Maangchi, with a few alterations:
First, I substituted chicken for the beef or pork. Plus, I used 1.5 times what the original recipe called for (6 oz vs 4 oz).
Then, just when I was patting myself on the back for having everything else, I realized I had dried porcini mushrooms, vs dried shitake. Still delicious in this dish.
Finally, I made 1.5 times the final sauce ingredients (a mixture of garlic, soy sauce, sugar, black pepper, and toasted sesame oil) as that sauce is my favorite and I had to have a little more of it. And I also drizzled a little of the strained porcini soaking liquid into the sauce, too, for extra umami.
Note: This recipe is killer. But this is not Maangchi’s easy version of japchae; this version takes commitment to cook all the veggies separately. So plan on making it when you have the time to give it the loving attention it deserves.
4 ounces beef, filet mignon (or pork shoulder), cut into ¼ inch wide and 2½ inch long strips
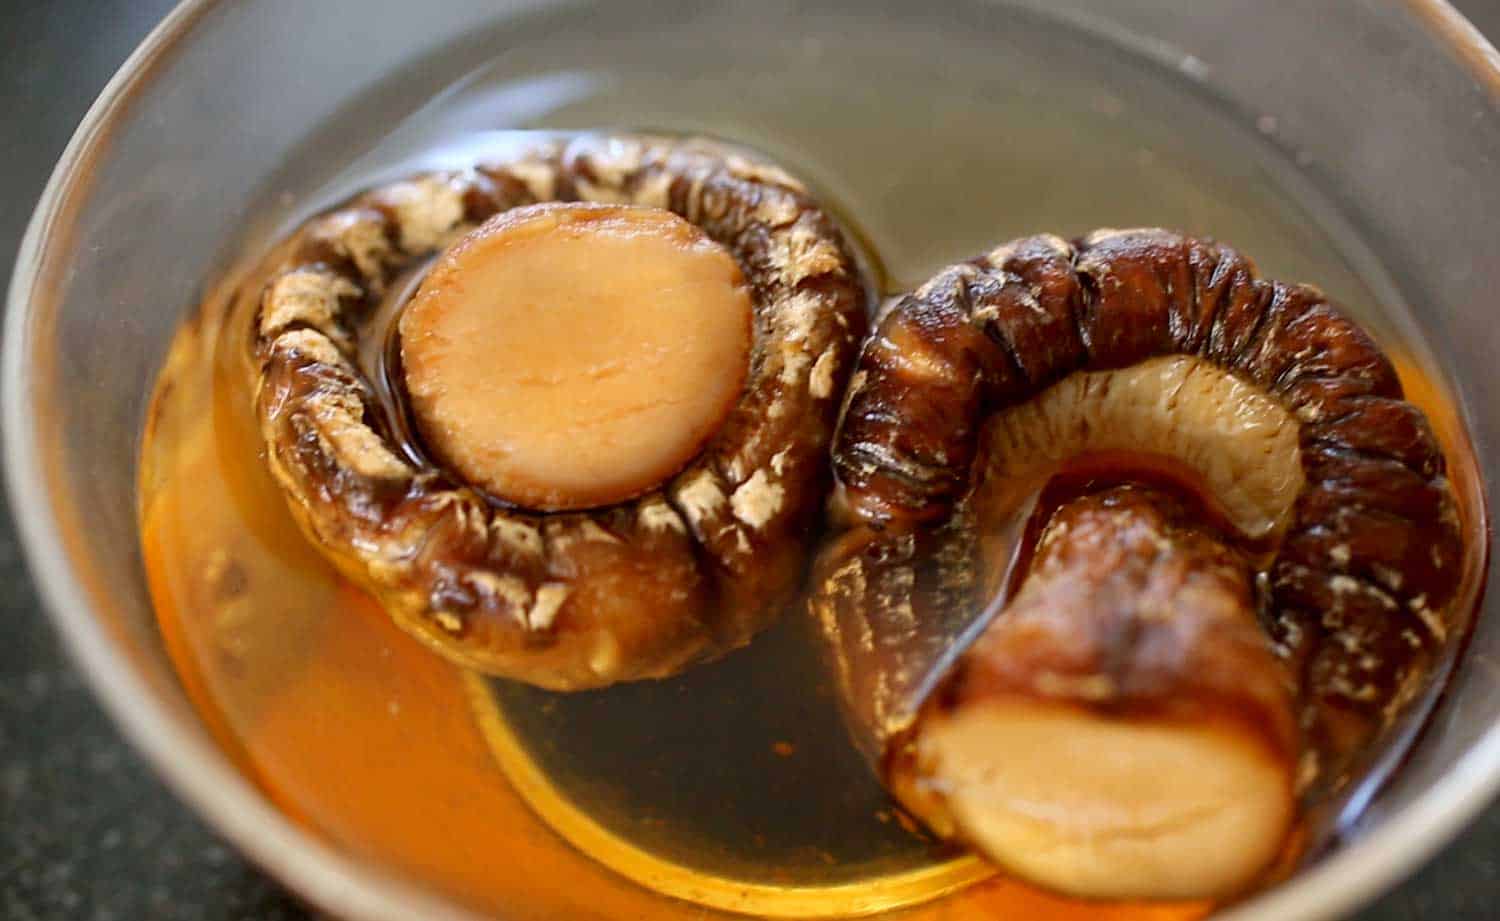
2 large dried shiitake mushrooms, soaked in warm water for 2 to 3 hours, cut into thin strips
2 garlic cloves, minced
1 tablespoons plus 2 teaspoons sugar
2 tablespoons plus 1 teaspoon soy sauce
2 tablespoons toasted sesame oil
1 tablespoon toasted sesame seeds
1 large egg
4 ounces spinach, washed and drained
4 ounces of dangmyeon (sweet potato starch noodles)
2 to 3 green onions, cut crosswise into 2 inch long pieces
1 medium onion (1 cup), sliced thinly
4 to 5 white mushrooms, sliced thinly
1 medium carrot (¾ cup), cut into matchsticks
½ red bell pepper, cut into thin strips (optional)
ground black pepper
kosher salt
vegetable oil
Directions
Marinate the beef and mushrooms:
Put the beef and shiitake mushrooms into a bowl and mix with 1 clove of minced garlic, 1 teaspoon sugar, ¼ teaspoon ground black pepper, 2 teaspoons soy sauce, and 1 teaspoon of toasted sesame oil with a wooden spoon or by hand. Cover and keep it in the fridge.
Make the egg garnish (jidan):
Crack the egg and separate the egg yolk from the egg white. Remove the white stringy stuff (chalaza) from the yolk. Beat in a pinch of salt with a fork.
Add 1 teaspoon of vegetable oil to a heated nonstick pan. Swirl the oil around so it covers the pan, and then wipe off the excess heated oil with a kitchen towel so only a thin layer remains on the pan.
To keep the jidan as yellow as possible, turn off the heat and pour the egg yolk mixture into the pan. Tilt it around so the mixture spreads thinly. Let it cook using the remaining heat in the pan for about 1 minute. Flip it over and let it sit on the pan for 1 more minute.
Let it cool and slice it into thin strips.
Prepare the noodles and vegetables:
Bring a large pot of water to a boil. Add the spinach and blanch for 30 seconds to 1 minute, then take it out with a slotted spoon or strainer. Let the water keep boiling to cook the noodles.
Rinse the spinach in cold water to stop it from cooking. Squeeze it with your hands to remove any excess water. Cut it a few times and put it into a bowl. Mix with 1 teaspoon soy sauce and 1 teaspoon toasted sesame oil. Put it into a large mixing bowl.
Put the noodles into the boiling water, cover and cook for 1 minute. Stir them with a wooden spoon so they don’t stick together. Cover and keep cooking for another 7 minutes until the noodles are soft and chewy.
Strain and cut them a few times with kitchen scissors. Put the noodles into the large bowl next to the spinach. Add 2 teaspoons toasted sesame oil, 1 teaspoon soy sauce, and 1 teaspoon sugar. Mix well by hand or a wooden spoon. This process will season the noodles and also keep the noodles from sticking to each other.
Heat up a skillet over medium high heat. Add 2 teaspoons vegetable oil with the onion, the green onion, and a pinch of salt. Stir-fry about 2 minutes until the onion looks a little translucent. Transfer to the noodle bowl.
Heat up the skillet again and add 2 teaspoons vegetable oil. Add the white mushrooms and a pinch of salt. Stir-fry for 2 minutes until softened and a little juicy. Transfer to the noodle bowl.
Heat up the skillet and add 1 teaspoon vegetable oil. Add the carrot and stir-fry for 20 seconds. Add the red bell pepper strips and stir-fry another 20 seconds. Transfer to the noodle bowl.
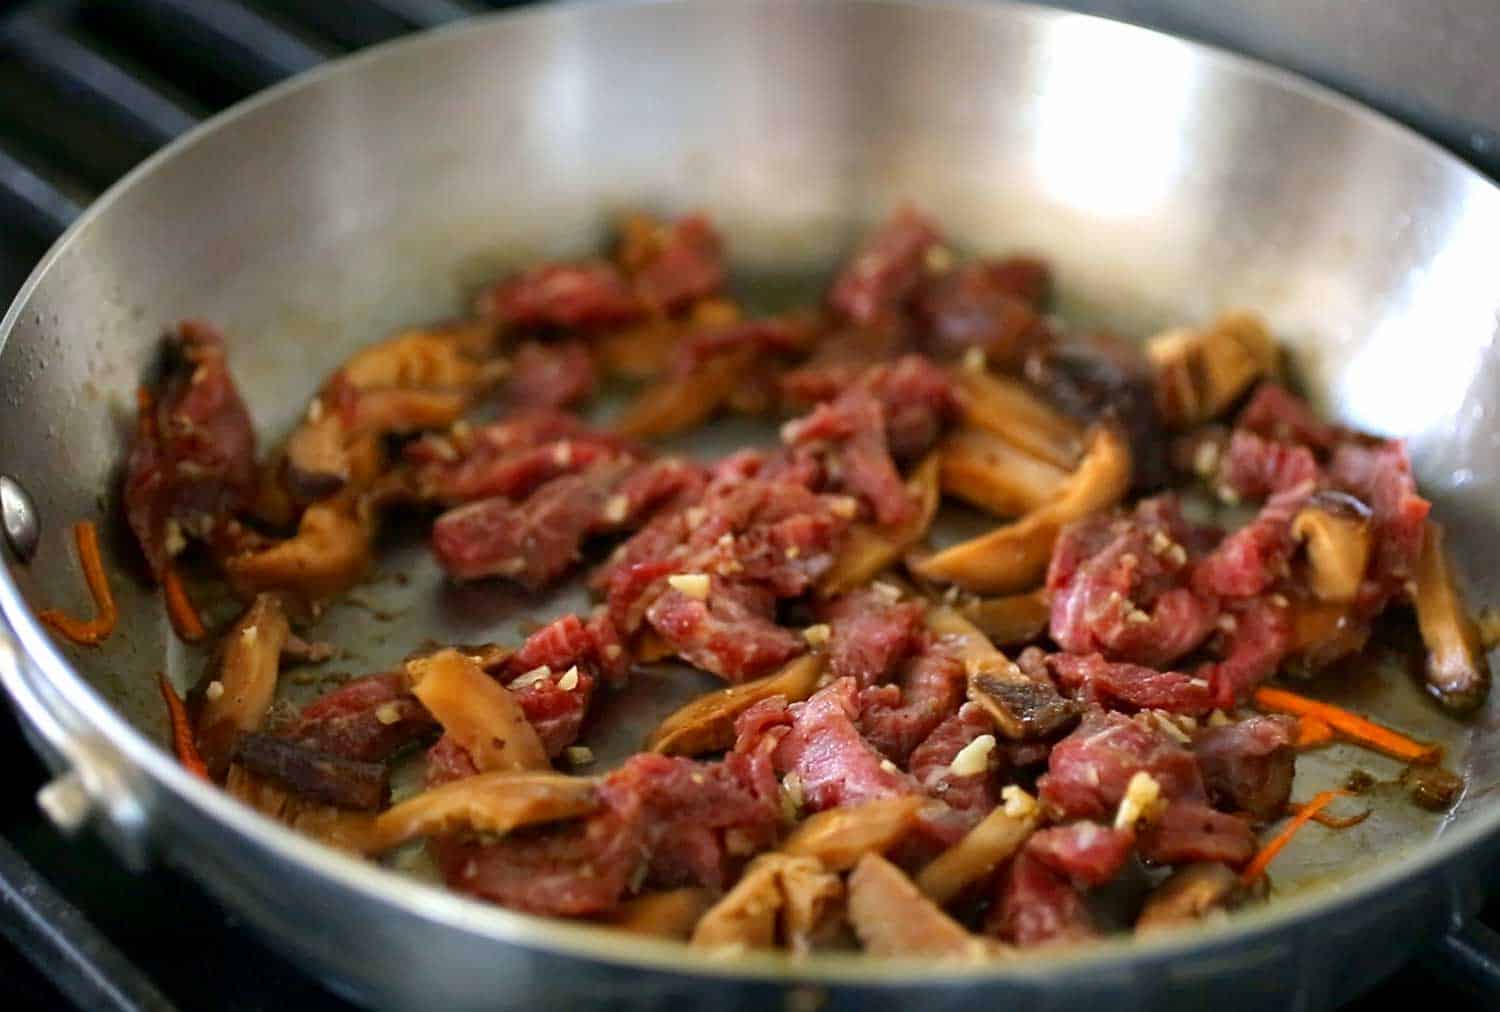
Heat up the skillet and add 2 teaspoons vegetable oil. Add the beef and mushroom mixture and stir fry for a few minutes until the beef is no longer pink and the mushrooms are softened and shiny. Transfer to the noodle bowl.
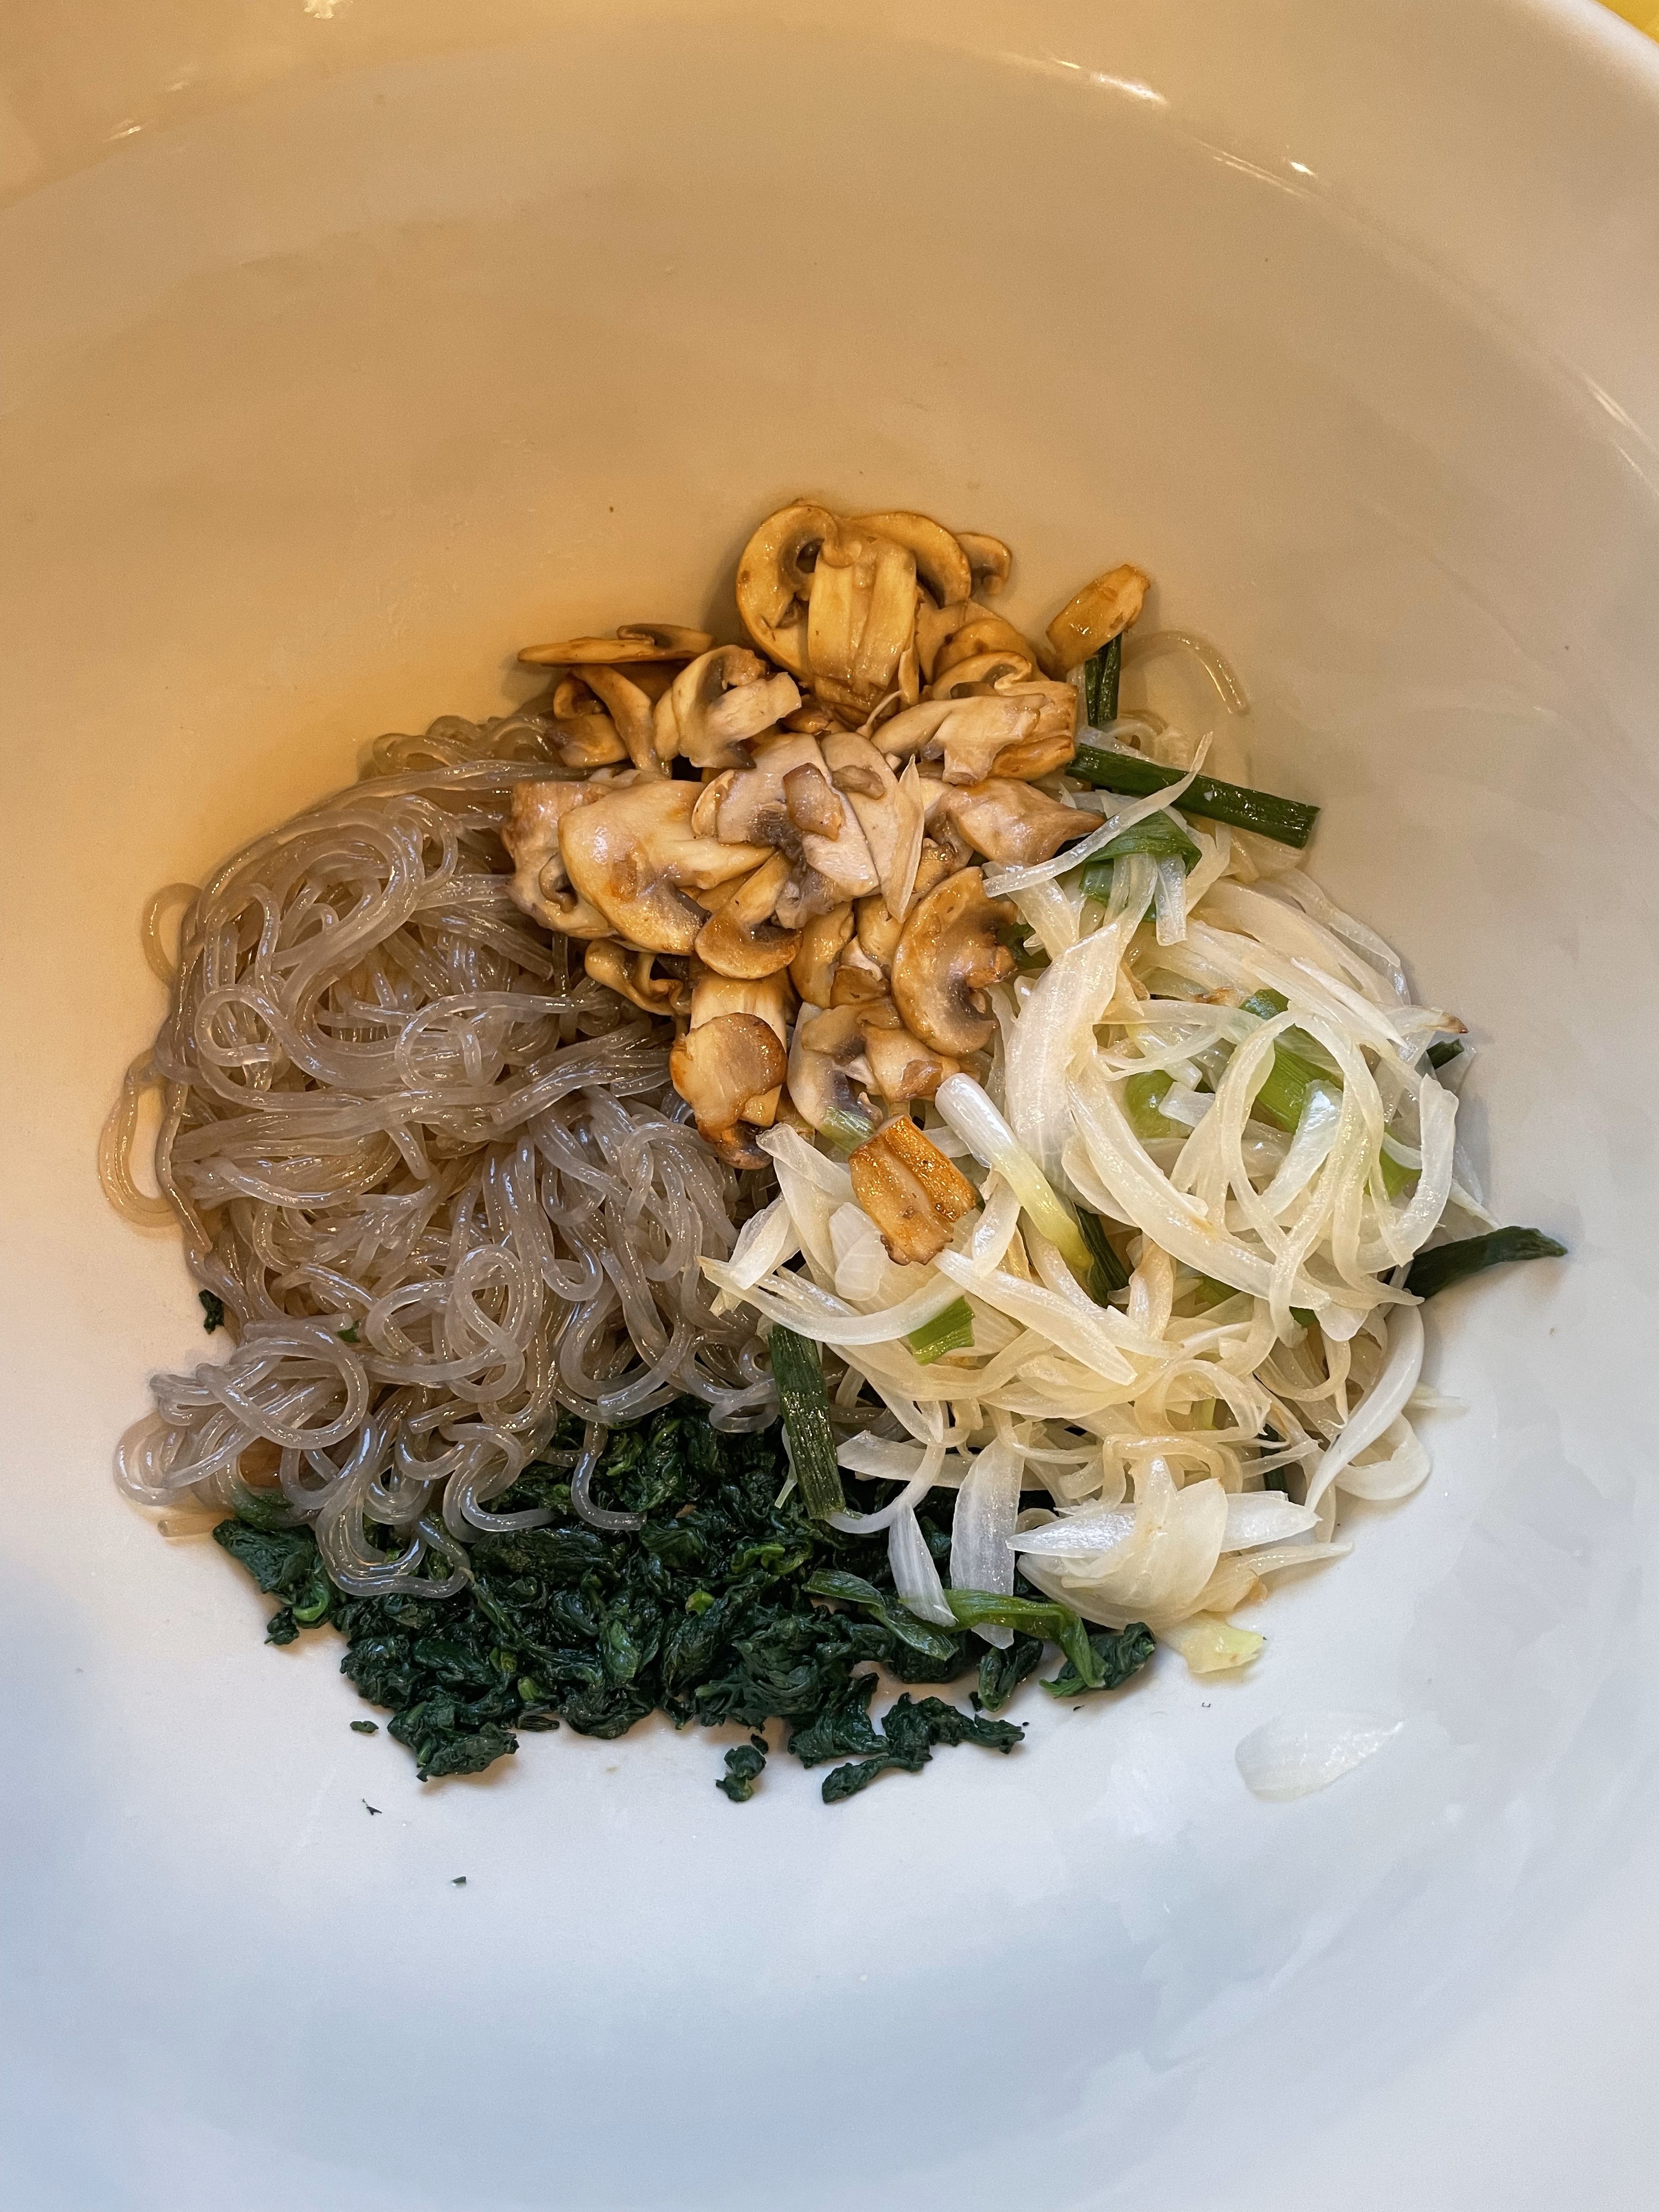
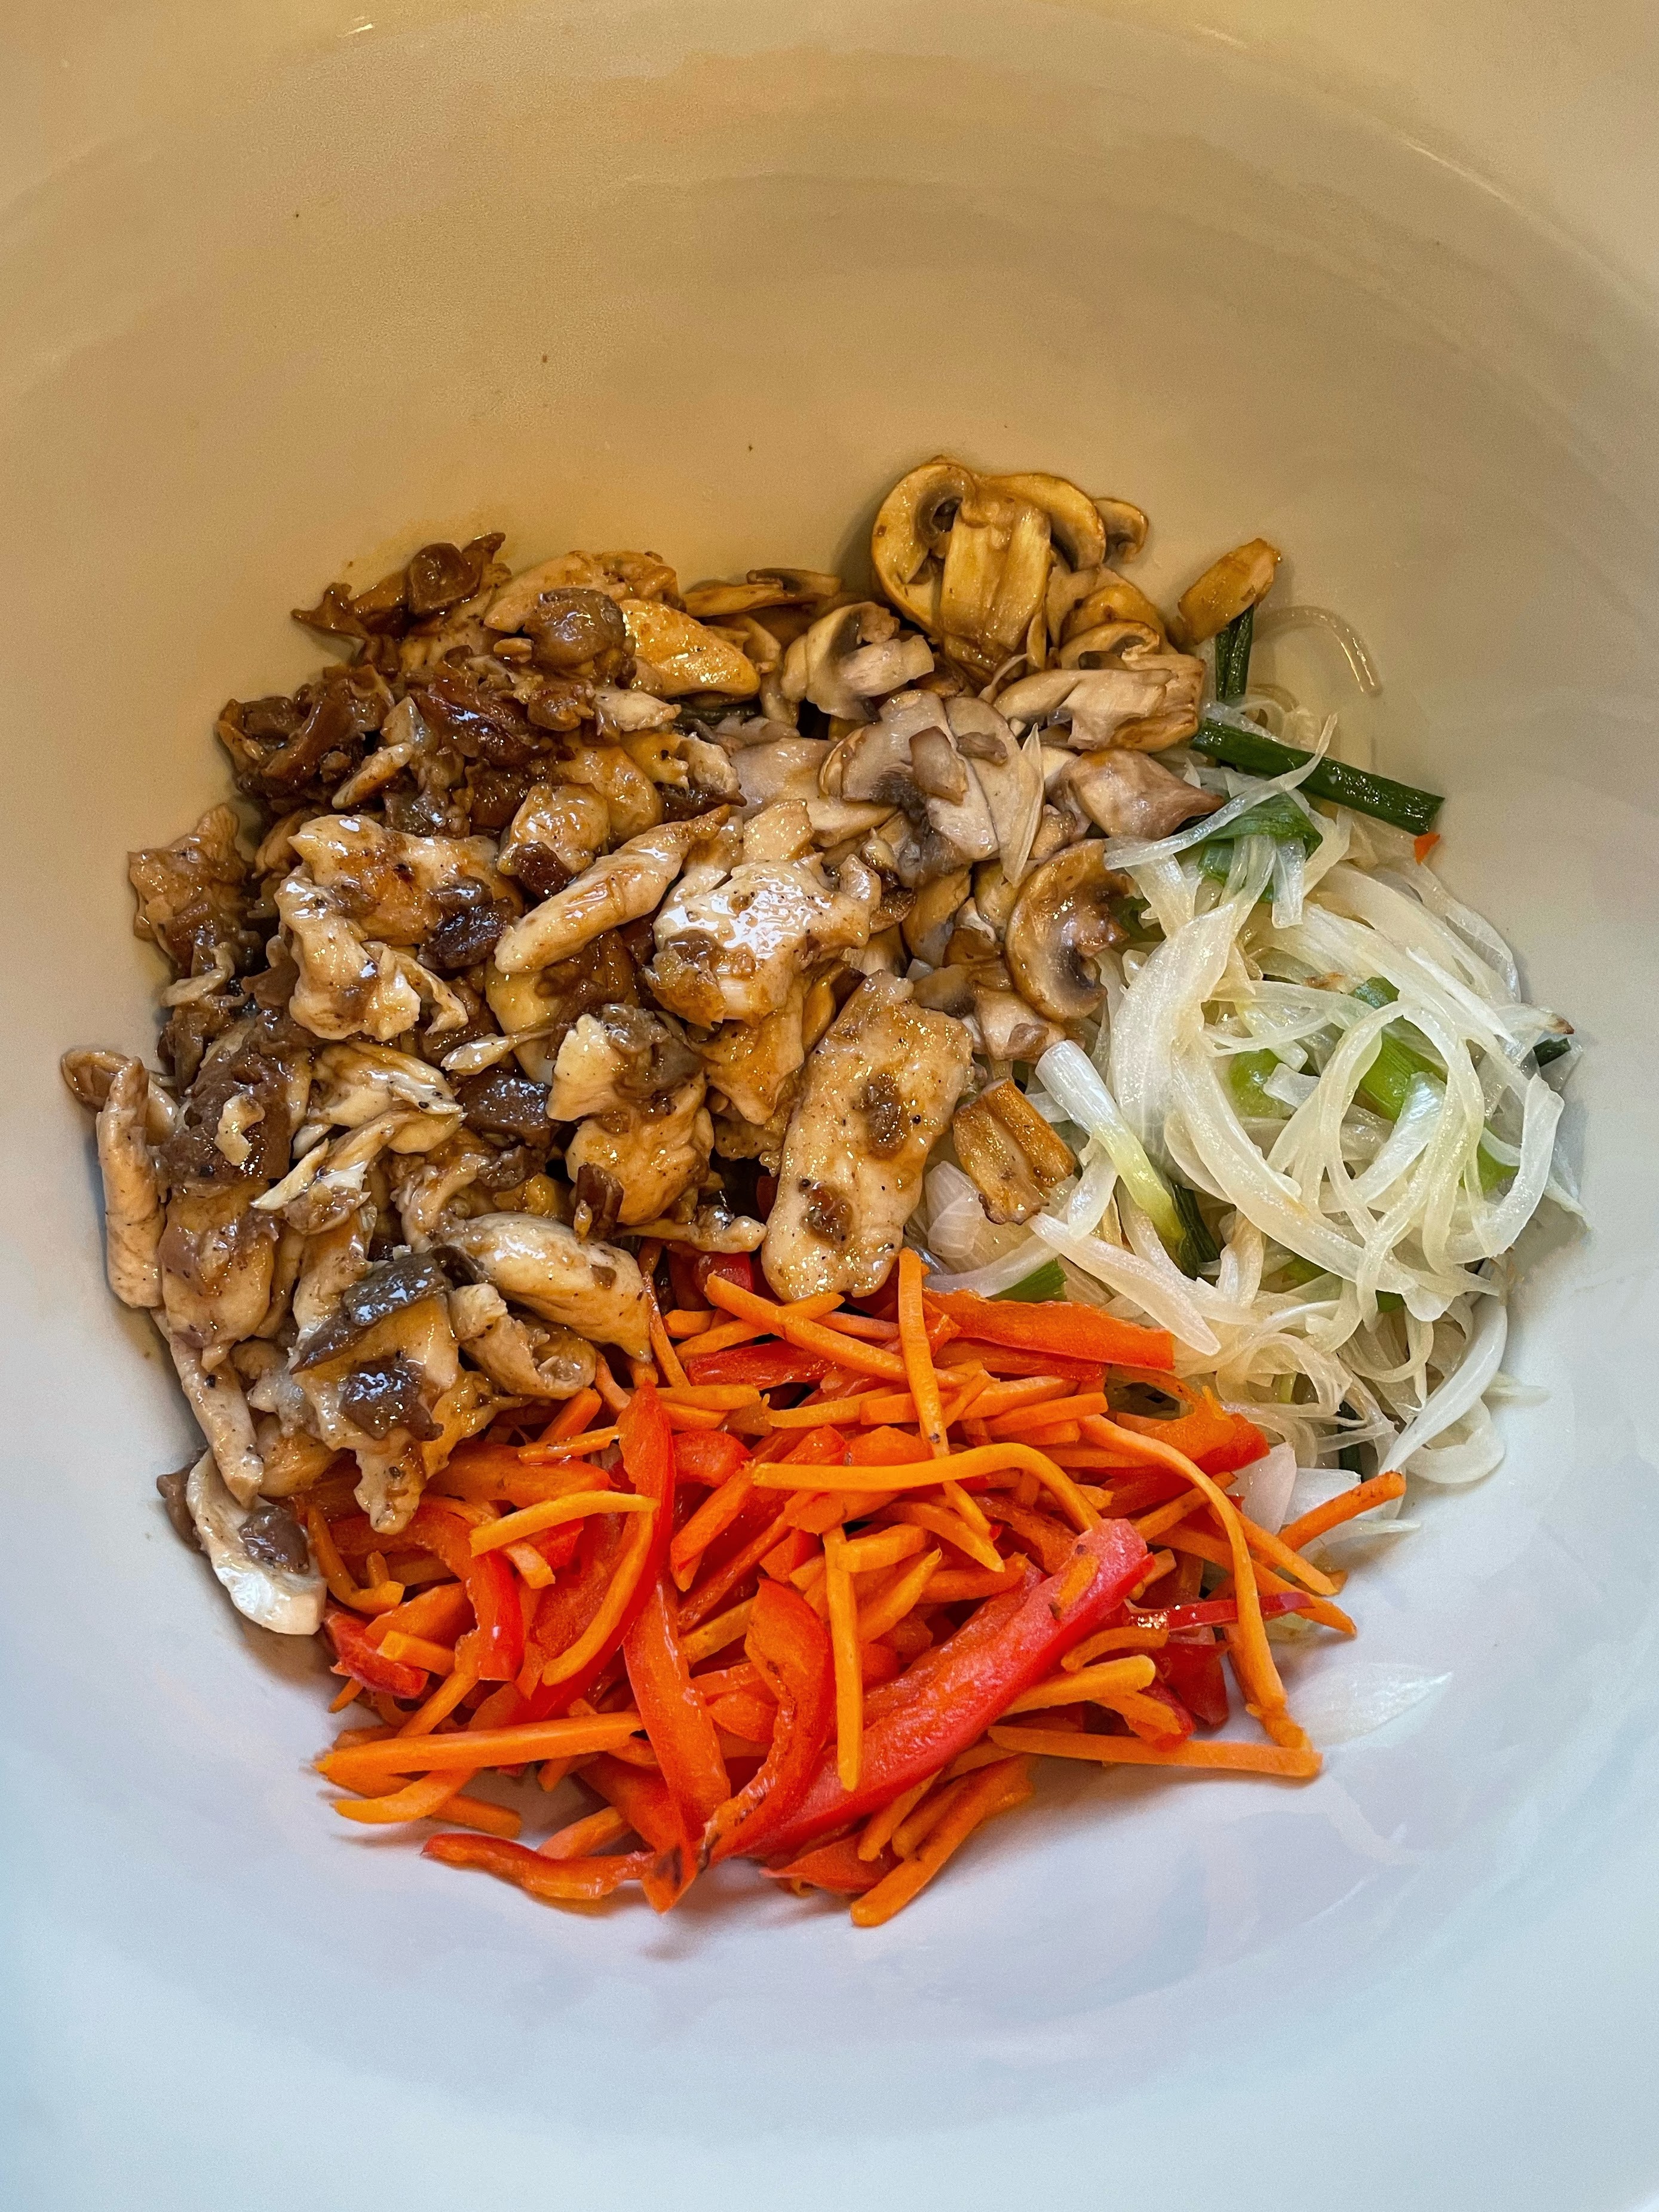
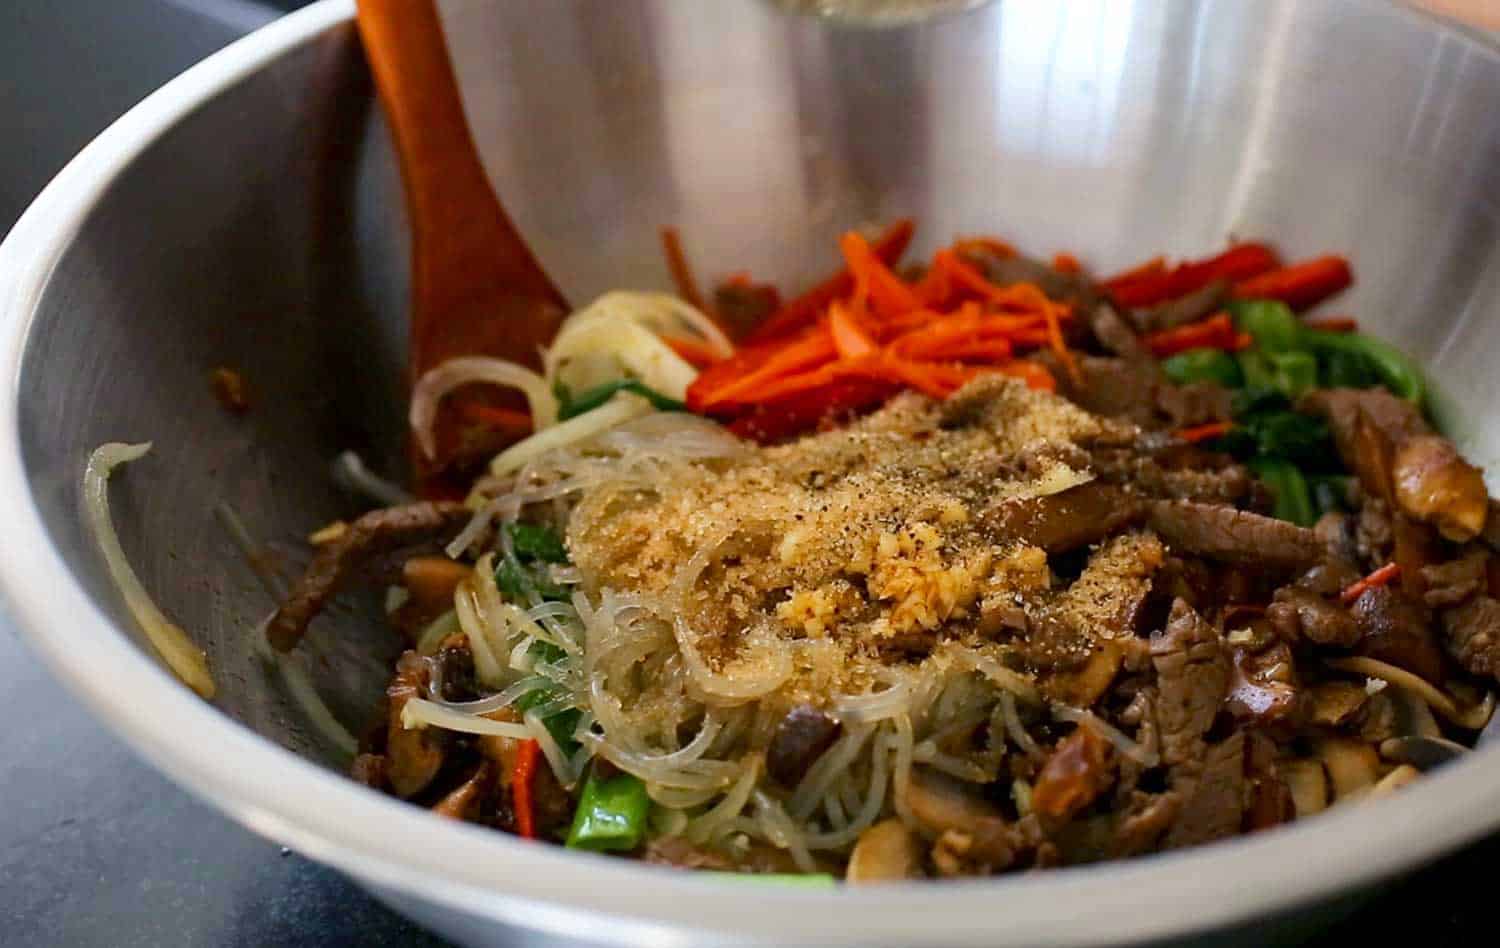
Layering the cooked ingredients in the bowl
Mix and serve:
Add 1 minced garlic clove, 1 tablespoon soy sauce, 1 tablespoon sugar, ½ teaspoon ground black pepper, and 2 teaspoons of toasted sesame oil to the mixing bowl full of ingredients. Mix all together by hand.
Add the egg garnish and 1 tablespoon sesame seeds. Mix it and transfer it to a large plate and serve.
Last week, I finally got around to doing the 30-Plant Challenge, which is pretty simple: Eat 30 different fruits, vegetables, grains, nuts, and seeds per week. (Herbs and spices contribute to the total, too, as do garlic and coffee, but I decided to count those only in emergencies.) Essentially, the more diverse range of plant foods you can add to your diet, the better for your gut microbiome. The better your gut microbiome, the better your overall health.
I’m not vegetarian and I have a wicked sweet tooth, but I’ve convinced myself I eat pretty healthily otherwise. However, I am all for good microbiomes, and I wanted to do the challenge to see if it would be a challenge. I started on Sunday with a breakfast smoothie (spinach, banana, blueberries, cinnamon), followed by a curried chicken salad for lunch (made with celery, carrots, currants, red grapes, and almonds), with some cherries on the side. For dinner, it was pasta with cherry tomatoes, red onion, garlic, basil, and mascarpone, along with a salad made with mixed greens, pear, walnut, and goat cheese. Total for Sunday: 14 plant foods, not counting herbs, spices, or garlic. Or the coffee in the affogato I had after dinner, which was delicious. It’s too bad ice cream is not a plant food….
I thought, “This will be easy; I ate almost half of the total in one day!” For the next five days, I added new plant foods to my list if I happened to eat any, but I wasn’t really planning meals around new foods. I did notice that I repeated a lot of the plants on my list throughout the week, making it harder to find new things the farther along I got. Plus, I didn’t eat pure vegetables and fruits at every meal. At one breakfast, it was just coffee and a cinnamon roll; not a plant that I could count in sight.
By Friday, I was at 24 plants, so had to make a concerted effort to add 6 new items by end-of-day Saturday. Luckily, I made it. But I learned I need to plan a bit more, and have a few more things easily on hand (like pre-cooked lentils, more seeds and nuts, etc). I also learned I should incorporate more beans, legumes, and grains into my meal planning, and that I can’t have very many cinnamon-roll-only breakfasts without risking failing the challenge. 😦
Here was my total list from last week (in mostly chronological order):
Banana
Spinach
Blueberries
Celery
Carrot
Red grapes
Currants
Almonds
Cherries
Cherry tomatoes
Red onion
Lettuce
Pear
Walnuts
Avocado
Black beans
Pineapple
Cucumber
Red bell pepper
Green bell pepper (different colors of same thing count separately)
Zucchini
White mushrooms
Broccoli rabe
Potatoes
Red cabbage
Mango
Quinoa
Grapefruit
Lentils
Yellow tomatoes
In addition to the meals mentioned above, others included:
–Burrito with beef, black beans, avocado, lettuce, tomato; sliced pineapple –Creamy chicken, zucchini, and mushroom pastry puffs; garden salad –Roasted red pepper bruschetta, pork chops, mashed potatoes, broccoli rabe –Egg salad on whole wheat, with lentil salad and sliced mangoes –Other salads


 on the sides; front-facing wall of opus mixtum (bands of brick and tufa), with lateral 'toothing' and a structural arch; plus rough-hewn travertine column--Portico of Claudius, Portus (c. 50 AD)")
")
 with lateral 'toothing' and putlog holes at the top--Trajan's warehouse, Portus (c. 100 AD)")
")
, Trajan's warehouse, Portus (c. 100 AD)")

