

This post is LONG overdue. In 2021, I wrote about experimenting with fabric weaving and the many lessons I learned doing a triaxial/tumbling block weave. In that post, I mentioned a triptych-style weave I had done for our bedroom, a weaving project that was completely different from the others in that 1) I wove each piece by stapling the strips onto a frame vs pinning them to a foam board, and 2) I went into it without any clear patterns in mind. In the end I adopted a square weave for the center panel, based on some of the experimenting I had done before. For the side panels, I played around with the placement of the strips until I was happy with the end result.
But first, I spent way too much time figuring out what fabrics to use. Our room has plum walls and our comforter is burnished gold. We have black night tables and cream colored lamps. Somehow, this project had to bring all those colors together. The first thing I found was not a type of fabric per se, but rather a thick woven ribbon:

I thought it perfectly tied most of the colors together. So then I set out to find fabrics that could complement it. Here’s what I ended up with, all laid out on the floor as I started to work out the pattern for the side panels:

You may be wondering why I decided to do this on a frame, versus on a foam board. The main reason is that I (still) don’t know how to use a sewing machine and I wanted a finished product right away. I also mistakenly thought weaving/stapling on a frame would be easy. In hindsight, I could have woven each of the panels on foam boards, taped them off, then wrapped the entire finished weaves around the frames, but I didn’t think of that, and even if I had, I would most certainly have run into problems getting smooth corners. As it was, I blundered onward in completed ignorance and completed these panels out of sheer stubbornness after “revising” them multiple times.
Oh, another reason I decided to use frames? They were free! They came with the packaging for the night tables, to protect the sides, and even though they were odd-looking, compressed cardboard frames, I thought “Hmmm, I think I can use these for something.”
So, with free frames at hand, fabric choices complete, fabric strips made, and a couple vague patterns in mind, I started weaving–on the floor of our guest bedroom. I started by finding the vertical midpoint of each frame, to place the first strip there. I wanted to be sure everything was symmetrical, and figured I could fudge the edges if needed (which ended up being needed).

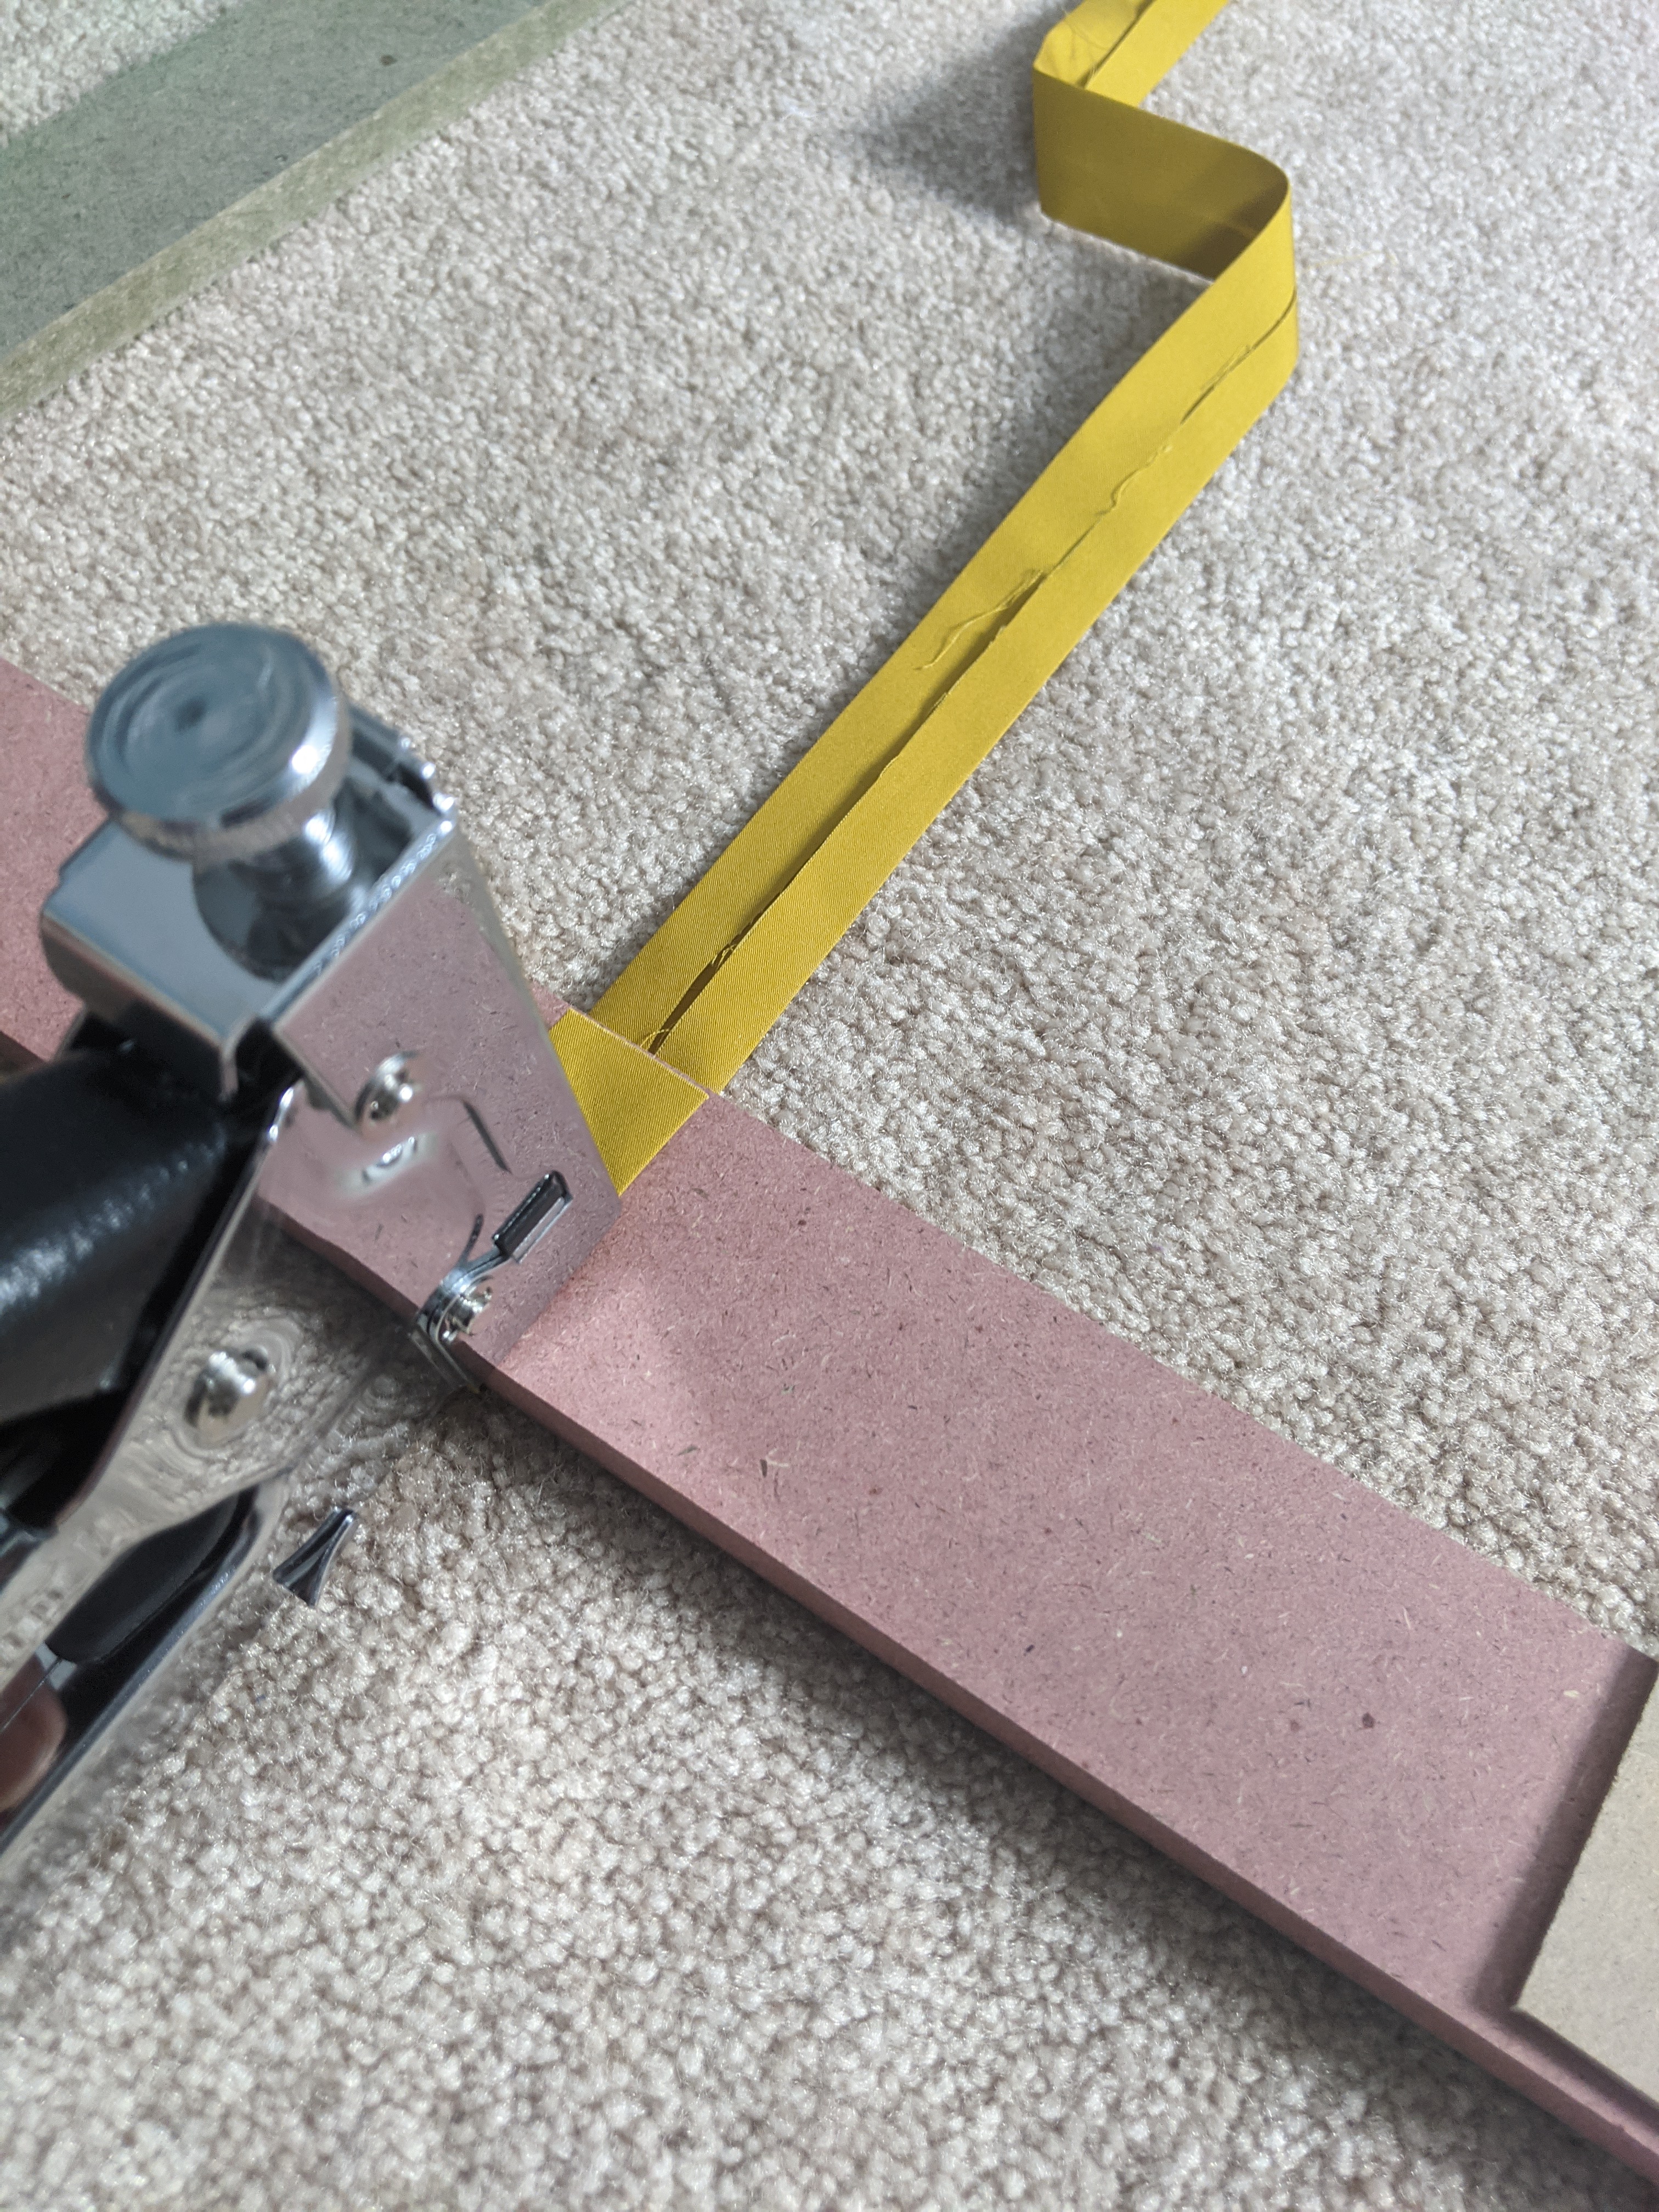
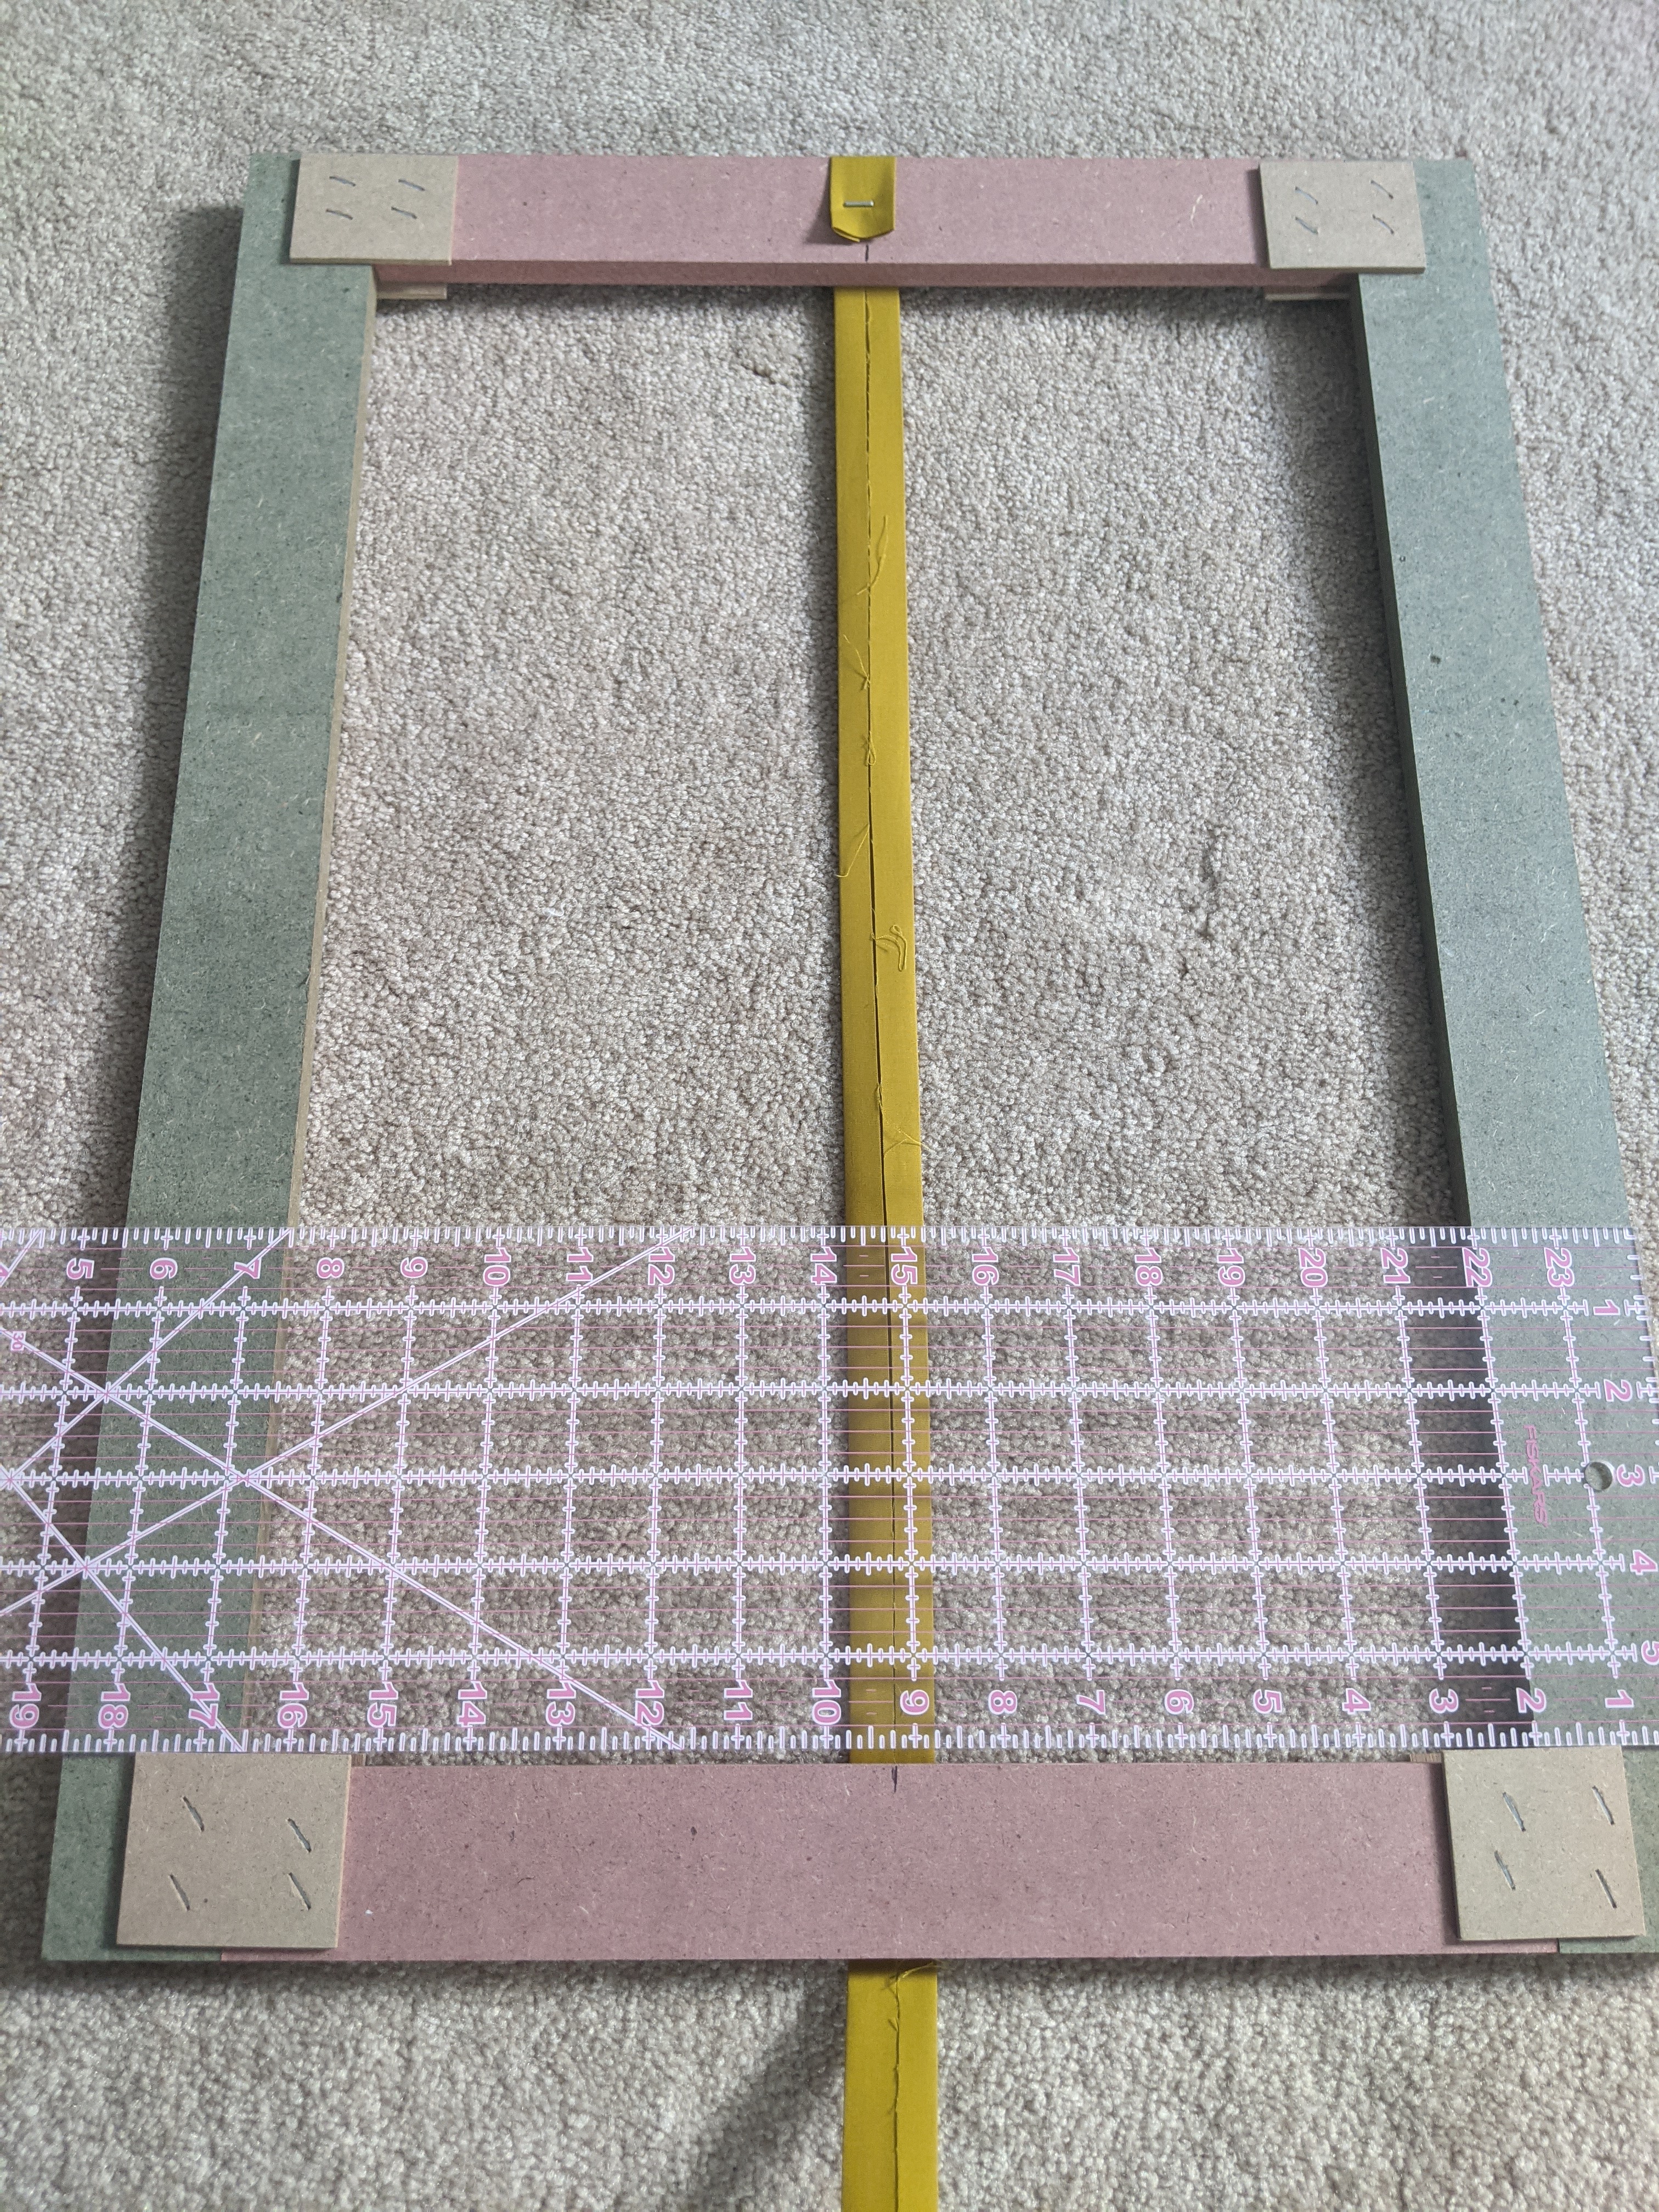
Then I proceeded to staple on all the other vertical strips. (These photos are of the center, square-patterned panel in my triptych, which I actually wove after having completed one of the side panels):

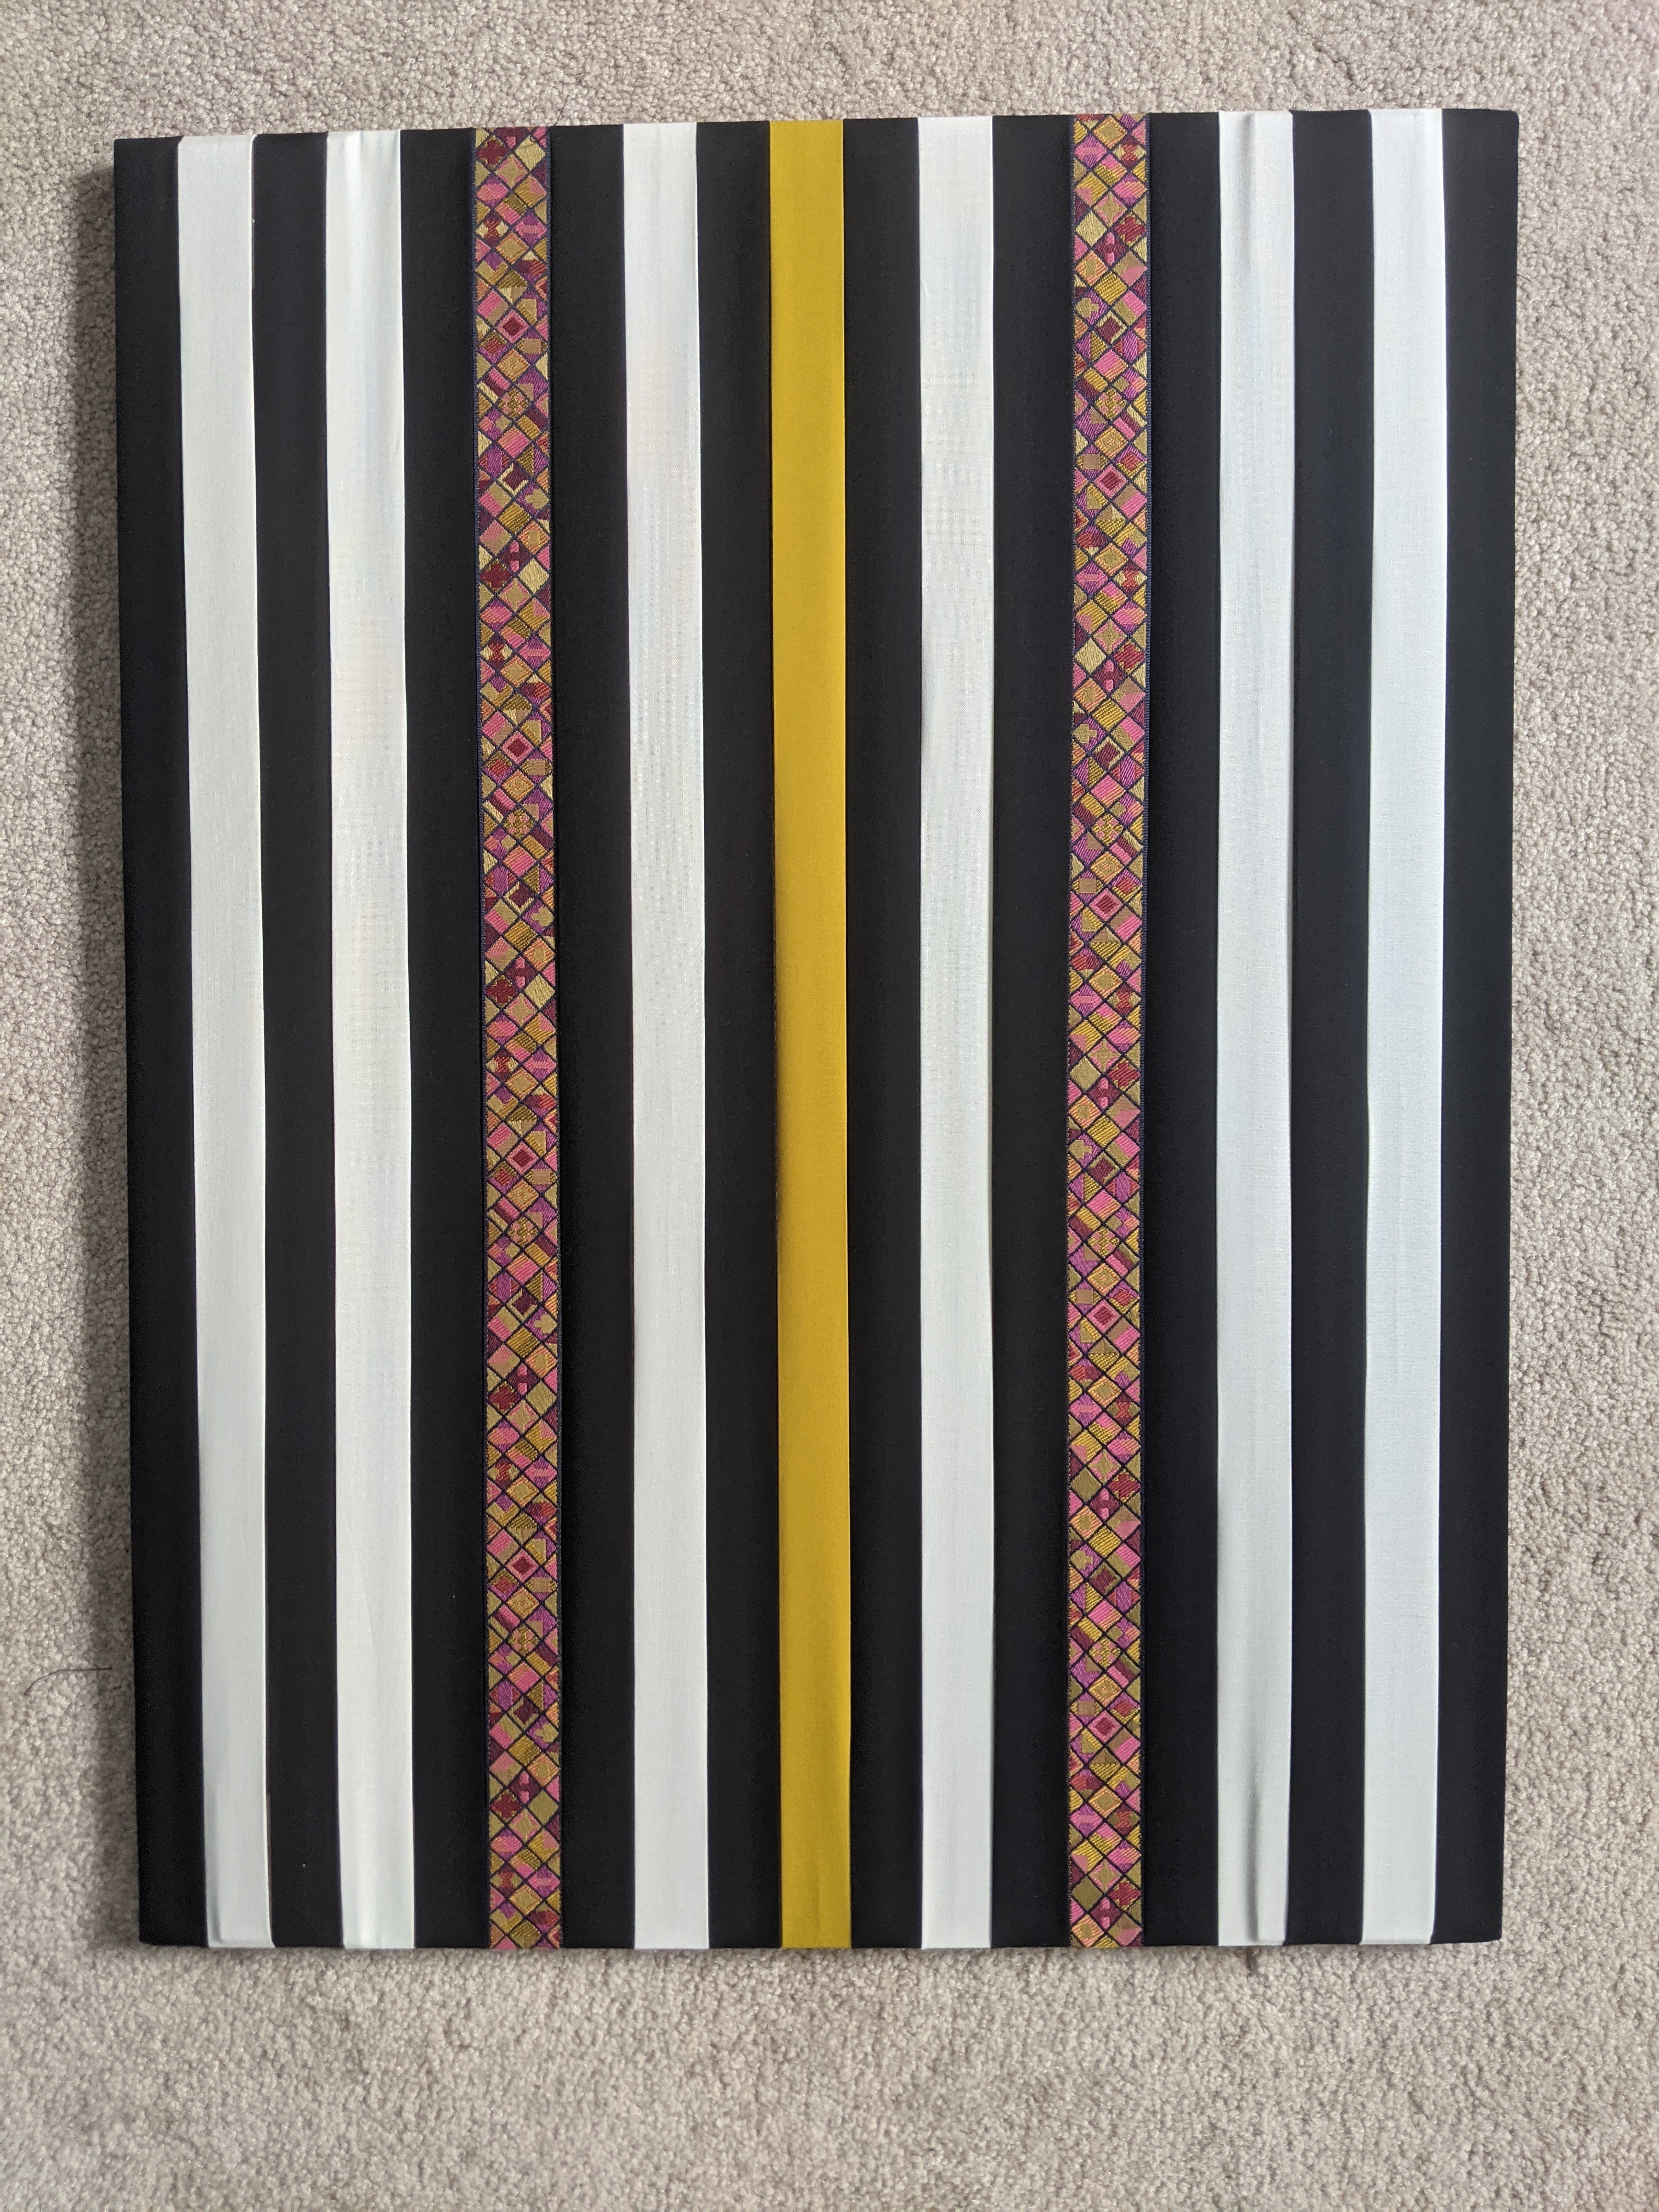

Except, eagle-eyed observers will note that the strips in the first two photos don’t look quite right, as the finished center panel (right) has purple in it and the ribbon strips are near the edges. Correct. I wasn’t happy with the way the original strips looked, so I un-stapled most of them and started over, but failed to take photos of the new version!
I don’t have any good photos of the horizontal weaving I did, except one where I stood the uncompleted center panel next to a completed side panel on our bed to see what they looked like together (right photo) :

Here’s what I learned from this experiment:
- Do not staple the horizontal strips until they are all in place. You need the wiggle room to slide them around a bit to get them smooth and in the right place. Then, stretch them tight and staple them in place.
- Weaving across the middle of the frame is easy because there is only air beneath the area you are weaving, so there is a lot of give and you can reach under and adjust as needed.
- Weaving across the top and bottom of the frame is hard, as the vertical strips are very tight where they are folded over the frame and stapled. Also, for me, it entailed weaving over hard compressed cardboard there, so it was not possible to adjust from underneath. In the middle of the frame, I could use my fingers to guide the fabric strips across, but at the ends I had to use a WEFTY tool (see my previous post) to guide the fabric strips through.
- The frames were not perfectly sized to fit the 1″ strips I created, so I folded the last strips at the very edges over the frame a bit. It turned out ok.
Would I do this again? Yes! I’ve just been waiting for more free frames to magically appear. And also, I’ve been a bit busy in the garden….


 on the sides; front-facing wall of opus mixtum (bands of brick and tufa), with lateral 'toothing' and a structural arch; plus rough-hewn travertine column--Portico of Claudius, Portus (c. 50 AD)")
")
 with lateral 'toothing' and putlog holes at the top--Trajan's warehouse, Portus (c. 100 AD)")
")
, Trajan's warehouse, Portus (c. 100 AD)")


Wow- stunning. Your patience is inspiring.
LikeLike
I love your vision to re-use the cardboard packing as frames for fabric weaving! Your weaving is beautiful. Love the plum and gold. It’s great to make something eye-catching with materials most people consider trash. Can’t wait to see what you’ll do next!
LikeLike
Thank you–yes, I love plum and gold together. As for re-using those frames, sometimes necessity is the mother of invention! I couldn’t think of what to use until those frames arrived at just the right time. Whew!
LikeLike